


Organize and Beautify Your Cabinets

by
DeeDee
2 Materials
$40
3 Hours
Easy
Do your cabinets call for some organizing and beautification to make them look even more pretty and functional? Here's an inexpensive way to achieve that.
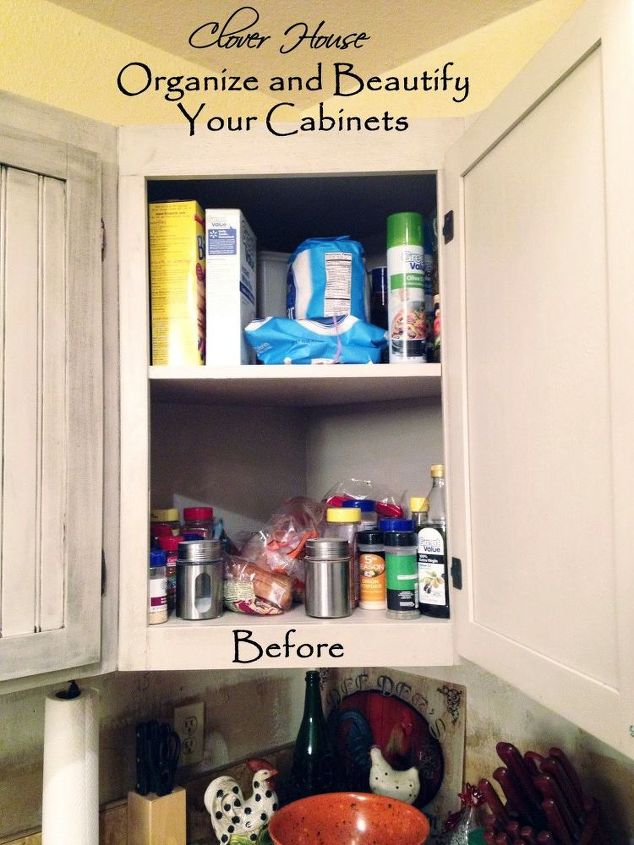
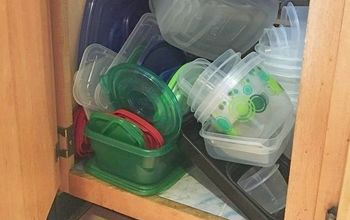
What a jumbled up mess I had going on in this cabinet! I just threw things back into cabinets to get them off the counter tops. The clutter was making me crazy!
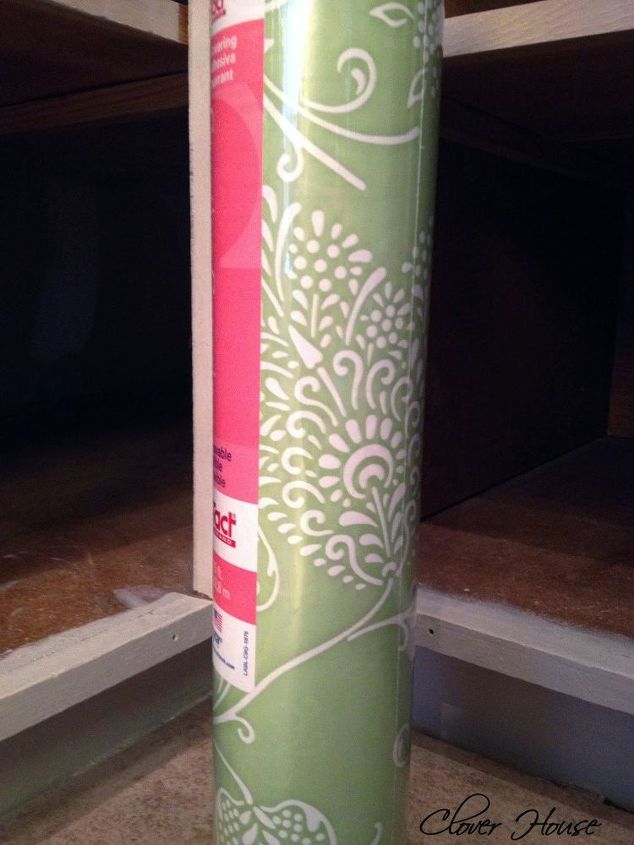
I wanted to put some shelf paper down before I reloaded the cabinets. I was a bit too inpatient for the top cabinets (clutter makes me coocoo), but I did wait for my new green Contact paper to arrived so I could paper the bottom ones before I filled them up again. Click right here for the link to the exact paper.
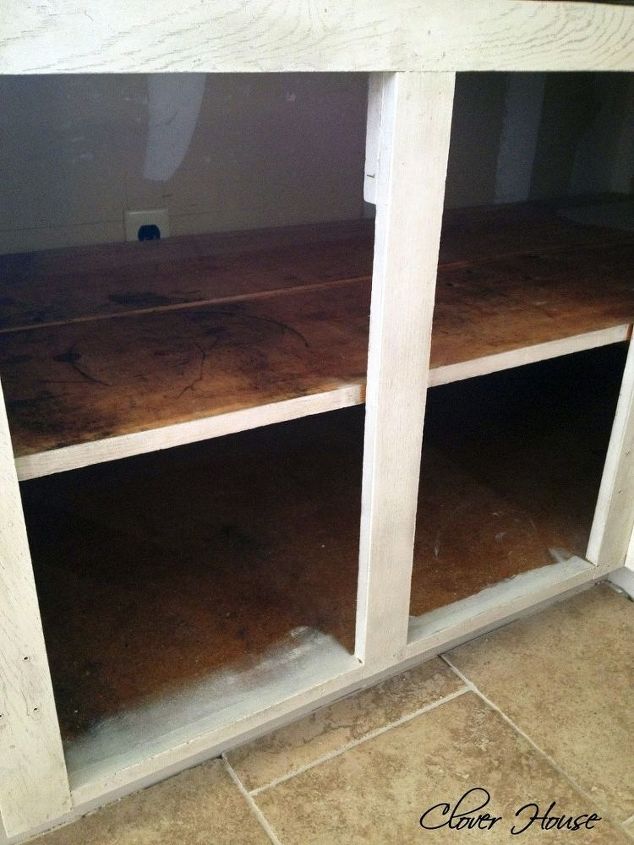
This is how the lower cabinets looked before I lined them with my pretty green paper. Before this picture and the new paint, it actually had some old shelf liner on each shelf. I peeled the old stuff off and then cleaned each shelf with Murphy's soap and water. I let it dry for about 30 minutes then started papering!
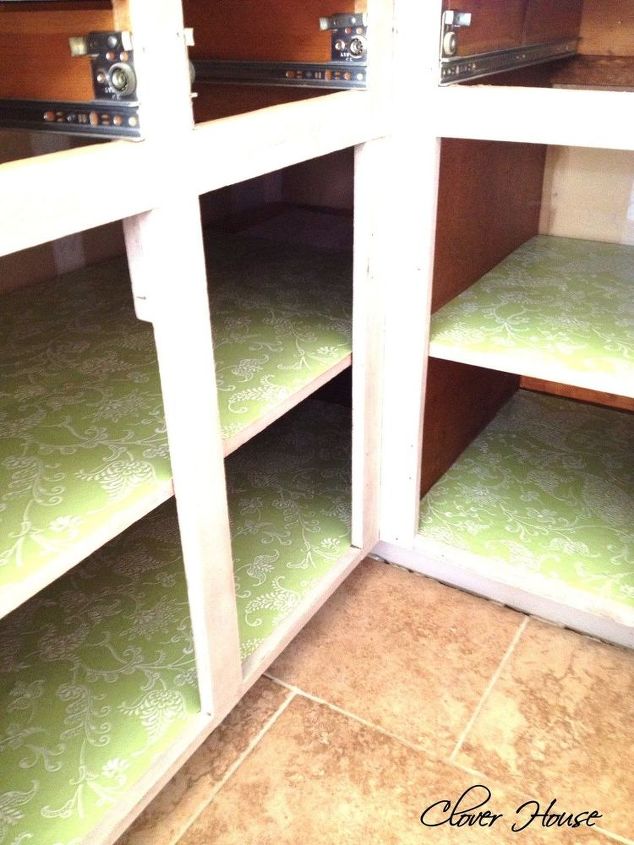
So fresh and clean! I really love it and I still cant get over the color being so perfect! I lined every shelf in my kitchen with one roll of paper and I still have plenty left over for the new pantry when it gets built. The rolls are 18" x 75'. Plenty of paper for our small kitchen.
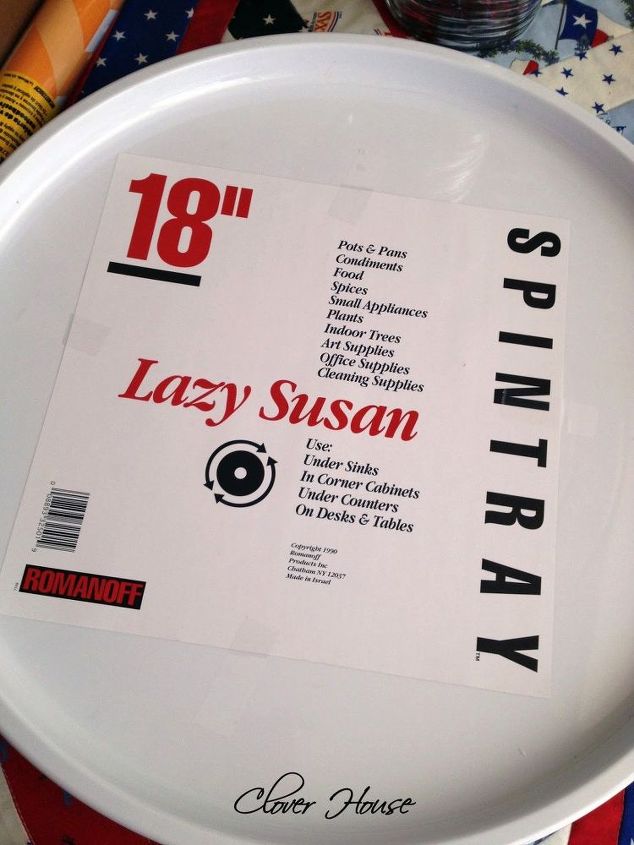
Originally when we built the corner cabinet we planned for a lazy susan so on to the internet I went to look for one. Oh I found one alright! Yeah! 18 inches of spinning goodness! Do you see there where it says its for corner cabinets? Our giant sized corner cabinet needed a giant size lazy susan and I found one! Click right here to go to my blog to get the exact one. It holds up to 150 pounds! I don't think my spices weigh quite that much, but you never know!
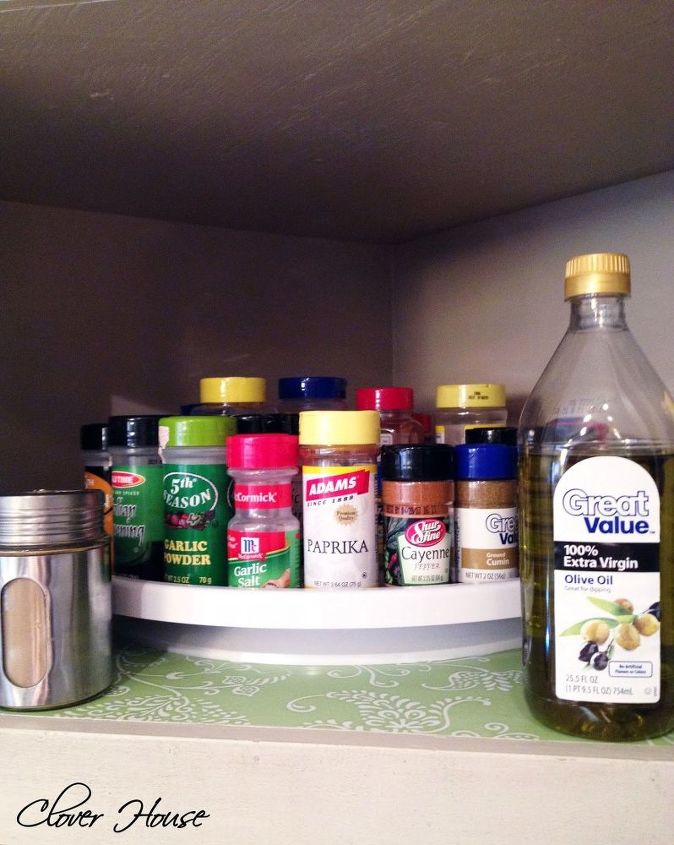
This is very awesome! All my spices on one lazy susan. I just placed them close to the edge with the labels facing out so finding what I need is always easy. If I had two of something, I just lined them up one after the other so I know I have extras.
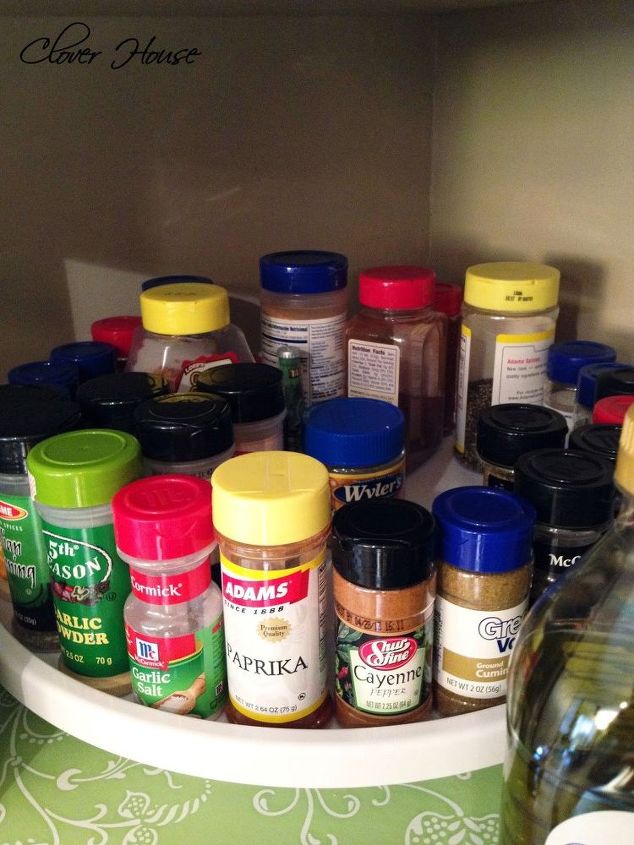
I even have extras space to add more spices if I want to. And although its hard to tell in these pictures, there is still left over room around the lazy susan to put more stuff in the cabinet too. I pushed the lazy susan all the way back to the back of the cabinet and then just pulled it forward a bit so it could freely spin. Lots of leftover room!
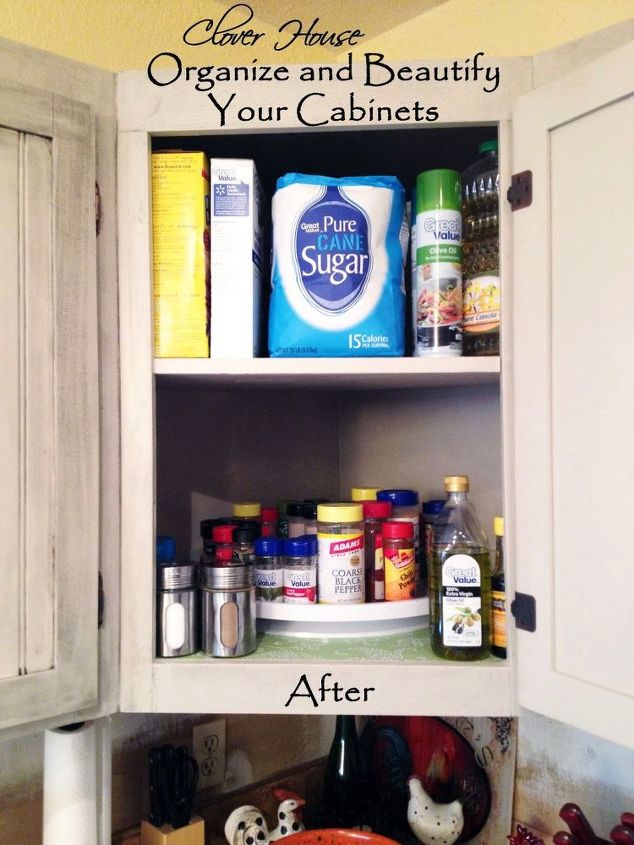
Tah Dah! So much spinny organization I can barely stand it! Oh and pretty shelf paper too! Hey, I think the inside of that door needs a chalkboard painted on it!


Any price and availability information displayed on [relevant Amazon Site(s), as applicable] at the time of purchase will apply to the purchase of this product.
Hometalk may collect a small share of sales from the links on this page.More info
Want more details about this and other DIY projects? Check out my blog post!
Comments
Join the conversation
5 of 43 comments
-
Love it but I would have alphabatized the spices!
-
Thank you for the Lazy Susan idea! I was racking my brain for better storage in my bathroom cabinet and they work perfectly!


Frequently asked questions
Have a question about this project?
Any ideas on making that area in the deeper cabinet more accessible? I have one just like it and it's a BEAR to get access to my items there!
I love the big lazy Susan. Thanks for the link. Suggestion...put your spices in alphabetical order around the lazy Susan and they will be even easier to quickly find.