


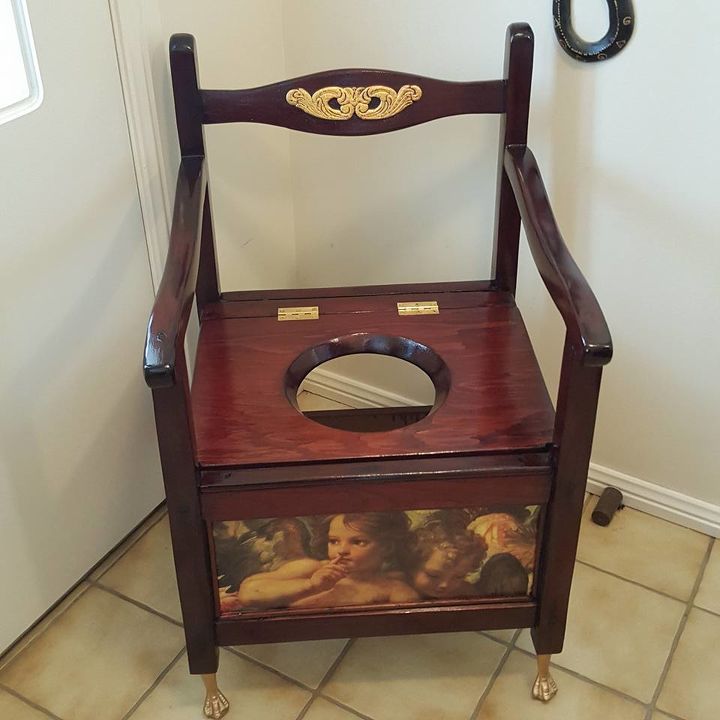
A Throne Like No Other
4 Materials
$50
2 Days
Medium
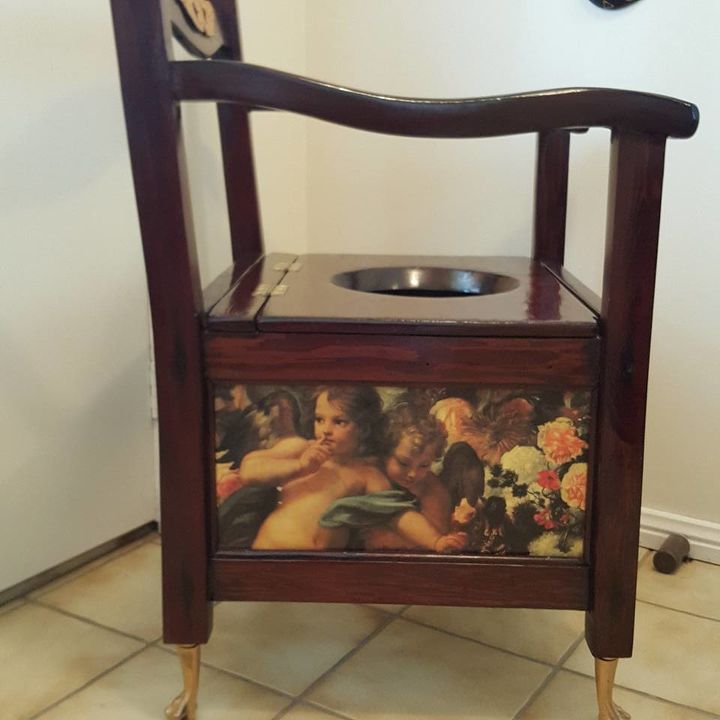
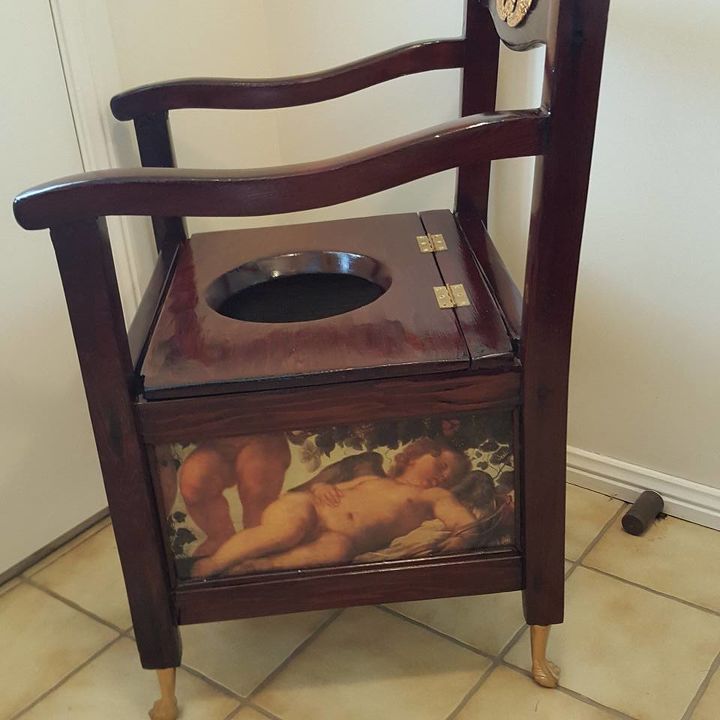
I spotted this chair sticking out from a pile of furniture at a house of a fellow DIYer. I was instantly attracted to it because of the pictures. I asked her about it and she said that it was a Commode chair and that it was in the old church that she bought. She said they had used it for years and was known as the Throne among her friends and family. I told her it was beautiful and with that she gave it to me. Yay!!
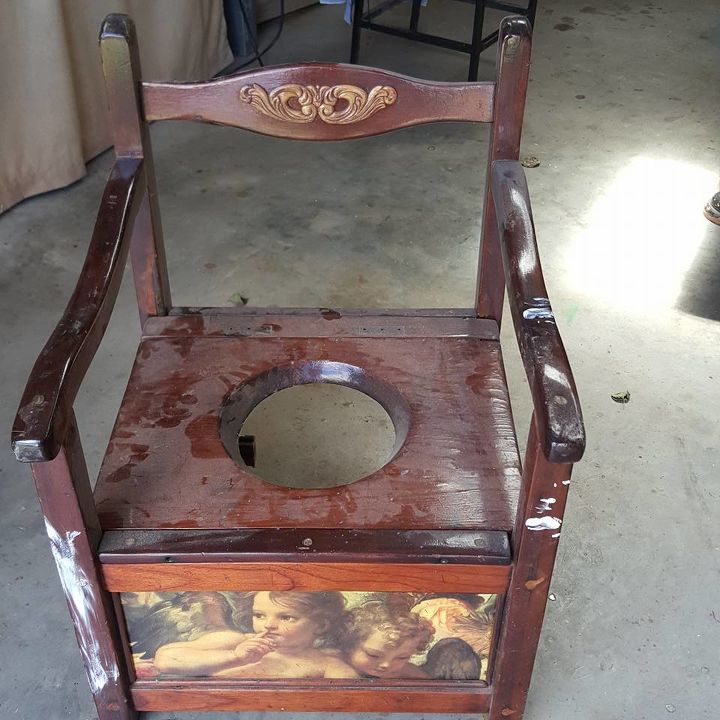
I knew I would not use it as a commode but I wanted to keep it as original as possible, but I also wanted it to fit into any house as a feature chair. The chair was in very poor shape but because it was free all it cost me was my time and I had most materials needed for this project at home.
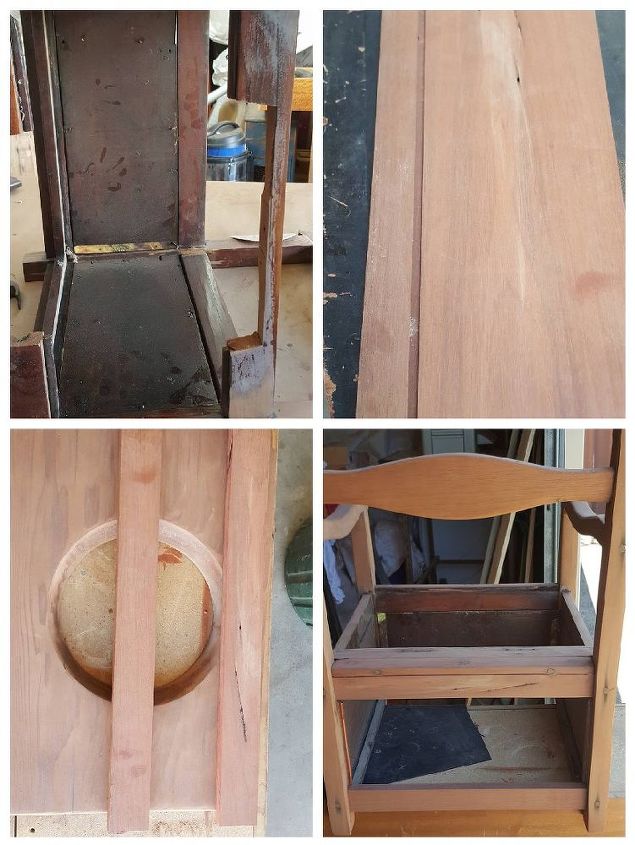
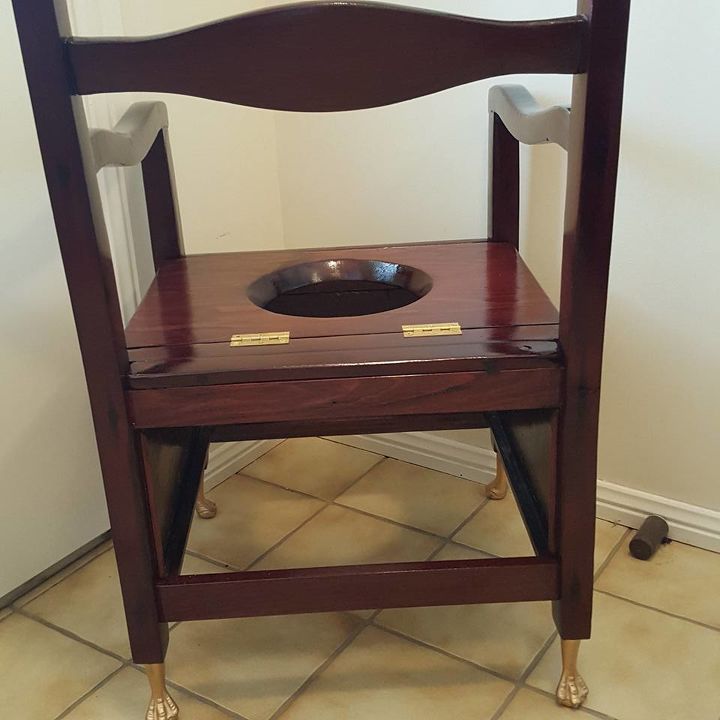
I started by sanding it down to get rid of the many, layers of varnish. And then it went down hill from there. My first task was to fix the structure of the chair. The centre supports had been cut to fit over a toilet, but that made the structure of the chair weak. I built some new support from a recycled drawer front which was a close enough match to the wood on the chair. I removed the old supports and used them as a template to cut two new ones. I used my table saw to cut a section away so it would it into the slots already in the chair.
Repair screw holes
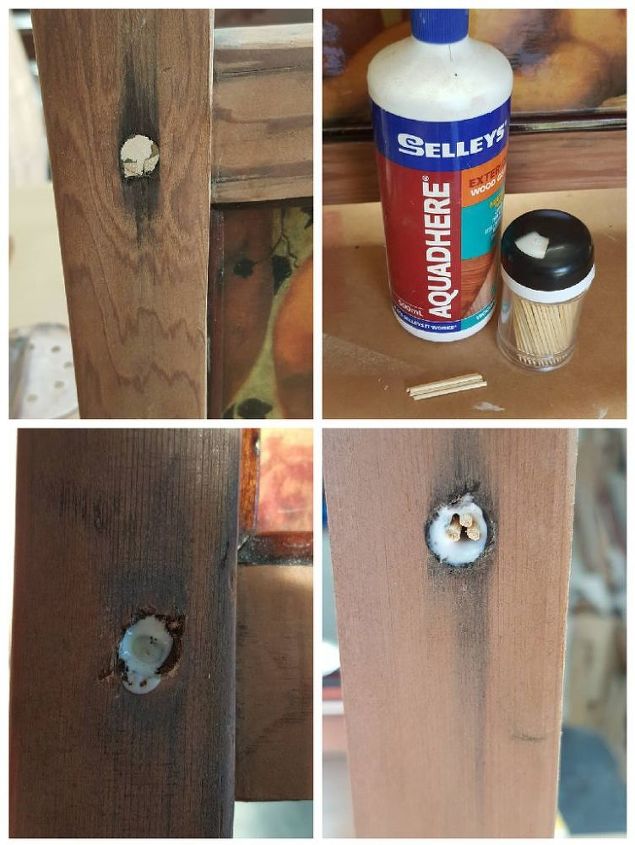
I removed all the screws only to find that all the wood around the screws was rotten. The big rust stains around the screws should of been a clue that this chair had been outside or had got wet at some stage of it life. But I was in to deep now to quit and was way to committed. So I set about to repair every screw hole in the chair. I put some glue into the hole and used some toothpicks with the tips cut off and pushed them into the hole. I left the glue to dry and then screwed my screws into the now new smaller hole.
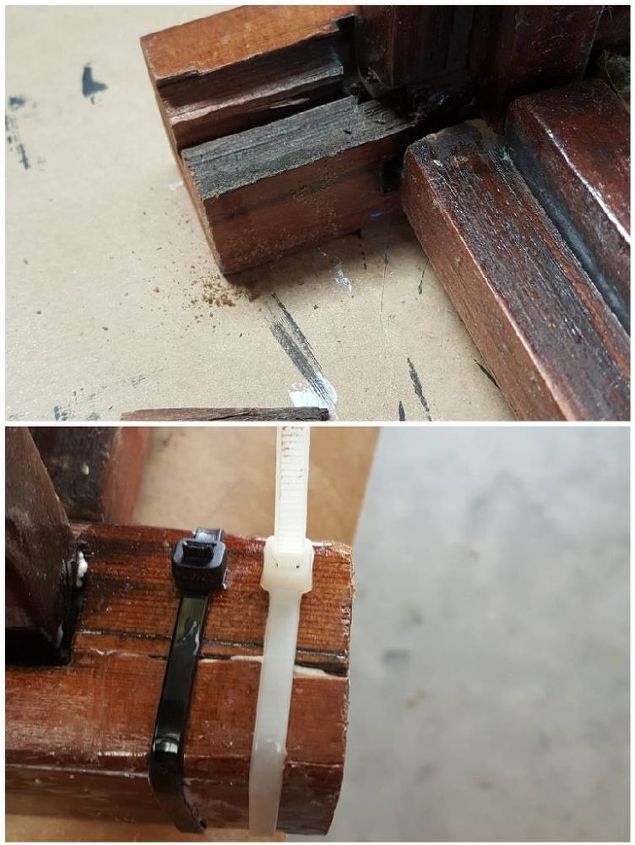
One of the legs was broken, but lucky for me all the pieces were still hanging on. I used wood glue and a couple of cable ties to hold it in place while it dried and the leg was fixed.
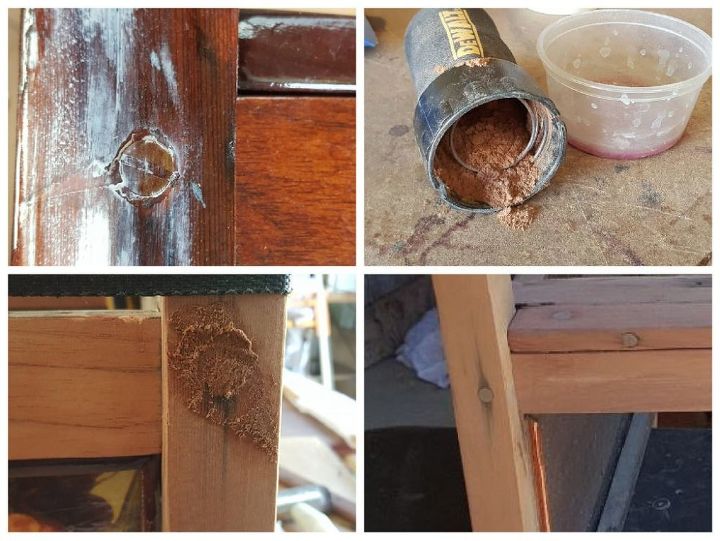
Some of the screw heads were stripped and some sitting on the surface and others counter sunk. So I went with a countersink to make the chair look tidy. Once I had the chair all screwed together it was time to hide the unattractive screws. I have used wood filler in the past but found it does not stain as well and you can clearly see a hole has been filled. I used the dust out of my sander which was from the chair and mixed it with glue to make a paste and filled in the holes and any area that had filler. And once it was dry I sanded away the excess.
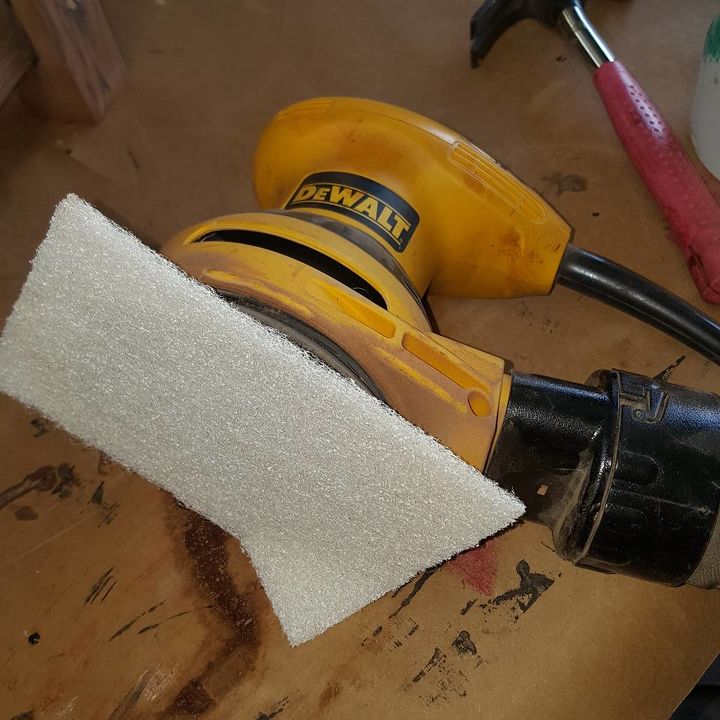
To clean up the pictures and remove some of the layers of varnish and paint. I used a fine rubbing pad attached to my sander and this worked perfect.
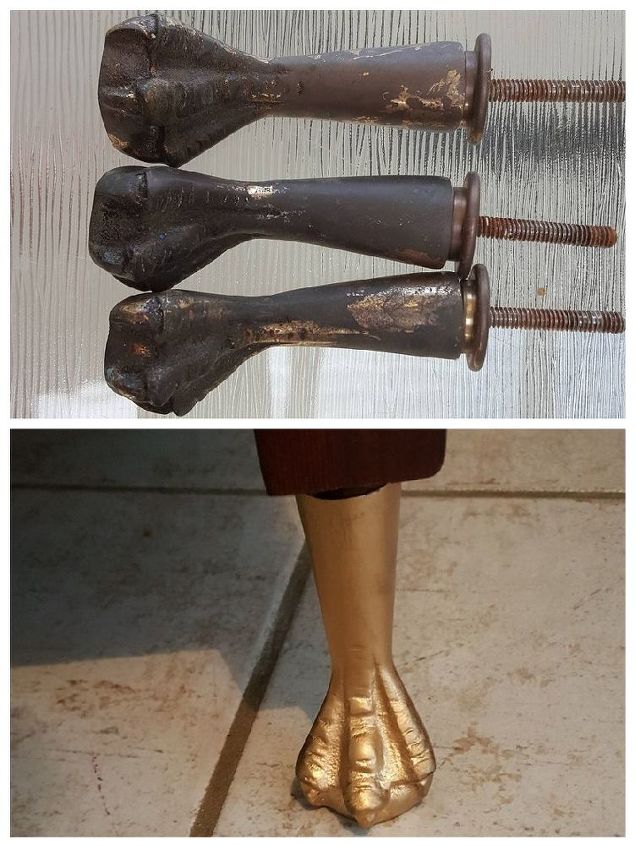
I tried to clean the legs up, but turned out to be cast iron and not brass. I spray painted the legs with a gold spray paint. I attached the legs back on using epoxy resin. I went for a dark mahogany stain thinking it would hide some of the black marks left by the screws getting wet. I applied 2 coats of polyurethane sanding with a 240 grit after the first coat.
Commode chair/feature chair
As much as I loved this Commode, I knew there would not be a high demand for a posh toilet. So I wanted to make it more functional without taking to much away from the original piece. I decided to turn it into a bedroom feature chair.
Chair padding
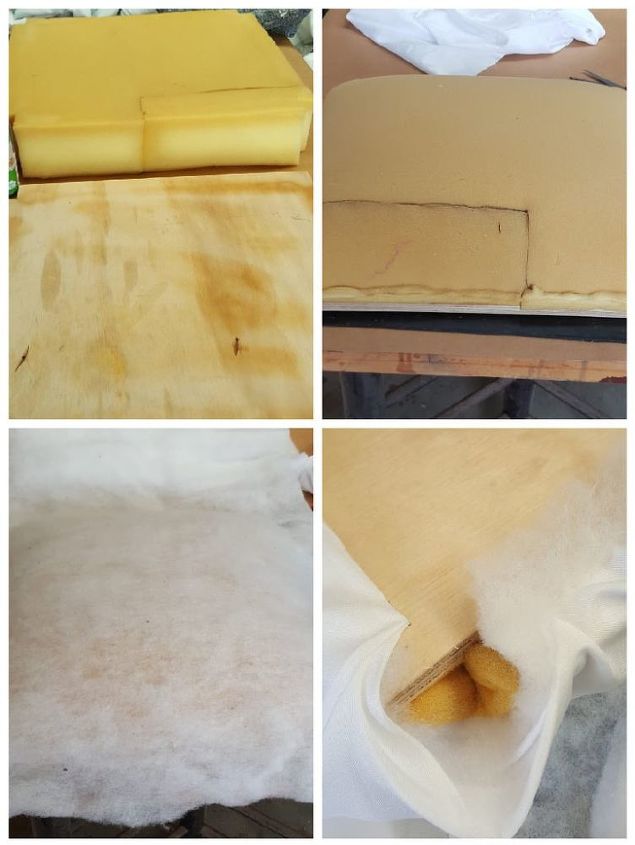
I just wanted to add a removable seat, so that the chair could be used as a commode or a feature chair . To do this I used all recycled materials to make my seat. I used 2cm plywood. I cut some foam I had left from a previous job, but had to do some cutting and pasting because it was to small. I cut the foam with an electric knife using the plywood as a template. I added batting to smooth out the surface and stapled it all down.
Commode chair seat
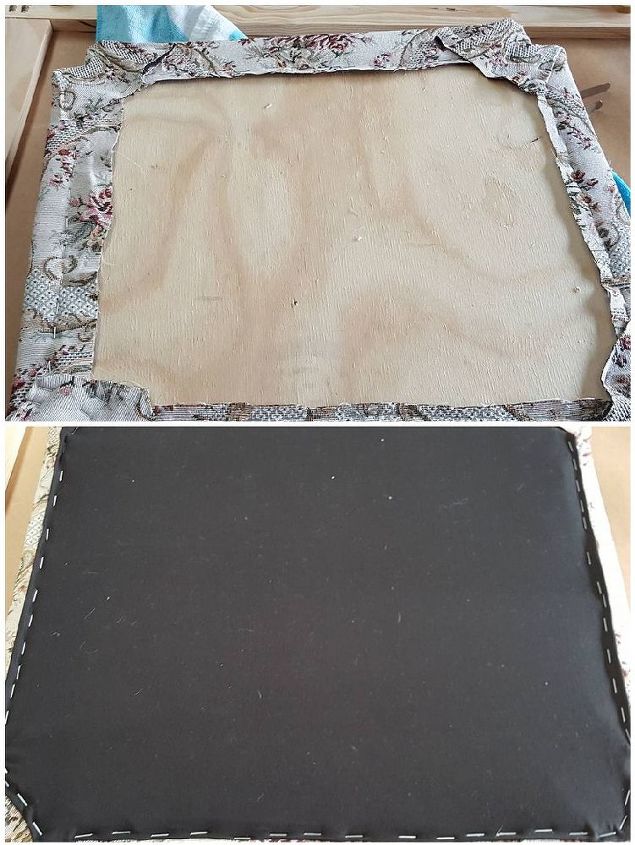
I don't know much about this chair, but I felt it looked old so wanted to get a fabric that was in keeping with the style of the chair. I went with tapestry fabric. I ordered 2 metres off ebay which was the smallest piece I could buy, at $20 it was a bargain. I placed one of the main panels in the center of the chair and cut out my fabric leaving an extra 3 cm just in case. I stapled the fabric in place and finished off the back by adding some black sheet to give it a more professional look.
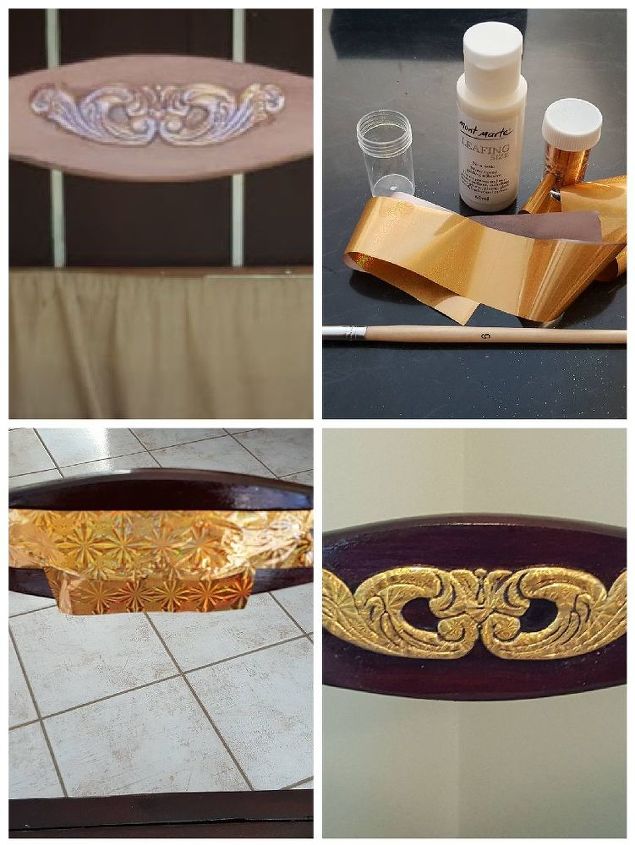
Fake gold leaf
I found it very hard to sand the applique without damaging it, not even with paint stripper. So I did a good old Macgyver job. I had seen people using gold leaf but I did not have any, but I did have lots of nail foils and they worked perfect. Just a bit prettier than gold leaf in my opinion I applied size to the applique and after and hour just rubbed the foil over all the detail. And that was my chair completed.
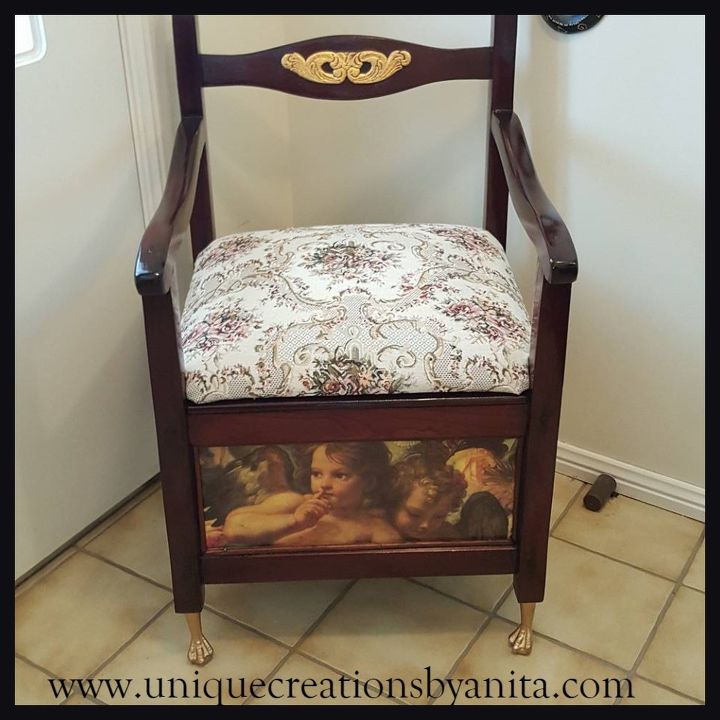
Commode Chair/ feature chair
Commode Chair/ feature chair
Commode Chair/ feature chair
Commode Chair/ feature chair
To see more detailed steps for this project you can visit my site using the links below. to see more of my unique creations


Any price and availability information displayed on [relevant Amazon Site(s), as applicable] at the time of purchase will apply to the purchase of this product.
Hometalk may collect a small share of sales from the links on this page.More info

Want more details about this and other DIY projects? Check out my blog post!
Comments
Join the conversation
3 of 70 comments
-
Thank you!
-
Love it! It looks like new, and in a pinch with a pot underneath, it could be used for what it was intended if the plumbing goes out! LOL


Frequently asked questions
Have a question about this project?