


Epoxy Resin Door Knobs
I ordered some epoxy resin for a table that I was making, it was so much cheaper to buy a large bottle and now I have some left over to play around with. And making door knobs came to mind.
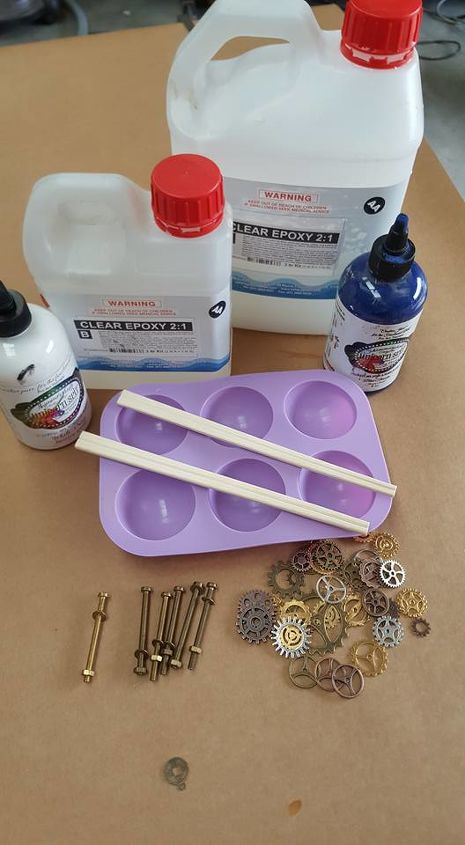
I had ordered some gears and watch mechanisms for Wish and when they arrive they were a bit smaller than I thought they would be, but they were perfect for this.
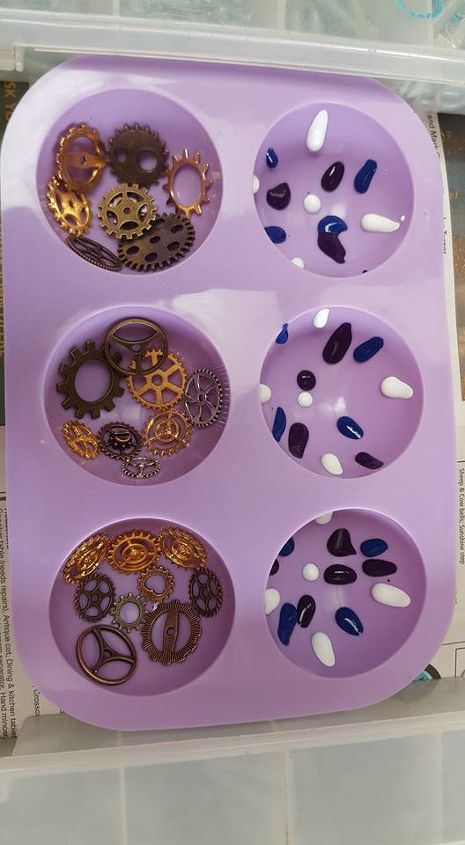
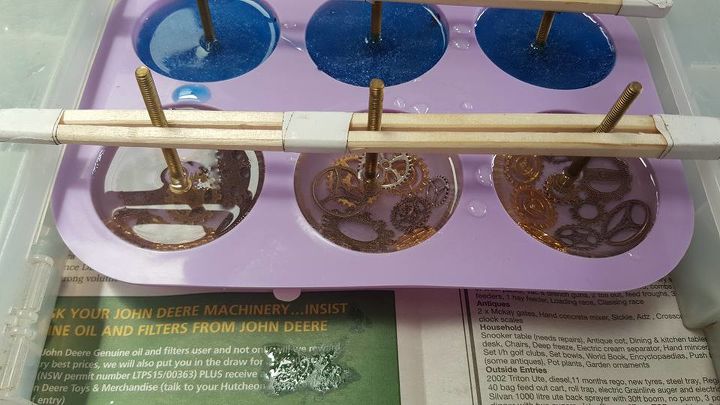
For my moulds I used silicone cup cake trays. I am hopeless at baking and cooking so it was nice to see them used after years in the cupboard. I arrange the gears in the moulds and for my second row I used unicorn Spit stain and glaze and some color pigment.
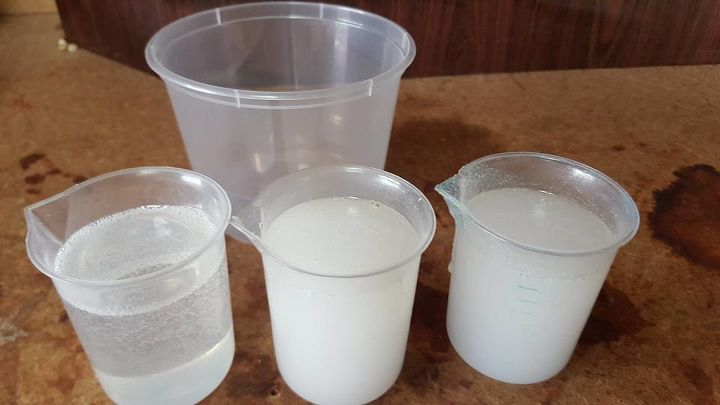
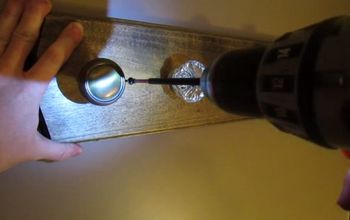
My epoxy resin is 2:1 so I used 300ml in total which was double what I needed. I had some long brass bolts with nuts on them which worked great. To hold my bolts in place I used chop sticks that I taped together with the bolts in between. It is a good idea to set that up before you start, which I did not do, so it was a mad dash to do it before the epoxy started to set. Mix resin to manufacturers instructions. Don't worry about bubbles--you'll later.
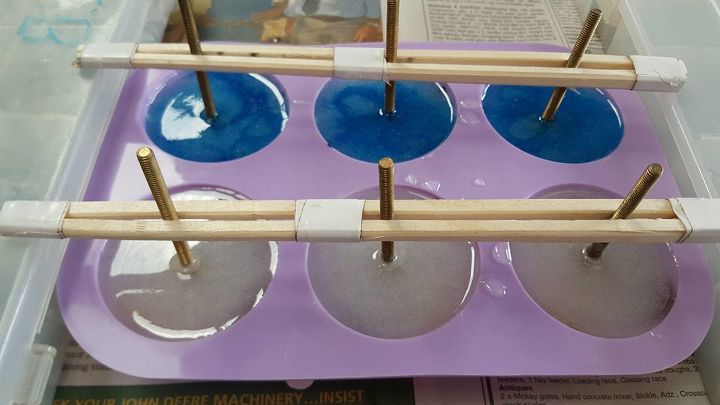
This is what my set up looked like in the end. The resin had lots of bubbles in it which is why it looks white. I by waving a creme Brulee torch ( Another useless item in my kitchen) quickly over the surface and they all disapeared.
Your resin should look like this after the bubbles are removed. I let them sit for 24 Hours and then just turned the moulds inside out to get the out.
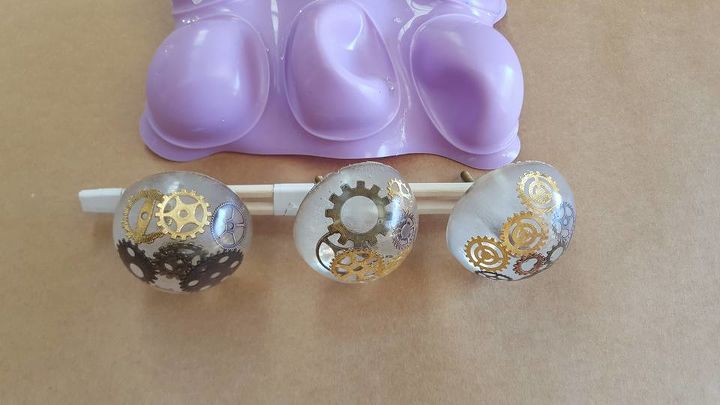
The back of mine had some fine rough edges. I used a sanding block with 320grit to remove them, the front came out perfect.

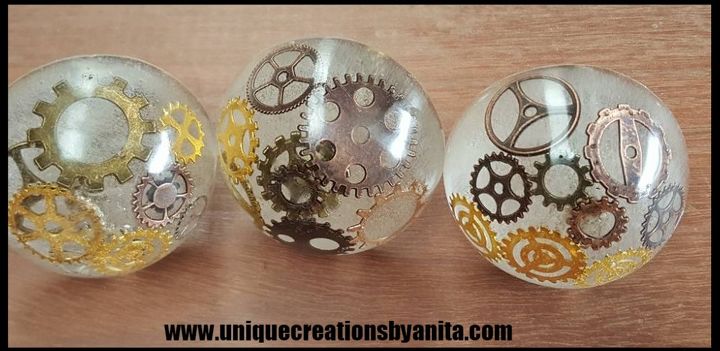
The unicorn spit door knobs did not work as great as I wanted, because I did not mix it in enough with the resin. But was so impressed with the steampunk door knobs, I just need to make a piece of furniture to go with them.
Besides being door knobs these can have many uses. They would make great hooks for a coat rack, great for hanging up your necklaces and many more.
The possibilities for these door knobs are endless as to what you can add to the resin.
To see more uses for the doorknobs visit
www.uniquecreationsbyanita.com
http://uniquecreationsbyanita.com/ned-kelly-outdoor-cooler/
http://uniquecreationsbyanita.com/unique-desk-sandpit/
Really can't cost this because the amount of resin was so small and all the other items I had. And only too 20 minutes to do excluding resin drying time.


Comments
Join the conversation
-
A pic of them installed would bee nice. Please.
-
These are fabulous! You are so creative. They would sell for at least $10 at Anthropology. 👍❤️✌️


Frequently asked questions
Have a question about this project?
I wonder if you can use this same concept to make DOOR KNOBS ?...Take the piece from the middle of the door knob and add it to the center to be able to connect the doorknob back on ....That would be so cool to have these pretty knobs on your bedroom doors / pantry doors bathroom doors ...Ect. Ect. Ect ...
The balls look all round but the way they are made they should have a flat bottom. Is that right?
These door knobs actually look round in some pics. Are they round or half rounds??
Very nice idea, the clear ones especially.