


From Trash to Treasure: Block Houses Made From Wood Scraps

by
Gabi Ralea
I’ve had one of those “Ahhh… how did I miss it?” moments when I realized the potential of this project.
I grabbed two wood pieces, and dug into the pile for another two. They were around 10-in high, like half-cube cut on diagonal, with sharp edges. They were perfect for DIY block houses.
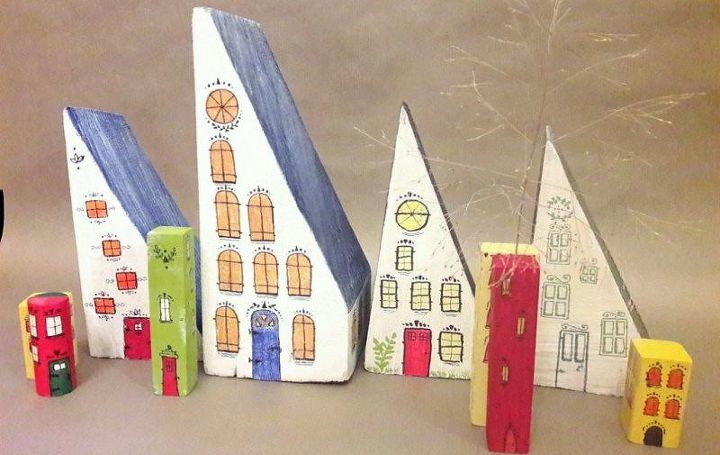
Once with a coat of vernis and dried, your block houses are ready to be displayed and admired.
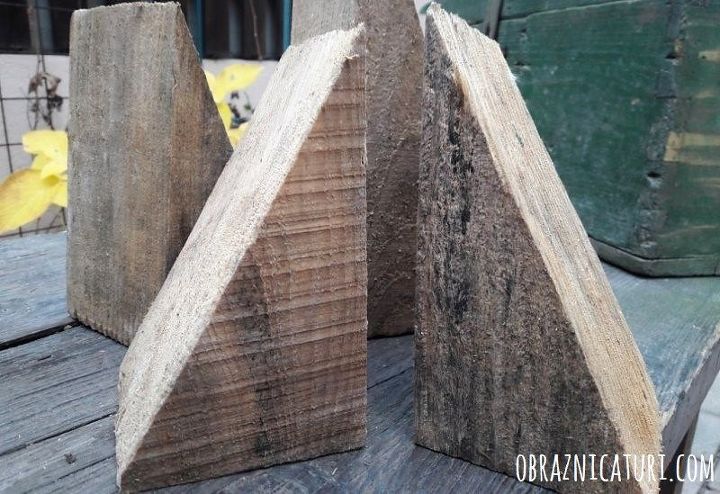
Sand the wood pieces in order to make the surfaces and the edges smoother, but also to prepare them for painting. Clean them with the cloth dumped into rubbing alcohol, to get rid of the dust and dirt left after sanding.
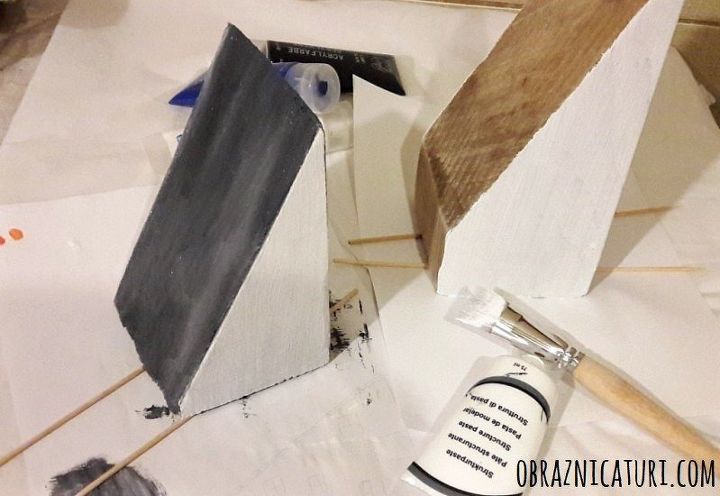
There are two ways to color them: you can paint in one light color as a base or primer first (use chalk paint at this stage), then use your final color, or you just can skip this step and go further with the desired colors (acrylic or chalk). I tried both ways, and there aren’t big differences in the results, but only in the length of the process.
Either way, choose your colors for roofing, walls, windows and doors, then start covering the wood scraps with colors.
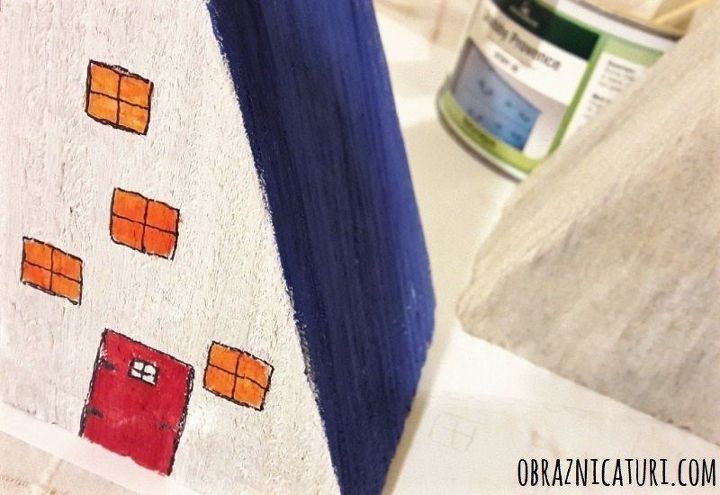
When the paint dries out, draw small windows and doors, using orange, yellow or gold acrylic paint, or any other color at your choice. You can even draw the windows and the doors using only ink pens, for a lighter design of your block houses.
Want more details about this and other DIY projects? Check out my blog post!
Comments
Join the conversation
5 of 9 comments
-
Here's the picture I promised! Lol. I used some joint compound I had on hand to make the mountain one. I'm experimenting with it. It's smelly but interesting to work with.
- See 2 previous
-
Very sweet!


Frequently asked questions
Have a question about this project?