


Grid Style Gallery Wall: Tricks For Creating A Stunning Feature Wall
2 Materials
$250
1 Hour
Medium
Do you have wall space that you have no idea what to do with? And no matter what you try it just doesn’t seem to be enough?
So you then start crowding the space with random decor just to try and make up for all of the blank space. Pretty soon the walls look like a hodgepodge of crap that doesn’t even remotely go together and you are left scratching your head wondering what in the world you did wrong. Does any of this sound familiar?
I know this feeling all too well, hell I practically lived this way for years until the day I finally had enough, but that’s another story for another day!
Our living area has always been tricky for me when it came to decorating the walls due to the shape of the space and how large one of the walls is, so no matter what I tried our walls either looked bare or too cluttered. There was no happy medium and I was beyond frustrated.
Since this space is one of the first things you see when you step into our home I wanted it to make a statement, the kind of statement that people actually like to look at and the statement we were making was more like “please help me”.
After living with the mess for several years I finally decided that enough was enough. So I started brainstorming ideas that would look good in the space instead of causing the wall to be broken up into sections of different stuff.
I pretty much knew I wanted to do some kind of gallery wall but couldn’t decide which type.
When it comes to gallery walls the options are pretty endless when it comes to size, shape, material, colors, etc. and I also knew that I wanted the wall to blend well with the rest of our decor no matter how often we decide to update it, because who am I kidding, that will probably happen often.
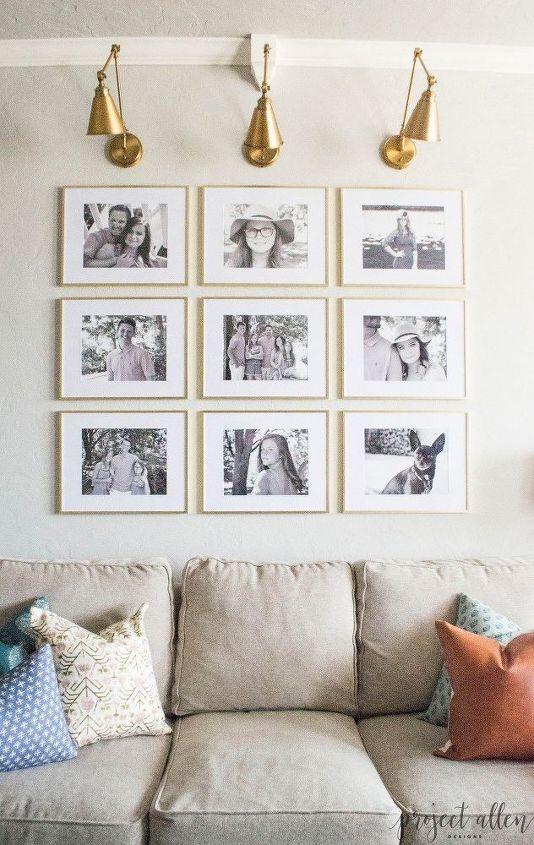
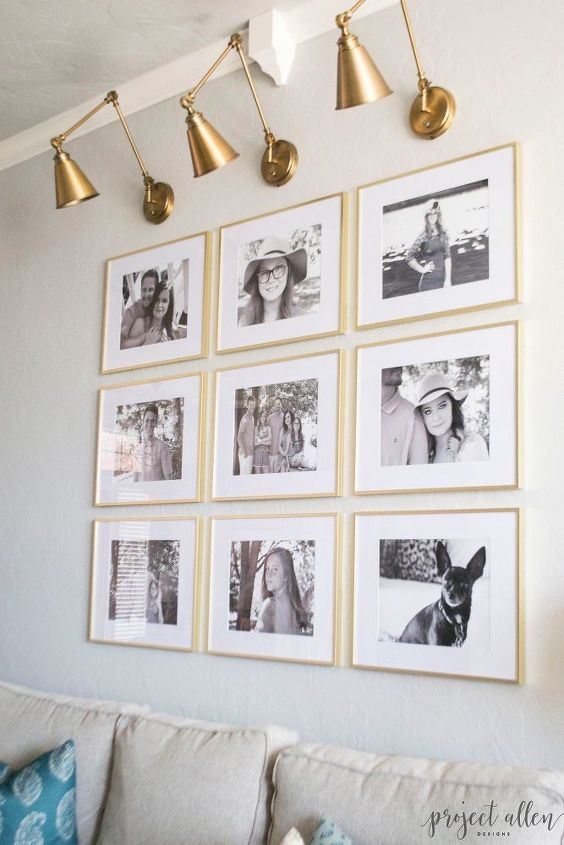
To keep things clean we settled on a grid style gallery wall, I love the uniform look and I have been dreaming of sconces behind the sofa for so long and it would allow me to easily incorporate those.
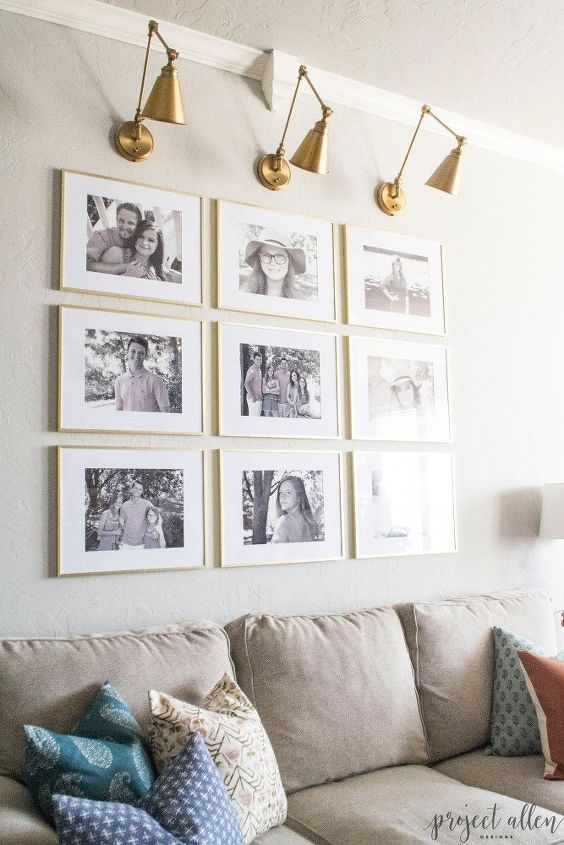
If you have been a reader for a while you know that brass is my jam, so it is probably no surprise to you that I went with brass frames/brass sconces/brass everything.
These frames are my go-to when decorating, they come in many different material options and sizes to fit any style. I love the color and the fact that they come with mats which instantly makes anything you put inside look amazing. We went with the 16×20 option which is matted to 11×14 here.
.
Once we settled on frames it was time to nail down how many rows we would use. We decided to go with three rows of three to keep it from being larger than our sofa. And to make sure they looked like sisters instead of cousins we went with 2″ between each frame, top, and bottom.
We used the exact same spacing and pattern that we planned to use on the wall and laid the frames out on the floor then took the final measurements for the finished square.

The first thing that most people think about when anyone says gallery wall, is holes, holes, and more holes!
Because who gets it done on the first try right?
This is where our secret weapon came in, (disclaimer: the Mr. is pretty damn good at everything so I have no doubt we would have been able to do this project without this bad ass laser level but man it sure made things easy!)
There are tons of options to choose from when it comes to laser levels, there are types that suction right onto the wall and types you mount across the room. We chose this option by Bosch for several reasons.
Yes, it is more expensive than the average laser level but we do plenty of DIY projects around the house and so does the Mr. for his day job so we spent the extra money and invested in something we could use not only on other projects like tile, hanging artwork, backsplash but that he could also use at work.
The Bosch Cross Line Laser Level is amazing, it is self-leveling so we simply mounted it onto our ladder across the room from the wall we chose and with just the push of a button, we had a full cross beam laser displayed onto the wall that we would be hanging the frames.
Once we had that we had to decide where to start the gallery on the wall. We chose the center row, top frame for our first nail and simply used the laser level to make a perfectly straight red line onto the wall. If you look below you can see the red laser cross line on the top row.

Insider Tip: The perfect placement for any piece of art if 60″ center. So basically if you are getting ready to hang something you typically want the center to be at 60″ which keeps things at eye level.
Once we had our first nail in we measured the frame plus two inches for spacing and that’s where we placed the next nail. Repeat with the next frame. At this point, you should have the entire top row ready and adding the rest of the nails should be a piece of cake.
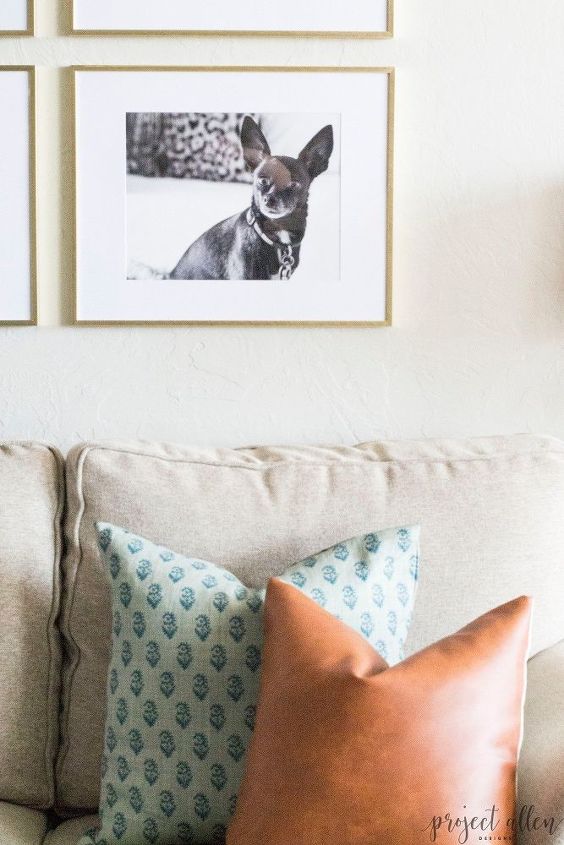
For the photos we chose our latest family photos and obviously one of our sweet fur baby Sparkles, I mean just look at that face y’all! Isn’t she the cutest thing ever? She loves posing for pics too. 
b We had the photos printed at our local Walgreens to save some money and they turned out great plus I love the fact that I can change things up at any point just by updating the photos.
After the gallery wall was finished it was time to place the and I have also several similar options below. We went with the same few inches above the frames to make sure that everything looked like a family.
The last thing you want when hanging artwork is for it to be spaced out too far, it then looks unintentional. It is always best to keep things a few inches apart for a cohesive look.
Once you've finished stand back and admire your handiwork! Looks good, doesn't it?
For more home decor and DIY goodness, you can head over to my blog by clicking the link at the bottom of this post.


Any price and availability information displayed on [relevant Amazon Site(s), as applicable] at the time of purchase will apply to the purchase of this product.
Hometalk may collect a small share of sales from the links on this page.More info

Want more details about this and other DIY projects? Check out my blog post!


Frequently asked questions
Have a question about this project?