


DIY White Deer Head
I want to ask a favor of you. Please don’t assume I’ve lost my mind until you’ve read the whole post. I will admit, there are going to be times that you will realize that I may very well be completely off my rocker, but try to stay focused. Just keep repeating “She’s not crazy; just creative.”
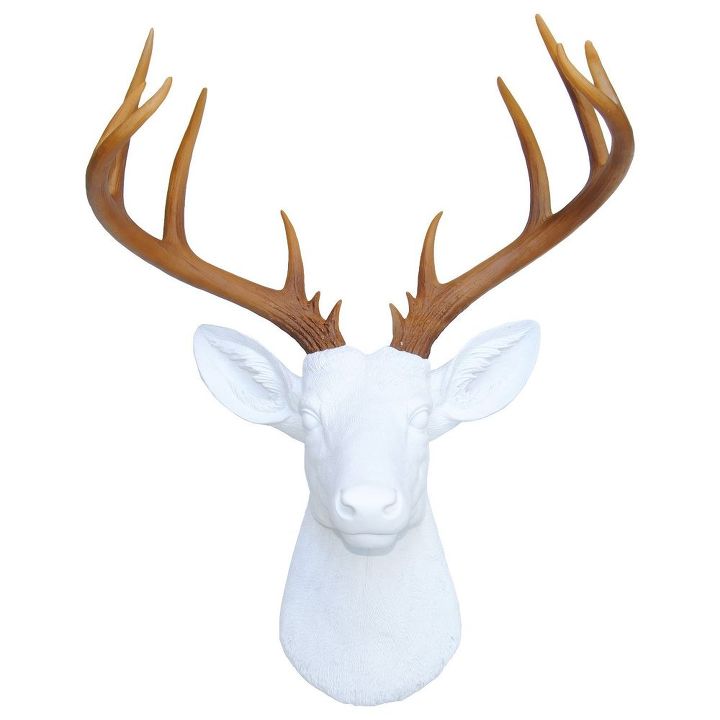
A year or so ago, a white deer head (usually with gold antlers) was the got-to-have decor item of the moment. Since they were so hot, retail establishments decided to put large price tags on them. Since I don’t like spending a lot of money (read: I’m cheap), I decided I could make my own for a lot cheaper.
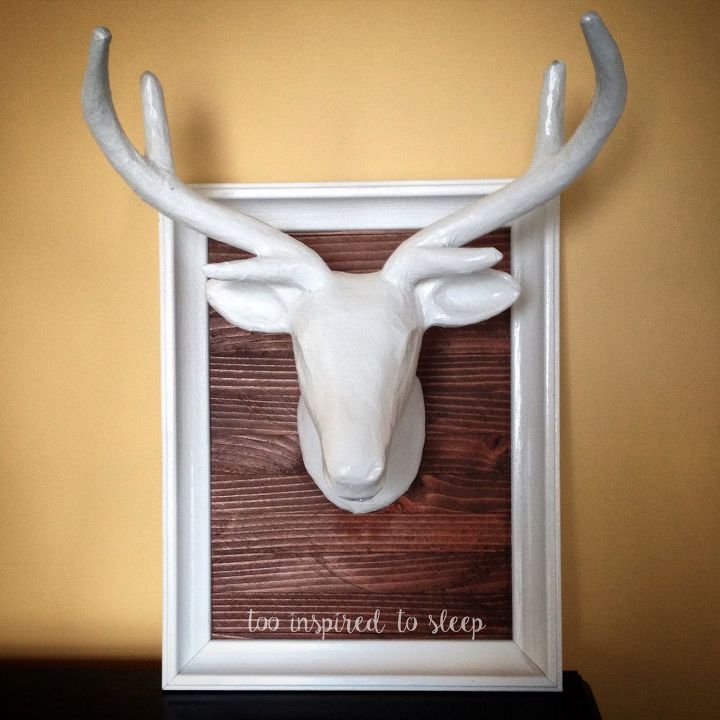
Starting out, I had found a paper mache deer head at Hobby Lobby. It was only $24.99 (you can bet I used my 40% coupon). Took it home and spray painted it high gloss white. Then I found an old frame I’d gotten at Goodwill and attached pieces of left-over wood to the back. Since the deer’s head didn’t weigh much, I was able to affix it to the wood with wood glue. It ended up costing me around $20 in all but I decided I could do even better than that.
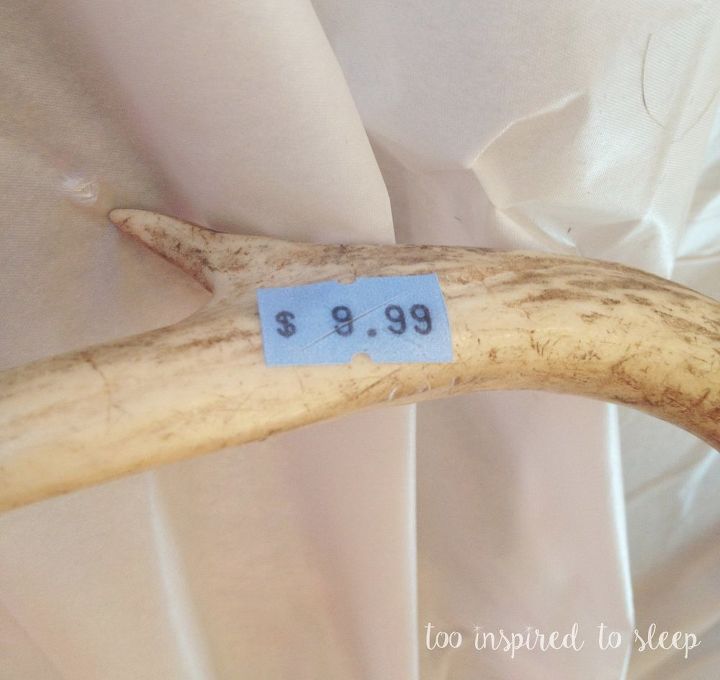
Fast forward a couple of months: I’m walking through Goodwill and what do I see? It appears that someone had donated their trophy to the thrift shop. And when I say trophy, I’m not talking about a bowling trophy–I’m talking a five-point buck! Lucky me…I was able to bag this buck for less than $10. (“She’s not crazy; just creative.”)

I brought it home and that’s when the madness began! Mwahahahaha!
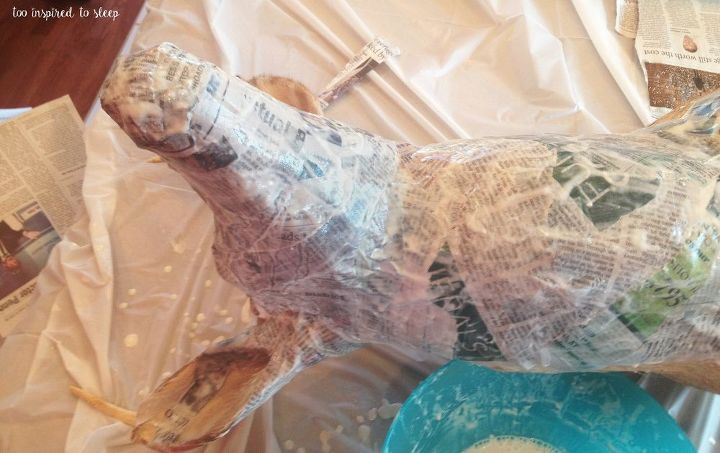
If you haven’t guessed by now, my plans were to envelope this poor deer in paper mache. Being the animal lover that I am, I will have to admit at times this felt a little wrong. I couldn’t seem to keep the commercial with Sarah McLachlan out of my head. (Dang onions!)
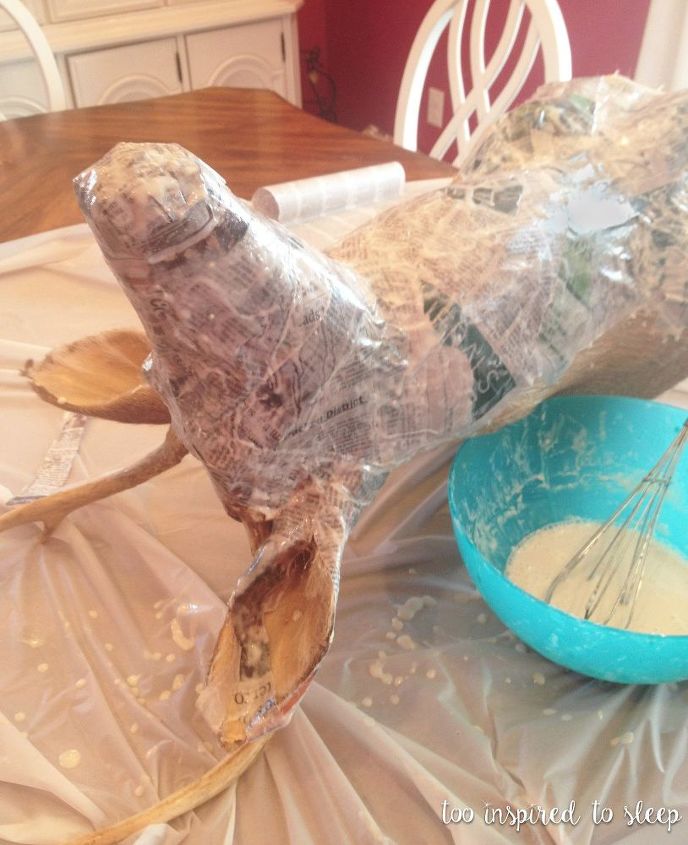
I covered our dining room table with a plastic tablecloth from the Dollar Tree so I wouldn’t make a mess (I still did). To make the paper mache, I poured a little flour in a bowl and then added a little water until it was the desired consistency. I tore pieces/strips of newspaper and dunked it into my concoction, then completely covered the deer from head to t….well, just the head. (“She’s not crazy; just creative.”)
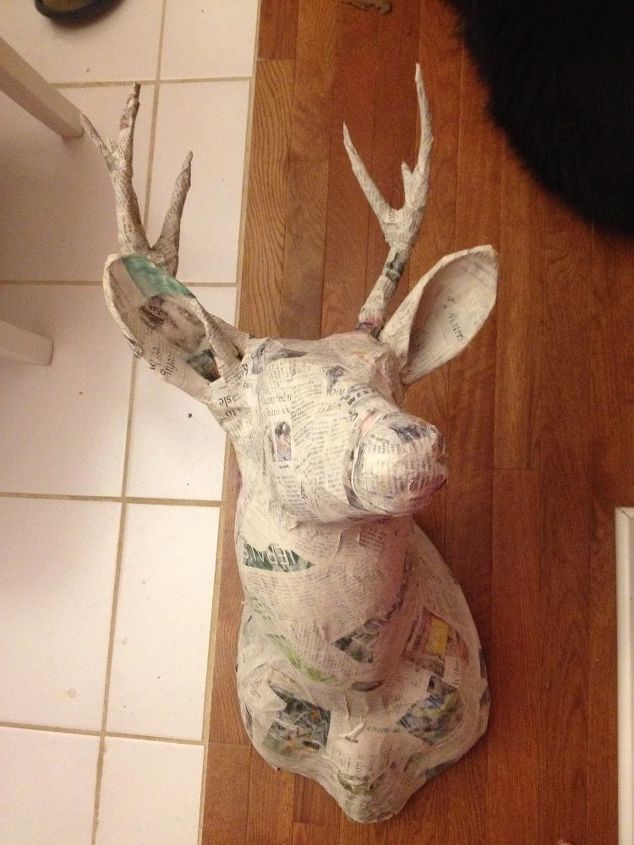
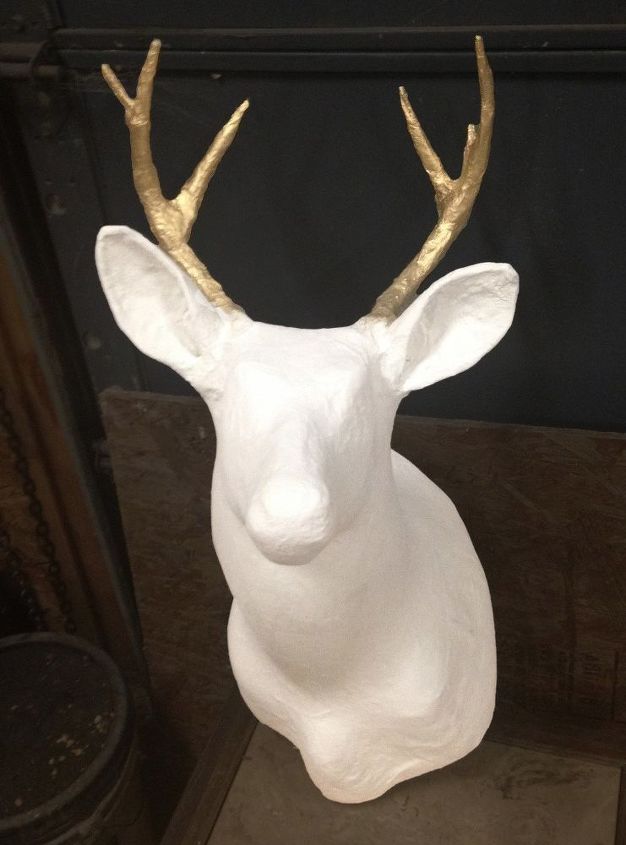
I feel like a broken record. I keep having to explain the reason for the shortage of photos. You see, I created a lot of projects before I had even considered having a blog. Therefore, I didn’t take all photos needed to really explain it well and for that, I apologize. Luckily, I think after this step I just painted it. I spray painted the antlers first with Rustoleum Metallic Pure Gold. After they had completely dried, I covered the antlers and spray painted the rest of it with Krylon white high gloss. Here’s it is finished…
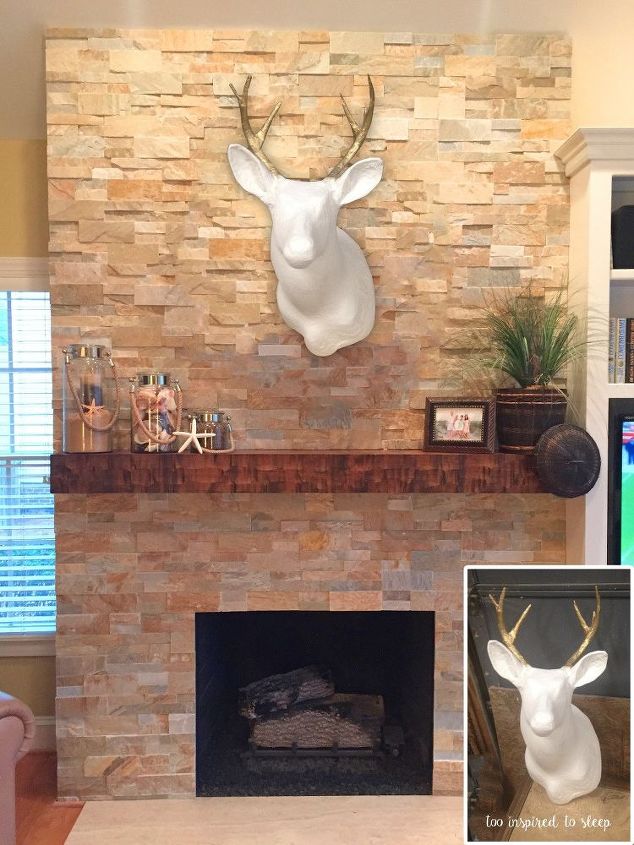
Well, kind of. The photo in the bottom corner is actually after it was finished. I found it didn’t look very attractive sitting in the barn with my hubby’s tools and what-nots scattered around. Therefore, I found a photo on Pinterest that I felt would best show off my creation. (Thankfully, I know how to Photoshop a little bit.)
If nothing else, I hope this post has inspired you to look past the norm. Remember: “She’s not crazy; just creative.”
Resources for this project:


Frequently asked questions
Have a question about this project?