


New Life for A Small IKEA Table

by
Kaye
9 Materials
$50
6 Days
Easy
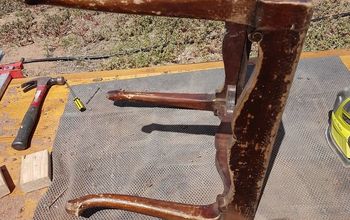
One of my first finds at ReStore was a wobbly, warped IKEA tiered table. It was cheap and looked easy to rehab so I took it home. I didn't realize then that finding "Good Junk" buys would become my idea of a really good time.
Joe has done a bit of woodwork during our marriage and I was had been happy to watch from afar. As I had more time, I want to learn how to do it myself or with him.
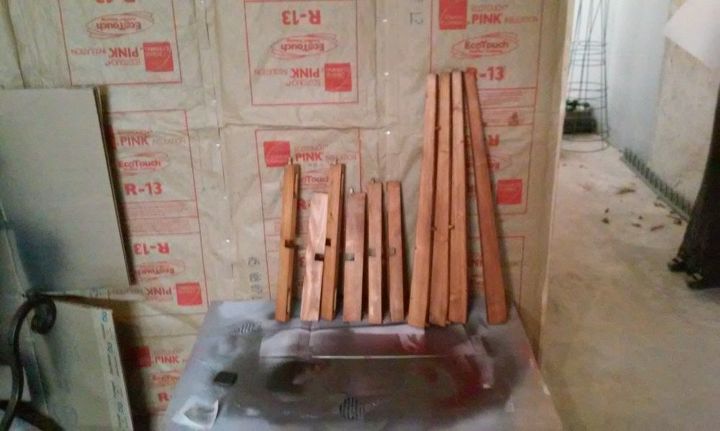
Unfortunately, my hubby decided to help out and took it apart to sand before a picture could be snapped. I always want him to do things with me so I couldn't complain!
Before staining the legs, we applied wood pre-conditioner to prevent stain blotches and help the stain flow evenly. Pre-conditioner only takes a few minutes to apply and 15 minutes to set before staining so it doesn't add any real extra time and makes a big difference.
We used 100% cotton rag to apply the stain. I tried using a brush on other pieces I did after this one but found I didn't have the control over the stain application I do with rags. Also, use rubber gloves to apply stain or be happy with brown stuff around your fingernails for a few days.
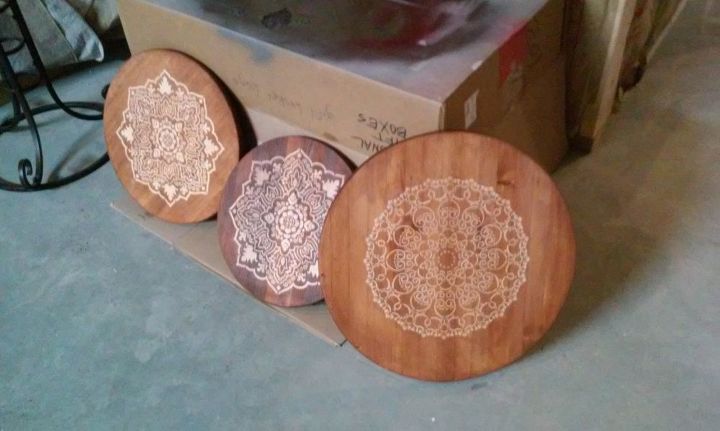
I was going to go ahead and stain the rest of the table but just before that I viewed a project on Hometalk. The Hometalker used a stencil to make a great design on two matching pieces. I decided I wanted to try something like it.
I purchased two stencils and couldn't decide which one to use so I used both. Lightly spraying adhesive on the back held the stencils enough so I didn't have to apply additional tape. With Joe's help, I centered a stencil in the middle of each shelf and filled it in with antique white acrylic paint. After it dried 24 hours, we applied pre-conditioner and stain.
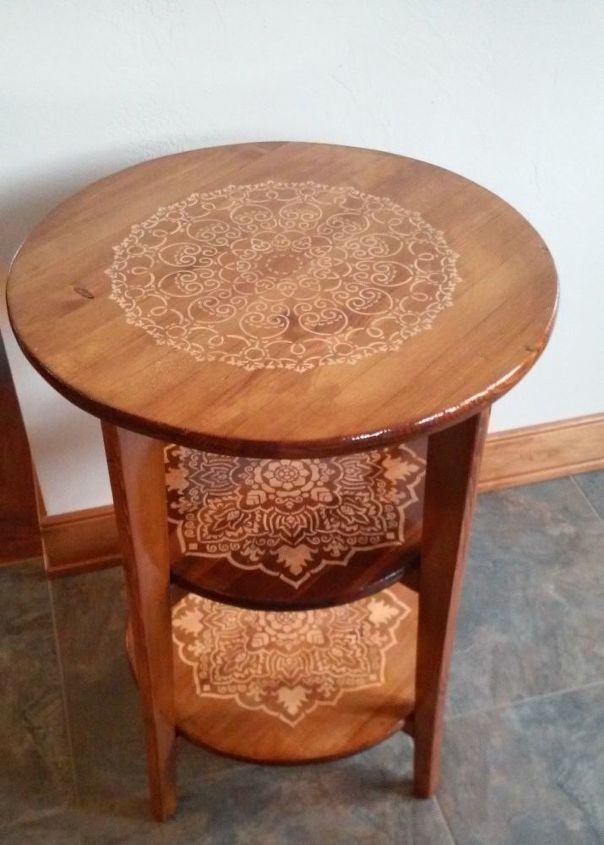
We applied three coats of polyurethane sealer, sanding lightly between each coat. The polyurethane really brought out the grain of the wood and popped the stencils.
The stencils almost appear to be floating above the stain.
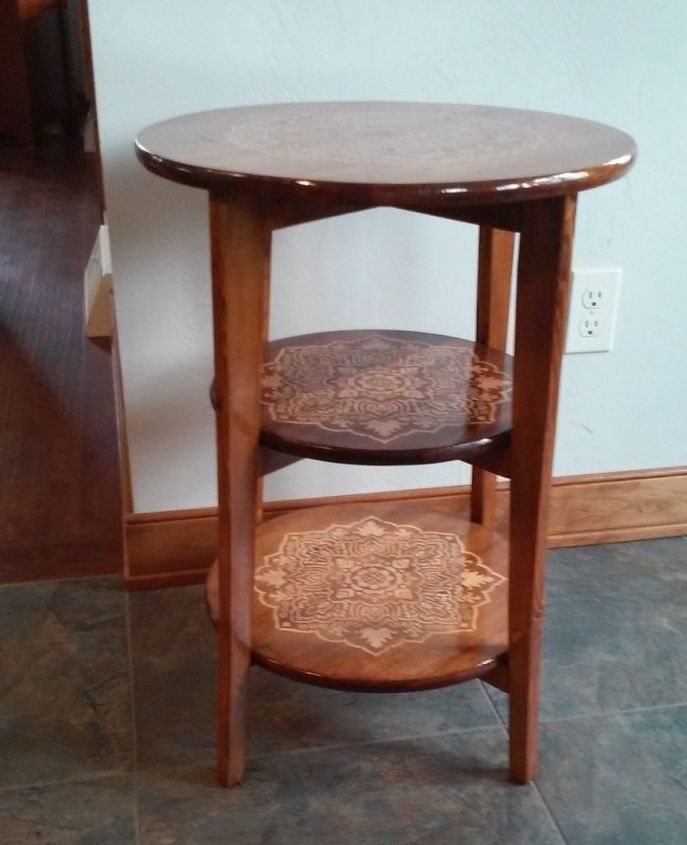
I would love to find another table just like this one to do again, but differently. Hope you like it.
Thanks, Kaye
Resources for this project:
See all materials


Any price and availability information displayed on [relevant Amazon Site(s), as applicable] at the time of purchase will apply to the purchase of this product.
Hometalk may collect a small share of sales from the links on this page.More info
Comments
Join the conversation
4 of 68 comments
-
What a beautiful job...Love it!!!!
-
This is beautiful!!! I want to try but stencils have never done very well for me in the past but I have learned some new tricks lol and with new products to help that have come out over the years I am going to give this a try I will let you know how it goes!!!


Frequently asked questions
Have a question about this project?
Did the spray adhesive leave a mark after you removed the stencil?