


How To Make Your Landscaping Stand Out From Your Neighbors
5 Materials
$500
4 Hours
Medium
Let's face it! Standard landscapes can be boring. Builders use the same required plants and trees for each lot in the neighborhood and all of a sudden everyone's landscape looks exactly the same. You can think outside the box and have your landscape stand out from your neighbors by adding unique professional designs.
We decided to add a vertical green wall to the side of our home to "dress" it up a bit. Green walls are very popular in the commercial industry. Architects are required to incorporate sustainability in their designs and why not use these similar ideas on a scaled down version for your own home?
Green walls can help to cool the outside wall surface of your home (especially on southern and western exposures) and are just as beneficial in shading benefit as large shade trees. Residential green wall systems are a simple way to add vertical vegetation and can be installed with some basic tools.
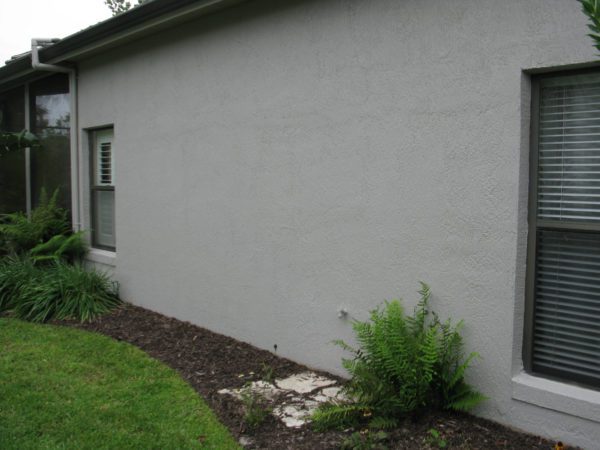
This is the photo of the side of our home before the installation.
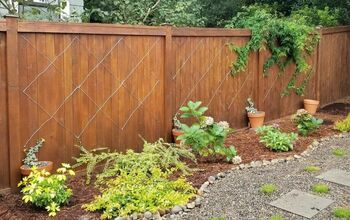
For your trellising system, you can browse your local home improvement store for ideas or shop Amazon. We had access to a professional manufacturer of previously used 3 dimensional metal trellises that we re-purposed, however, if you do some research you will find all types of trellises made from wood, metal or even rope like this.
All that we needed to install the panels were a hammer drill, level, masonry bit and masonry anchors. The welded wire panels require a certain number of attachments per panel and on our installation, we used 4 attachments for the top panel and 6 attachments for the lower panel. The masonry anchors will be used to fasten the clip attachment to the block wall to hold the panels in place. The manufacturer recommends that the panels be mounted 6″ off of the ground, so we started by holding the panel on the wall to mark the locations of where the clip attachments will be located.
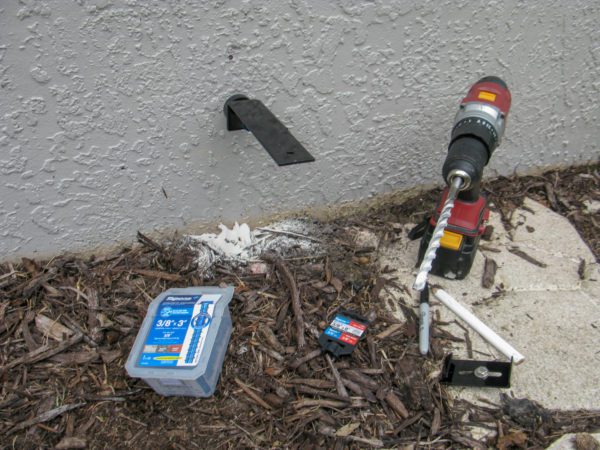
After marking the location of the first masonry anchor location, we drilled the pilot hole with the hammer drill and installed the first clip attachment. The clip attachment has a removable sled, which clips onto the panel. After installing the first attachment and using it as a guide, we leveled the panel and marked the location for the remaining attachments.
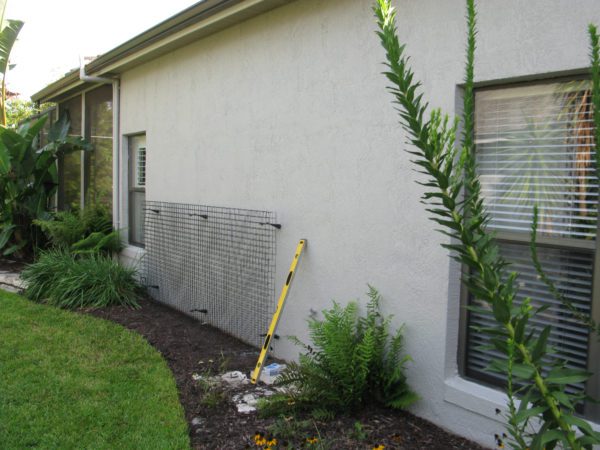
The removable sleds were then installed and the lower panel was installed with the sleds holding the panel in place.
To install the top panel, we temporarily laid the panel on top of the lower panel to mark the locations of the attachment clips. Once the hole locations were marked, we removed the top panel and drilled the pilot holes for the masonry anchors. The sleds were removed from the attachments, the panel was put in place and the sleds were re-attached to hold the panel in place.
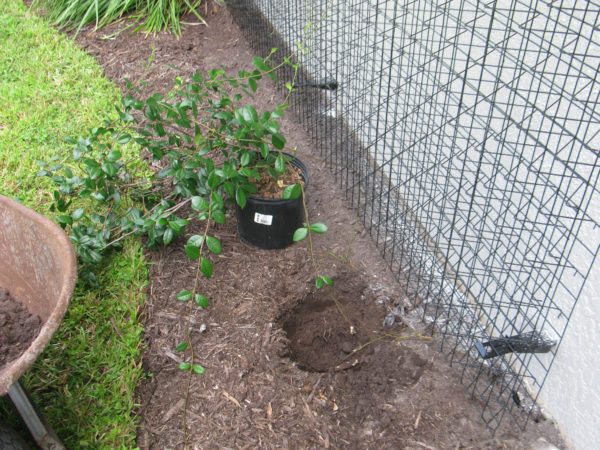
The green wall trellising system is ready for some plants! For this installation, we wanted to include two different types of vines to add some seasonal interest. The panels are 10′ in length and 8′ in height and we felt like 5 plants would be more than enough to cover the panels. 3 Confederate Jasmine (Trachelospermum jasminoides) and 2 Mandevillea (Mandevillea var.) were planted 24″ on center at the base of the panels and the long tendrils were woven into the grid of the panels.
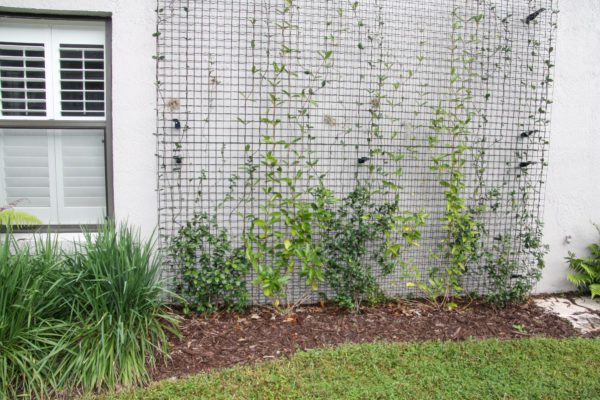
After the plants were installed, the entire area got a fresh layer of hardwood mulch and all we have to do is wait for the plants to grow!
Resources for this project:
See all materials


Any price and availability information displayed on [relevant Amazon Site(s), as applicable] at the time of purchase will apply to the purchase of this product.
Hometalk may collect a small share of sales from the links on this page.More info

Want more details about this and other DIY projects? Check out my blog post!


Frequently asked questions
Have a question about this project?