


Hall Table With a Little Bit of 'Chic'

by
Denise Hardy
3 Materials
$42
2 Days
Medium
Would you like to know how to give a piece of furniture that 'little bit of something different'? By using a coloured wax it can make all the difference to your furniture. In French - 'quel que chose de chic' - 'something classy'
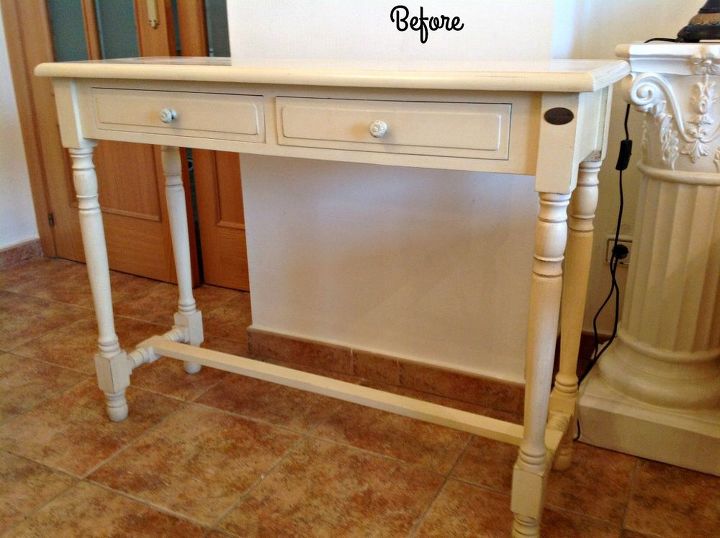
Before - Painted Cream
This hall table was painted by me a few years ago for a friend in cream and she wanted it 'updated' - she left with me to do whatever I thought. I love it when that happens, especially when you want to do 'something a little bit different'. Which I already had something in mind.
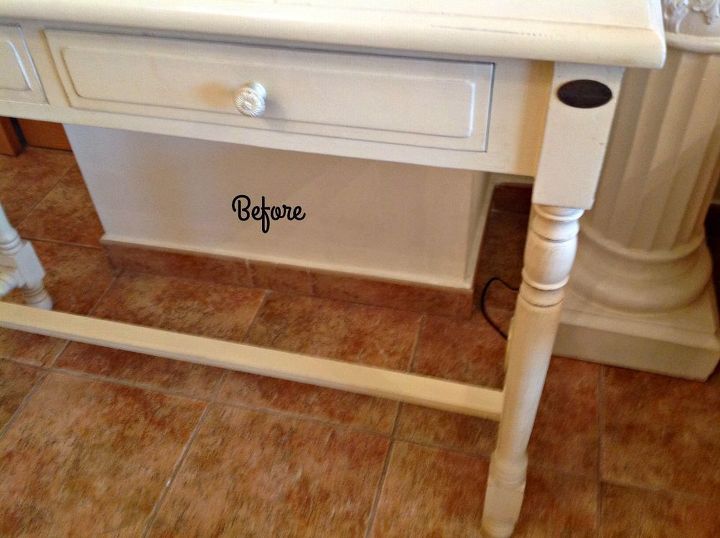
Before
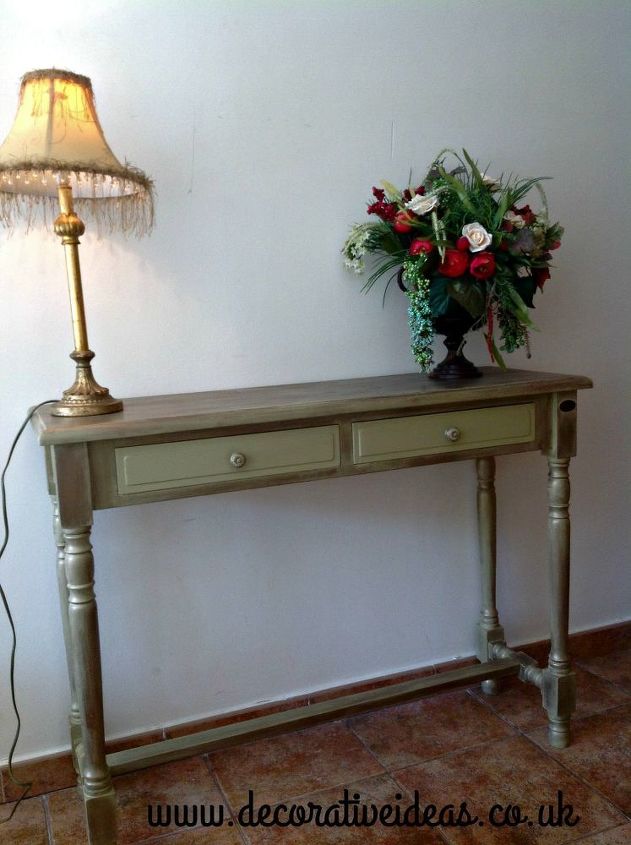
As this was cream anyway and I was going to use Rustoleum Chalk Paint I did not need to use a primer first. I went straight into using the chalk paint and I used the colour of Sage Green. Which I think is a beautiful green. I painted the whole table with this and used two coats.
If the furniture you are going to paint is brown/red i.e. oak, cherry, veneer or whatever - you will need to prime it first and use two coats before the 'base' coat is applied. i.e. the chalk paint or whatever other paint you may choose.
This table already had a primer on it before I painted it cream - so I just used a sand block very slightly over the table before I used the chalk paint.
After
TIP:- when using Chalk Paint I personally like to add small amounts of water. As all Chalk Paints I have used are rather thick and when it is watered down it flows much easier and personally it looks and feels better. Just go sparingly with the water, as you don't want to go too overboard with the water so add little by little. You can always add but you can't take out!! It is much preferable to have two thin coats than one thick!
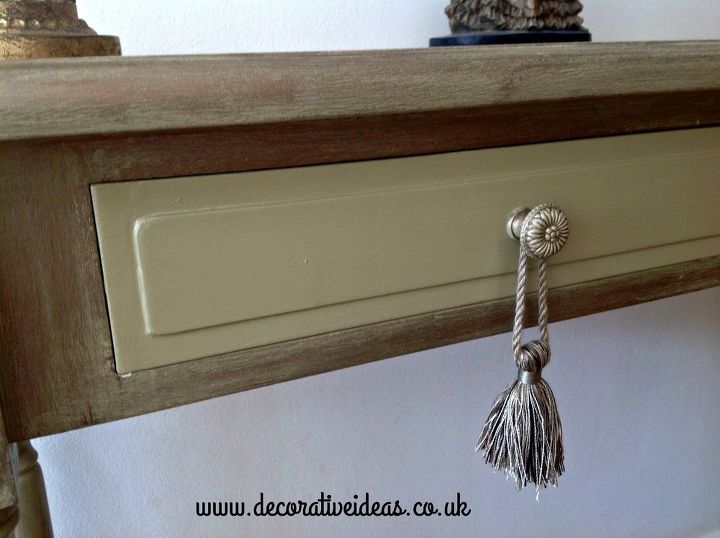
AFTER - with Bronze Wax
To 'make it a little different from the norm' of just the chalk paint, I used some Liberon Bronze wax - putting the wax on with an old t-shirt of my husbands or you can use a wax brush if you wish, but an old t-shirt off your husband's back doesn't cost anything does it?  Always put the wax on in the direction of the wood grain.
Always put the wax on in the direction of the wood grain. Rub it on but then taking a lot off. Then I buffed the whole of the table up to give it a nice soft sheen. If your not too sure when you use the wax, use it sparingly first to get used to putting it on - you can always add more as and where you need it. This is a very soft and pliable wax - not like a lot of others that are being used, so it could be easy to put too much on - just be aware of this.
You will see that I did not put any wax on the drawers, just the whole of the base as I think this also makes it a little different and just rubbed some wax on the small knobs. The wax and the chalk paint go a long way - so you don't actually use much of neither of them. Plenty left for other jobs you may want to use them on.
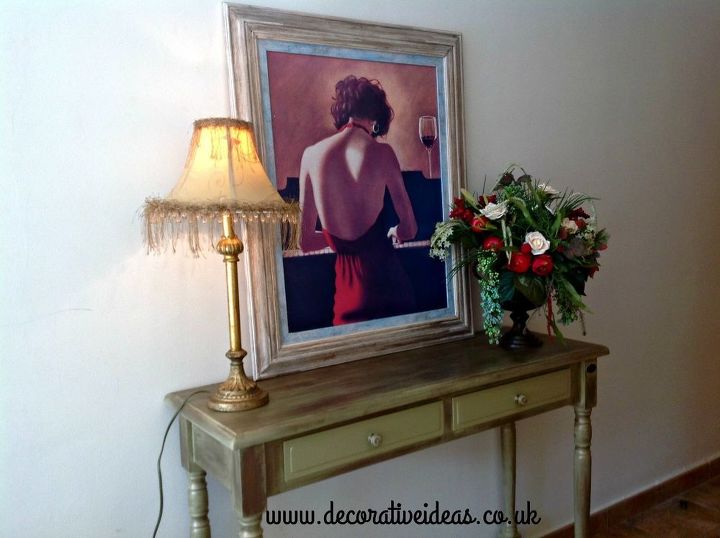
The drawers with Polyvine Acrylic Varnish
For protection for the drawers, I used 3 coats of Polyvine Acrylic Varnish (Water Based). The wax is enough protection for the rest of the table.
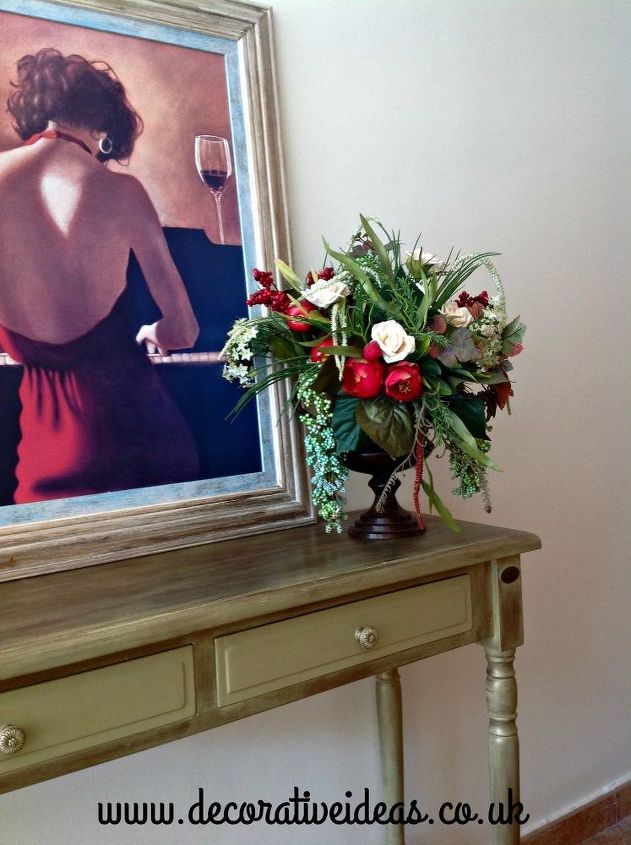
One last photo of the finished product

Alright - I couldn't resist to show you one more photo
Please note that the $42 was in fact 35 euros. And.... that was just for the paint and the wax, but you don't use that much and there is plenty left to use for other projects you may have or want to do. I had all my brushes, rollers and varnish as I use these quite a lot.


Any price and availability information displayed on [relevant Amazon Site(s), as applicable] at the time of purchase will apply to the purchase of this product.
Hometalk may collect a small share of sales from the links on this page.More info
Comments
Join the conversation
2 comments
-
I love that extra touch of the tassel!
-
Thank you Wendy - glad you like it


Frequently asked questions
Have a question about this project?