


Industrial Style Mahogany Bookcase

by
Zac Builds
6 Materials
$370
2 Days
Advanced
I've been on a mission to replace all of the Ikea furniture in my house with real adult furniture. I had an Ikea Kallax bookcase in my bedroom that I'm sure you're familiar with from every university students apartment. After sitting down and sketching out a few different design I finally decided on one I really liked.
I really like an industrial aesthetics and this project, I think, has it in spades. Exposed fasteners, raw wood, and simple building materials.
This project wont be for everyone, it's definitely on the expensive side and requires some specialized tools. That being said I've included notes at few key points on how you could make it easier and cheaper on yourself if you wanted embark on a similar project.
Let's get into it!
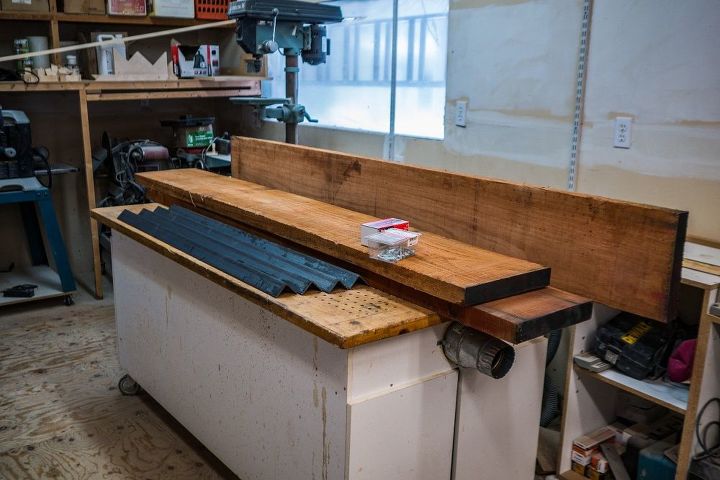
I started this project by rounding up all the materials I was going to need. The mahogany came from a local lumber mill and cost me almost $300. This was by far the most expensive part of this project. Thankfully, you could make this project with basically any wood and believe me, there are many species of wood out there that are cheaper than mahogany. A nice pine would also work well here and could save you 2/3 of the price.
Next I bought four lengths of 4 foot 2"x2" angle iron for 30 dollars from a local metal store.
Finally I bought 4" lag screws from Home Depot that are painted black and look pretty cool.
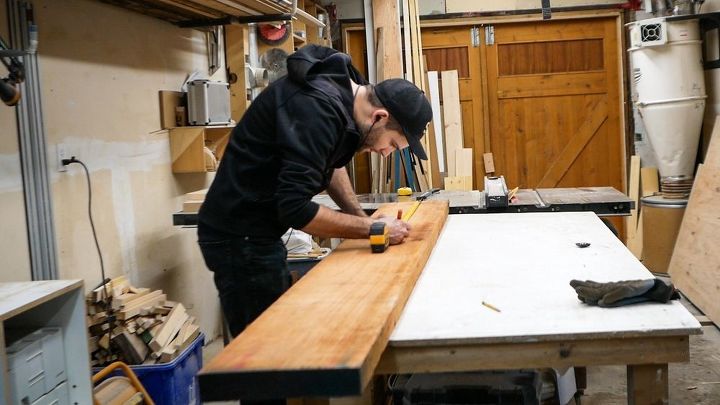
I laid out my mahogany and marked where I would need to cut it with a pencil.
I needed to cut four 36", four 13 1/2" and one 18" pieces.
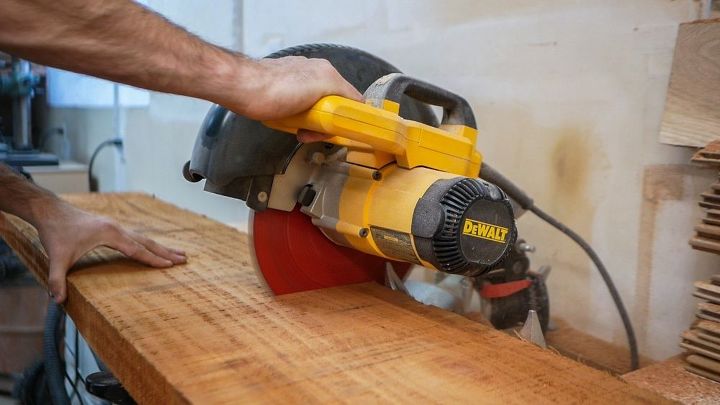
I left my big chop saw at a clients house so I had to make all of my cuts with this little chop saw. I can make it work though.
I would cut halfway through the piece of wood, then flip it over and cut the other half. Doing it this way took a little longer, but sometimes you have to make do with the tools you have, not the ones you wished you had.
Because I bought raw mahogany from the lumber mill each piece was a different width. I measured my narrowest piece to be about 11 1/2" so I had to cut all of my wood to 11 1/2" wide.
If you were to purchase wood that's already a standard size you could skip this step because all of your wood would already be the same width.
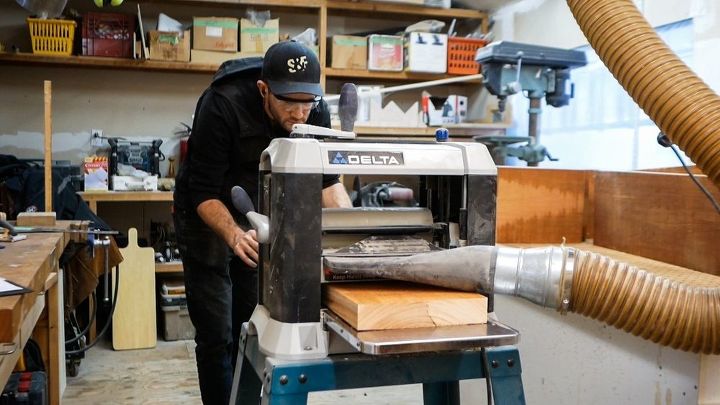
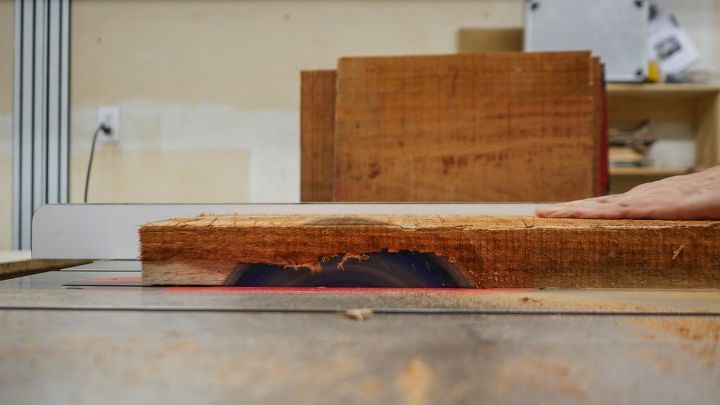
Next I ran each of the pieces through a planner to remove surface imperfections and make sure all my pieces were the same thickness.
Again, if you used a more off the shelf, standard sized wood, this is a step you could skip.
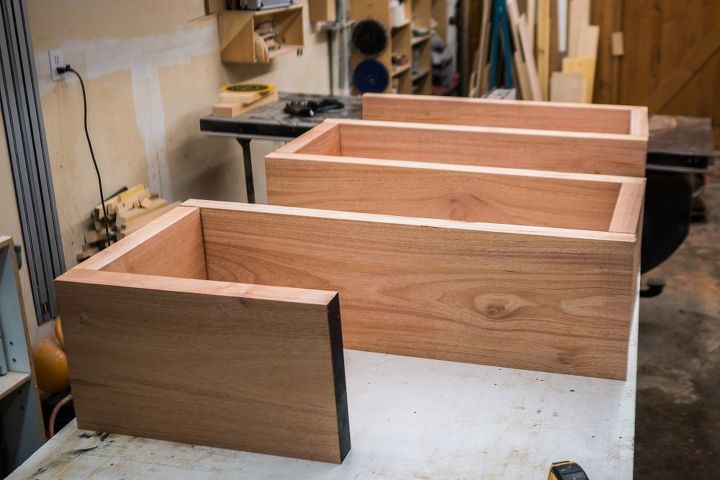
After I had done all of that I laid it on the table so I could really visualize what it was going to look like. This is the point where I started to get really excited about this project.
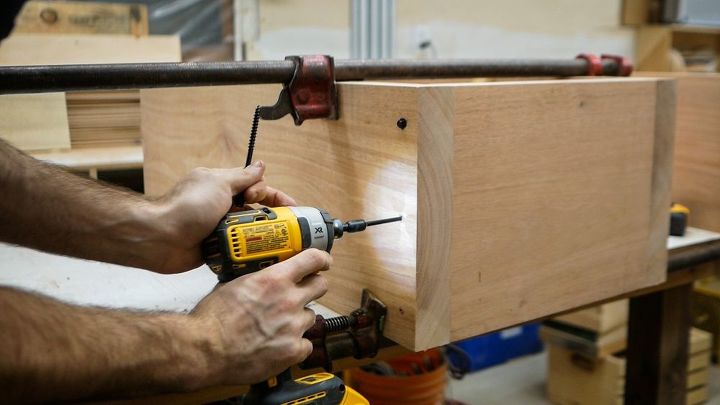
Wherever a horizontal piece met with a vertical piece I used three 4" lag screws to connect them.
Because I was using big screws and screwing into the end grain of the wood I would pre-drill all of these holes with a drill bit that was slightly narrower than the lag screws. This prevents the wood from spiting and maximizes the strength of the connection.
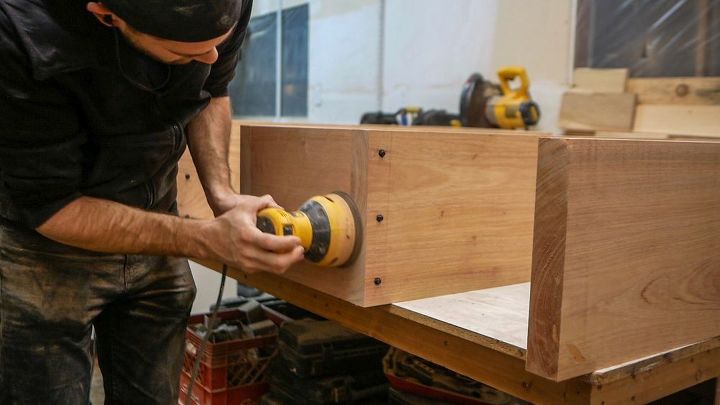
After everything was screwed together I used a random orbital sander to smooth out any imperfections. I did my best to make sure everything was lined up before I screwed it together but you'll never get it perfect.
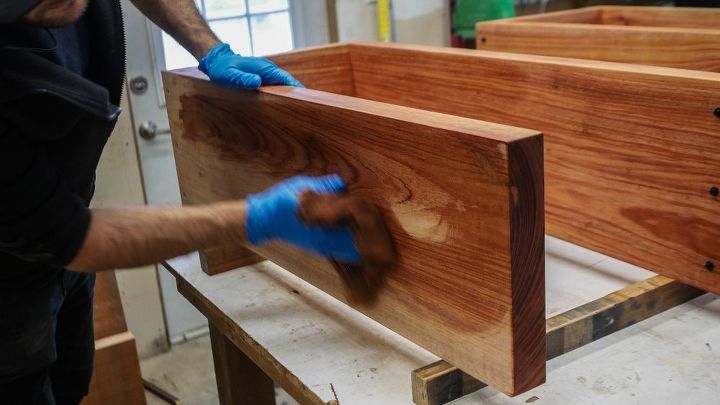
To finish and seal the wood I used a Danish Oil rub on coating. To applying it I soaked a rag in the oil and wiped it on. It's a very simple and quick application, almost impossible to mess up.
I did two coats, waiting an hour in between each coat.
The Danish Oil will help protect the wood against moisture and also helps to bring out the natural color and grain of the mahogany.
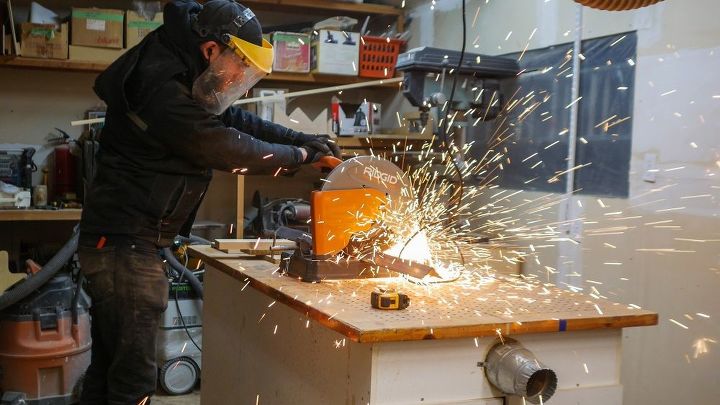
To cut the metal brackets that hold this whole bookcase up I used an abrasive saw. Each bracket 17 1/2" long and made from the 2"x2" angle iron.
This part might not be for beginners. That's ok, you can easily skip this step. Most metal stores that will sell you 2"x2" angle iron will also be able to cut it for you for a reasonable feel.
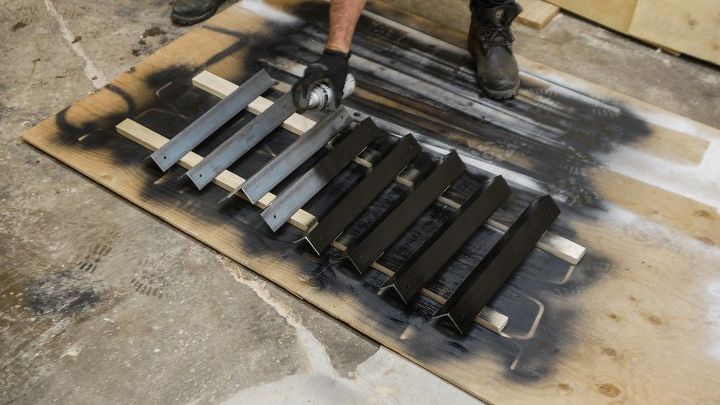
A couple of quick coats of semi-gloss black spray paint was applied to the metal brackets. I wanted the finish product to look a little bit distressed and imperfect so I didn't bother to sand or prep the metal in anyway.
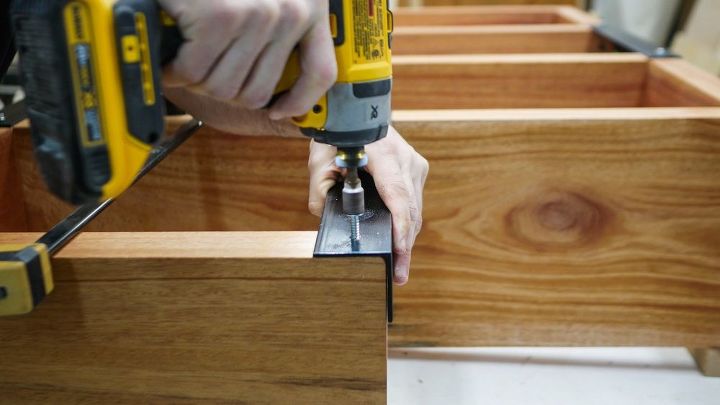
Once the spray paint had dried it was time to the final assembly of the book case. I attached the metal brackets to wood with short 1" lag screws.

After it was all assembled I brought it home and loaded it up. Can you tell how much of a geek I am by the contents?
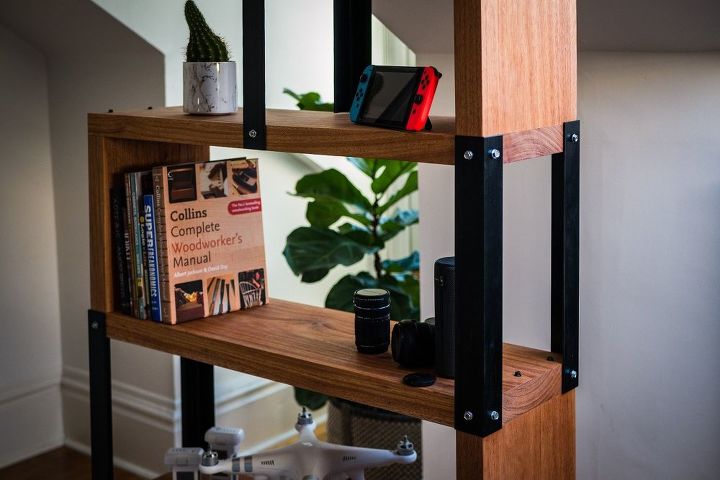
I think this might just be my favorite project yet. It really makes a great addition to my space.
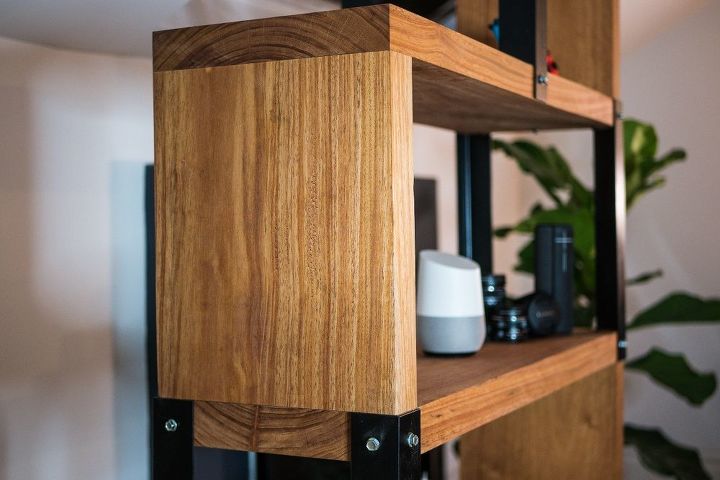
I love the grain of the mahogany!
That's it for this project, let me know if you have any questions or comments below and check out the link to my blog for a more in depth build guide!
Resources for this project:
See all materials


Any price and availability information displayed on [relevant Amazon Site(s), as applicable] at the time of purchase will apply to the purchase of this product.
Hometalk may collect a small share of sales from the links on this page.More info
Want more details about this and other DIY projects? Check out my blog post!
Comments
Join the conversation
3 of 7 comments
-
I love this!! I want one!!
-
Here it is. Love this build & it looks so great. I just saw your new build of the zig zag bookcase. Both are such high quality. You have a gift. Enjoy!


Frequently asked questions
Have a question about this project?