


Story With a Magnetic Ending

by
Pat Ruge
9 Materials
$20
30 Minutes
Easy
When I posted my "Mom Podge the Mother of Gesso and Modeling Paste" project, I wasn't certain if the Modeling Paste recipe would work with silicone molds I had ordered some from Ebay, but hadn't arrived yet.
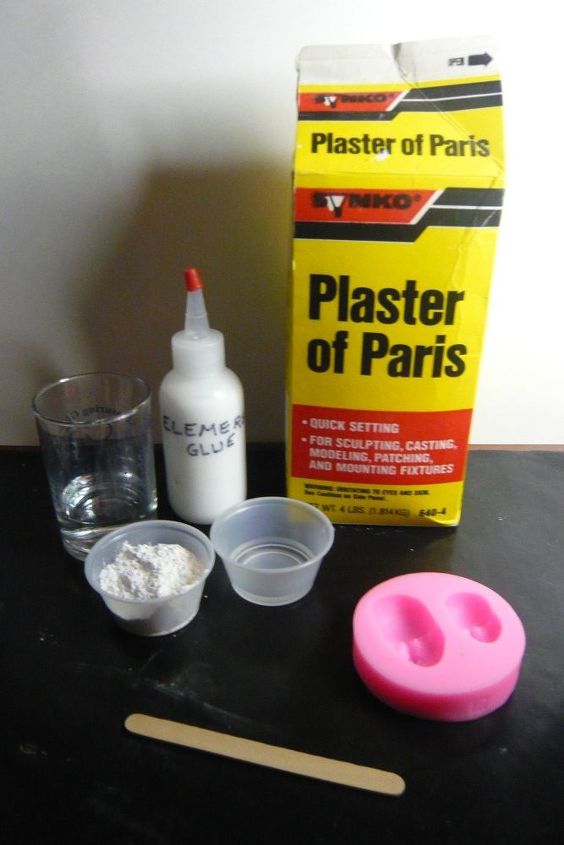
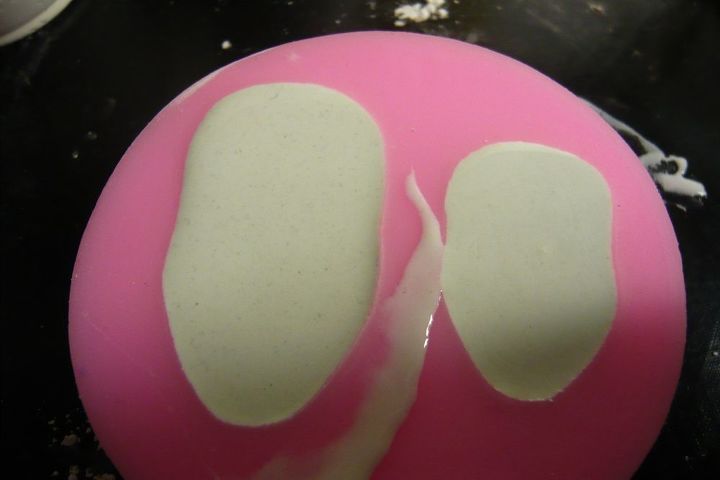
The one I was most interested in was this mask mold which gives me two faces in different sizes. I was so excited the day it arrived and just couldn't wait to try it out. So I mixed up my little recipe for modeling paste per my very own instructions and poured into the molds. Waited 3 hours to insure they were completely dry and then popped out this result...

Ewwww! Air bubbles produced this result - pot marks all over the place and both of the noses look like they had been bitten off. Back to the drawing board. Now the one on the left, I put a light layer of black paint on it, dried, and then a light coat of white acrylic paint in order to emphasis the flaws. You can still see the flaws on the smaller face which remained unpainted.
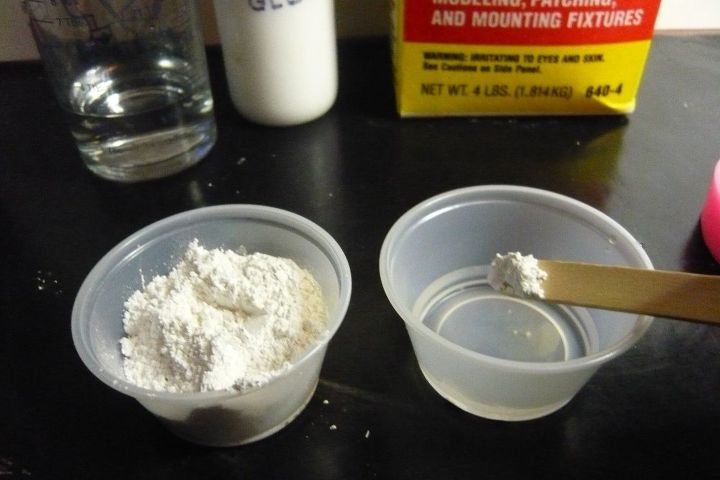
What I learned was to avoid the air bubble, add a small amount of POP to the water (not the other way around). Wait until the POP is absorbed completely into the water - without stirring. Continue to do this until it appears the water cannot hold anymore POP. You will know this as it floats on top and appears to no longer take in the POP. This is one reason you add just a little bit at a time. There is a really good tutorial on this method on youtube if you need to see it in action. The only thing he does not do is to add the glue. I think the glue makes it stronger and less likely to crack. Really worth watching if you intend to make molds. https://www.youtube.com/watch?v=qxcWs_5YFJE
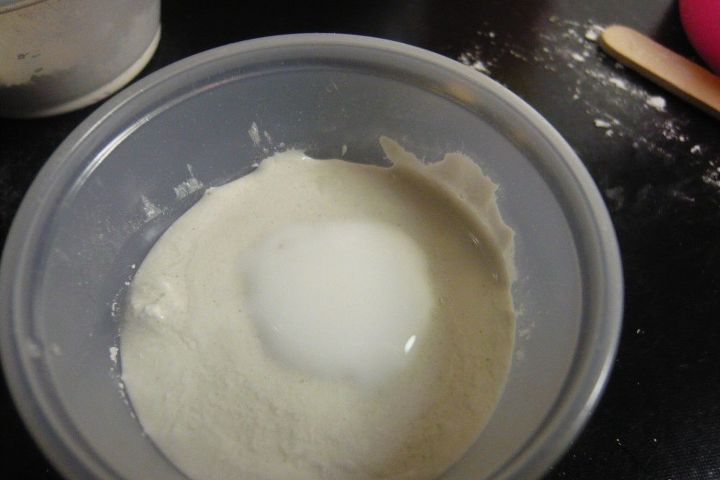
You can see on the left, a small amount of POP still floating on top. Time to add a small amount of glue. Because I've made several of these, I know if I start with a little less than 1 tablespoon of water, enough POP to get to this point and probably about 1/4 teaspoon of Elmer's glue. These are all the same ingredients used in the modeling paste, it's just the order and method in which they are added and the wait time. Up till now, no stirring has occurred. Now, I take the Popsicle stick and gently stir until the glue is incorporated. No whipping or beating occurred in this procedure. Gently, gently.
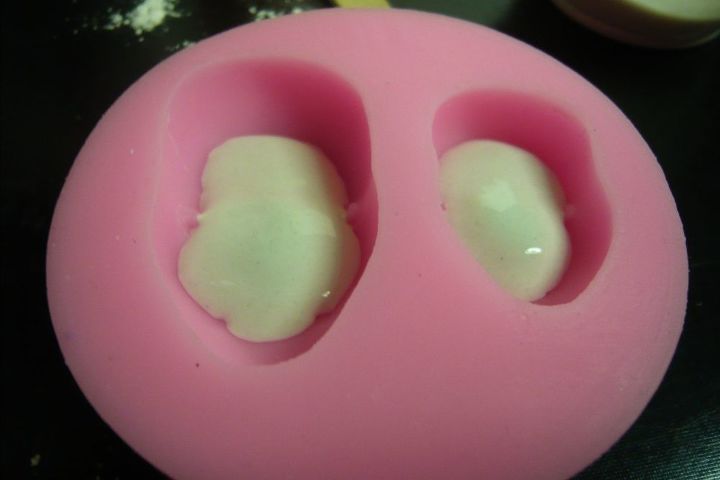
At this point, I pour in enough of the mixture to insure the mouth and nose are completely covered. Pick up the mold about 1" above the table and drop flatly. Do this several times. This will insure the POP get to the lowest and smallest details of the mold and if there is any air bubbles, they should surface.
That done, fill the molds to the top. This mold is quite deep and therefore I allow 3 hours minimum to dry. Gently loosen around the sides and pulling the mold away from the form until it is ready to pop out easily.

I hope that you can see the difference here - no air pockets, features well defined. Oddly enough, we are using the same exact ingredients only the order and the method applied are different. No beating or whipping!
At this point, it's not much to look at. Have some faith my fellow Hometalkers.
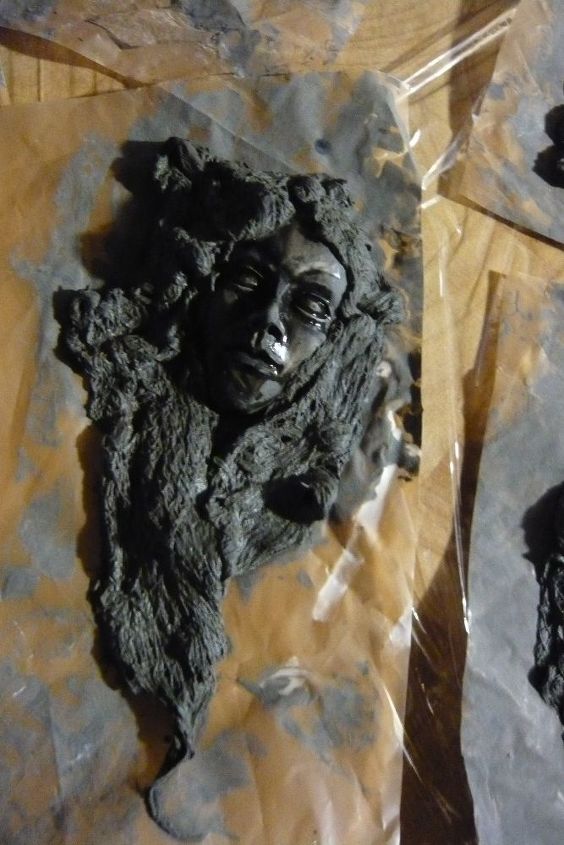
As you can see, I have five of these set to go. I prepared my slurry recipe presented in my "Molding Fabric Into Wine/Plant Holder" project. i.e. equal parts, water, POP, glue and acrylic paint. For this project I used cheesecloth as my fabric and just randomly placed around each of the faces. The next steps will be to paint them all black using black acrylic paint and then they will be highlighted with a variety of metallic paints.
I show the back side of this to make the point that I wrapped the cheesecloth around the head and not behind it. After it dried, I realized that pulling the magnet off the fridge might dislodge the head. I will correct this situation, by adding a layer on the back to join up with the cheese cloth.
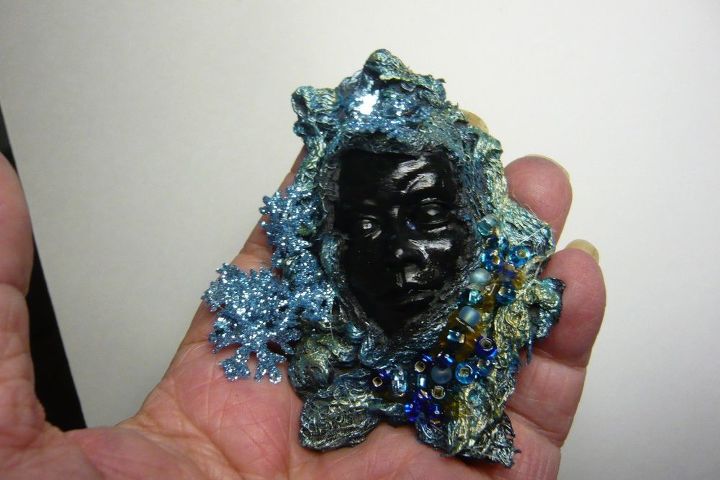
A magnet was added to the back of each. These could also be mounted to some other art form, such as a canvas an altered box, an altered bottle, journal book, or where ever your imagination takes you. I've taken dozens of pictures and just can't seem to capture the true beauty of these magnets. So you will have to take my word for it. I will give you a video at the end where I got my inspiration. However, keep in mind that the products i.e. paints, and glazes I have not been able to locate anywhere. I will say that I came pretty close. If you find them, please let me know.
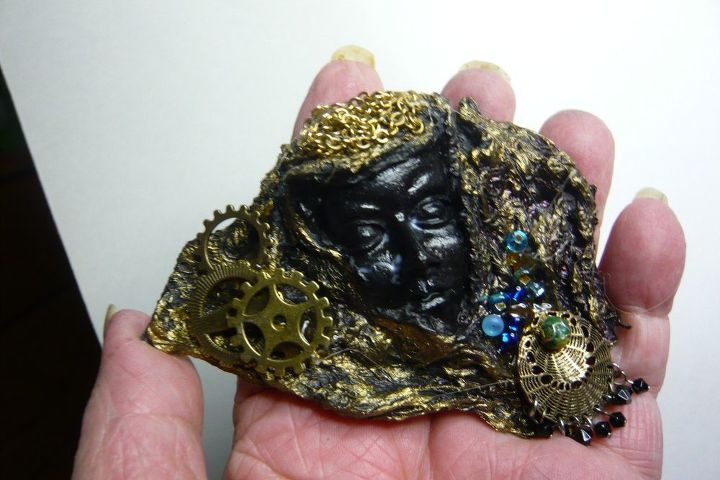
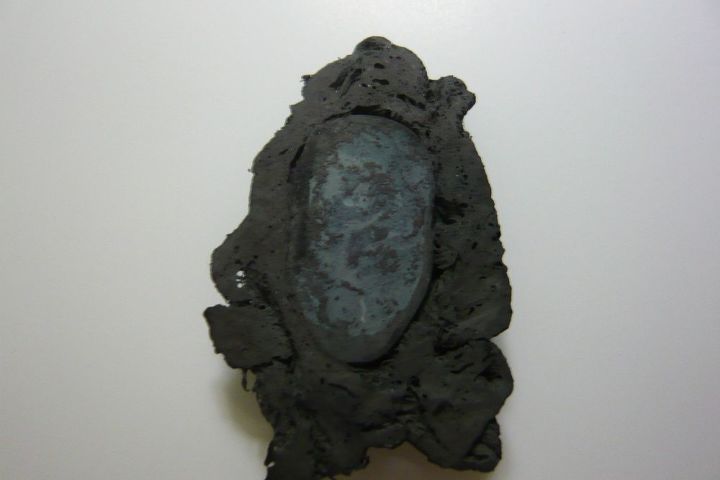
In order to get as much detail as possible, I opted to show each individually. By adding two coats of a glazing medium to the face, I was able to bring out the facial features in the pictures.
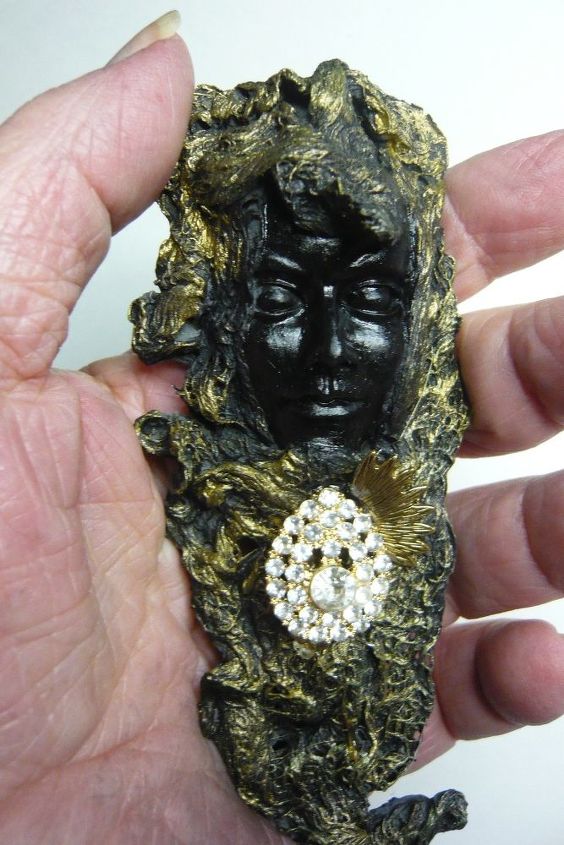
Although I made five of these, I'm holding back two because I think I'd like to do one in a red and another in a green metallics and right now these are not in my inventory. This tutorial was to take you to the steps to get to the final step - which every artist will express in their own way. I used a combination of hot glue gun and E6000 to add the bling.
Just wanted to add a PS re the face mold. I spent a lot of time finding it and when I did I ended up paying $7 + $7 in shipping. It has since been changed to $16/w/free shipping. Now I see it being offered for $3.21 w free shipping. Looks exactly the same to me. Be sure to find the best deal.
Comments
Join the conversation
2 of 22 comments
-
I have the same face molds you have ., got them off Amazon for cheap.., I have used them several times !! I made a few of the faces with hot glue I just filled them with hot glue them I painted them,, sorry I can’t find the pictures I took of them gave them to my daughter in law for Halloween... she loved them ., but I am going to try your way those are just so awesome !!
-
I think you will enjoy working with the POP for your molds. It's really cheap and very paintable. Once you get the hang of the mixing process, not difficult, just takes a little time and patience but with great results.


Frequently asked questions
Have a question about this project?
Are you calling Plaster of Paris POP? I'm a little slow today, had to read all ingredients before I figured it out...