


Hutch Makeover With Chalk Paint
5 Materials
$200
1 Week
Medium
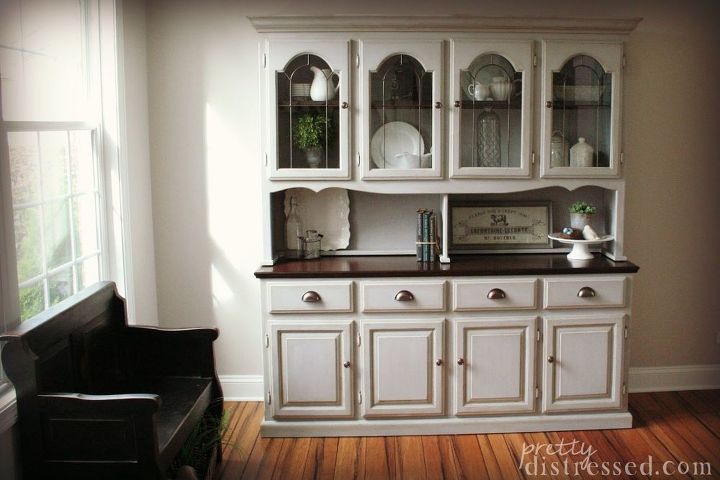
This is a makeover of a dated, oak dining hutch using Annie Sloan Chalk Paint in Paris Grey.
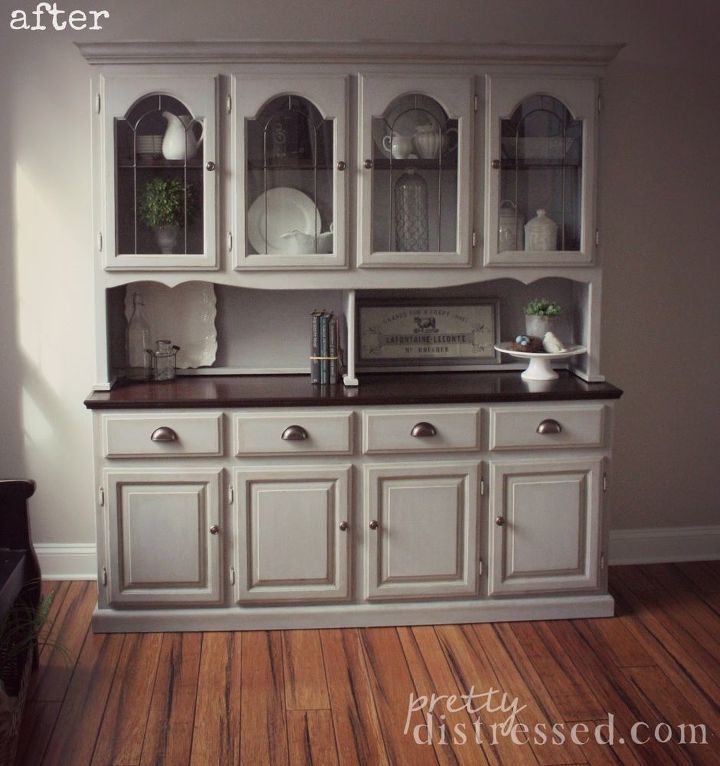
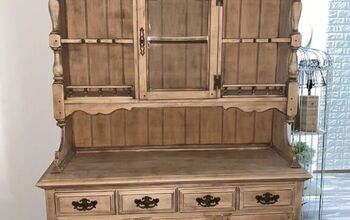
Here is the after. What a difference. Keep reading for details on how I completed this look.
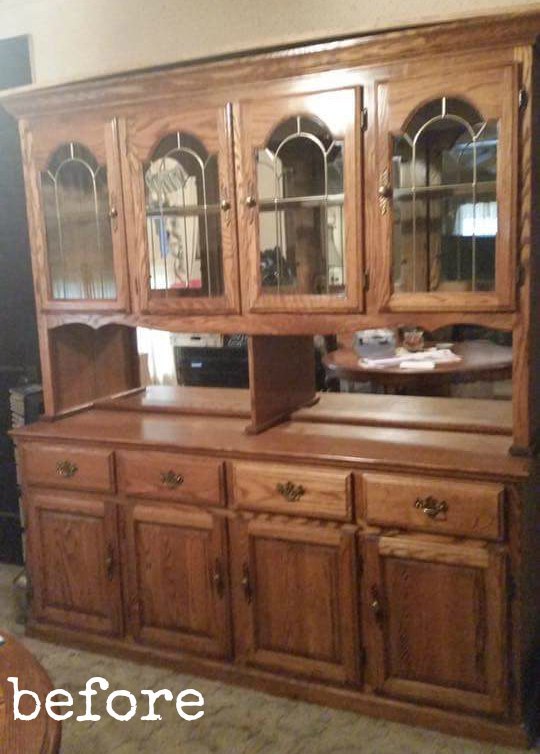
This hutch had been in a storage unit for some time and smelled pretty funky, so I started off by sealing the entire piece in Zinsser Shellac. This product along with neutralizing smells helps seal water stains and bleed through. It is always a great idea to coat a piece in Shellac if you don't know its history. I took an old sock and applied it over the entire piece before painting.
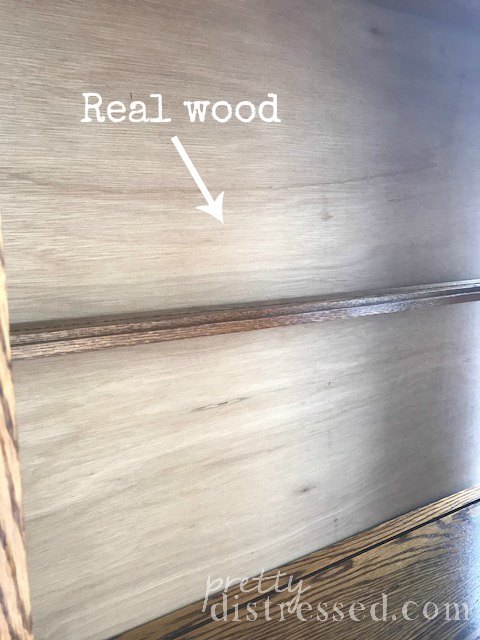
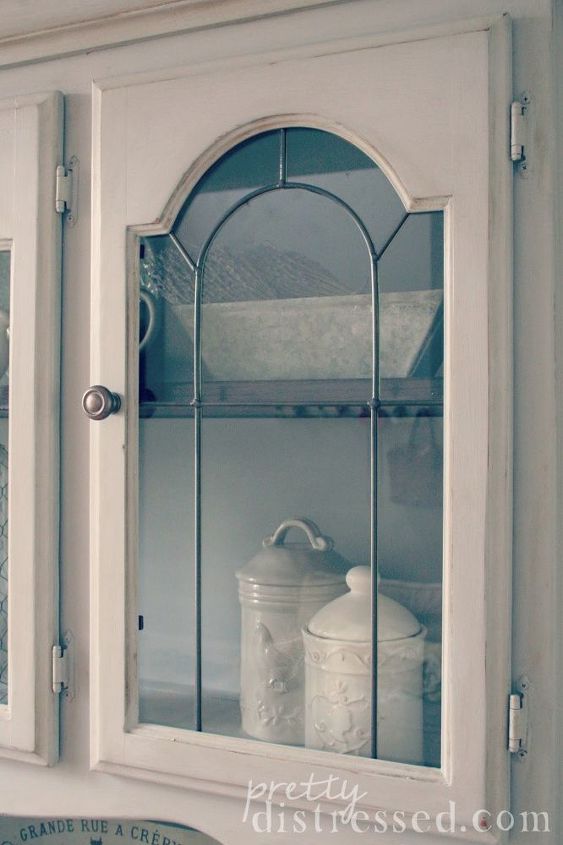
Originally, I had decided to rip out the mirrors and replace them with beadboard like on my personal hutch makeover. Once I ripped out the mirror, I realized the paneling on the hutch was real wood! It was in such good condition, so I could not bring myself to replace it. In the end, I think the beadboard backing would have detracted from the simplicity of this piece. This was a huge win.
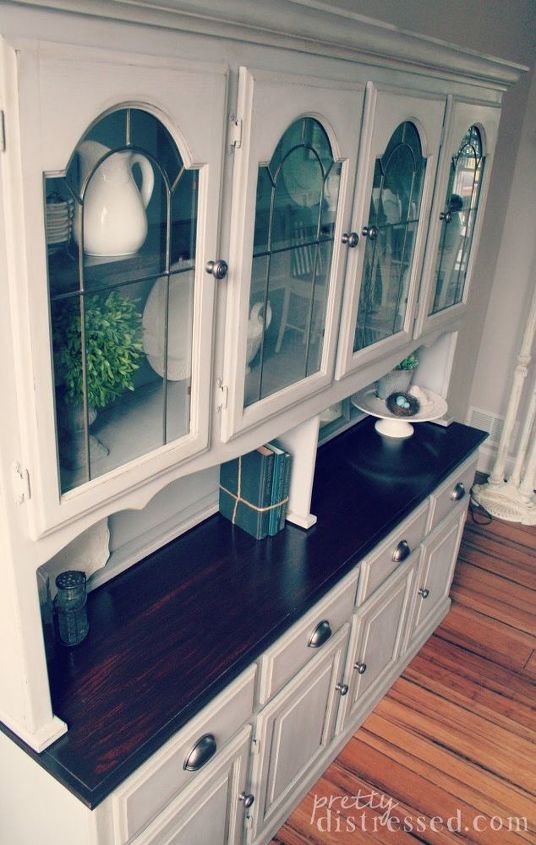
I used Annie Sloan Paris Grey for this piece which is a great choice for staying neutral without doing white.
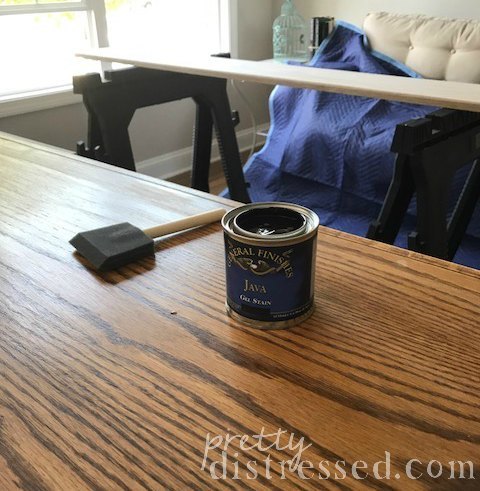
And for the top, I wanted a two toned look so I used my new go to stain General Finishes Java Gel Stain. The veneer on this top was pretty thin, so I used the stain right on top of the finished wood. This is a technique exclusive to gel stain. It is so pigmented you can use it right on top of finished wood. It definitely has a learning curve, but it has a huge payoff. I'm going to make a video on this technique soon for my YouTube channel, so make sure to subscribe if you want to see it.
I had a shelf cut to replace the glass one in the hutch. You can see it in the pic above. I stained it with the Java Gel to match the top of the sideboard. I applied General Finishes Gel Topcoat to seal both pieces.
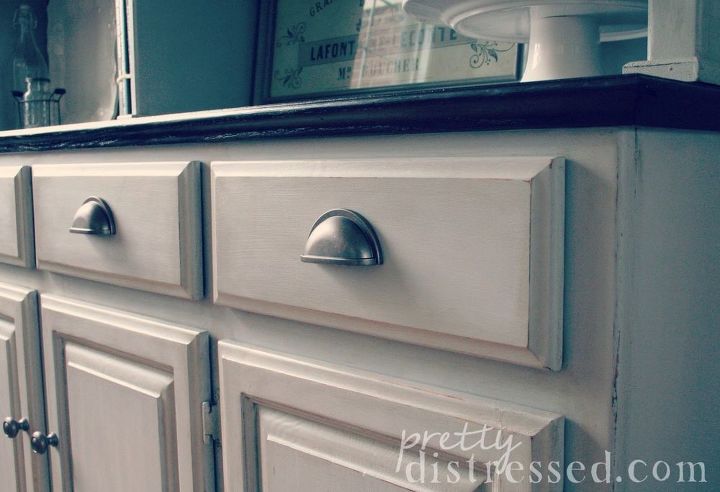
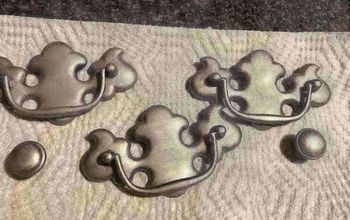
To add a touch of masculinity, I decided to replace the old hardware with antiqued cup pulls and knobs. This is more costly and in this case I had to drill new holes for the cup pulls, but it gives the piece a whole new look if you are up for the cost. I purchased the hardware from Menards for around $70, but you could also buy it on Amazon. The pulls are from Hickory Hardware, the Williamsburg Cub Cabinet Pull and the Cottage Cabinet Knob in dark antique copper.
I finished this piece off with some light distressing. Then I sealed the entire piece with Annie Sloan Clear Wax. Then I used a light application of Annie Sloan Dark Wax around my distressed areas.
I wanted to keep the glass in the cabinet doors, so I had to tape them off and spray paint the brass etching with some Rust-oleum Universal All Surface Spray Paint Metallic. This is my go to paint for getting a metal finish on hardware/metal. I used the color Burnished Amber.
If you want to see more pics and details how I created this piece, check out the full post on my blog. You can also visit my Youtube channel by searching for "Christina Muscari." I have lots of tutorials on my channel.
Resources for this project:
See all materials


Any price and availability information displayed on [relevant Amazon Site(s), as applicable] at the time of purchase will apply to the purchase of this product.
Hometalk may collect a small share of sales from the links on this page.More info

Want more details about this and other DIY projects? Check out my blog post!
Comments
Join the conversation
2 of 7 comments
-
I have my mom's circa 1990 dining room set...the hutch looks very similar to this one. I love how you've given this furniture a new life!
How many gel coats of java did you use?
-
Beautiful! You did an amazing job!


Frequently asked questions
Have a question about this project?
What is shellac please?