Bathroom Wall- There are cracks and slight dents

by
Lori Dumm
+13
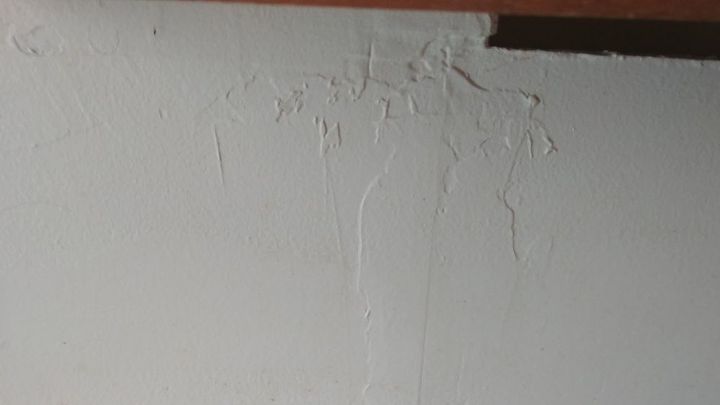
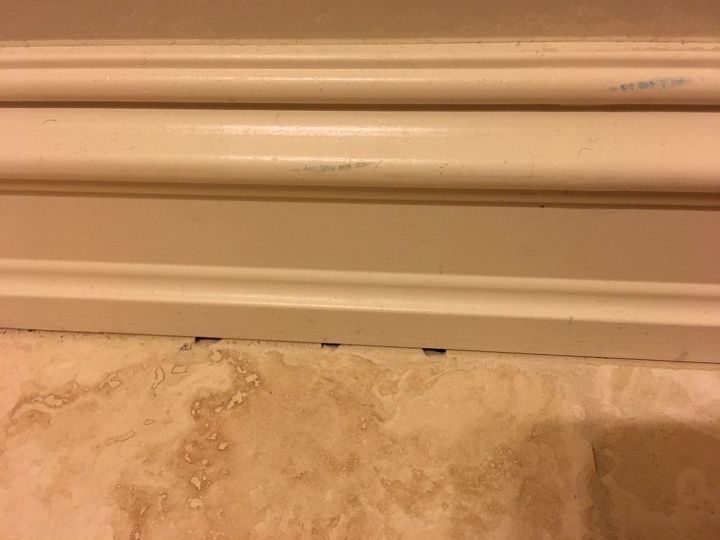
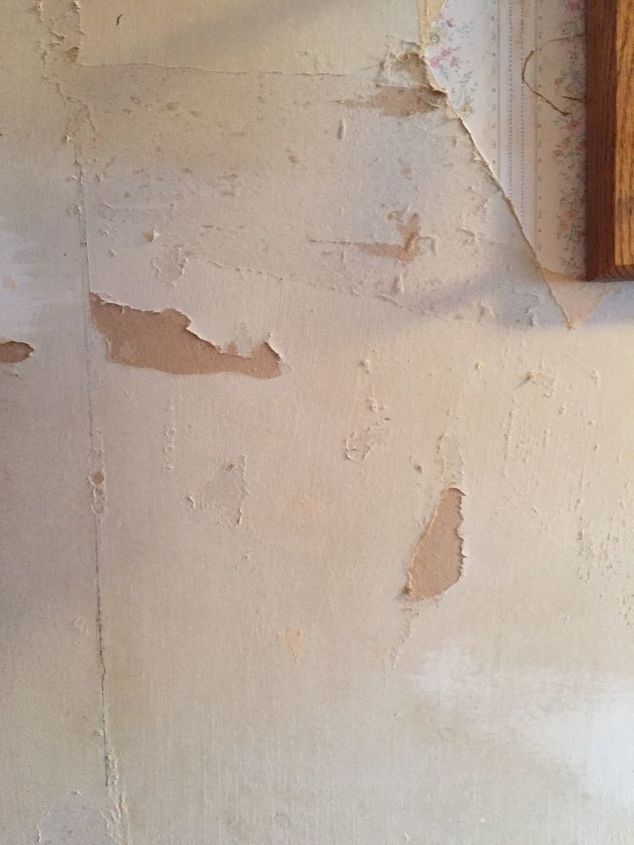
My husband did our bathroom a few years ago and he used drywall for our wall There are cracks and slight dents and its all painted white I do not like all the out come of it all Plus he bought a bathtub and shower stall all together has strips all around it plus screws to hold the stall, How would I cover that all up and the shitty wall he did and make it all so homey and country looking. It the dullest bathroom ever seen in my lifetime . As you can see the shower outline ,I do not like it at all. Thankyou Lori


We had a bathroom wall like that in a rented home and I hated it. I got permission to paint the bathroom. I used a sponge and 3 colors: salmon, pink, apricot, and made it look like a brick wall. I used the 1 inch side of the sponge to "top" the wall, then drew a creeping vine with morning glory blossoms on it at the top. The ceiling I painted light blue. It really hid the rough wall! My family loved it. Just an idea, maybe you could adapt the idea to fit your need with your own "wall" of some kind.
there is no easy fix, the wall have to be done over
if you like country get some barn board do you walls with that. You can actually buy at home depot now. You could also get paneling. So many options
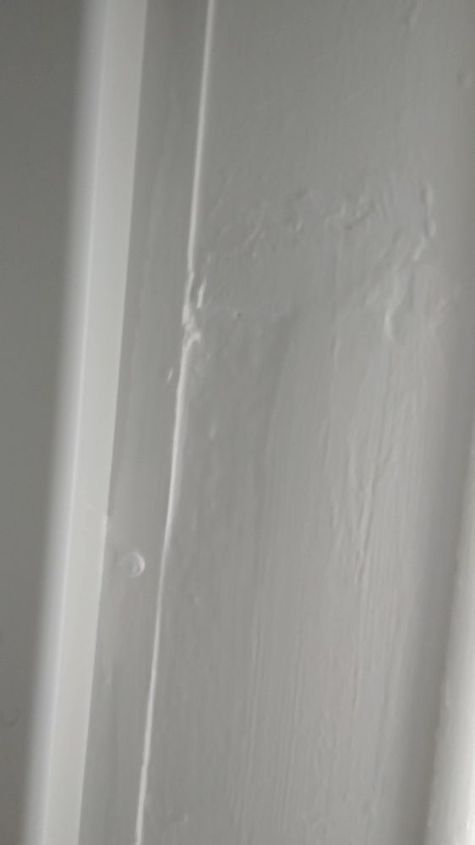
first pic, it is just a crappy mud job! Second pic is a crappy caulk job! To repair the drywall, scrap it with a sharp scraper and then sand it with a 60 to 100 grit. Using a large mudder, go over the area at a 45 degree angle. Both directions. Up then down. Let dry. Keep doing light coats till it is even. If you can get it smooth enough, you won’t have to sand it again at all.
now the over caulking! You can get plastic razor blades and get all that caulk off. I mean all of it. once done, recaulk the seam with a small bead. I use my finger to finish it up. I keep a wet paper towel and keep my finger wet, like dripping wet and clean. Run the bead till smooth. The smaller the bead, the less mess that will squeeze out from under your finger. Hope that makes sense. This is an easy fix just a bit time consuming. But oh so doable!
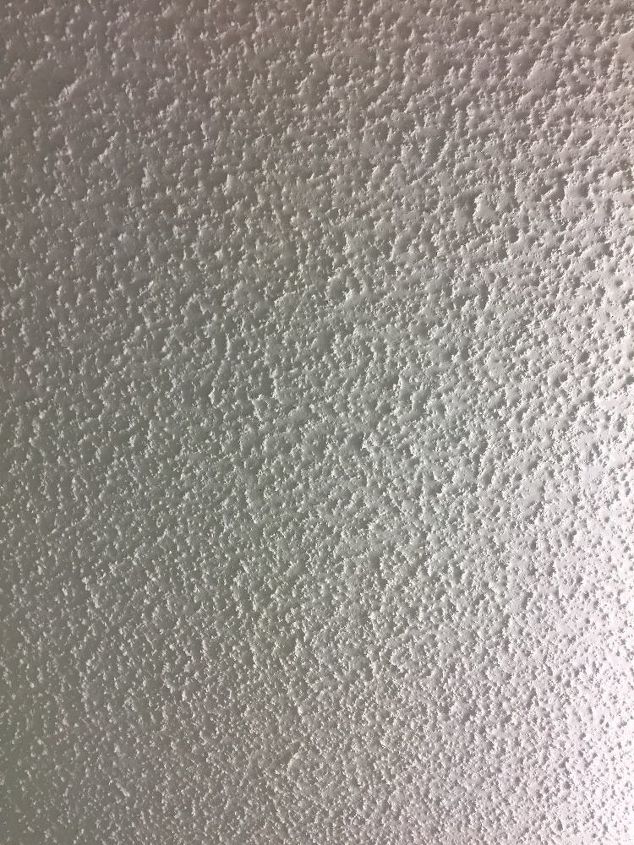
Easy fix with joint compound. scoop a bit on your wide blade putty knife and just smear cross hatch, back and forth, up and down and cover the entire wall, WITHOUT smoothing. You can ALSO put joint compound and stipple with a wet sponge to camouflage the problem by doing the entire wall. Paint and you have a beautifully textured wall totally hiding the problem all for a little bit of spackling and some time. Paint over and you have a great looking wall without the expense.
My team & i hate doing anything with these walls as it will always cost high.. however a great decorating technique is to use water resistent fabrics/or lace {or stretch lace & waterproof it yourself}, all of which are not expensive if one looks around a tad; sew a pleated look. *Either by hand with decent sewing needles(& note, only one side requires a fold over b4 sewing your pleats).. or do it on machine// after measuring & cutting &/or arranging..(some waterproof material shower curtians can look lovely too & may be the right size from point ‘a‘ to point ‘b’)
Using the smallest correct tacks, place up ‘your designer pieces’ from a top corner first,& get as close to the roof as possible: if you must leave a space, then use a marking tape that compliments the bathroom.. this acts as a boundry,& a subtle look as one ought to place the materials just on it//leave it on..*to keep it on without it peeling off, just use clear nail varnish at the ends only//2cm coverage is all:)
*Having an assistant to help hold fabrics/materials while it is being placed up is a general good idea if you haven’t done much creative works”... • you want all’ to look nice...
After this is done a wall looks so totally amazing, & especially in a bathroom if its possible. Its all about your colour choices, however even plain white laces look great!
We keep fabric walls done this way cleaner by using a decent hair spray every few months... one must general damp sponge first always b4 spraying though...
Have fun with Crafting Happy:)))
I see a crack in the first picture. I don't think the first mud job was done correctly. If you can't have it done over, try a knock down technique. You can have it done professionally or do it yourself. Get a sea sponge at your paint store. Also get joint compound. Dab it on the wall with the sponge and use a flat edge to go over it to lightly knock it down. Do all over the wall. It's a nice effect and hides cracks. It is a lot of work, but I have done it.
I would then go over it with a primer and then paint.
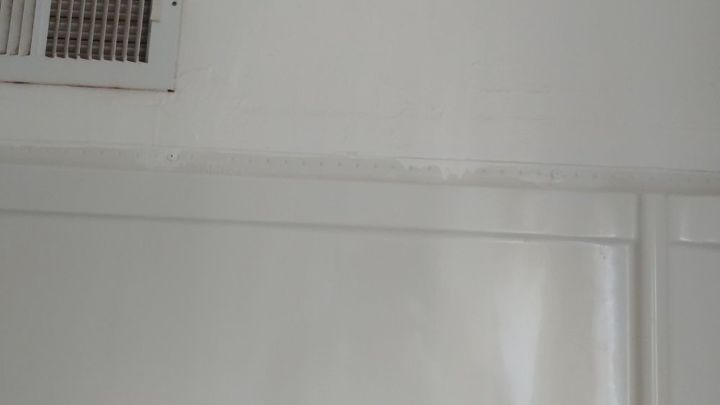
Its not caulking all the shower part is all a shower stall It came with screws
You could possibly hide the screws by putting some tiles along the edge of the shower to cover the screws. As for the wall, sand, sand, sand until it is smooth. If a crack shows after sanding then cut a "vee" into the plasterboard and then use patching compound to fill it up. You may have to buy some mesh tape to cover the crack if it is large. Ask at your local hardware store. I am sure they will be willing to tell you how to do this. You can get varying size containers of patching compound, so put it on and get it as smooth as possible (you will need a flat bladed tool for this). This could take multiple layers, sanding in between layers when each layer is dry. Once dry you can sand with finer grit sandpaper to smooth it out.
Is the entire bathroom wall this bad? If so you have some work ahead of you, but in the end you will have great satisfaction for a job well done, and perhaps incentive to take on more projects.
It looks like it was not sanded properly after applying the spackle. You could probably rent or buy an electric drywall sander and go over the whole wall to get it back to a smooth finish. It will have a vacuum attached to pick up the majority of the dust. Fill in the cracks with spackle, smoothing off as much as you can and let dry. Then prime and paint. As for the strips, you can purchase mouldings to cover up areas like this. If you do not want to see any nails, then glue it on with P9000 contractor's glue.
ok... first the shower stall..
the lip with the screws is mean to be covered by the sheet of drywall. not be attached to it. once shower was in stalled the green board would have been lapped over that lip covering the screws. then it would have been caulked
caulking is easy... even for someone as sloppy at it as me. use painters tape to cover areas not to be caulked,. both sides.. caulk,.. smooth, with wet finger, removing excess, and filling in low spots. Remove tape and let dry ...
entire bathroom,.. simplest fix,. just lay another layer of green board over the walls. Hire a professional taper, ... to tape and sand.. then repaint a nice color other then white.
I agree with Steve. The shower stall is meant to be installed over the studs, then the drywall butts over the lip covering the screws. The stall does not go over drywall. Even covering the flange with anything you still can develop leaks over time. The mud job is terrible. Did he use drywall tape for the seams? Did he use waterproof drywall? Best solution is to scrape and/or sand the the bad job to smooth it out. Patch any low areas and sand smooth. Personally I would remove everything, tear out the drywall, and start from scratch. Should have came to Hometalk for advice and assistance. Even doing a search on Hometalk would have provided tutorials. Good Luck.
You have got to stop your husband from touching anything ever again! There's the first and very major problem. The drywall has to be redone - there is no camouflaging that - it'll have to be sanded (you've got to be careful not to sand the drywall paper away, re-mudded, primed and painted (also was the correct type of drywall used for high moisture areas?). Someone who knows what they're doing with drywall has got to do this repair work. Also, the shower stall is installed incorrectly. It should have been put in first then the correct drywall (I believe the green papered drywall is for bathroom) put up around it to go over the edge. If his idea was to do all of this so poorly that he'd be banished from doing more remodeling work, I'd say he succeeded!