


Mini Cabinet Update
2 Materials
$100
5 Hours
Medium
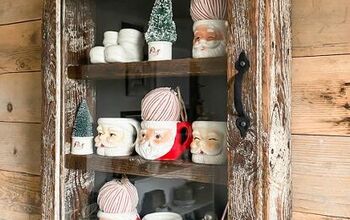
Purchased this little cabinet at Goodwill for 10.00. I also like to collect vintage maps from flea markets and second hand shops. This little cabinet had more screws holding it together than my kitchen cupboards! So needless to say there was a lotta hole filling. The avocado paint I used was left over from my half bath and seems to be my signature paint on a lot of my projects.
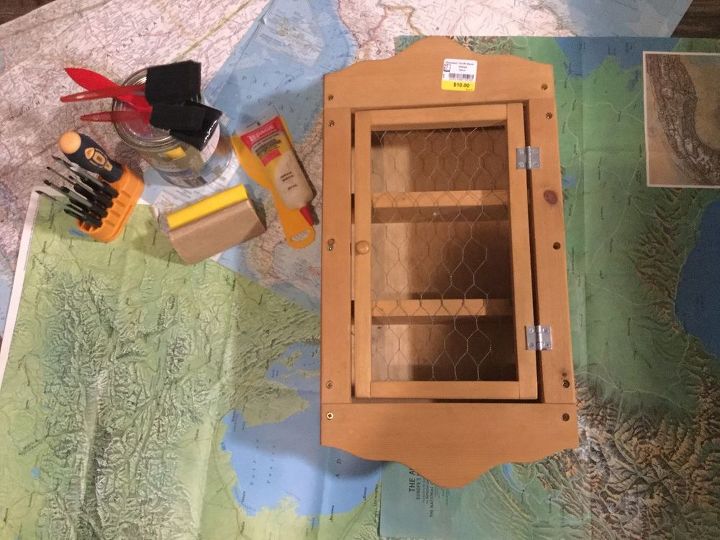
Well here it is in its holy state, there is six holes on the sides as well. The materials used, cabinet, wood hole filler, screw driver, sand paper,maps, paint and paint brushes, glue.
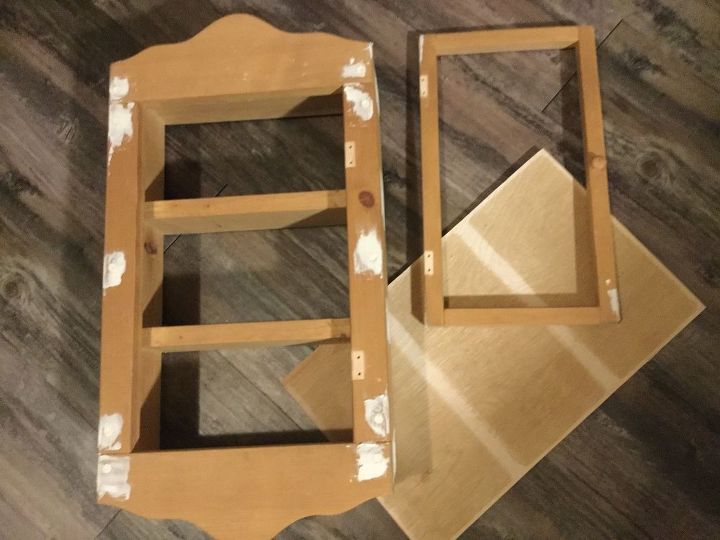
I took the door off as well as the chicken wire. The back popped off really easy. I filled ALL the holes waited for them to dry before I sanded. I did use my mouse sander, which made the job go quickly.
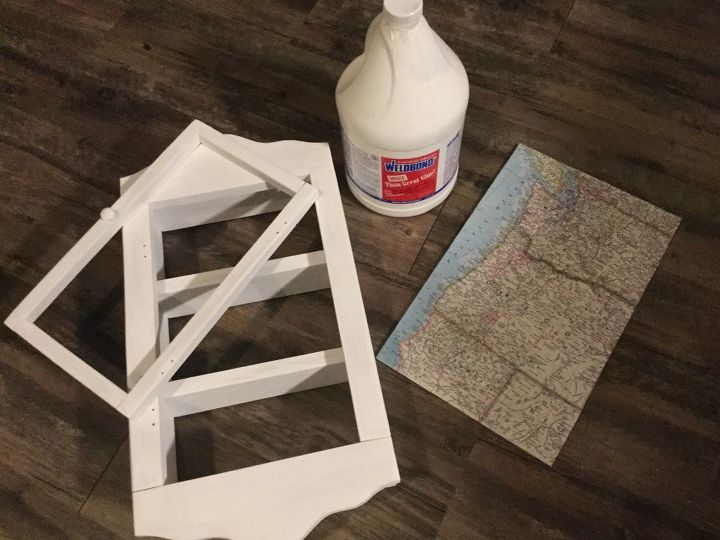
I picked my favourite spot on my map traced the back of the cabinet piece that I popped off and cut it out. I then spread glue across the whole board and laid the map on it, you can use a paint scraper gently to get any bubbles out. Priming it helps hold your top coat as well as the piece was never finished before. If after you prime you may find as I did some of the hole that I filled dropped, just add some more filler, sand then prime over that spot.
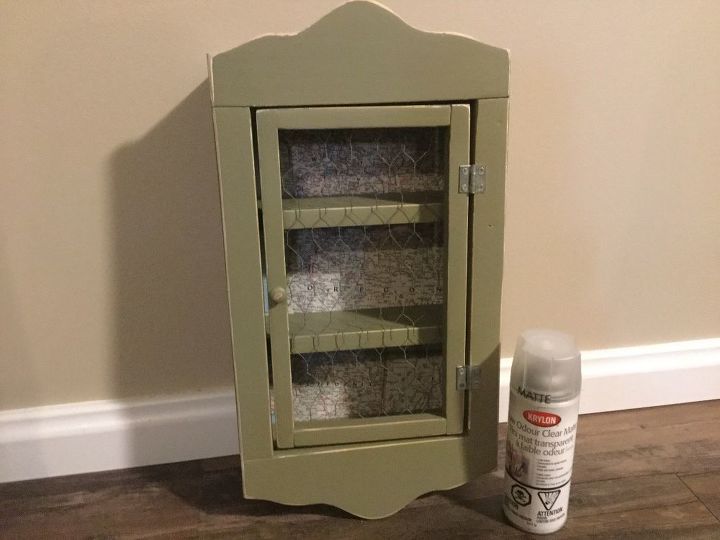
Before I put the cabinet together I sanded the edges to give it a bit of a weather look, and sprayed it with KRYLON low odour clear matte spray. I stapled gunned the chicken wire back on the door and attached it with the hinges it came with.
Comments
Join the conversation
2 of 4 comments
-
Such a great update to a cute cabinet.
-
Thanks Emily 😊


Frequently asked questions
Have a question about this project?