


Making Needed Shelves in the Kitchen

3 Materials
2 Days
Medium
I saw this post.
https://www.hometalk.com/diy/build/shelves/diy-pull-out-cutting-board-for-cabinets-31420491
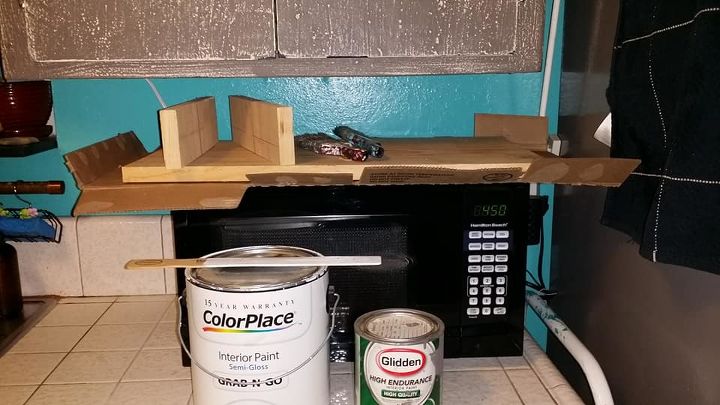
And I thought what a great idea. My only problem with it is I have like 5 or 6 cutting boards of all different sizes. So I set my brain to work. I had some left over pine from a previous project and left over kitchen paint so this project cost me nothing. I also needed a shelf over in the kitchen sink area and that shelf needed to have a light mounted under it. My kitchen sink area is pretty dark even with the ceiling light on.
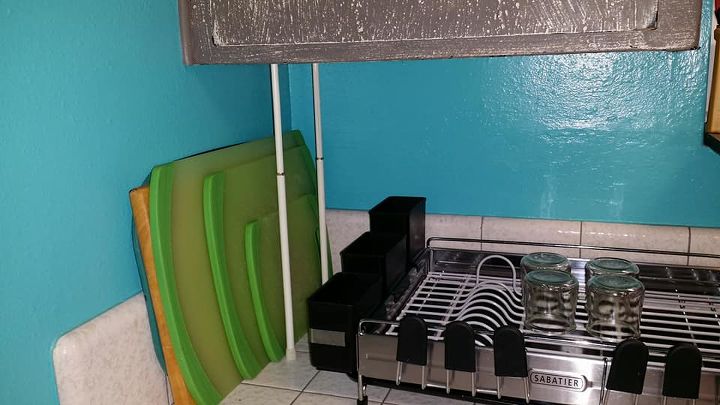
For the cutting boards this is the before picture. All in all a fine idea except for one thing...
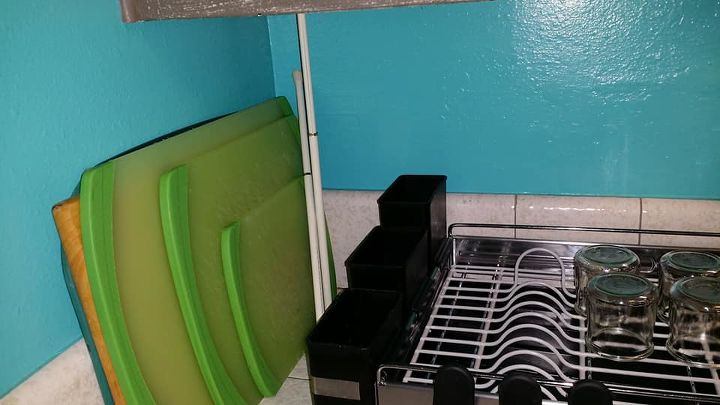
The problem is those tension rods never stay up. No matter how tight I make them they fall over. Then the boards slip and get damp when someone does dishes. This is the only place to put the dish drainer as the microwave needs electricity and there isn't an outlet on this side.

This is the kitchen sink. my old house had a light mounted under those upper cabinets, This house does not. I put a light under the shelf in the window but it was right in my eyes when I used it. I need it to be higher. This was when I painted the kitchen cabinets but before I painted the walls. I still had paint left from the cabinets so I used that to create a hopefully seamless look on the shelves I made.
This is where my cutting board holding shelf will go. This is the left over pine board cut to the size I need. It is slightly wider than my largest cutting board. I then stacked the cutting boards on it to determine the height of the sides needed to hold it up under there. There was one thing I forgot to factor in... there is a bit of a lip under the cabinet that makes it so even though my measurements are correct I can't stack the smallest cutting board on the top of the stack. I figured out another option. See the end result for that.
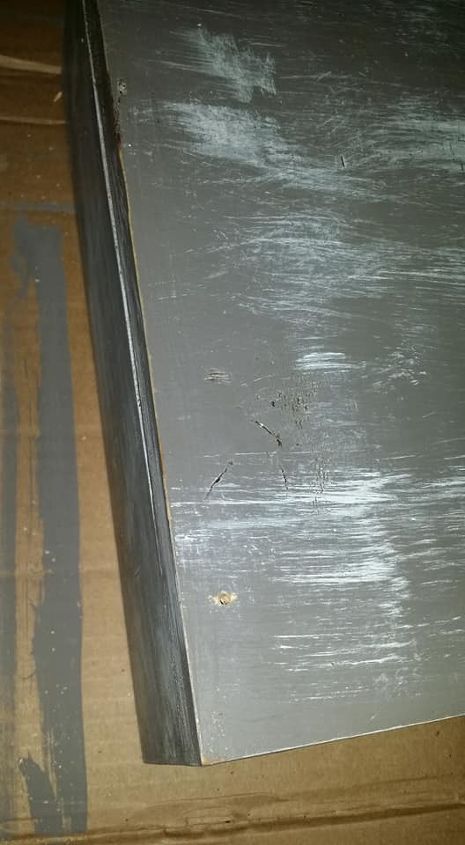
I first painted the boards the gray color of my cabinets. Sorry I forgot to take a picture so just imagine 2 coats of plain gray applied and dried. 
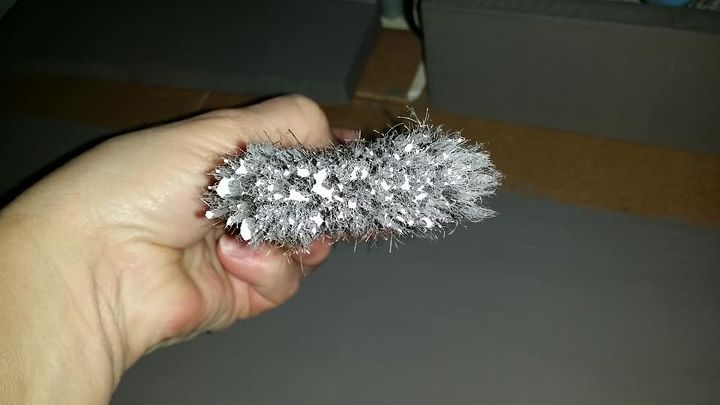
Now this brush has been ruined by the saltwash that I used on the cabinets. I didn't have any saltwash paint left over so I had to get creative to get that rugged abused look that I had painted on the cabinets. In a perfect world I would have had the idea for the shelves back then and then all would be right in the kitchen... But life being what it is.. OK so here is what I did. I used that rough and crusty brush to dry brush on the white paint. I just barely touched it to the white paint and then brushed it on the shelves.
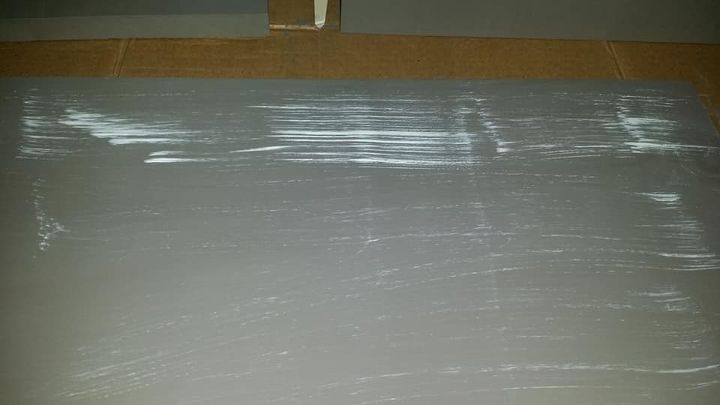
Just start swiping it across the boards. Keep applying until you are happy with the look. Now if you are just doing the cutting board shelf to match your kitchen you just need the same color as your kitchen cabinets. And these steps aren't necessary.
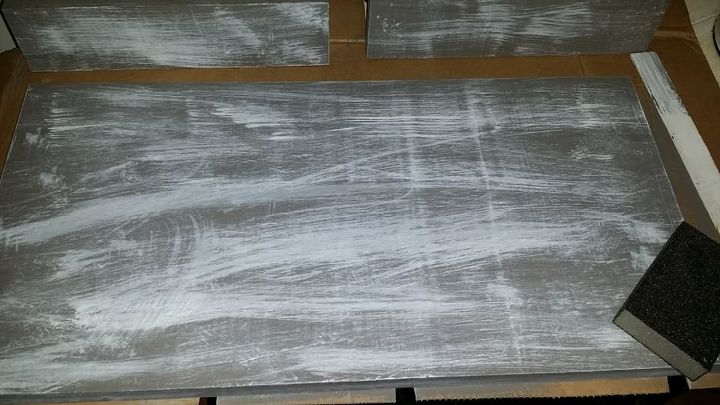
Once I was happy with the look and it had dried. I got out the sanding block and started sanding off some of the white. I sanded the edges to give it an aged wear and tear look.

This is after sanding. on the edges I sanded down to the wood. Don't forget to make the side pieces match.
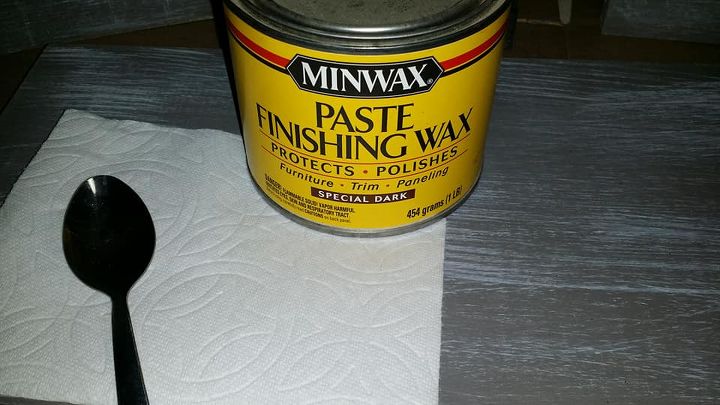
I used the same dark wax that I used on the cabinets. When working with wax you shouldn't use your rag to dispense the wax. You can contaminate it with dust, debris or possibly any paint that was loose or hadn't dried fully. I use an old spoon to scoop out wax and plop onto the project if it is small. When I did the cabinets I scooped it into a throwaway bowl.
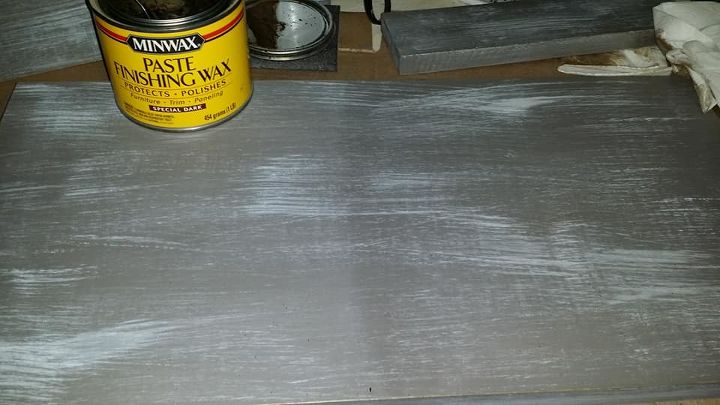
On the right is the first coat of the dark wax. I'm just showing you the difference between plain and dark.
Now I fit the sides under the shelf. I drilled pilot holes with a small drill bit. I'm not 100% sure this is necessary as pine is a really soft wood that screws easily go into. But I was worried the wood could still split. After the pilot holes I used coarse drywall screws to hold it all together.
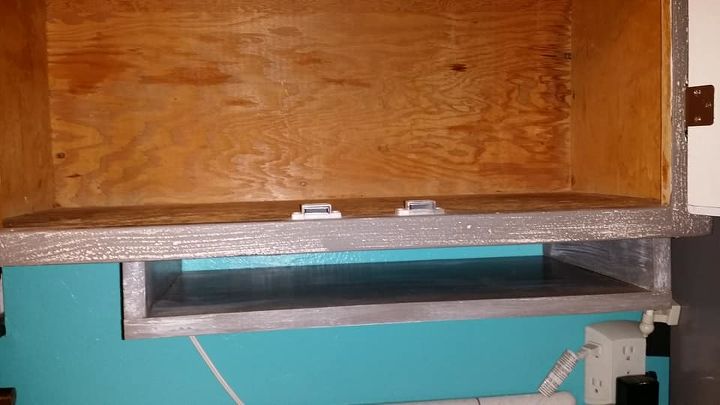
I then opened the cabinet and cleaned out all the stuff. I marked where the sides of the shelf would be and drilled holes through. The screws go from inside the cabinet down through the floor into the side walls of the shelf that will hold the cutting boards.
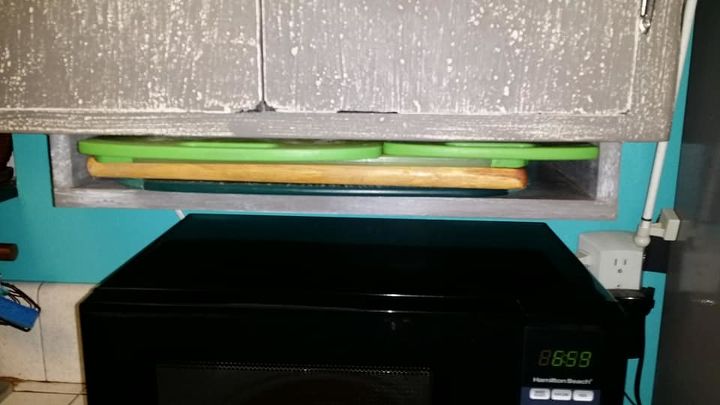
This is the finished shelf. I was unable to put the smallest board on the top because of the slight over hang of the cabinet. So what I did was turn the next size down sideways and then the little one fit in sideways too. I could always donate the large one on the bottom but it comes in handy. I use it when I make a bunch of hamburgers to freeze. It holds 6 or 7 burgers. I'll do that on the 2 largest boards and on 2 cookie sheets and stack them in the freezer. It is also used when anyone needs to use the electric knife as it is all chewed up from my son cutting up steak meat.
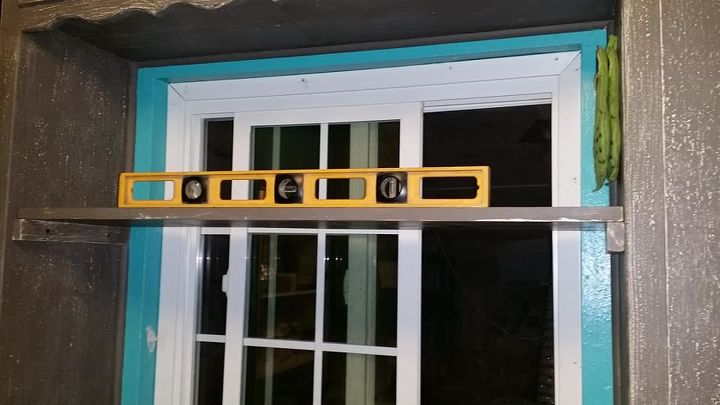
Now for the shelf over the sink. I cut it to fit. And I cut two small pieces for support. Those are all painted in the same way. The difference here is only the support pieces are screwed in. The shelf is loose so I can remove it if I need to clean the window. I did remove it to apply window privacy film. That will be a future post.
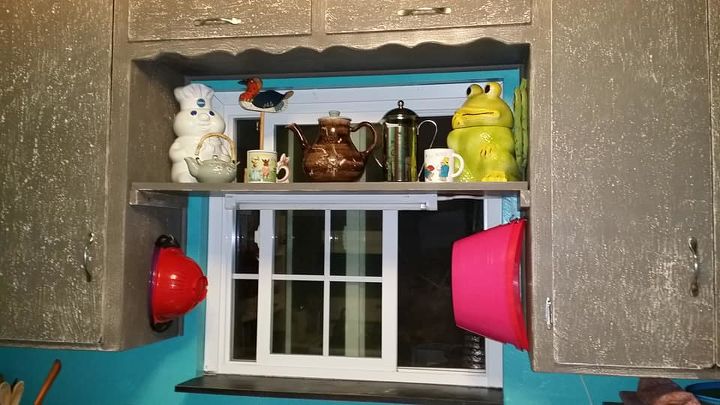
Here is the shelf with some useless stuff on it.  Under The shelf is the LED plug in light. It makes it so much easier to see now when washing dishes. The cord for the light is on the right. There is a cup hook in the back right corner and another under the cabinet to the right to hold the cord up and out of the way.
Under The shelf is the LED plug in light. It makes it so much easier to see now when washing dishes. The cord for the light is on the right. There is a cup hook in the back right corner and another under the cabinet to the right to hold the cord up and out of the way.Comments
Join the conversation
2 comments
-
Fabulous, it looks wonderful!
-
Thanks that side of the kitchen is almost done. I still need to put tile on that black shelf under the window.


Frequently asked questions
Have a question about this project?