


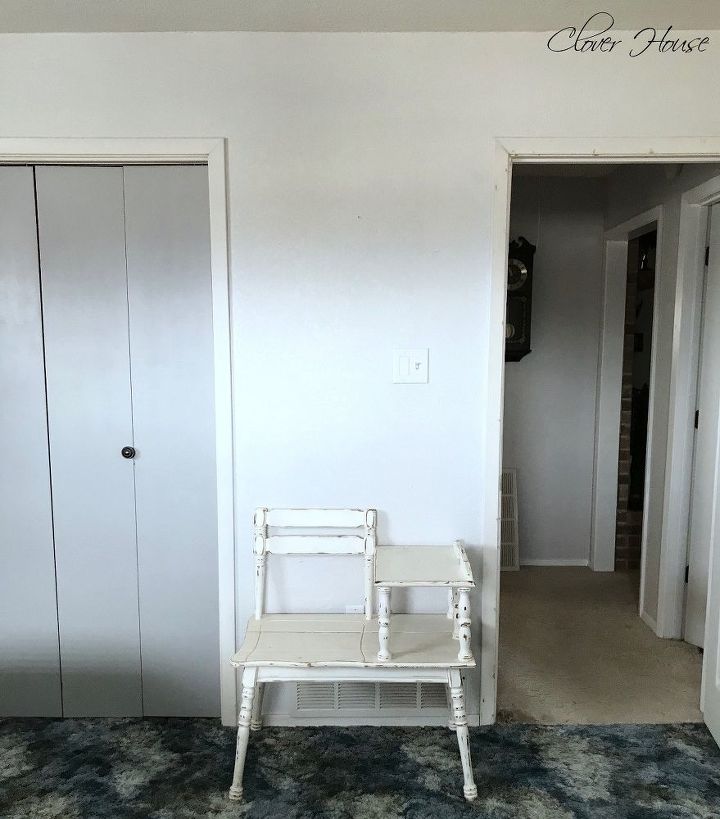
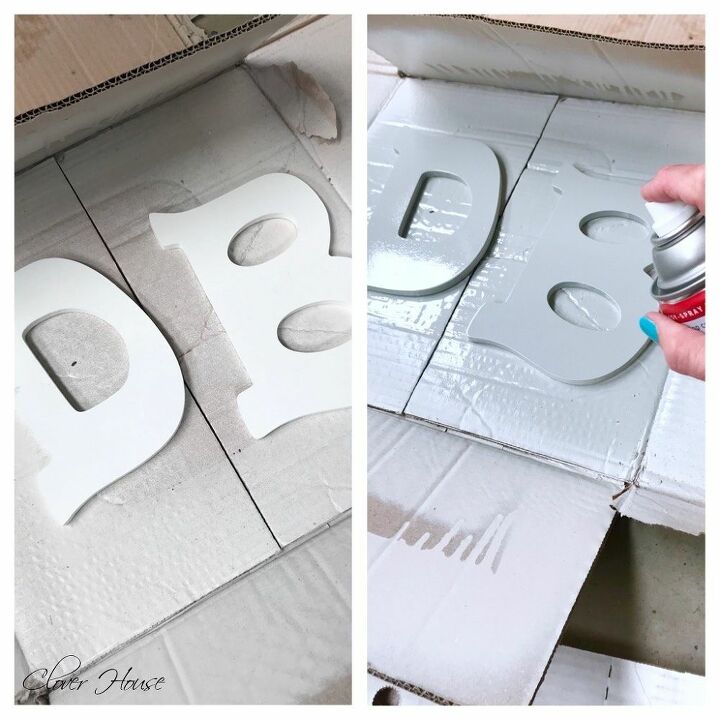
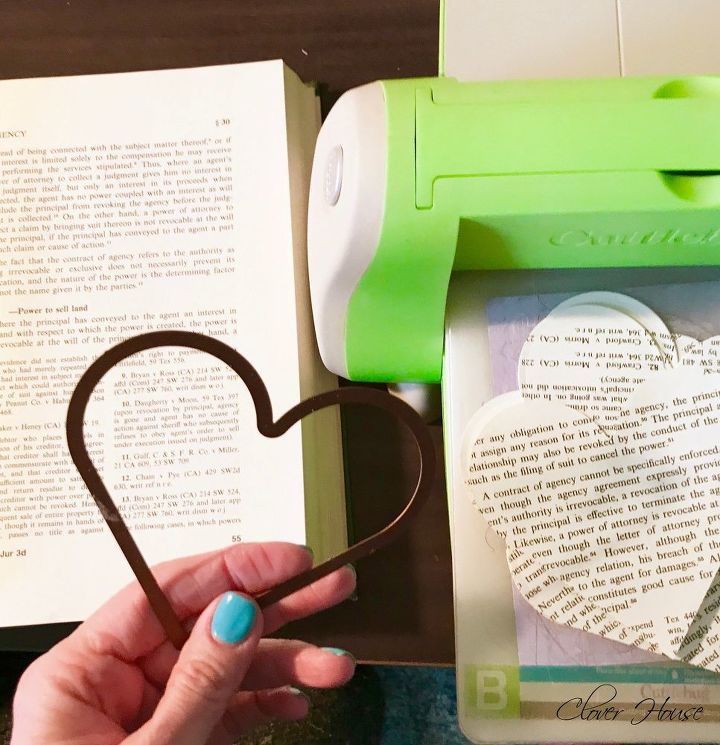
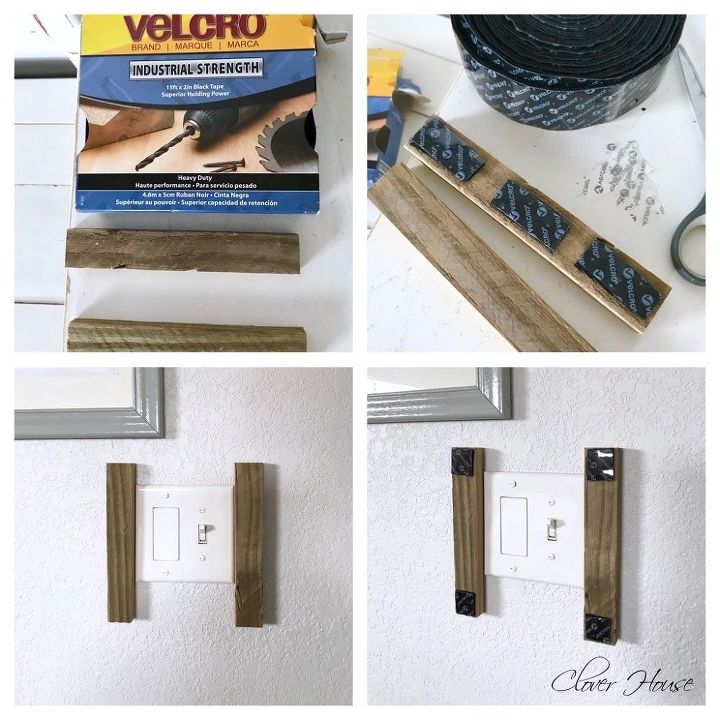
Create a Bedroom Accent Wall - How to Cover a Light Switch


Resources for this project:
See all materials


Comments
Join the conversation
-
Hey I caught the product placement. Hope you are getting some $ from Starbucks for including their product in the photo...
-
Not to put a damper in anyone’s project here, but just a little bit of warning to consider when covering your electrical switches and/or plug ins your not using.
switches over time even if you don’t use them the wires and switches themselves start to degrade and from time to time will short out and you’ll loose your power. It’s not at all unusual to see burn spots on light covers and switches and the more burnable things you have close or over a switch could be just enough burnable material to start a bigger fire! This is especially true whenever someone doesn’t realize how many items they have on the same circuit or in older homes where electrical wiring isn’t near as good of wiring as it is in newer homes. Although I have seen this happen in fairly new homes as well. I’m a contractor so I may come across this more then the average person? But I’ve had it happen in my own houses over the past 20-30 years from time to time as well. In fact the house I live in now was built in 2005 and just recently I lost the power in almost half of the house. Which is all on one circuit that runs from two bedrooms and my whole living room plus runs outside to other plug ins! Since I’ve done trouble shooting for electrical problems since I was a teenager being my Dad was also a contractor that I learned a lot of skills from. I first went to the circuit breaker box and tried to turn the flipped switch from off to back on and it flipped back off on the spot! Diffidently a short some where? So then I started checking every light switch and plug in throughout that side of the house having to remove the cover from each one and inspect each plug in closely for any problems? Finally I found the the problem! A plug in that was actually never used at all in our hallway towards the bottom of the floor that once I removed the cover you could see the burned area all around the box and on the back of the cover! The switch itself went bad! But the reason it went bad was partly cause the home builder used the cheapest plug ins they could buy! Which only had small holes to insert the electrical wires into to make a connection. These holes for connecting your electrical wires really should be against the law! Their extremely dangerous for the reason that your wires are barely making a connection when you use these holes on any switch and when there’s not a good strong connection with good metal to metal contact this creates excess heat and it’s only a matter of time till it fails! Always and I repeat always connect your electrical wires to the screws on your switches. If your switches only have the holes, get rid of them and buy a better quality switch or plug in and always connect your wires to the screws where the wires have as much metal contact as possible! This quite possibly could save you from having a house fire! Regardless switches and plug ins do get old and desenigrate over time. Sooner or later a switch or plug in will fail! In the worse case senereo that a fire does start in a electrical box, which does happen from time to time! You may want to keep your electrical switches uncovered where there’s no burnable material on them and that if you need to you can access that electrical switch quickly and put out a fire as quick as you can! It may not happen all that often, but it does happen! I’ve personally had it happen in the last 30 years or so roughly 4 times that I can remember. Possibly more, didn’t keep count! I’ve lived in several older homes in my younger years especially! But like I say this issue not limited to just old homes and if you own a newer home like the one I’m living I now where the home builder bought the cheapest switches and plug ins available and connected wires to these little holes. It’s a time bomb just waiting to go off some day? I went thru my whole house and replaced every plug in and switch in the house for this very reason! Feel free not to take my word for any of this though, but please for your own safety call any electrician you know or trust and ask them about connecting your electrical wires to these holes on switches or plug ins rather than using the screws to connect wires is safe or a good idea? I’m confident if there a descent electrician at all they will advise you not to use these holes on switches or plugs at all for any reason if you can at all avoid doing so!
Again don’t mean to rain on anyone’s parade here, but rather inform you the warnings now then for you to learn the hard way when you have a house fire and find out the fire started from a faulty switch or plug in. And once again it doesn’t have to be a switch or plug in that you even use that can fail on you! House fires are no fun, you don’t realize how much you loose till it’s happened to you. I had a house fire in a home I had rented right after being married. Lost everything including all our wedding pictures, etc. the sentimental loss is worse then the material loss! If I can help someone go thru that I gladly will do so! Be safe!


Frequently asked questions
Have a question about this project?
My husband & i have 8 GRANDbabiez Could the velcro idea b used,somehow,2 put small clusters of framed pics together with that many who are growing all the time our walls are overtaken by pics of them,& I can see it in my head but i am not real good @ this stuff YET. Any help with this idea would b greatly appreciated. Thanks in advance.