


Installing Faux Wood Window Blinds

by
ChickFix
3 Materials
$30
45 Minutes
Medium
We needed something to block the windows beside our front door, and for many years, we used some pretty hideous curtains. If I had known how easy these blinds would be to install, I would have done it a long time ago!
Be sure to watch the video for more detailed instructions, as well as a time-lapse before-and-after segment.
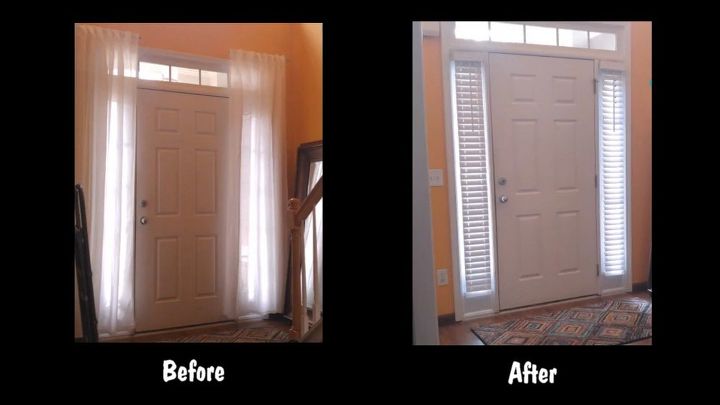
The space for these particular blinds to hang in my house is only 8.5" wide, so finding blinds (without paying custom prices) was tricky. I purchased 10" wide blinds online from Home Depot, then had them trimmed in the store to fit the window. They were hesitant to trim them that much, because they feared it would interfere with the mechanisms at the top, but it turned out to be okay.
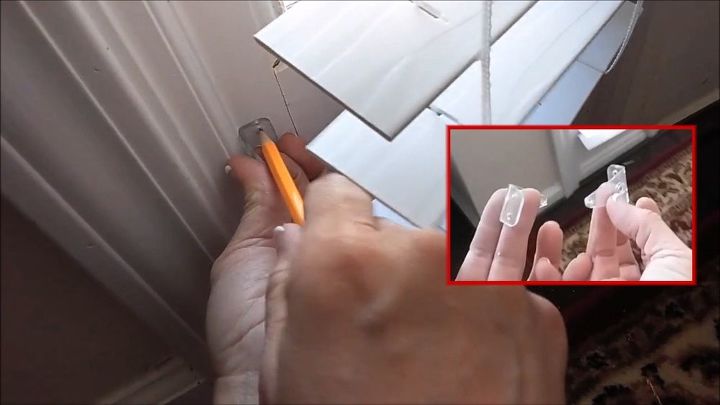
STEP 1: Confirm you have all appropriate hardware. I was attaching the blinds to a window frame with a very narrow depth, so I had to raid the garage for some extra short screws.
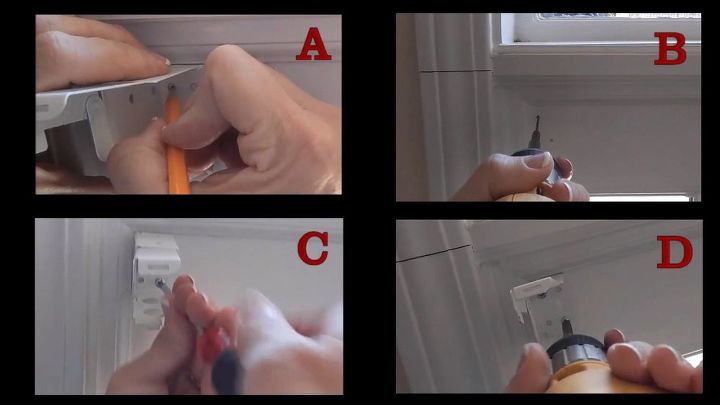
STEP 2: Mark and pre-drill holes for the bracket, then screw in the bracket. Repeat the process on the other side.
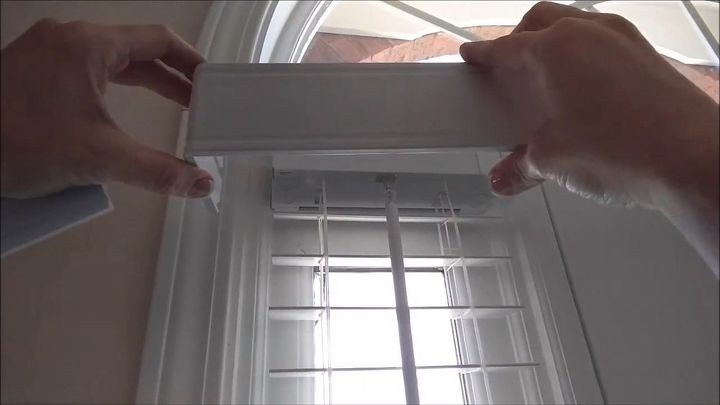
STEP 3: Slide the blinds into the brackets, and close the clasps.

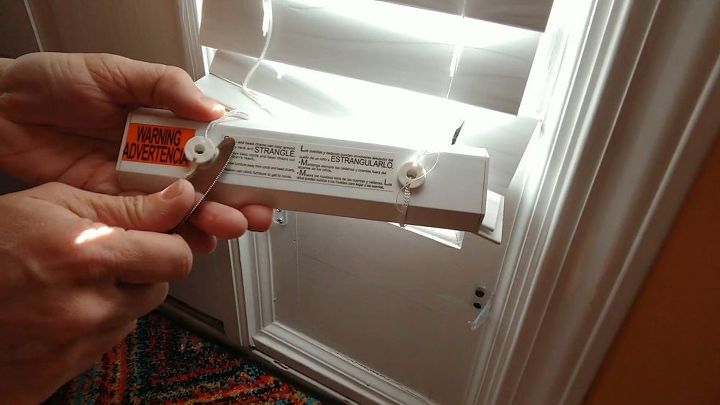
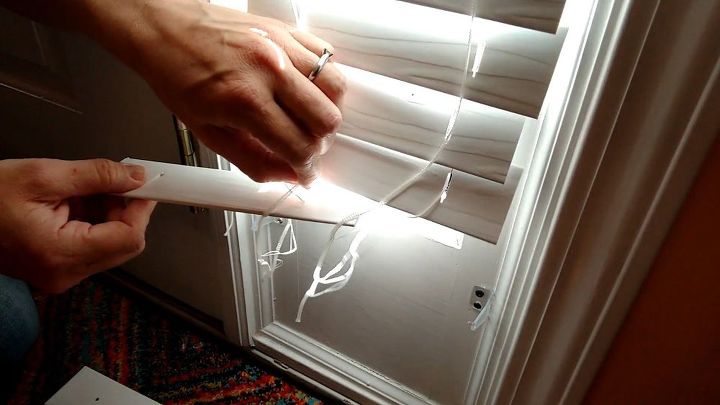
STEP 4: Unravel the draw strings. Make sure there are knots tied at the ends of the strings, so that the blinds don't slide off when they are lowered to the bottom.
*NOTE: See below for instructions on how to remove levels from the bottom to make the blinds shorter.
STEP 5: Add the caps on either side of the bottom level.
STEP 6 (optional): Since these blinds are right next to the door and I didn't want them to swing in the wind, I added the clips at the bottom.
Place the clips into the bottom rung of the blinds and press against the wall to determine their location. Mark the holes and screw them in place, then lock the blinds into place.
STEP 7: Assemble the decorative cover according to package directions, and attach to cover the brackets at the top.
*** IF YOU NEED TO REMOVE SOME LAYERS TO MAKE THE BLINDS SHORTER, FOLLOW THE INSTRUCTIONS BELOW
TO SHORTEN BLINDS:
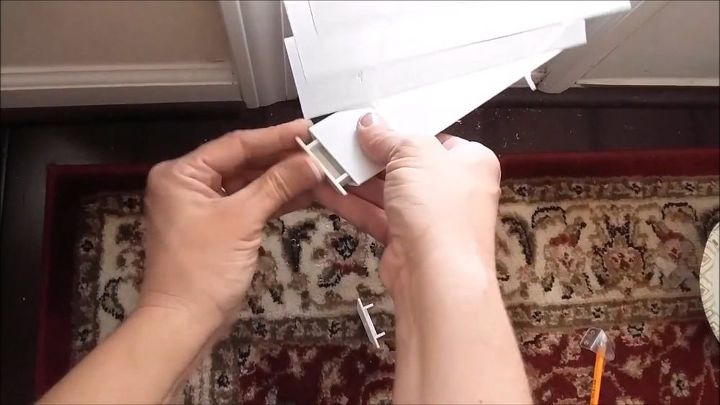
Remove the caps at the bottom.
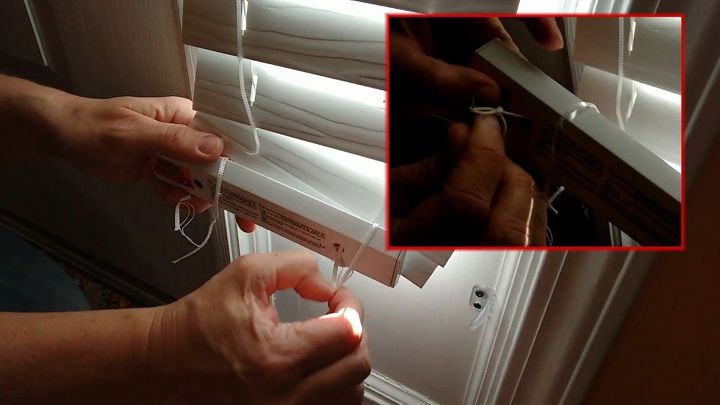
Pull all of the strings out of the bottom holes, and carefully untie the two draw strings.
Remove the bottom level, followed by any other levels necessary to achieve the appropriate length. Then replace the bottom level into the space immediately below the new last rung of the blinds.
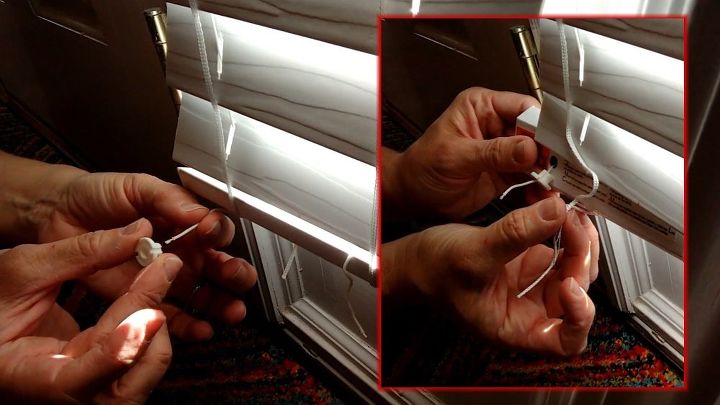
Insert the draw strings into the appropriate small holes at the top of the bottom layer. Feed the draw strings through the caps and tie knots in them to hold them in place. Tuck any extra strings into the larger holes at the bottom, then place the caps in the holes.
{
"id": "4659717",
"alt": "",
"title": "",
"video_library_id": "7060",
"thumbnail": "https://cdn-fastly.hometalk.com/media/videos/21/12/01/7060/installing-faux-wood-window-blinds.jpg"
}
{
"width": 634,
"height": 357,
"showRelated": true,
"noautoplay": ""
}
Resources for this project:


Any price and availability information displayed on [relevant Amazon Site(s), as applicable] at the time of purchase will apply to the purchase of this product.
Hometalk may collect a small share of sales from the links on this page.More info
Comments
Join the conversation
2 of 10 comments
-
we are building a new house and door has side lights and was dreading the "curtain" look! Thank you for the inspiration! :)
-
Great idea for many types of doors as well. I have used blinds on doors for years. But over time, blinds tend to get old. A former home we had similar doors and anyone at the door could look right in to the living room. I tried curtains, blinds and film. So I finally painted it the color of the walls on the inside and the color of the house on the outside. It was perfect and we did not miss the light that really didn't provide that much light anyway. We scraped the paint off before we sold.


Frequently asked questions
Have a question about this project?
Can the blinds be mounted to the top of window vrs the side?
Where did you find 10" blinds at Home Depot? I checked - and none exist. I'd love to try this, but there are no 10" blinds unless you custom order.
Yes it does look easy. But are the pictures of the same installation? The window above the door in the before and after picture shows a straight window above the door and some of the pictures where they are showing how to install hardware, the window is a half circle????