


Faux Brick Wall Art

by
Dysko7710
11 Materials
$20
3 Days
Medium
It was my first time perusing a Habitat for Humanity Restore that is about a half hour from my house, and I wanted to buy about fifty things I saw. But, I only bought two. I bought two kitchen cabinet doors, for four dollars a piece. Here is the before and after of one of those doors:
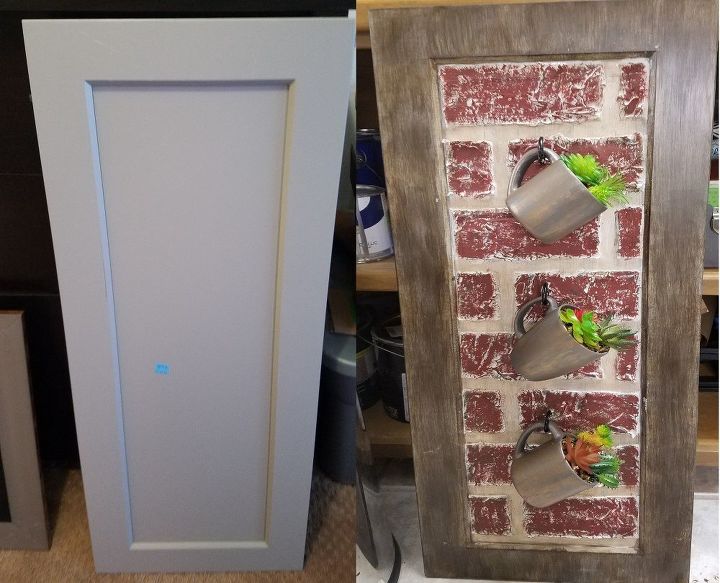
Here are the steps I took to get from the image on the left, to the one on the right. First, I dry brushed the frame of the cabinet with a dark gray paint, let it dry, then dry brushed over that with espresso acrylic paint, to make it look like a rustic wood.
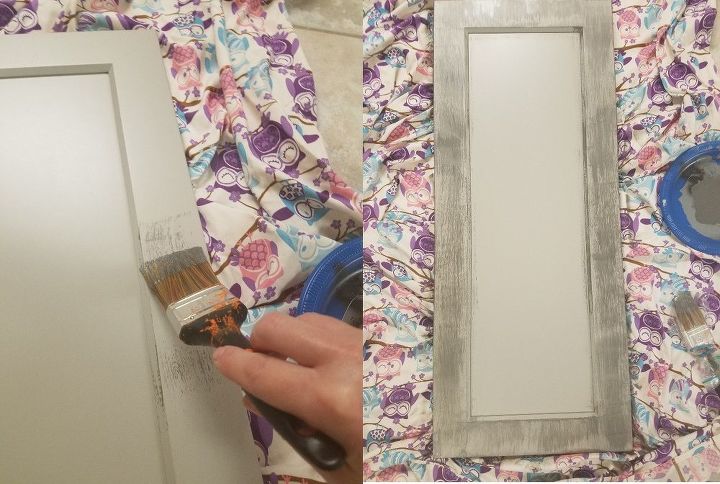
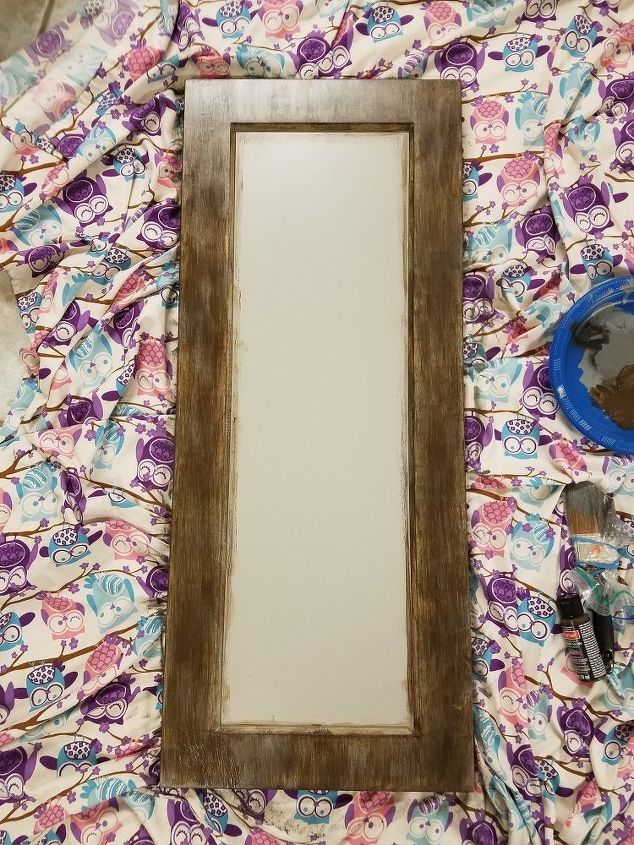
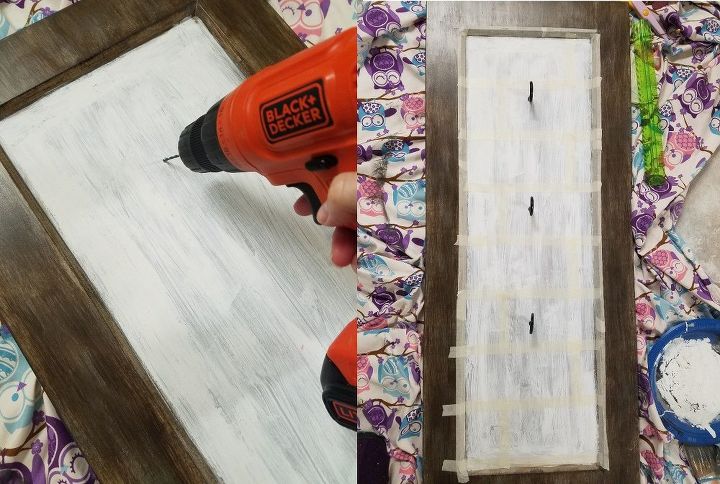
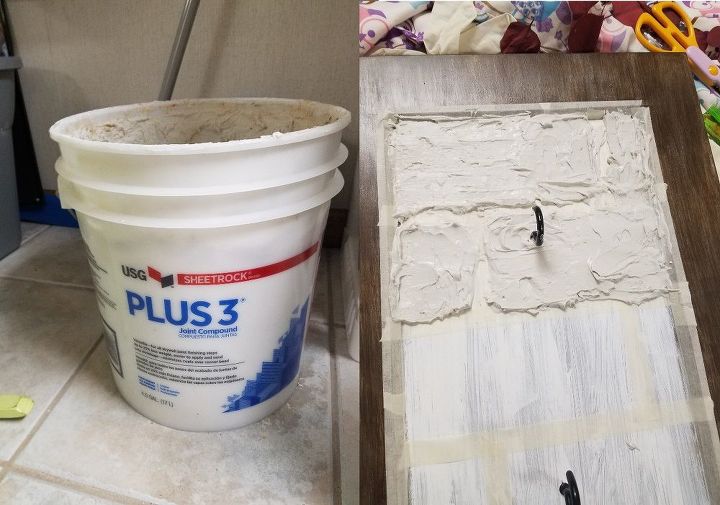
Next, I painted the inside of the cabinet white, mixing a little bit of baking soda into my white paint ( I just used old wall paint), to thicken it and get it to stick to the cabinet better. Also, I needed a less slick surface for my joint compound to stick to to make the faux bricks. I then inserted my cup hooks, so that I could build the bricks around them. I was afraid if I did the bricks first, then tried to drill, it could crack my bricks.
Then, I used a one inch masking tape to mark off where I wanted my bricks (where the tape is at will be the grout lines between the bricks). I measured so my bricks would be about 3 inches high by 7 inches wide.
The next step is to smear the joint compound onto the surface with a putty knife. I did not want to cover my tape too much, so that I could more easily peel it off. You have to peel the tape off before the compound dries. This is messy, so have a trash bag near by.
After removing the tape and letting the joint compound dry overnight, I dry brushed three different colors of paint on the bricks, letting each color dry before adding the next. I did gray first, then the espresso brown and then a brick red on top.
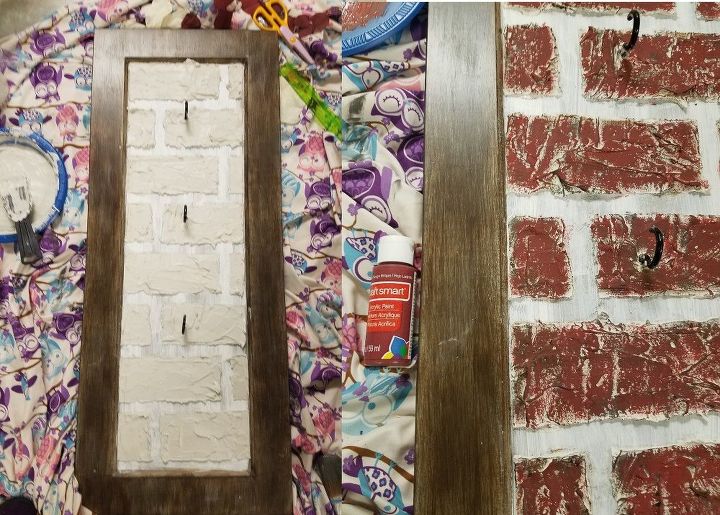
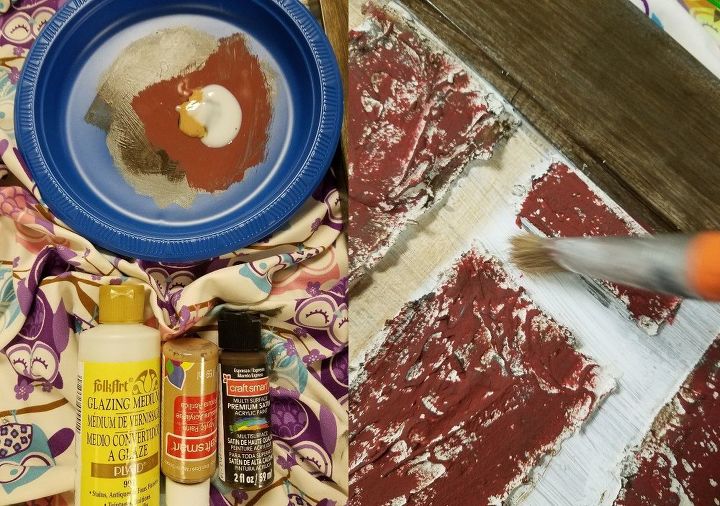
Next, I mixed the espresso paint with a light tan acrylic paint and also mixed in glazing medium to paint the grout lines between the bricks. Glazing medium really allows you to blend a color and work with it to get the effect you want. I used a dry brushing technique to paint this into the grout lines, as well.
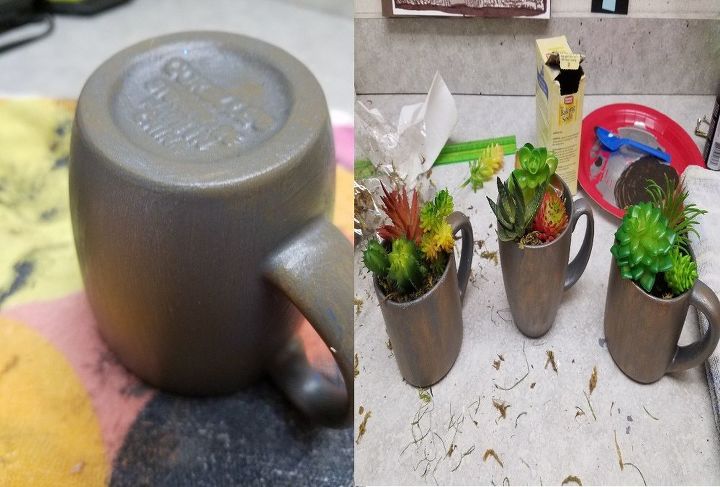
I also painted three cups to hang from this. I started out by painting them a dark metallic gray, then brushed on a copper acrylic paint with a cotton ball to get an aged effect. I filled them with faux peat moss and put faux succulents in them, these I had to buy from Amazon, since I kill real plants, so I had to do fake ones.
Here it is all put together on my wall:
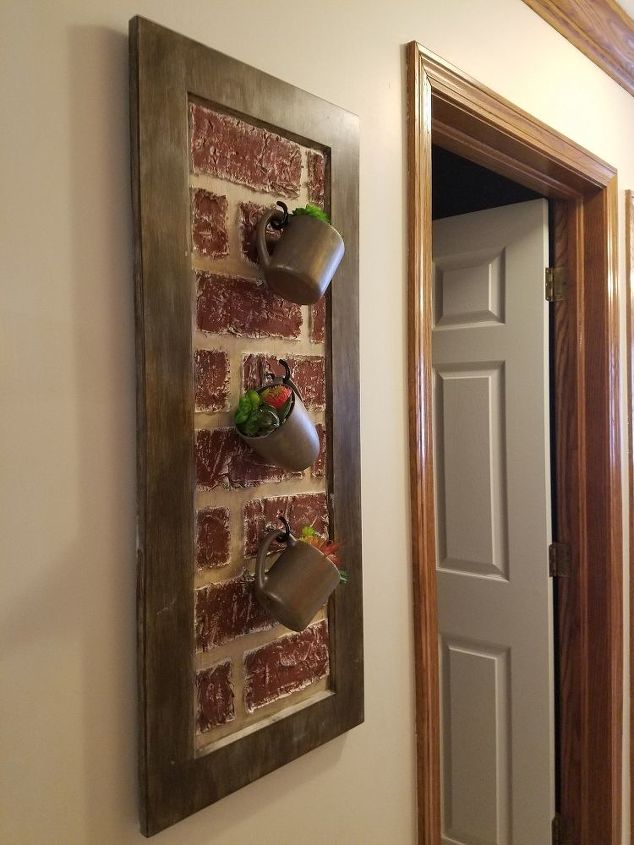
This was one of my favorite projects, and I love how it looks on a wall that desperately needed something on it!
Resources for this project:
See all materials


Any price and availability information displayed on [relevant Amazon Site(s), as applicable] at the time of purchase will apply to the purchase of this product.
Hometalk may collect a small share of sales from the links on this page.More info
Comments
Join the conversation
4 of 59 comments
-
Love it !!! , but want to see the second door.
-
Great job :) thanks for sharing.


Frequently asked questions
Have a question about this project?
Love this idea. Do you think I could this is a backsplash in the kitchen?
Love this idea. Do you think it would work as a back splash in the kitchen?
Nice job! This s has a lot of potential for many places Do you think it would withstand being outside?