


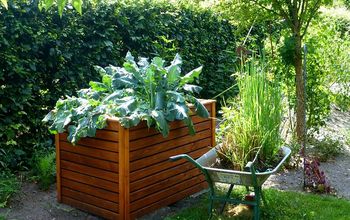
DIY Cedar Raised Garden Bed
4 Materials
$115
3 Hours
Medium
This cedar raised bed can be put together in a few hours, and it's durability will make it last for years!
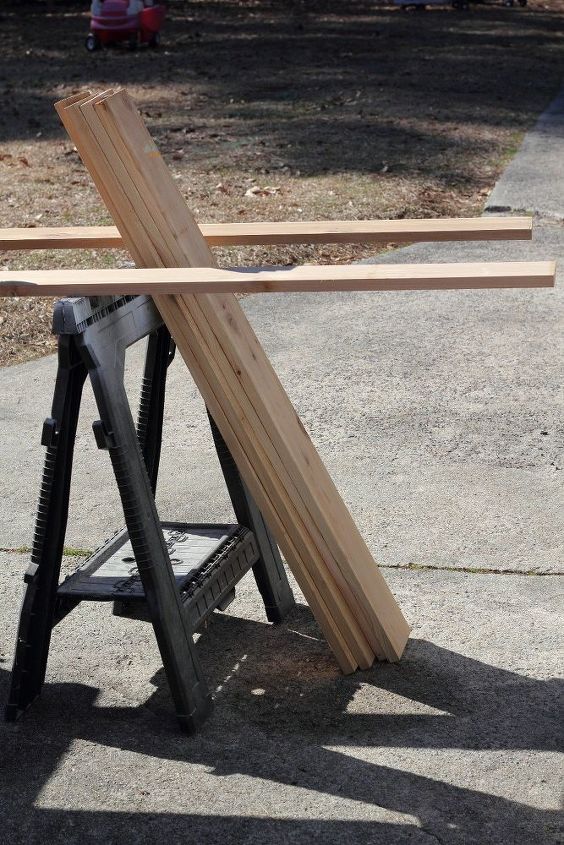
Begin by prepping your work area; get your saw and wood ready. Begin by cutting the boards for the sides of the bed. You’ll need 8- 1×4 boards cut into 4-foot lengths. Two 1×4 boards on top of each other will be a complete side. Set the boards aside.
Take another 1x4x8 and cut it into 8 inch lengths. You’ll use two of these cut boards for each corner of your bed. Set aside.
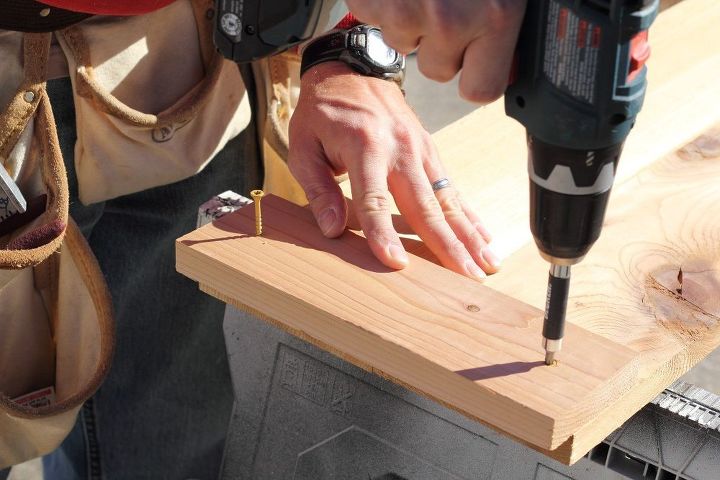
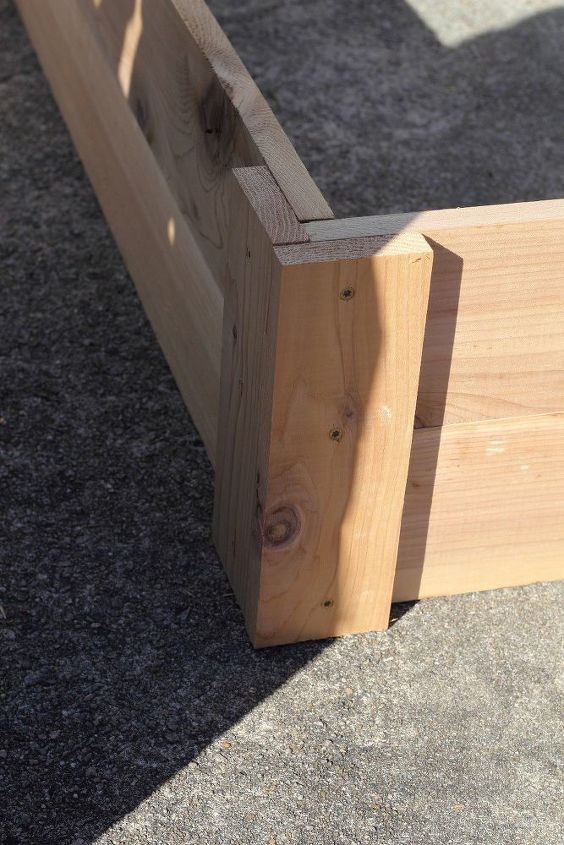
Now put together the first side of your bed. Take two 1×4 boards and place them flush beside each other. Be sure the ends line up. Take one 8in. 1x4 board and place it at the end of your 1×4 boards that are making your side. With your square, measure the thickness of your 1×4 boards. I know they say 1″, but in reality, they’re a little less. Our boards were about 3/4″. Whatever your thickness measurement is, that’s how much overhang you want to create with your 8 inch long 1×4. Having this overhang will give your next side the perfect spot to connect. Once you have your 8-inch 1×4 in place with appropriate overhang, screw in place with galvanized screws.
Repeat this process for making each side of your bed, keeping the overhang you’ve created on the same end each time.
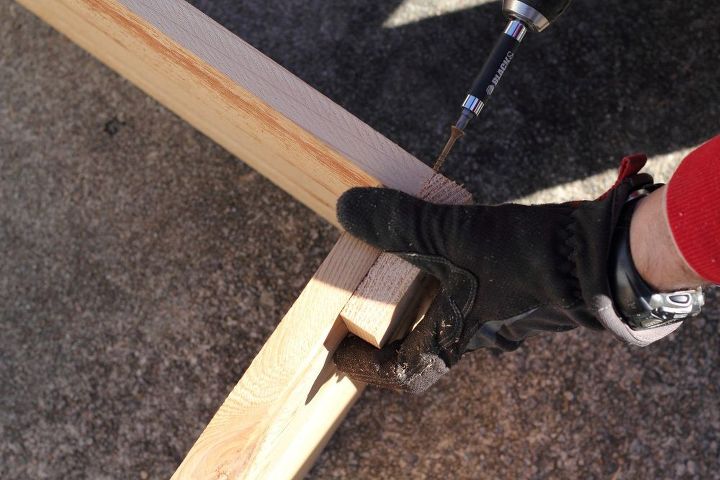
Once your sides are complete, begin connecting them. To do this, place the end of the raised bed-side which doesn’t have the 1×4 attached against the overhang of another side. See image below. Screw the boards into place using galvanized screws. Repeat this process until the four sides of your bed are connected.
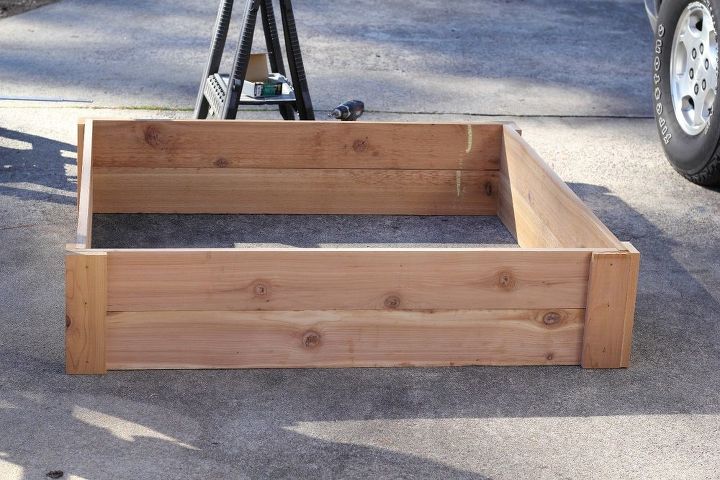
Take your last 4-1×4 pieces and begin adhering them to the corners of your bed. Each side has one 1×4 piece already, so take one of the remaining pieces and place them on the opposite side of each corner. Screw the 1×4 pieces into place. (Notice how the tan screws blend in well with the cedar? Win!)
If you’d like to keep your bed simple, you can stop building at this point. For the finished edge on the top, you’ll want to decide how much overhang you’d like on the interior of your bed space, then use your square tool to determine where to cut the 45 degree angles for the corners. Your 1x4x10 boards can be cut in half, with each half being used for one side of the bed. Lay your 1×4 pieces on the top of your bed; use your square tool to determine where to cut your 45 degree angle and mark with a pencil. Do this for both ends, then cut with your saw. Attach the pieces to your bed with screws, using several along the length of the board. Repeat for all four sides.

Now you're ready to put in place, fill with soil, and get gardening! For full tutorial and diagram, visit my site: https://thekitchengarten.com.

Want more details about this and other DIY projects? Check out my blog post!


Frequently asked questions
Have a question about this project?