


Install Your Own Laminate Flooring!
4 Materials
$900
1 Day
Easy
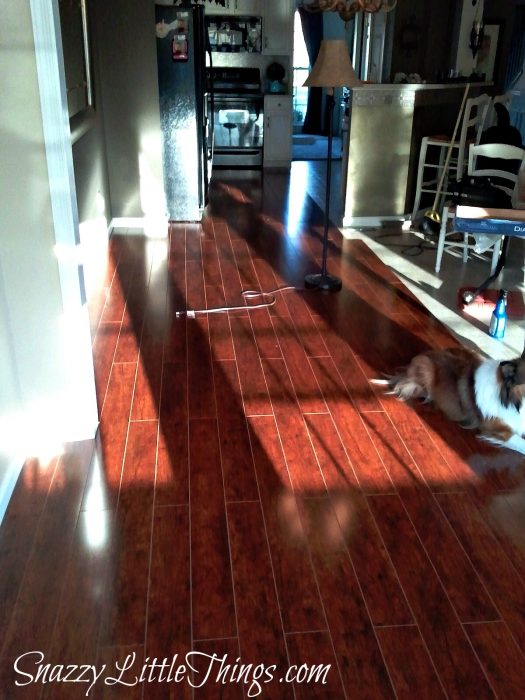
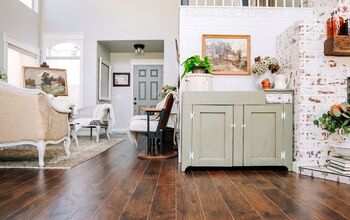
I built my house in 2005, and I lived in a sea of builders-grade white until 2012, when I started to upgrade my home. We added this piano-finish laminate flooring, which made a dramatic difference in the overall aesthetic in our home.
We chose laminate over hardwood not only due to cost, but we also have a dog and we wanted to ensure that if we sold the house, there would not be any visible scratches on the surface.

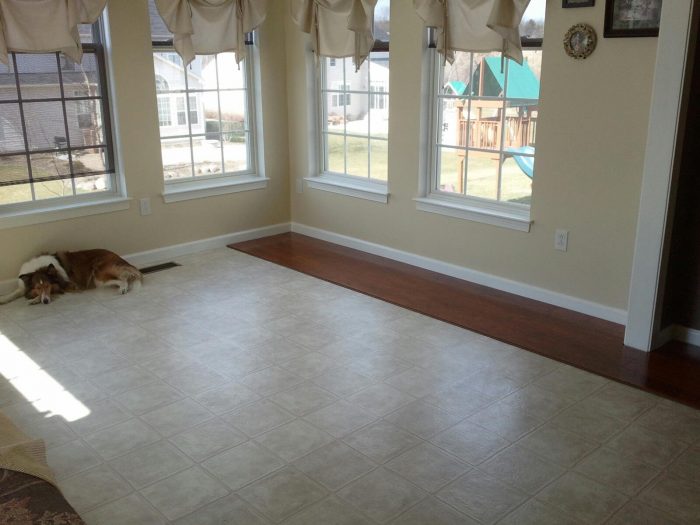
This was the standard flooring that came with the house. Any upgrades I did make at the time I built were things like bumping out walls and increasing square footage.
Lots, and lots…of white, which was starting to feel antiseptic and like I lived in a hospital.
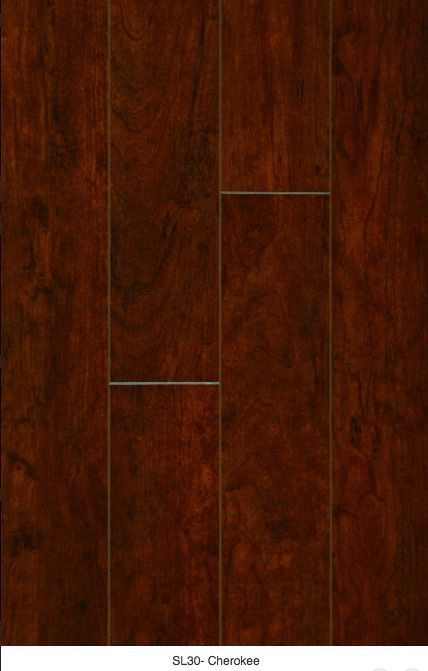
We opted for the piano finish mainly because it is very popular in my neighborhood, and we considered resale as part of our selection.
Here is a video overview of the Southern Lakes brand we chose.
You don’t need to be an advanced DIYer to install your own flooring. To make things easier, we chose flooring with the built in pad and it saved us a ton of time. This way you don’t have to do a double installation of the pad + the laminate overlay.
In spite of the skill level and minimal tools required, this was a very physical project if you’re covering a large area. The built in locking system makes it much easier. This means you lay them down at a 45 degree angle. Once the two pieces are locked, you lay them flat.
Start in one corner and then continue across the floor until you reach the end. You'll have to cut the pieces as you reach the end of each row to make sure it fits to your exact measurements. By starting in the corner and working your way out, you'll avoid "painting yourself into a corner."
We created a stair-step pattern, because it was simple and required minimal cutting, but there are several, more complicated effects that you can choose.
One of the great things about this option was that we could install it over the existing floor.
We got the whole room done in just one day!
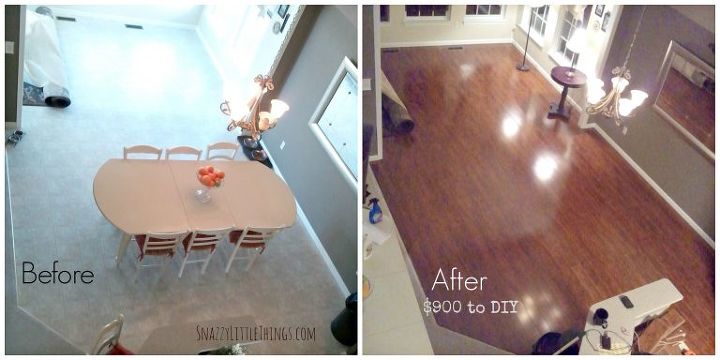
Here's a side by side comparison!! Isn't it beautiful?!

Want more details about this and other DIY projects? Check out my blog post!
Comments
Join the conversation
1 comment
-
It does look beautiful! great job!


Frequently asked questions
Have a question about this project?
I am assuming you removed the moulding first. is that the case?
I have seen flooring kits - do you feel those aren't needed?