


Updated Dresser, Distressed DIYer

3 Materials
$100
2 Weeks
Medium
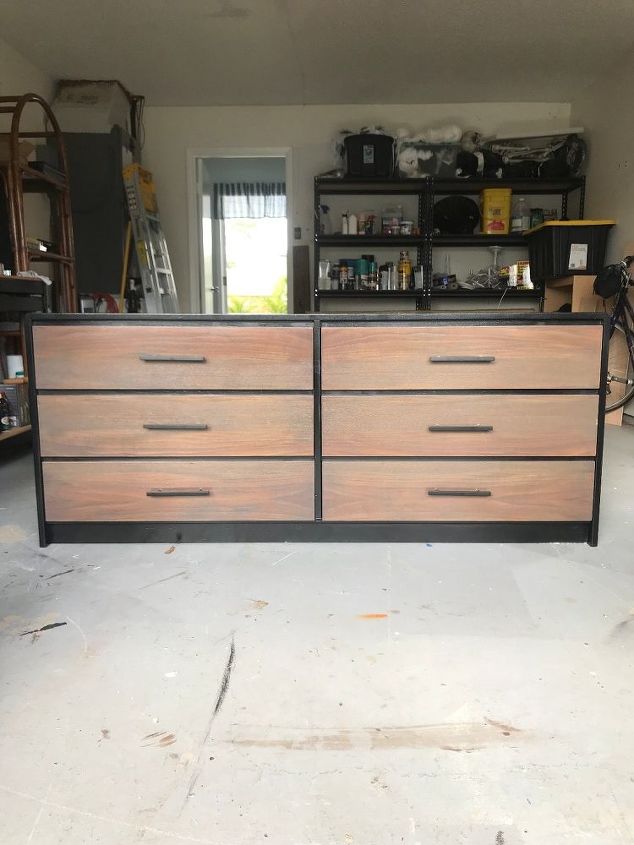
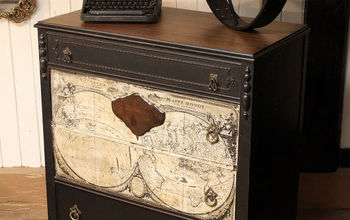
Anyone who DIY's has probably had a project that just does not come together as hoped. A project that seems to fight you on every level and at every turn. This was that project. I purchased this dresser on craigslist for $30. It is solid and really, really, really heavy! Like, T-rex heavy! There was damage to the veneer around the whole bottom and deep gouges and scratches on the top, so I decided I would paint the dresser a nice glossy black and stain the drawer fronts. In my haste to get started, I forgot to take a picture of the dresser so the picture below is one I found on the web that is similar.
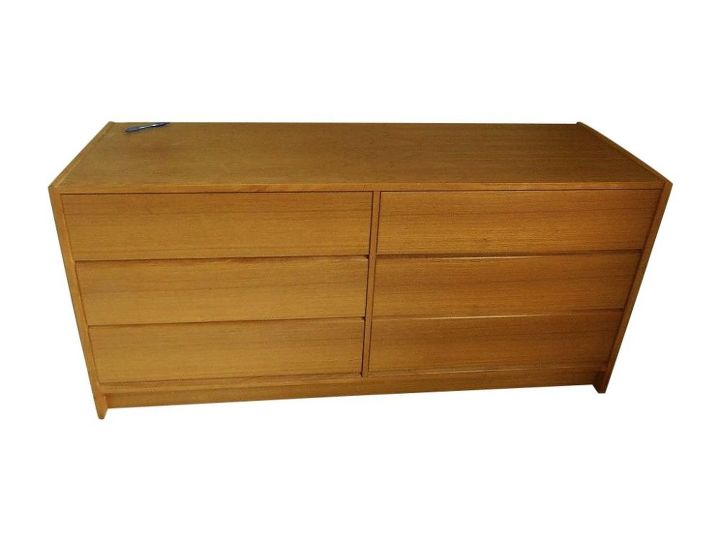
This looks very similar to my dresser, except a little smaller and my dresser has more of a bullnosey edge.
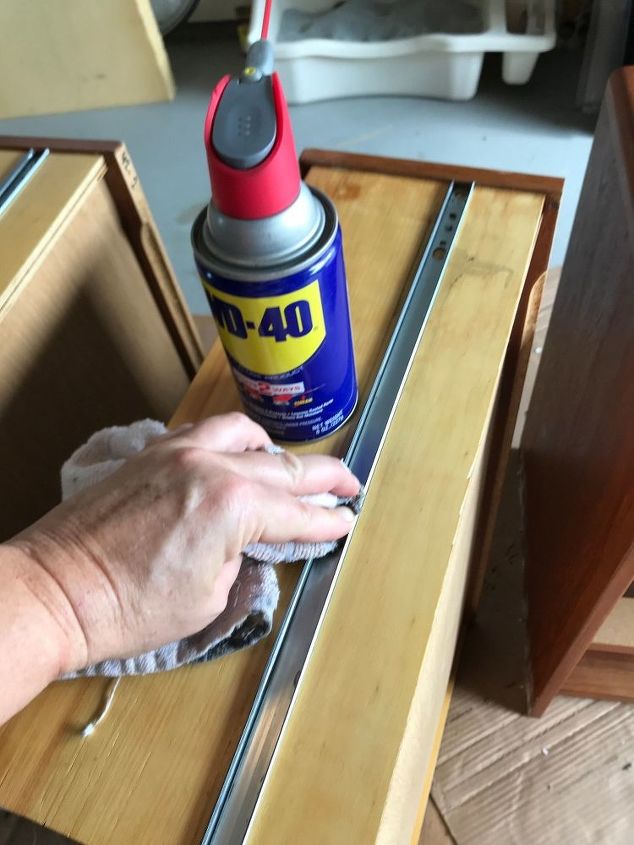
The drawers were sticking pretty bad, so I pulled them all out and cleaned both sides of the tracks with WD-40. Most of the tracks were really loose, so I glued them back down with gorilla glue. I marked the drawers 1-6 so they all went back to their original spot.
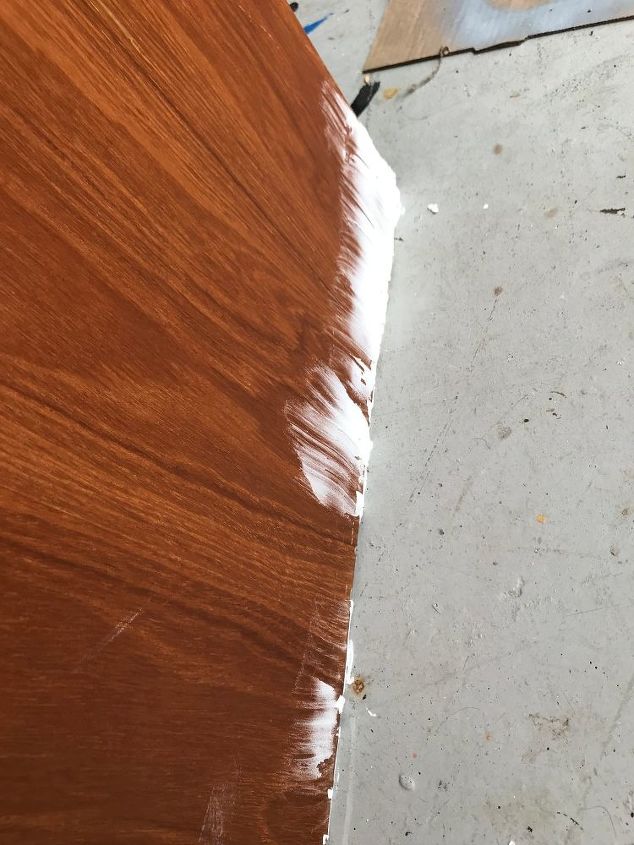
Filled the breaks in the veneer with spackle
Same on the top. Once the spackle dried, I gave the whole dresser a sanding till it was smooth.
To remove the finish, I applied Citri-strip to the drawer fronts and covered with plastic wrap and let it stew for a few hours. Using a plastic scraper blade, I removed the resulting sludge, then sanded the drawers down and cleaned them with warm soapy water. So far so good! But it was here that things started to go awry!

I applied a coat of black chalk paint to the dresser and proceeded to top coat with a latex gloss black paint. I wont use a gloss paint again on something this big. No matter how I sanded and smoothed, I could NOT get this paint to lay flat and there were always either ridges or haze. After 4 coats, I gave up on the gloss pain(t) and went over it again with the chalk paint. I was thinking I would just top the chalk paint with gloss polycrylic. The dresser is 6 feet long. The polycrylic dried too fast to get it on the whole dresser with out getting hazy spots. I sanded and smoothed and re-applied another 3 coats- with haze every time. Now the dresser has 7-8 coats of paint and poly and still looks awful. I was feeling pretty frustrated at this point. CURSES!
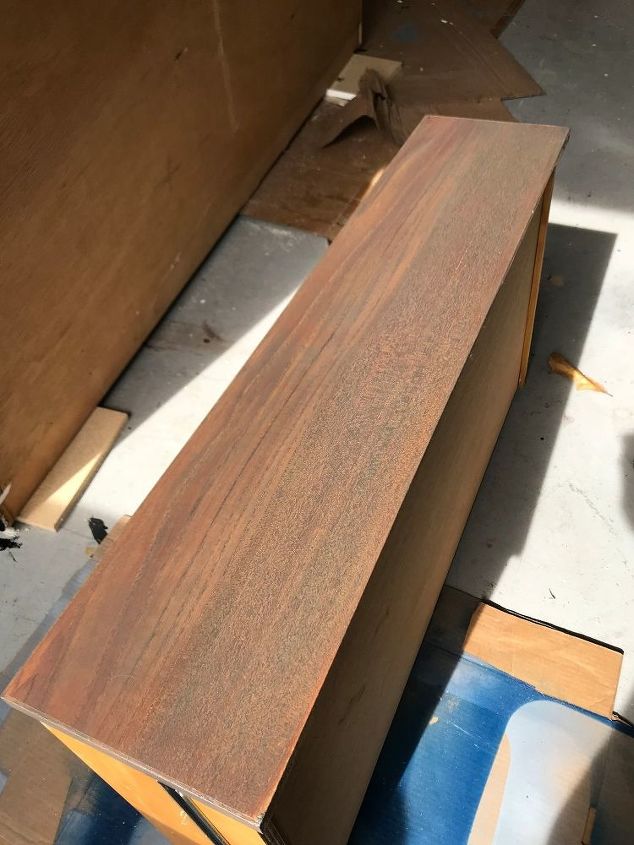
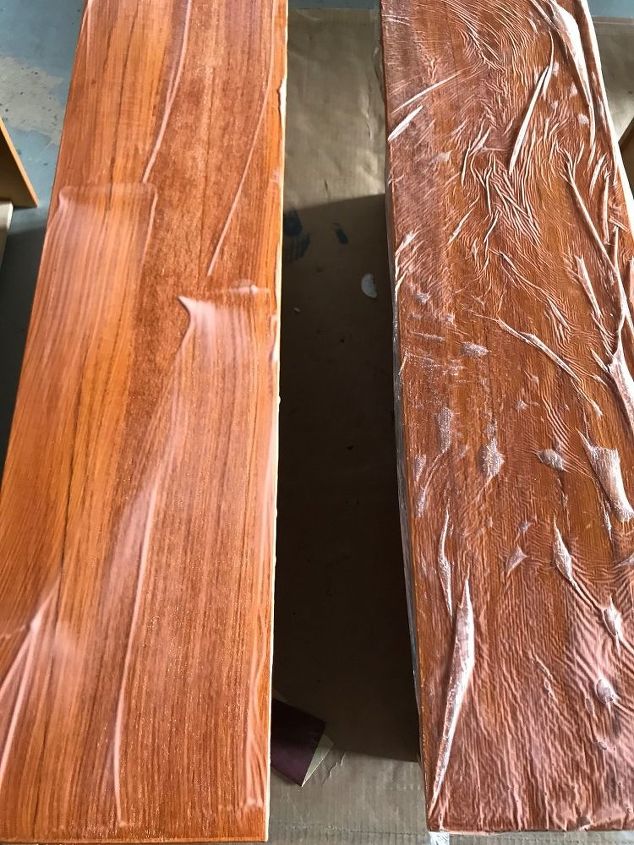
So I stepped away from the dresser and stained the drawer fronts with a grey stain. It created a unique color when applied to the wood and at first I wasn't sure I liked. By the time I got to the last drawer, I loved it. I wish I could have done the whole thing in that stain. The dresser was too badly damaged and after applying 1000000000 coats of paint, I wasn't about to try.
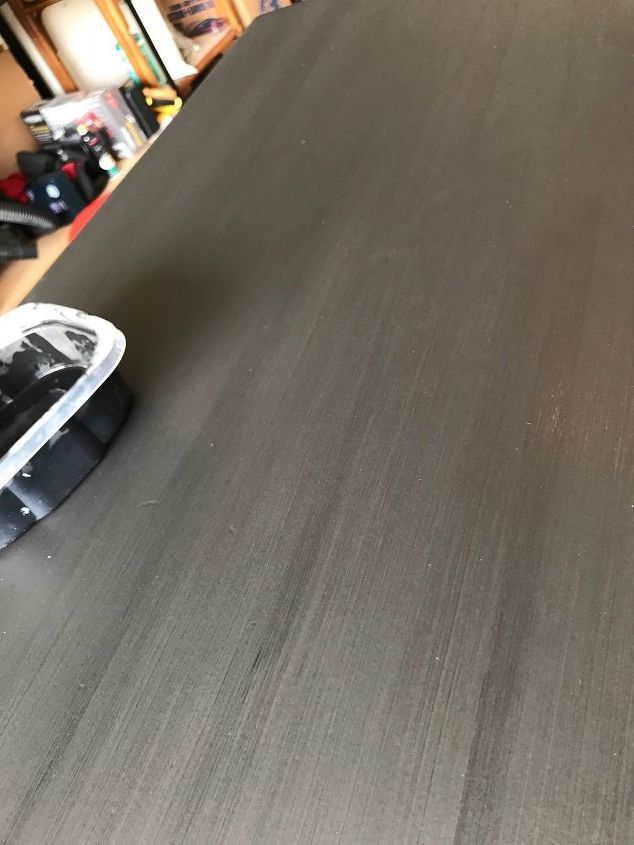
OK, back to the dresser. Yes that's another coat of chalk paint  I don't sell anything I do. Everything I work on, I use or give to a family member. This dresser was for my son who could give zero poops. But, I am a perfectionist and this was driving me out of my mind. I ended up using a gloss spray polyurethane. 4 coats- I still got haze.
 I finally made the decision to let it go. It was as good as it was going to get.
I don't sell anything I do. Everything I work on, I use or give to a family member. This dresser was for my son who could give zero poops. But, I am a perfectionist and this was driving me out of my mind. I ended up using a gloss spray polyurethane. 4 coats- I still got haze. I finally made the decision to let it go. It was as good as it was going to get. 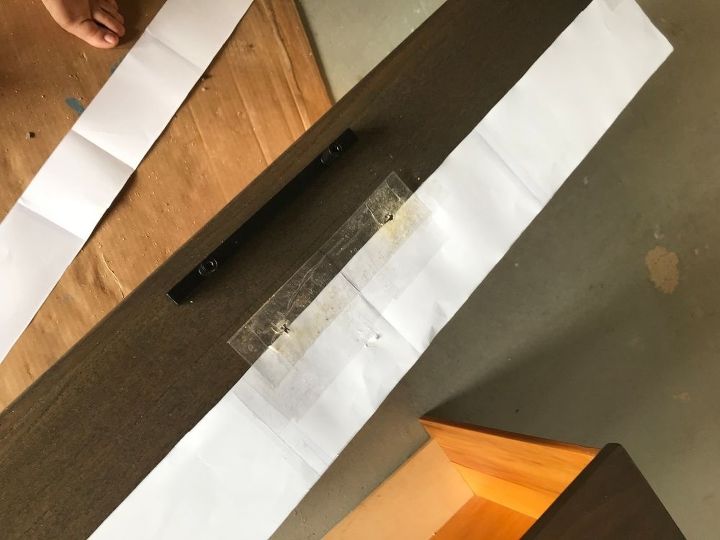
I wanted to put pulls on the drawers. The pulls came with screws that were way too long. Their ad said just snip with cutting pliers- yeah right. A Dremel might have worked if I had one. I went to Home Depot- My screws are metric and they don't carry metric in the store. I ended up ordering them from Amazon. (One of the readers made the excellent suggestion to try your local hardware store for odd sizes- great advice!) I made a template and traced a drawer front onto paper. I folded the paper in half both ways to find the center. To accurately find the distance between the holes for the handles, I placed packing tape across the bottom of the pull and marked the holes with a sharpie. I stuck my packing tape template to the sticky side of another piece of packing tape so neither side was sticky (If that makes sense) and folded it in half to find the center between the 2 holes. I then lined it up its center with the center on my paper template and stuck it down. (there are videos on you tube that show it better than I can explain it in writing).......know this, if things wiggle even a little it throws everything off in a very noticeable way. I made mistakes, and they still are not perfectly straight. Son= zero poops. Done.
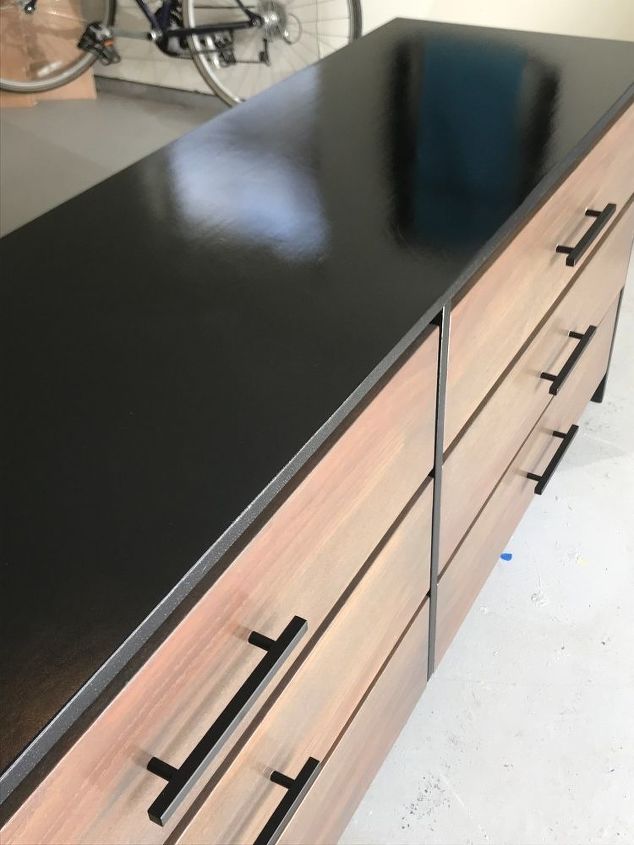
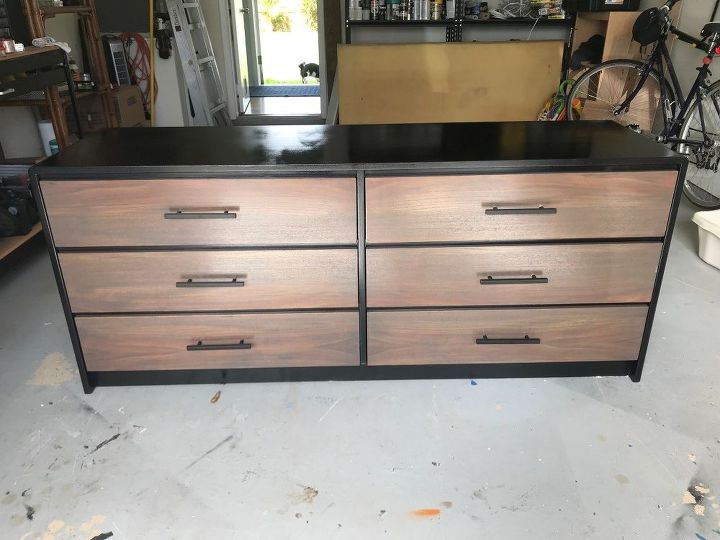
Here it is in all its hazy, crooked glory. Maybe someday she'll get another makeover, but for now, it's the best looking thing in my son's room and he loves it
Comments
Join the conversation
3 of 29 comments
-
The top makes it unique. Just tell everyone you intended it to be that way. The two toned look with the black and the stained drawers is a beautiful look that makes it look expensive. Enjoy it and the love your son has for it.
-
I like it. The drawers turned out great.


Frequently asked questions
Have a question about this project?