


Make a Sign Using a Homemade Stencil

by
Heatherelzey
3 Materials
$10
3 Days
Easy
I love to make signs, but can not afford all the diffeent stencils and some of them are just not what I am wanting to use.
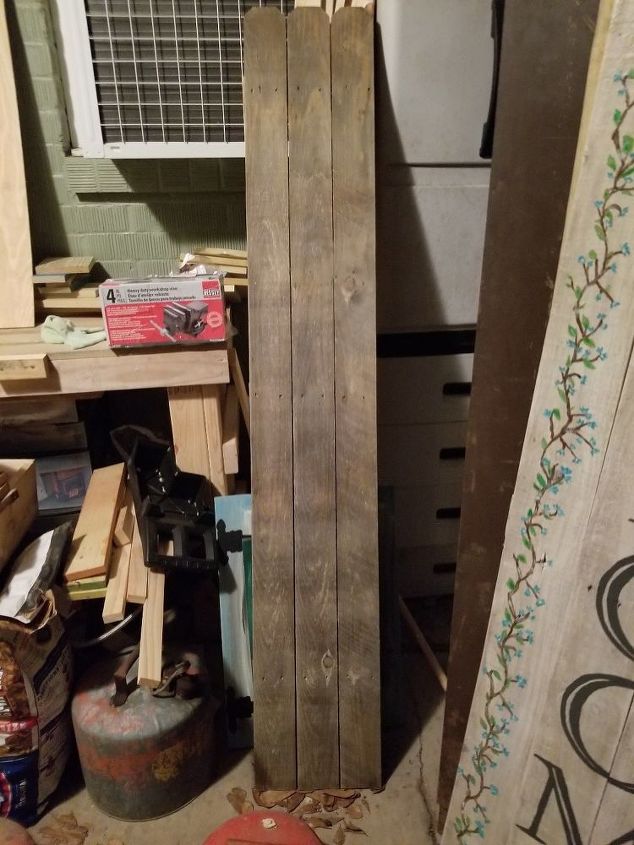
Find what some that you want to make your sign out of. I am using a fence panel.
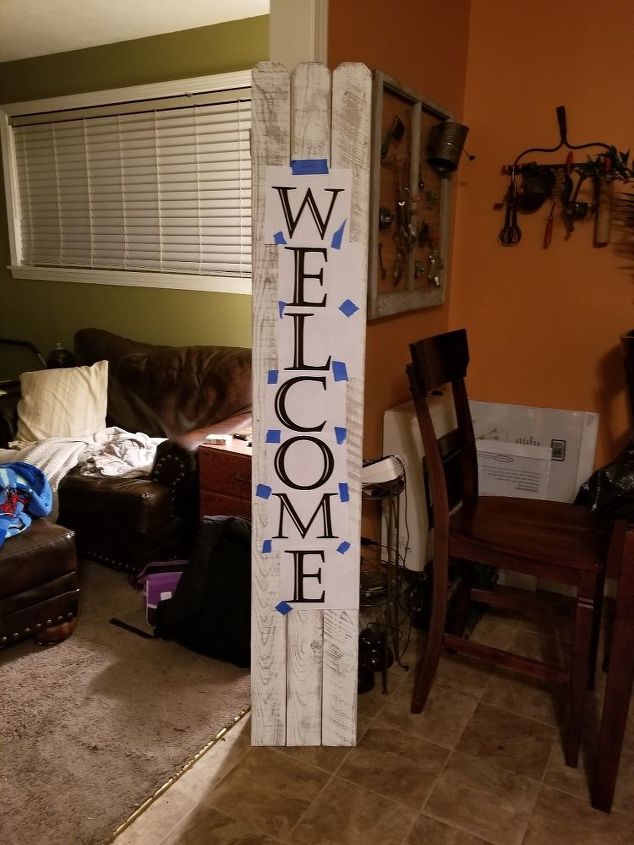
Print out your letters you want to use. I used Microsoft office word doc. I placed them on the board with the blue tape. You want to do this to make sure your letter are the correct size and that they are places one the board in the coreect placement.
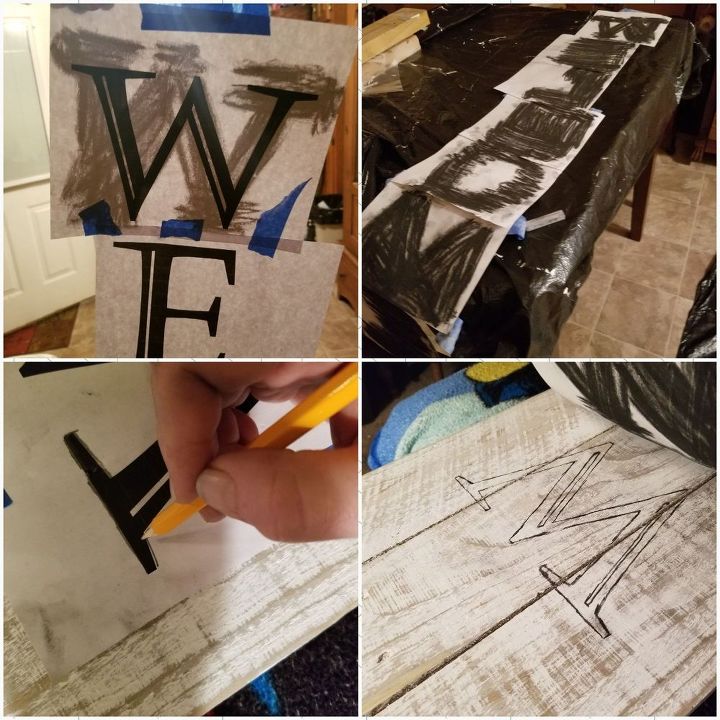
Lay the paper down blank side up and use charcoal to mark the back up.
Pick the paper up and hole it to the light. This allows you to see if you missed any thing. You want to make sure you cover the picture and letter so when you transfer the object you dont miss any thing.
Attach the paper on the board and trace the object. Remmember to use enough blue tape to keep the object in place also it will not move when you lift up to see if you are pressing hard enough to transfer the item. Make sure your board is laying down on a flat surface. It will make it easy to press firm.

Here is the word Welcome tranfered to the wood.
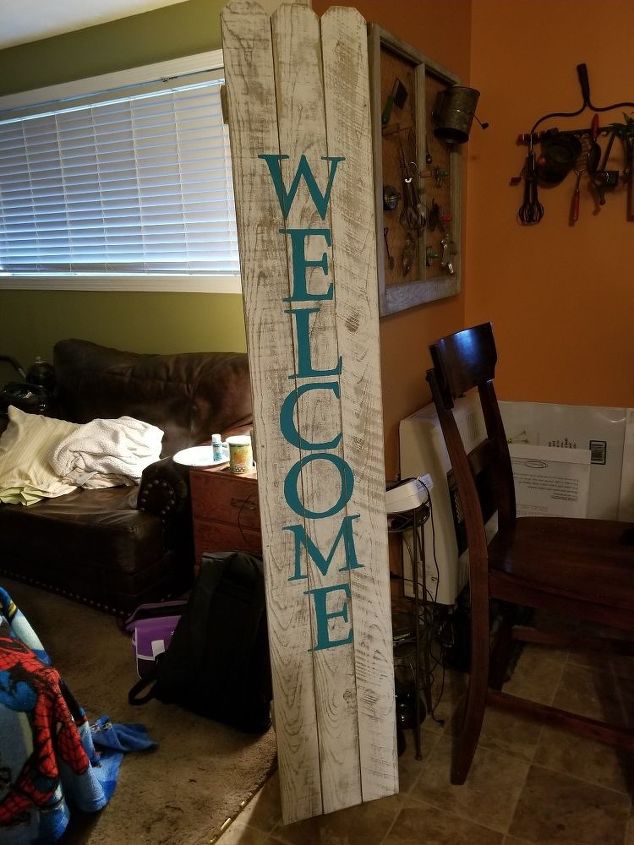
I hand painted the letters using the craft paint at walmart.
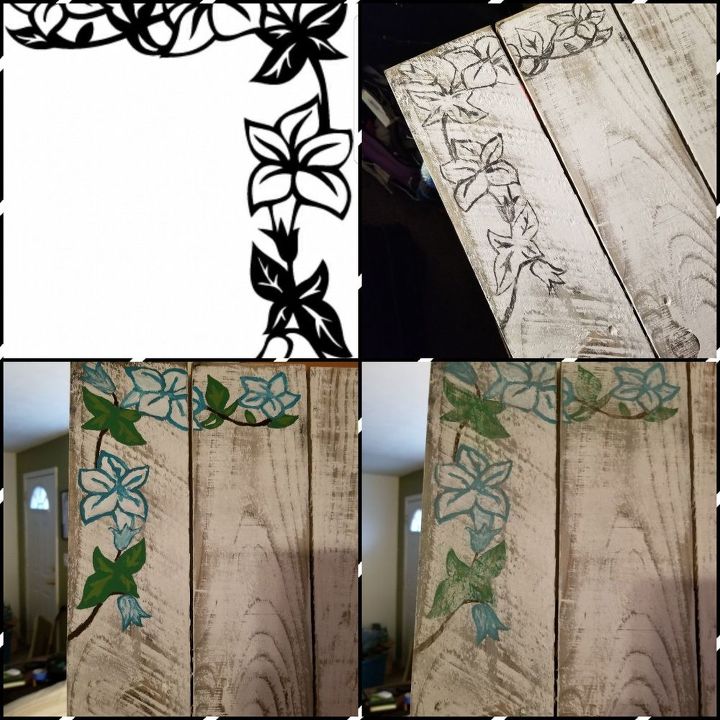
I stenciled flowers to two of the corners using the same method as above
This is why I love using the printer I can make anything i want for very little money.
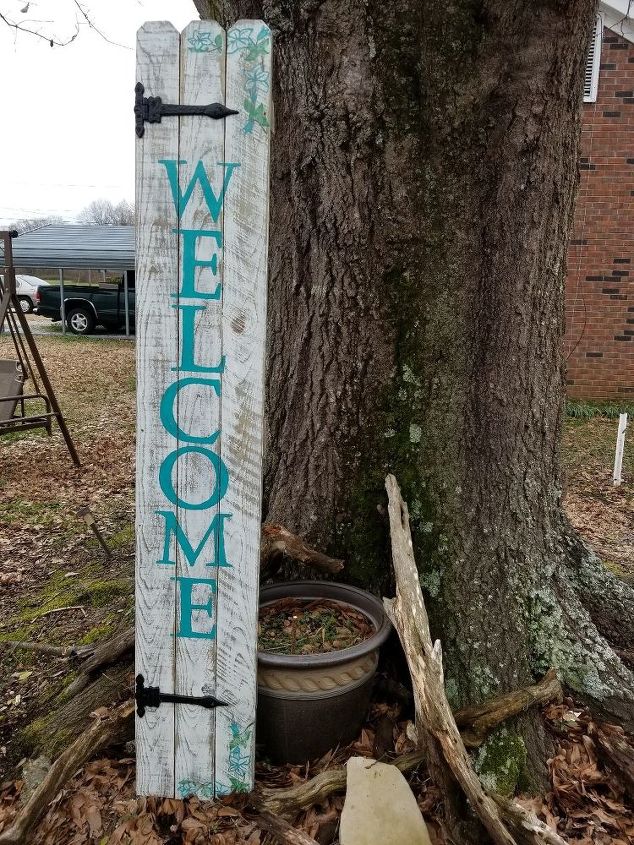
This is the finished sign. After the paint dried i applied 2 coats of polyurethane. Once the polyurethane dried I place hinges 2 hinges I found at hobby lobby.
Have Fun😉
Note if you already have a computer, printer and printer ink this project does not cost much.
Comments
Join the conversation
2 comments
-
I am in love with this sign!
-
The hinges set it off, love it!


Frequently asked questions
Have a question about this project?