


Simple Wood Staining With Food Coloring

by
Jennifer
7 Materials
$2
2 Hours
Easy
I haven't done wood staining in years but I really want to get back into it, especially with all the new products out there for staining in such beautiful colors today! I ended up getting white and teal unicorn spit! I ordered brown too but it's on backorder ! Well, while I was waiting for the spit order I thought I would do something I haven't done in years, stain some wood with food coloring!
! Well, while I was waiting for the spit order I thought I would do something I haven't done in years, stain some wood with food coloring!Here we go...
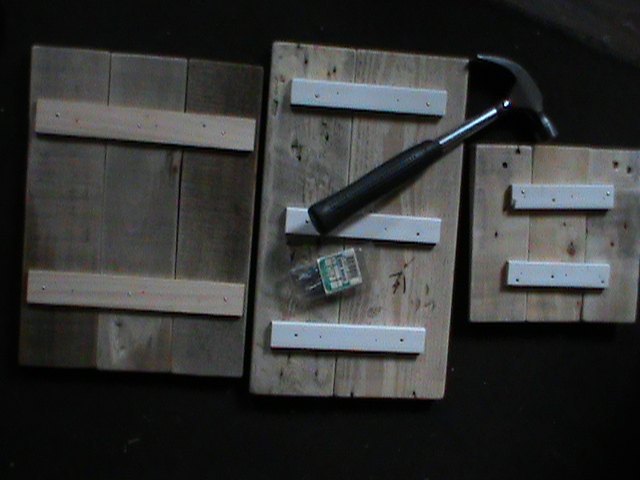
I made these from some scrap pieces of pallet boards I had leftover from other projects. The back pieces are scrap door jamb trim just nailed in with a little bit of wood glue to hold it all together!
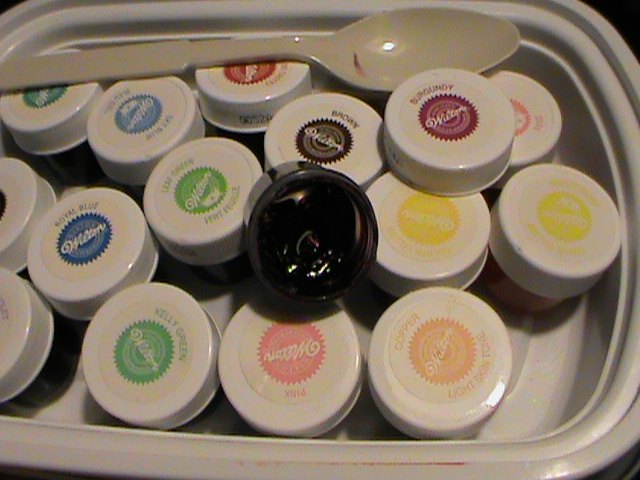
Now comes the mixing of color! Wilton food coloring paste, H2O and rubbing alcohol! Very small amount at first because it's been awhile and not sure how much I will need. Baby steps !
!
!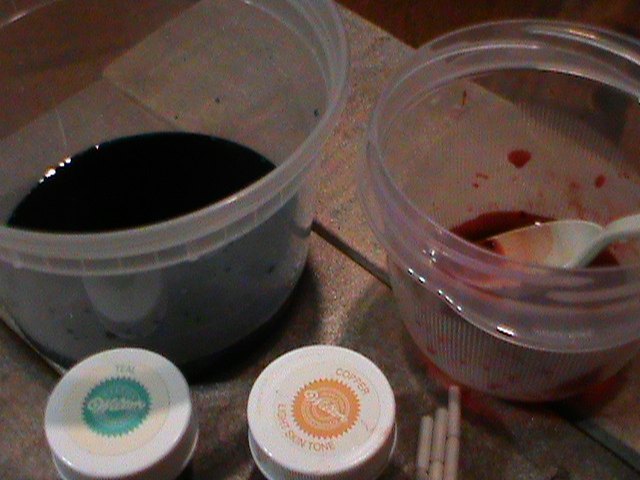
Here I have teal and burgundy mixed. I started with a few drops of warm water to help dissolve the paste, squish and stir to a very thick syrup consistency. I probably used about 1/4 teaspoon maybe a little bit more of paste. Then I slowly added the rubbing alcohol until it was say whole milk thick, a little less than a 1/4 cup.
This is really a judgement call because the thicker the color the deeper the color will be on the wood and of course the thinner the color the lighter the color will be on the wood. I think thinner is better because you can always add more color.
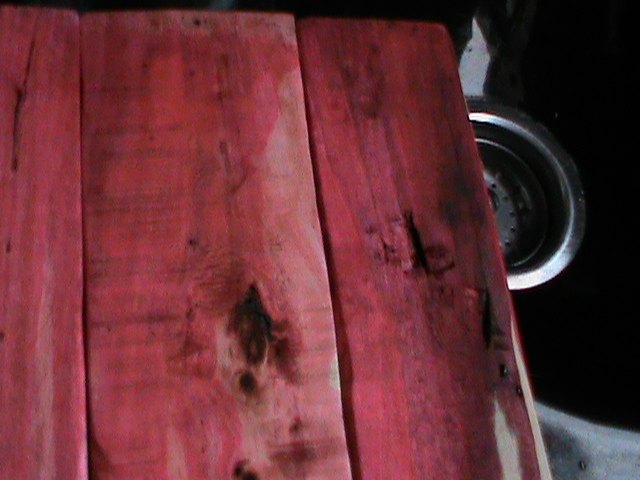
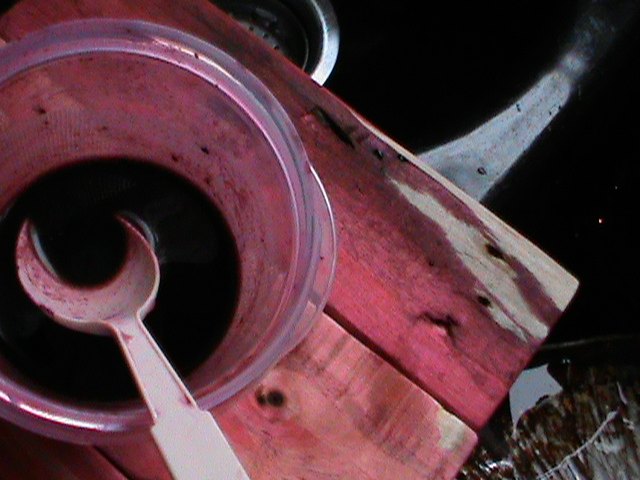
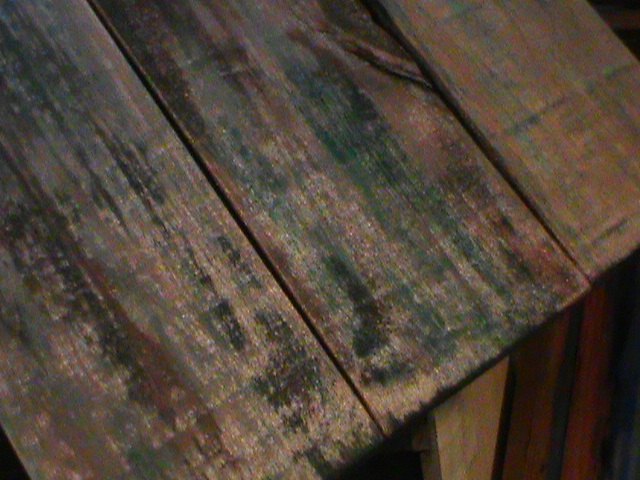
This is two pours and yes I said pours. I poured the color over the wood on this one then repeated that step two more times. I did this part in the kitchen sink!
I did this part in the kitchen sink!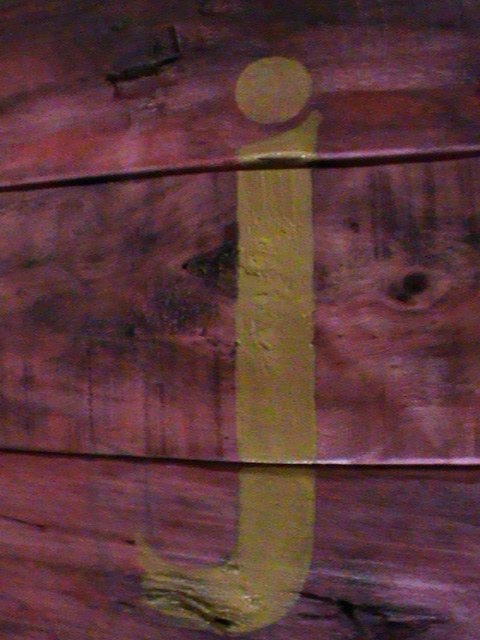
This is three pours. Some of the wood is darker in color while other spots are lighter. I hand painted a "j" for me on it with a sunset gold then sealed it with a rustoleum clear gloss spray paint. Finished with that one, two more to go!
I hand painted a "j" for me on it with a sunset gold then sealed it with a rustoleum clear gloss spray paint. Finished with that one, two more to go! 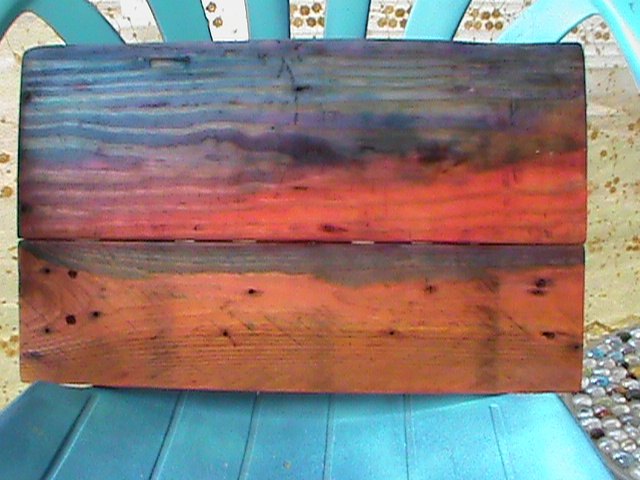
I did this one with more precision. By pouring and using a brush to blend the colors or to cut to another color all together.
A beach with the sun rising off the horizon! The glare of the sun making the beach somewhat tannish/orange to the greenish/blue calm shoreline to the fire of the sun coming up and pushing the bluey night sky away!  I used several colors for this scene!
I used several colors for this scene!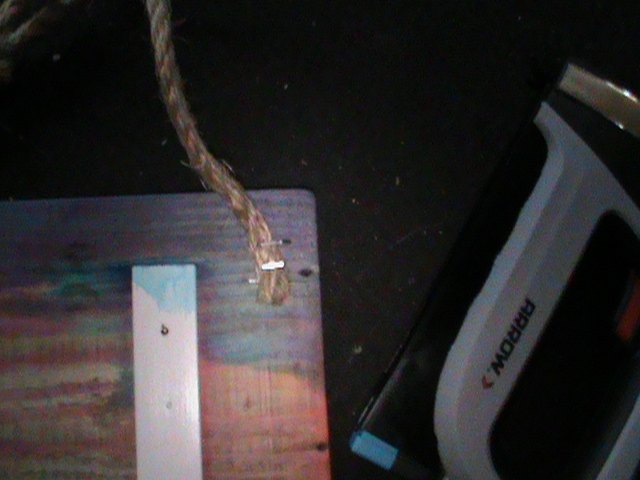
I attached a rope with my Arrow staple gun so it can be hung. I sealed it with rustoleum clear matte spray paint.
Two down one to go!
This one I used copper, teal, burgundy and brown. Again this is a judgement call on color depth and how much to use. I think I got an aged copper look to the wood. With this one I poured and used a brush too. This looks really cool!
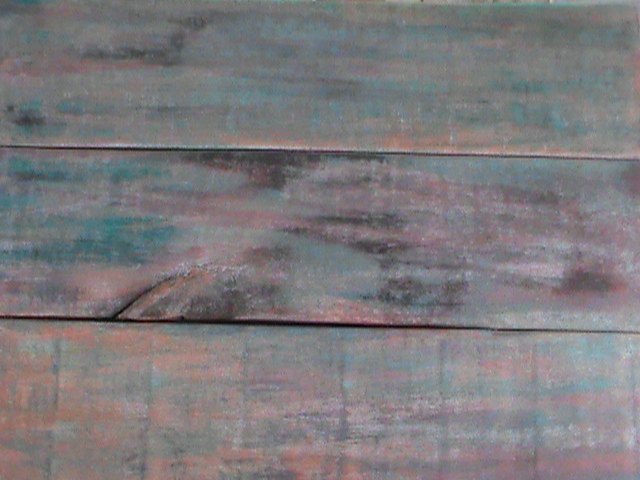
In the bright sunlight it looks muted.
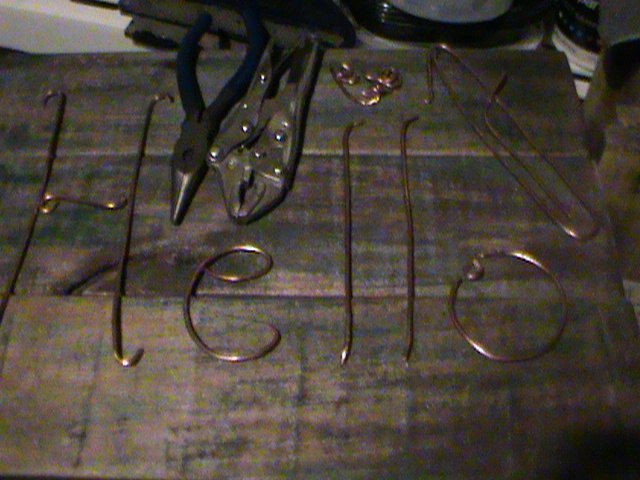
I think "Hello" would be cute on this one but I didn't want to paint it on... hmmm?
Got it! I'll use some copper wire I have! I used needle nose pliers to shape and cut the word out! Easy peasy!

At first I glued the letter wires on and hated it!! Then I thought about using decorative tacks to hold the wire down, prefect!! The "Hello" still didn't look right with it being just copper in color .
.
. 
I needed something more... Color!! I need a pop of color!!
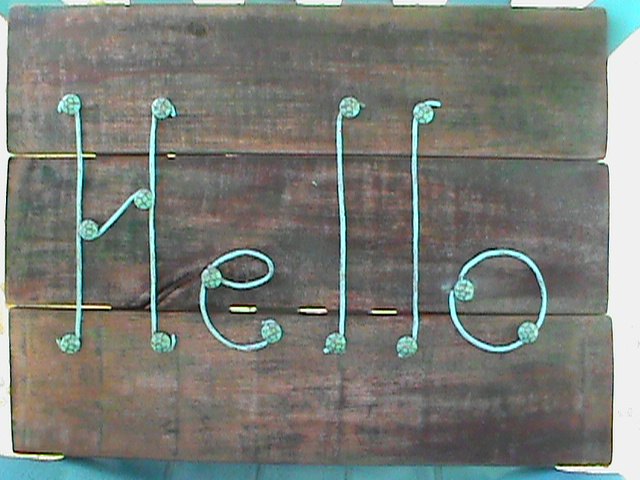
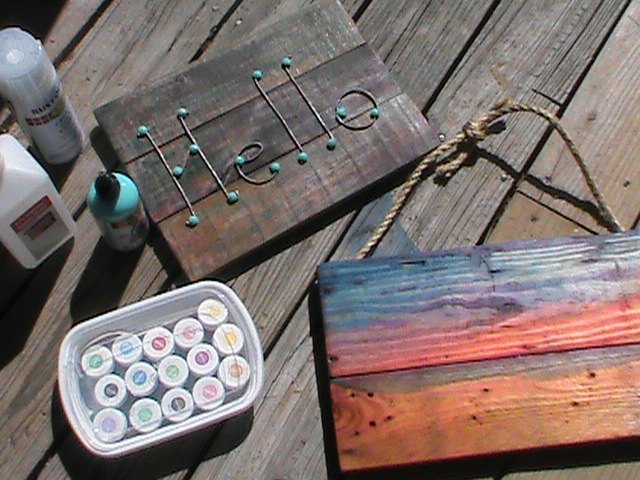
Aged copper patina "Hello" sign.
Well I decided to open up that teal spit and use it on the tacks and wire! A little bit of sanding and WALA!!! Now that is a "Hello" sign !!
!!
!!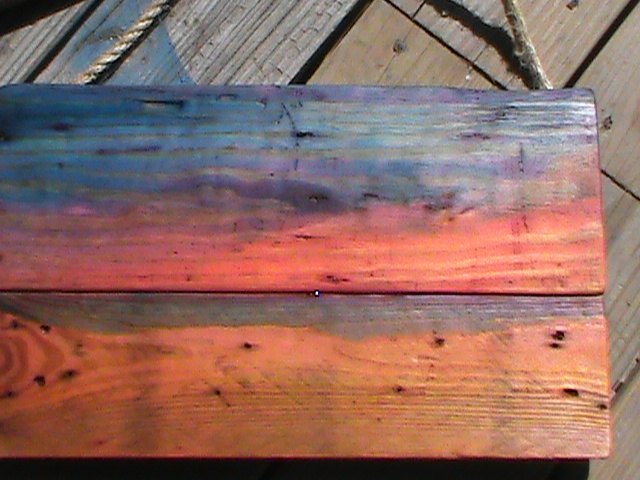
"Beach sunrise"
I made all three of these in about a day and a half mainly because of drying time. The wood took about an hour to cut and put together. The beach scene took about 15 minutes, the aged copper one about half an hour and the little "j" about 5 minutes to stain. Painting the "j" 5 minutes, wire letters about an hour to cut/shape and about 15 minutes to attach with the tacks to the wood! I love all of them and they look great!!
Now that I have opened up the spit I'm on to the next project!
Any questions or comments are always welcomed!! Thanks for looking at my new wall art!!
Comments
Join the conversation
3 of 5 comments
-
Really imaginative. I couldn't believe the effect you get with food coloring!
-
Did you really write "WALA"? LOL!


Frequently asked questions
Have a question about this project?