


Old Headboard - New Look

by
Denise Hardy
3 Materials
$21
3 Days
Medium
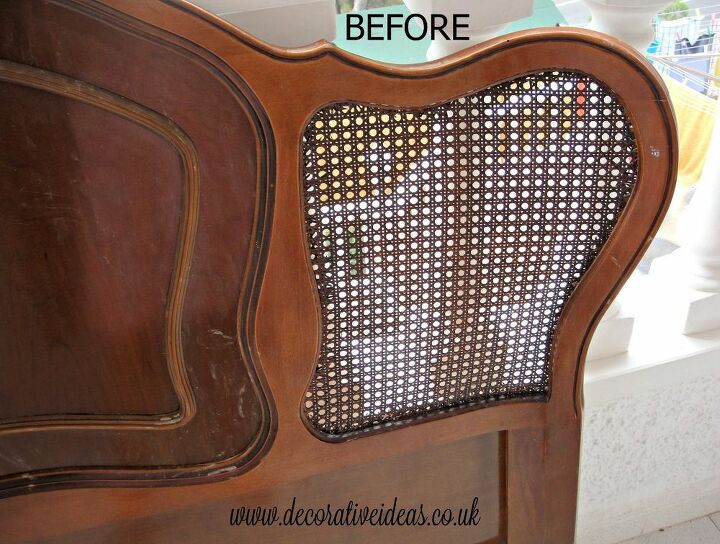
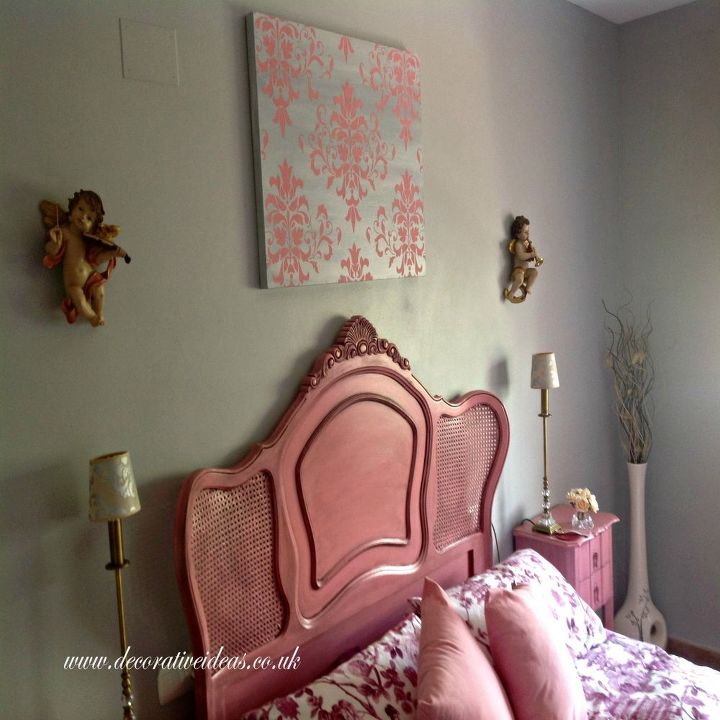
This headboard believe it or not was on our urbanisation in Spain at the side of the rubbish bins. I couldn't believe my luck so my 'hubbie' and I brought it home.
A friend of mine had asked me to re-vamp her bedroom and I thought this would look rather nice painted in a colour of her choice if she liked the style of it. So.. I asked her if she would like me to use it in her re-vamp and she was delighted with the style.
You will see below how I transformed this beautiful headboard.
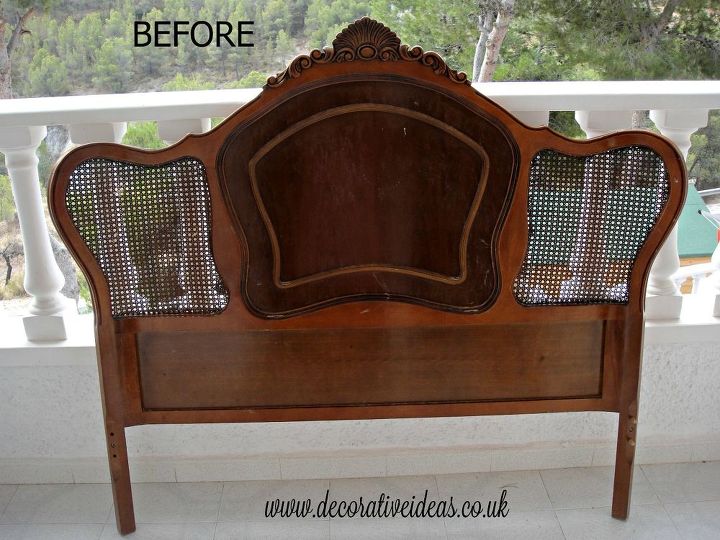
First of all I gave the headboard a good clean - athough to be quite honest - it wasn't that dirty.
I then gave it 2 coats of Zinsser BIN 123 Primer. (This is my 'go to' primer on most projects I do. Specifically on this type of wood and because of the darkness of the wood - I find it better if 2 coats of primer are used.
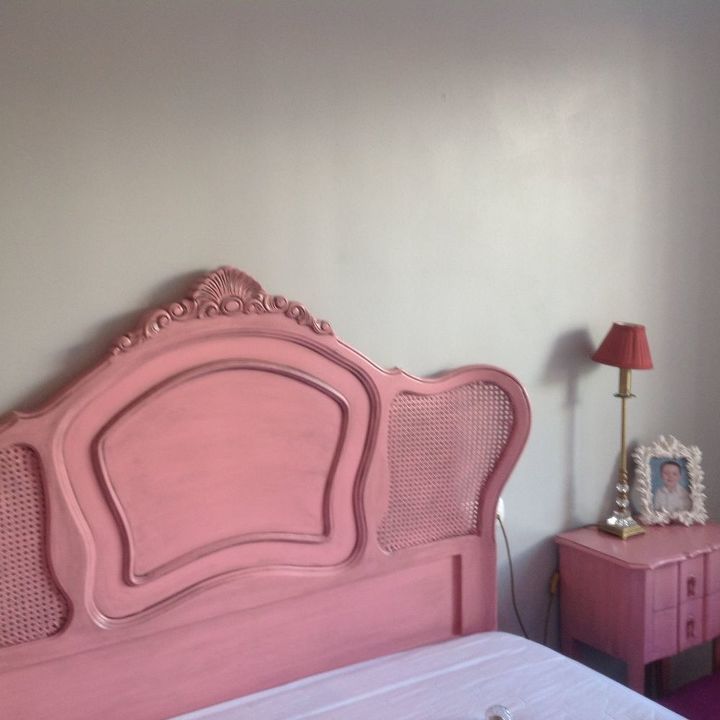
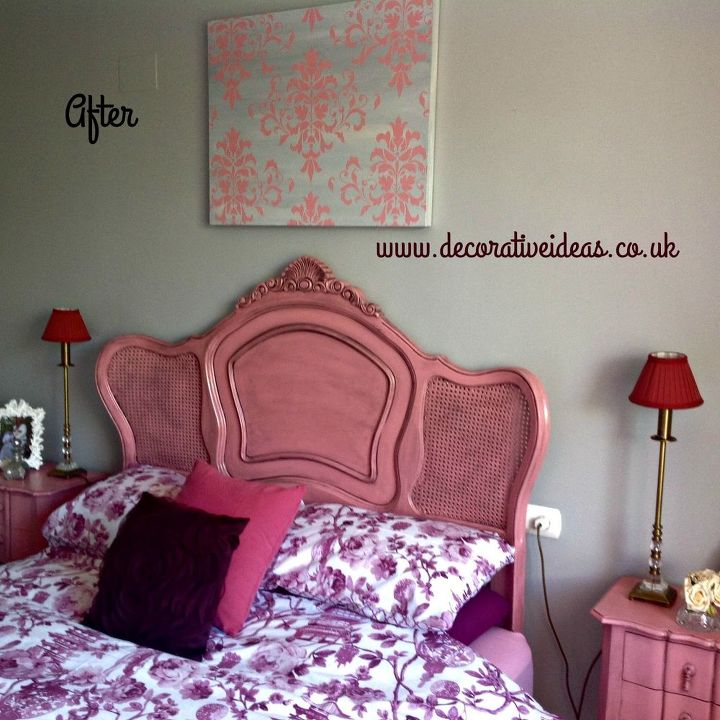
I left the primer overnight and the next day started painting it with 2 coats of Rustoleum Chalk Paint in Dusky Pink. I left that also to dry completely overnight.
AFTER - with Black Glaze
Once the two coats of Dusty Pink was applied - I thought it was too 'pinky' and thought it would look nice with a glaze applied to give it some depth. I asked my friend what she would like me to do and... as usual she says 'do you want' - I love it when people say that 
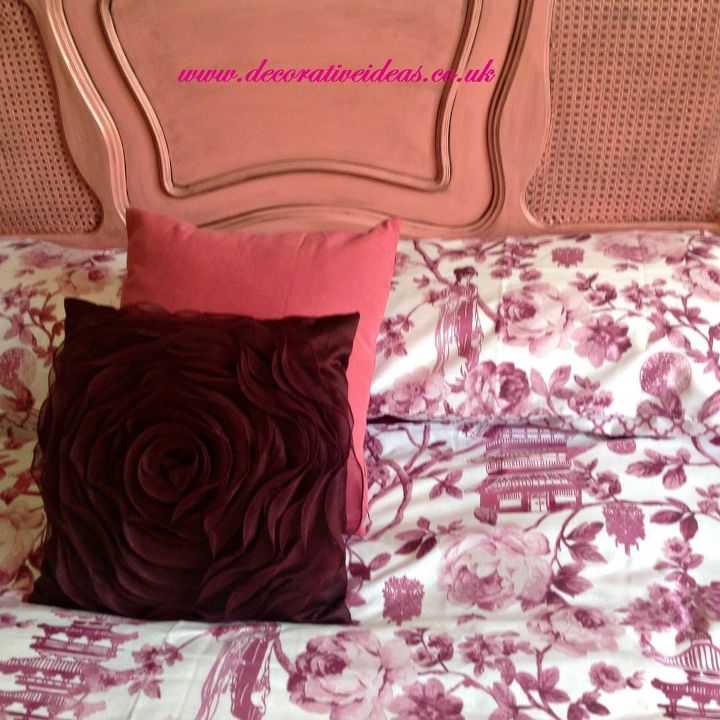
AFTER - with black glaze
To mix up the glaze I used a black artists acrylic paint with clear ready made glaze. You just add the paint into the clear glaze stirring - you don't need to mix too much because glaze goes a long way. I would say use approximately 3 tablespoons of clear glaze to one tablespoon of the artists acrylic paint. You can mix it in a plastic cup and stir with a lollipop stick.
I always like to purchase a tin or bottle of clear glaze - the one I use is called 'Polyvine' and then you can use it to mix as many different colour glazes as you want and it works out much cheaper than buying 'ready mixed' glazes.
After
I used a normal paintbrush to put the glaze on, but then used a lint free cloth to rub a lot of the glaze off.
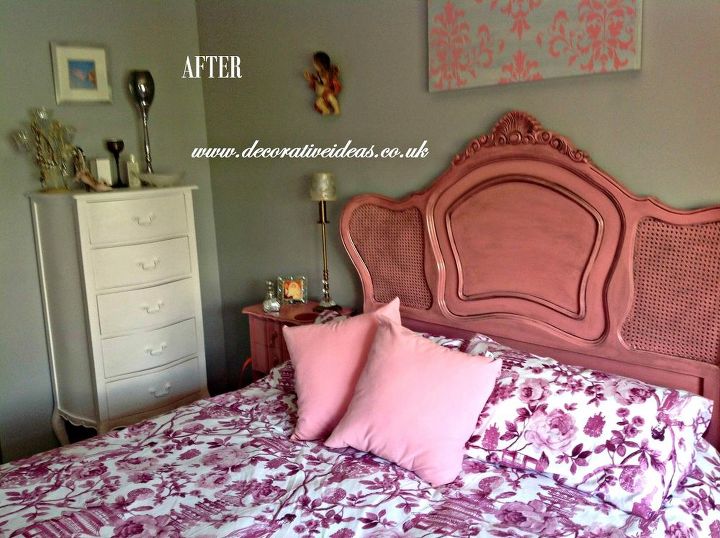
I also painted all the furniture to go in this room, which I shall leave for another post or two
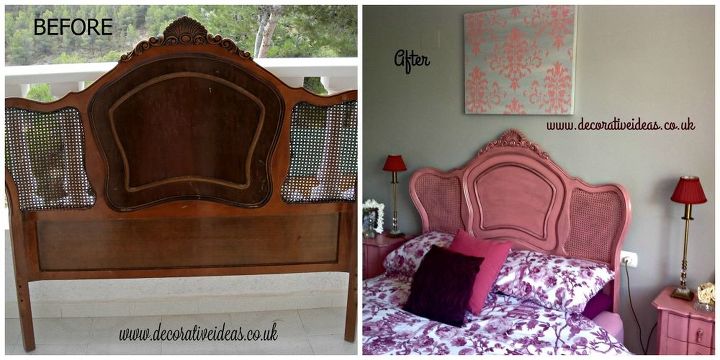
I thought you might like to see a 'before' and 'after' side by side.
Please note the only item I had to purchase for this project was the Rustoleum paint, which in euros, was 17.27. I'm always creating something so I already have a 'stash' of different products.
Comments
Join the conversation
2 of 3 comments
-
Gorgeous!! I love it!
-
Beautiful job and what a score!!! Huzzah!


Frequently asked questions
Have a question about this project?