


Flowing Flower Coffee Cup

3 Materials
$6
2 Days
Medium
Spring's here! Or right around the corner! I needed to find some colorful decor to make that screamed SPRING! I think I did!
I saw these on Pinterest and had most of the supplies. I really didn't find a tutorial, but they look self explanatory, and everyone said they're so easy. So here are the tips I DIDN'T find, and how I made mine.
The FIRST thing to do is throw that 'easy' out the window. It's a lie and a trap. Not easy. And not fun for a while either! But once you get to a certain point, it is fun.
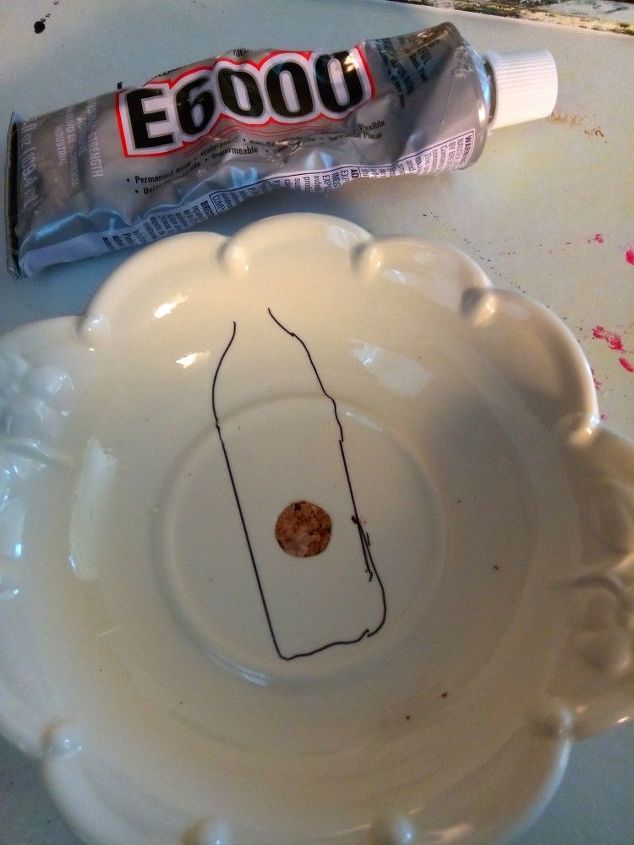
After deciding on a cup and saucer, I marked around my fork so I would know where to glue. My little dish had a hole in it, so I glued a cork in it.
Glue. Do NOT use hot glue on this part. Do not use craft or tacky glue on this part. I used E6000. Any industrial or epoxy type glue. Put a big glob of glue in the outline and press your bent fork tines. You can see the two places I bent my fork.
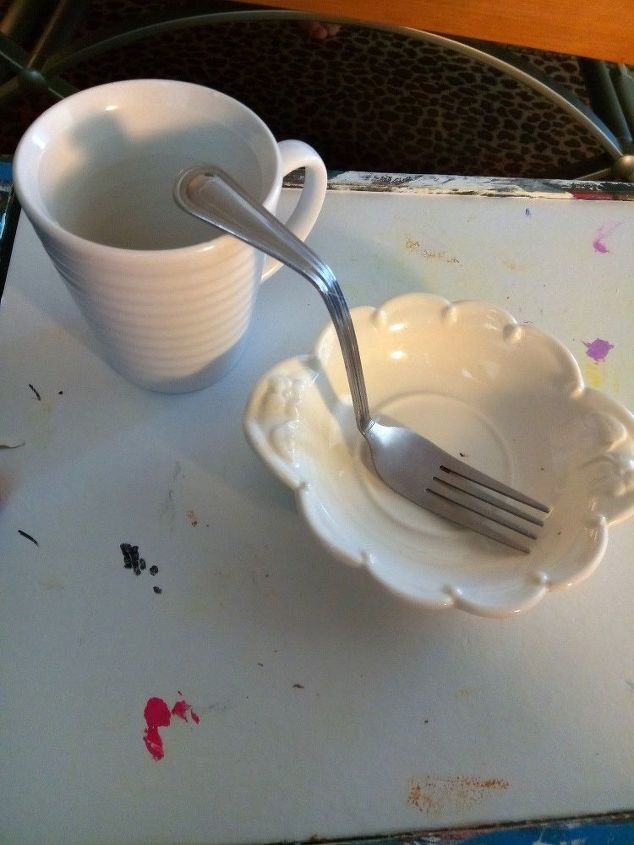
Lean it up on something and be patient. Every now and again press down on the tines. I put a quarter on mine to make pressing easier. And it was.
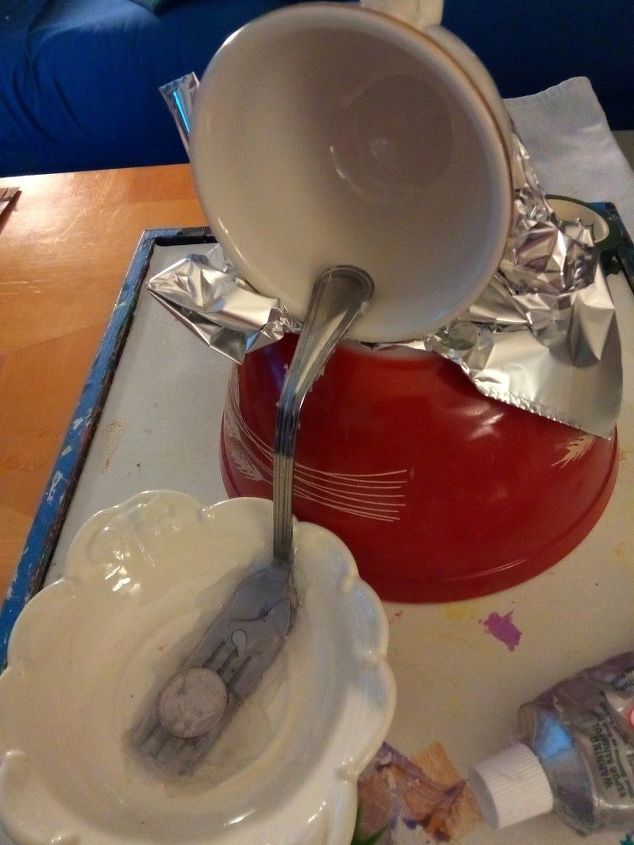
After it dries, do the same with the cup. I let the plate dry overnight, and the cup for about 6 hours. Foil, a bowl and painters tape helped keep it in place while it dried. Don't worry about how it looks, as it will be covered. You may need to reposition it a million times until it dries,and press it down, but it WILL dry and it will hold. On that note, yes, it held but the cup was too top heavy. I ended up gluing the plate to a second plate and that took care of that. Again, it doesn't matter what shows because it will be covered.
While you're waiting for it to dry, collect your flowers. I thought I had flowers for this, but mine were too large. And you need small ones. Hello dollar store! I bought 6 stems and had plenty left over. So get your flowers and start popping their little heads off. The bit of plastic on the bottom comes in handy so don't trim it, though you may want to a few here and there. Keep some of the leaves to use,too.

Now the fun starts! I began by gluing moss down (with craft glue) but after a bit, realized it wasn't necessary. You can see I still have my cup clipped. After it was dry to the touch, and not mushy (but not cured) I smothered it with hot glue. Really smothered it. That cup ain't moving!
You can start at the cup or the plate, it won't make any difference. Start gluing your flowers on with hot glue, throwing a leaf or two in.
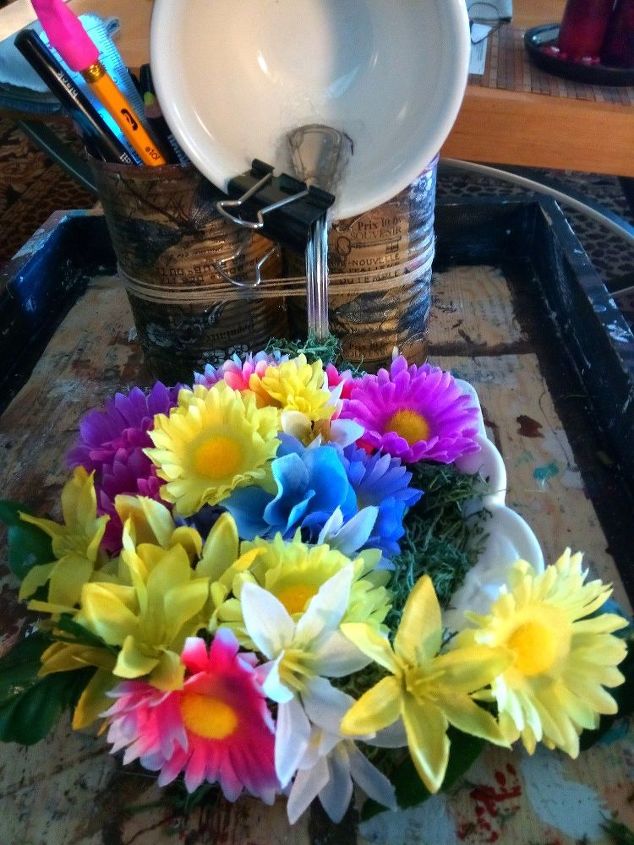
I wrapped the fork handle with floral tape and glued very small flowers on it. Make sure to get all sides, front and back.
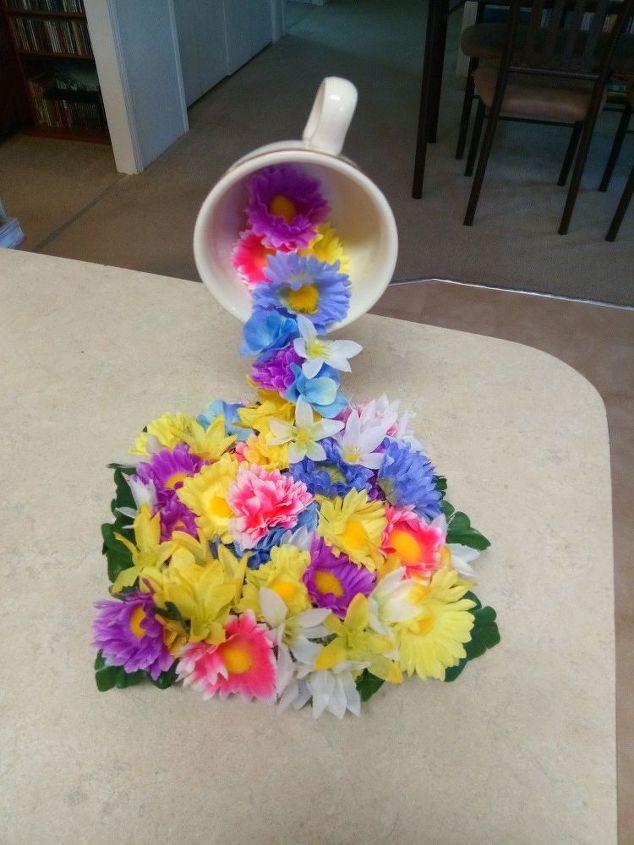
If that doesn't scream spring, I don't know what would!
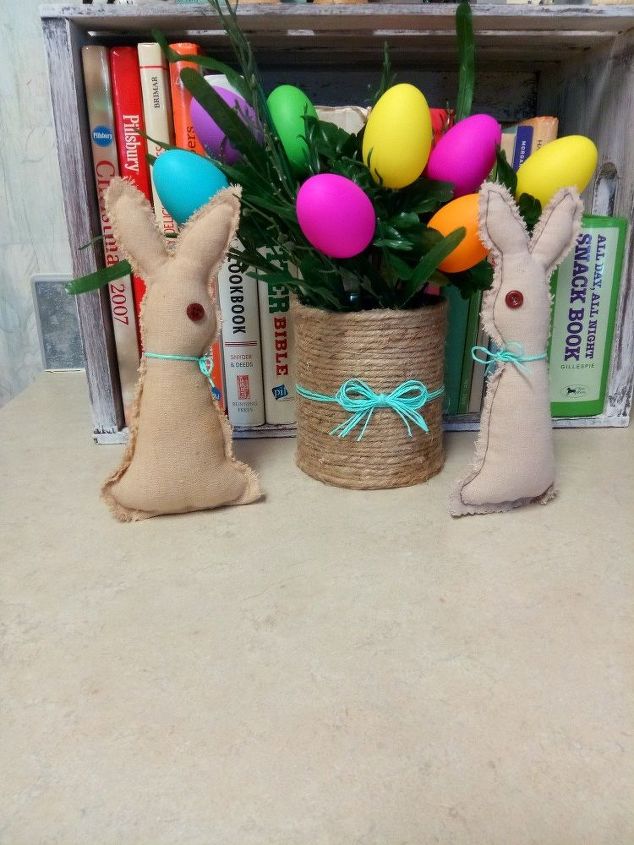
And don't throw away the stems!! I hot glued some eggs on mine, to go with my prim bunny rabbits I made the other day. Waste not, want not, right? Right!


Any price and availability information displayed on [relevant Amazon Site(s), as applicable] at the time of purchase will apply to the purchase of this product.
Hometalk may collect a small share of sales from the links on this page.More info
Comments
Join the conversation
3 of 28 comments
-
I will be trying this, I think its really a cute center piece
-
🦋🌷🦋I love this and I know what I'm going to do this for. My mom would love this for mother's day and it's so much better then sending her flowers or bb&b gift certificate (again) thank you for the great idea and instructions 🦋🌷🦋😁


Frequently asked questions
Have a question about this project?
Why not use a flattened out spoon instead of a fork for a larger gluing area in the saucer?
Also position the fork/spoon further toward the far outside of the saucer away from the direction of the cup for better balance of the cup hanging in the air? (Better leverage)