


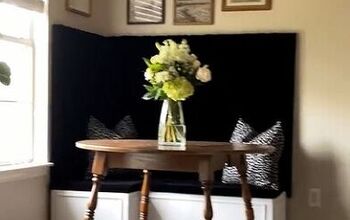
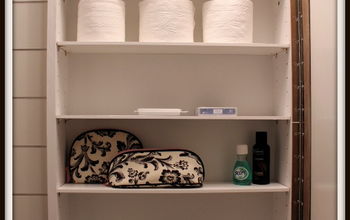
How to Install Open Shelves in a Nook
3 Materials
$25
2 Hours
Easy
Have a nook in your home that would look great with some open shelves? Maybe a spot next to your fireplace, or even inside a closet.
With these easy DIY steps, you can install your own basic open shelves.
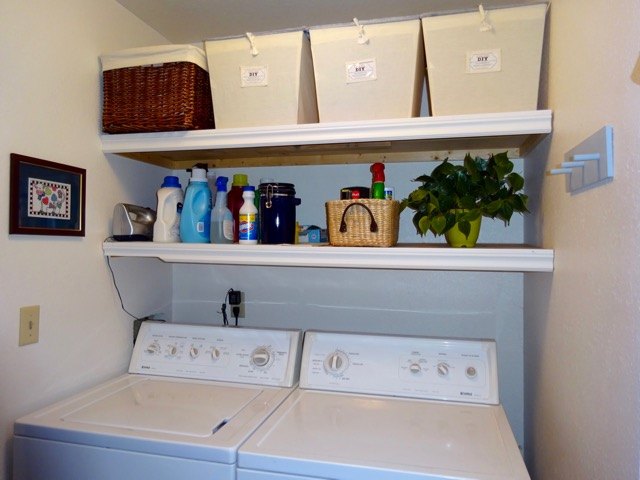
I used these steps to install shelves in my laundry room, replacing some really ugly metal shelf brackets. Be sure to check out my original post for more details, and a full materials list: How to Build Basic Wooden Shelves
Install open shelves in any nook in your home. Here's how:
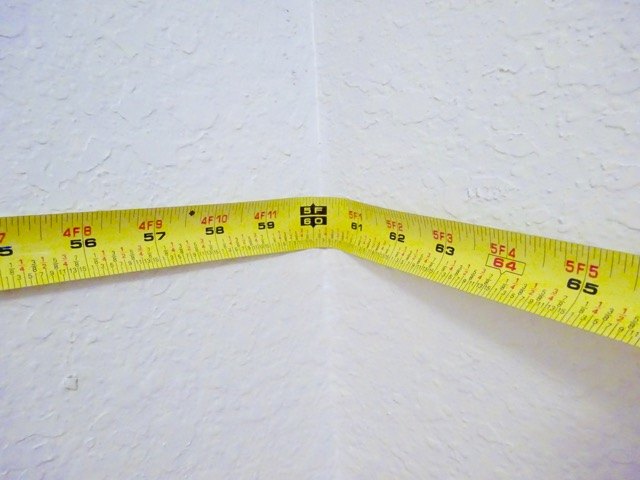
1. Measure your space
Know the length of board you'll need for your shelves. When you go to the hardware store, you can get them to make the cuts for you.
I used two 1" x 10" boards for each shelf.
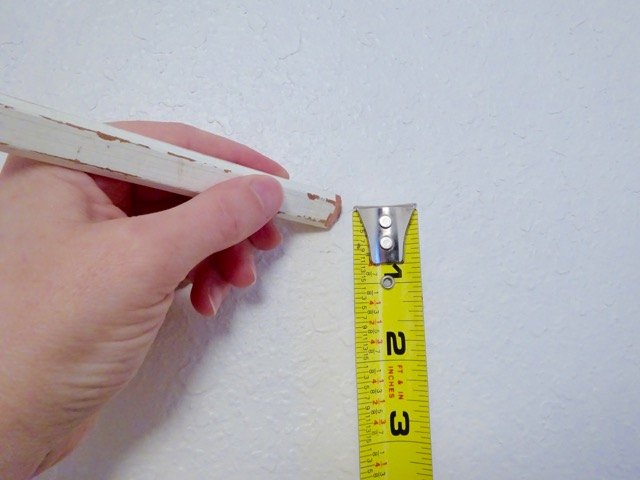
2. Mark the height of the shelves
Decide where you want the shelf to be and then make a reference mark on the wall.
Be sure to check the clearance for anything that will go on or under your shelves.
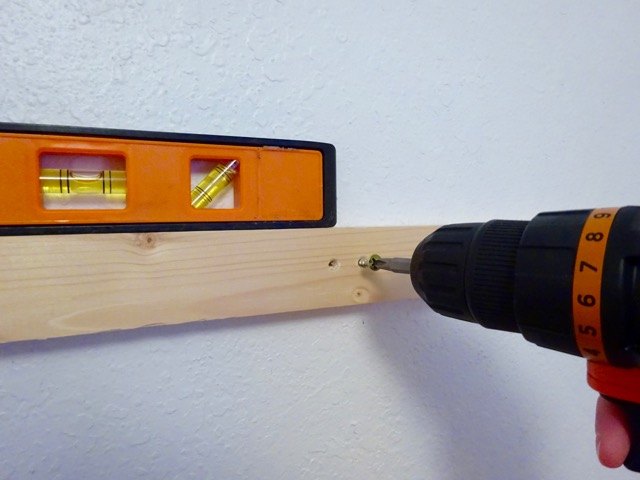
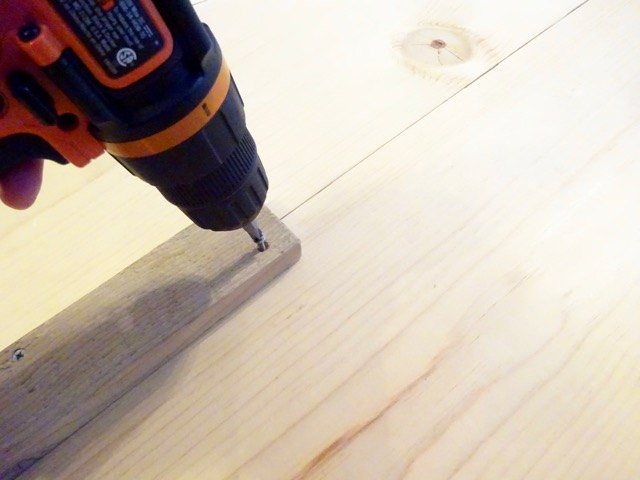
3. Install the supports
Install pieces of furring strip aligned with your reference mark. The shelf boards will rest on these supports.
Use a level to make sure everything is straight, and try to screw the boards into the studs.
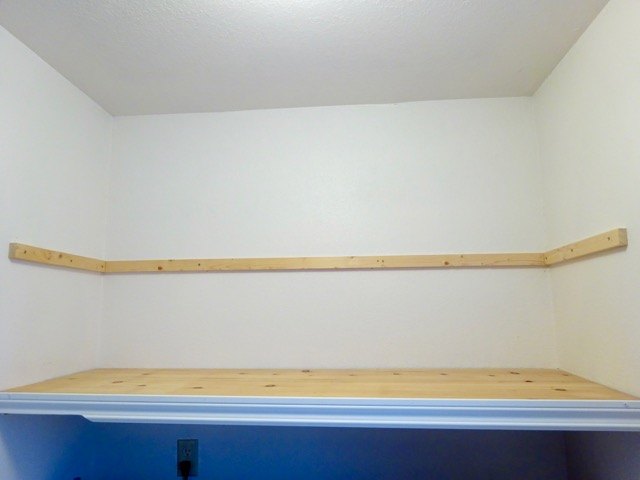
You will need to install supports on all three walls of your nook.
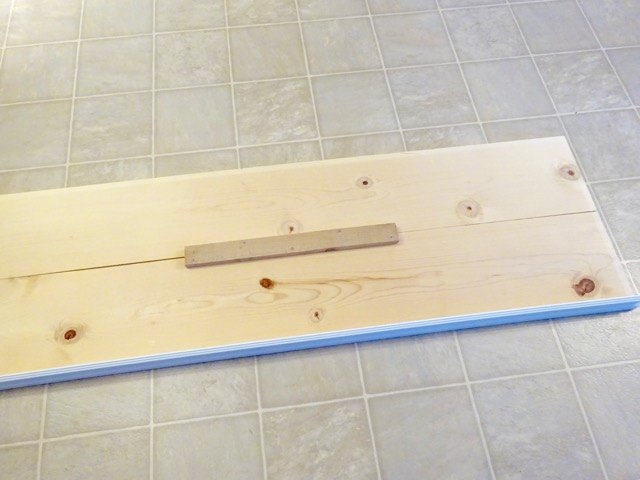
4. Tie the shelf boards together
If you're using two boards, like I did, to create a deep shelf, you'll want to tie them together.
Use another piece of furring strip on the bottom, and screw it into both shelf boards.
Attach the furring strip across the joint where your two shelf boards meet.
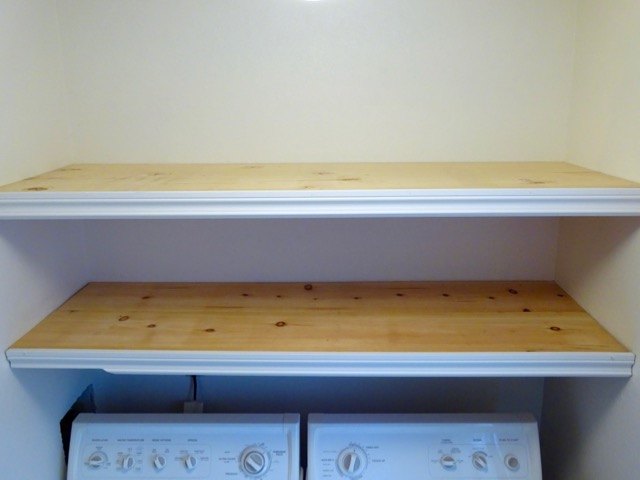
5. Install the shelves, and add trim
Depending on how tight your fit, you may have to tip the shelf boards at an angle to get them into place. They just set on top of the supports you installed.
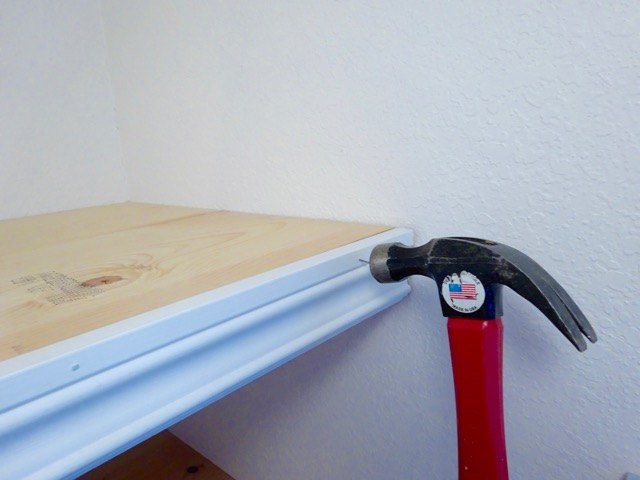
For a finishing touch, you can tack a strip of decorative molding to the front of the shelf. You can cut this to size at the hardware store, too.
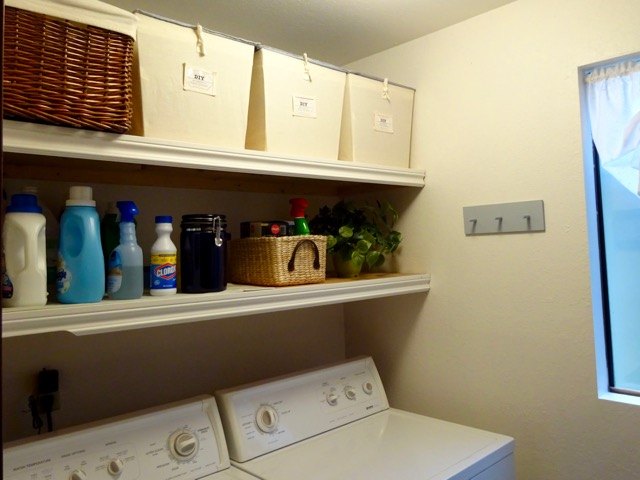
Without those brackets in the way, there is so much more room for storage. Not to mention it looks much better.
Let me know how your shelves turn out!
Resources for this project:


Any price and availability information displayed on [relevant Amazon Site(s), as applicable] at the time of purchase will apply to the purchase of this product.
Hometalk may collect a small share of sales from the links on this page.More info

Want more details about this and other DIY projects? Check out my blog post!
Comments
Join the conversation
2 of 76 comments
-
Very well executed....they look great. And, I really appreciate your clear step by step instructions. Thanks for sharing.
-
for wider shelves you can use plywood since most times you will not see it and if you know the the size have them cut it in the store for you ,they can do a straighter cut


Frequently asked questions
Have a question about this project?
Can and what can be used for concrete walls
I have something like this in my bathroom (over toilet area) where I would love to put these shelves - only problem is the one wall is where my showerhead and plumbing is. Any thoughts on how to avoid hitting the plumbing?
How can you reach the stuff on the top shelf?