


Create A Carrot Garland In No Time

by
Shoppe No. 5
2 Materials
$3
2 Hours
Easy
My friend was telling me about her granddaughter who is 7. She wanted to draw a carrot and wanted Grandma to draw one too. Grandma can’t draw, not even a carrot but Olivia can. Her drawing inspired me to create this little fabric garland from sample fabric my neighbor gave me.
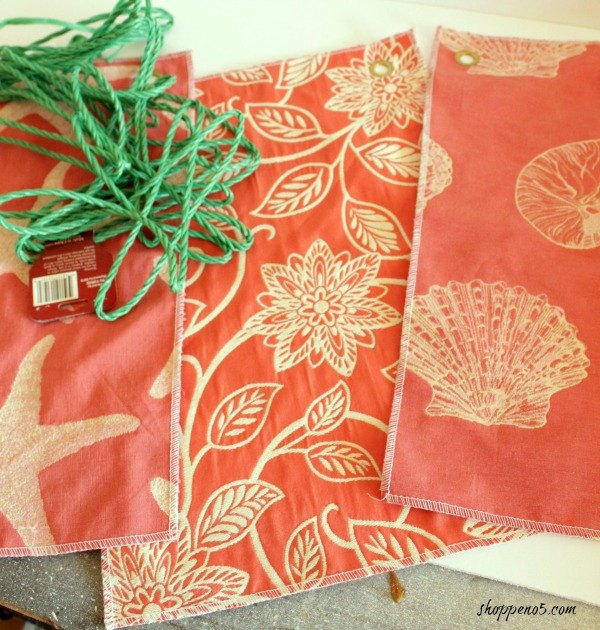
I quickly sketched out a carrot to use as a pattern. Then I decided on some material. I ended up using two different patterns but the same color orange.
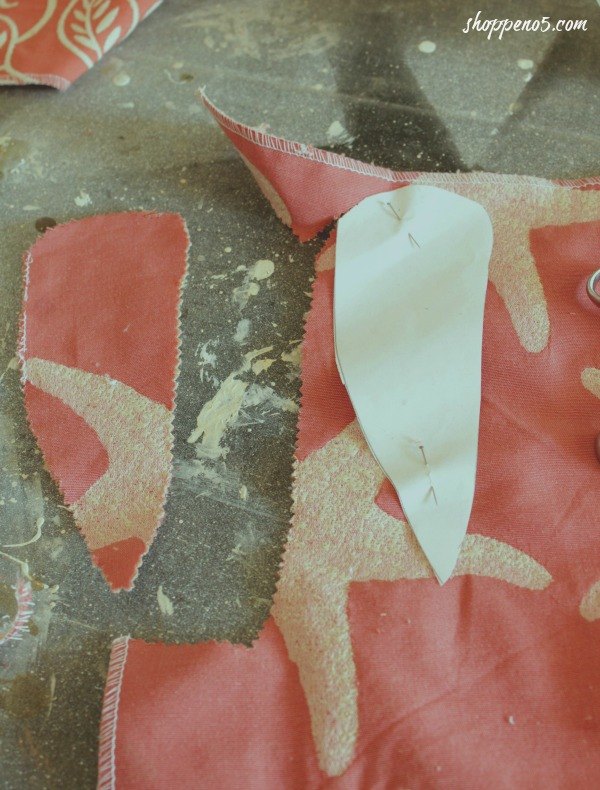
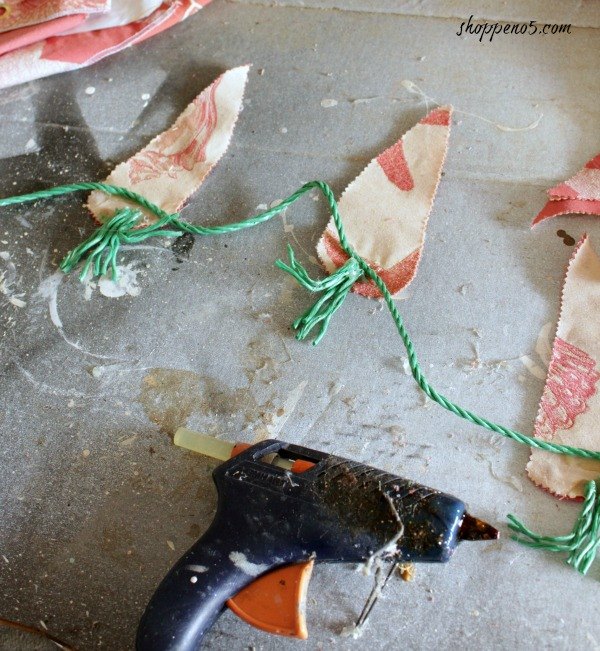
Use pinking shears and cut out 5 carrots from one design and 4 from the other. If you don’t have pinking shears you can use regular scissors. To prevent raveling you can sew around the edge or use Fray Check. Of course, you can always cut out more if you need it longer.
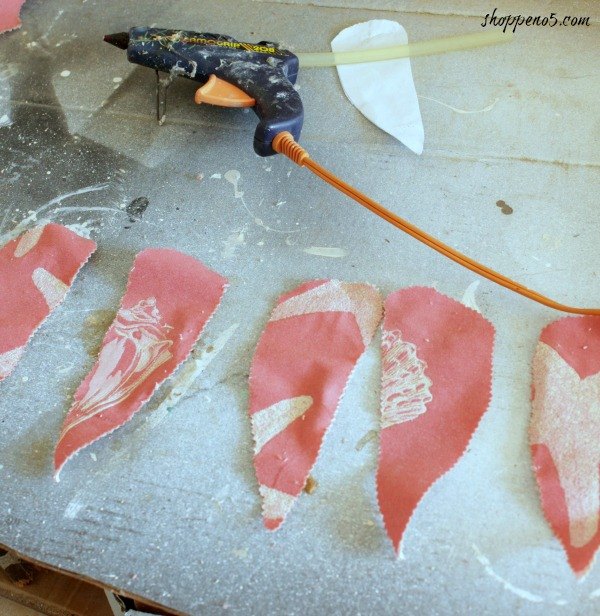
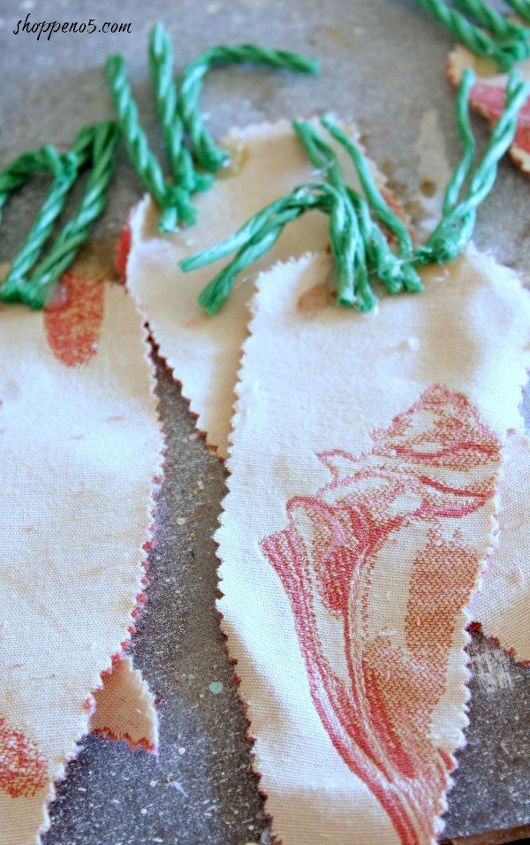
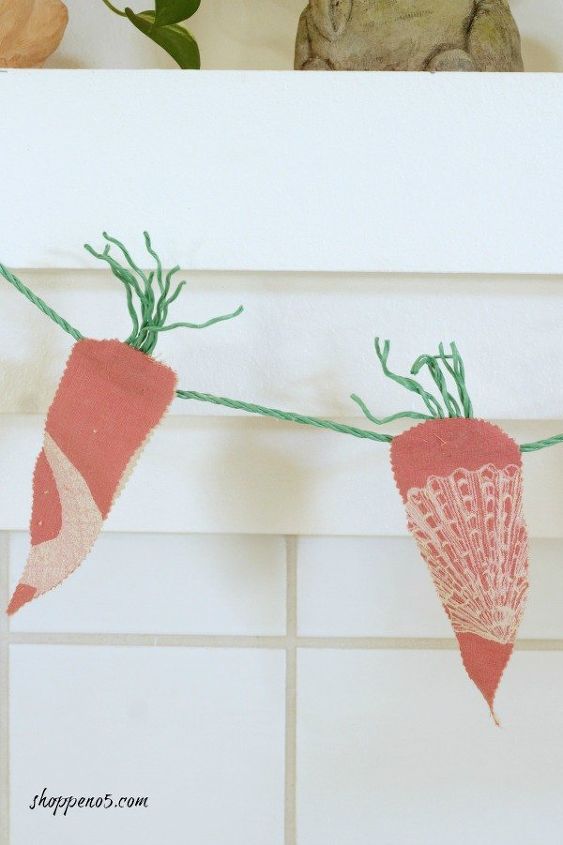
I had some green rope left over from another project. It is perfect for the leaves on top of the carrot. I cut three pieces per carrot in random sizes. Gather the three pieces together and hot glue to the back at the top. After they are glued down, unravel the rope.
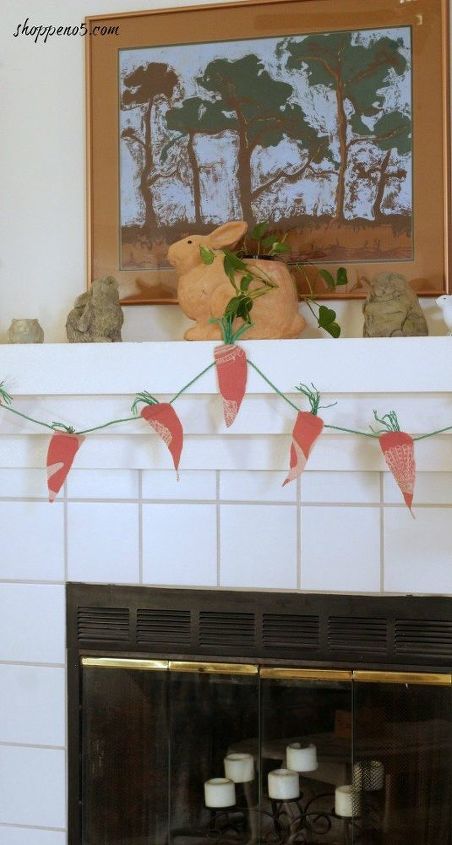
Then cut out about seven feet of cord. I glued a carrot from the group of 5 to the middle. Then on either side glue a carrot from the other design. Alternate until complete. I eyeballed the space between the carrots. And I will confess my mistake, I didn’t glue the carrots in the right order so don’t worry if you glue them randomly.
This little garland didn’t take any time to make. You can drape it on the mantel like I did or a shelf or even over a window. Have fun with it!
Want more details about this and other DIY projects? Check out my blog post!


Frequently asked questions
Have a question about this project?