


BUILD YOUR OWN FAIRY LIGHT TREE

by
NerdyKat
6 Materials
$3
15 Hours
Easy
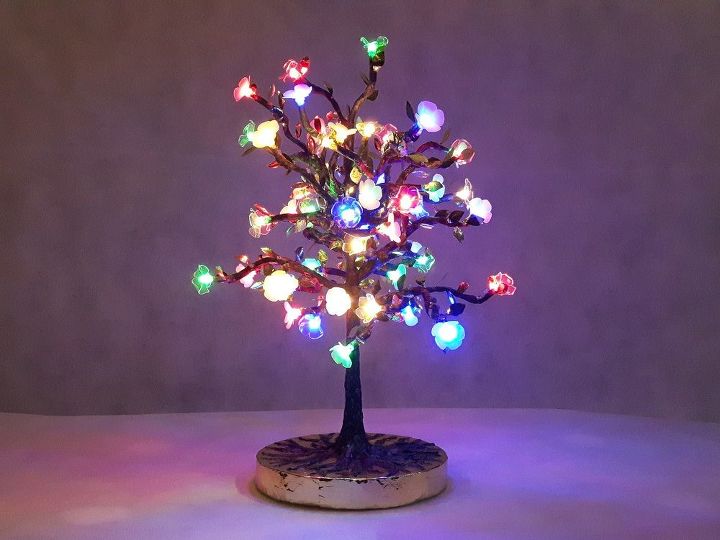
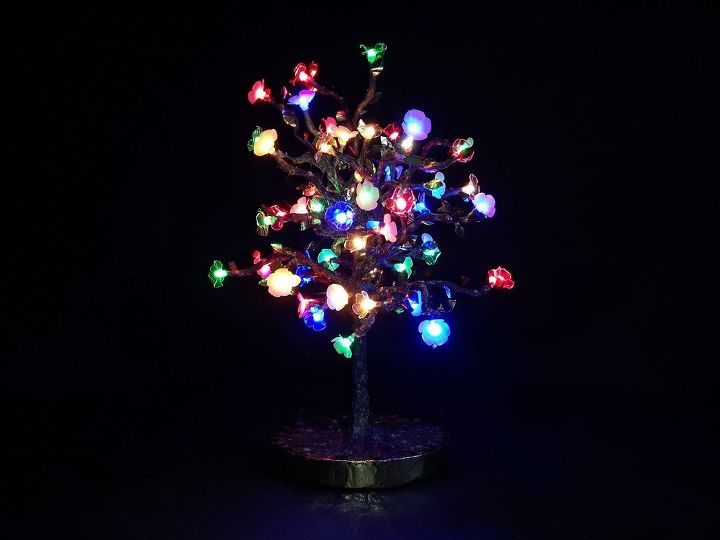
Recently I wondered how hard/easy would it be to make one of those LED trees/branches that seem to be popping up everywhere. So I ordered some fairy lights and gave it a go. It took me about 15 hours to complete (plus some drying time) and I'm really pleased with how it turned out. If you would like to make your own here is how I did it ;)
{
"id": "4726671",
"alt": "",
"title": "",
"video_link": "https://www.youtube.com/embed/Fbz4PnjfaZg",
"youtube_video_id": "Fbz4PnjfaZg"
}
{
"width": 634,
"height": 357,
"showRelated": true
}
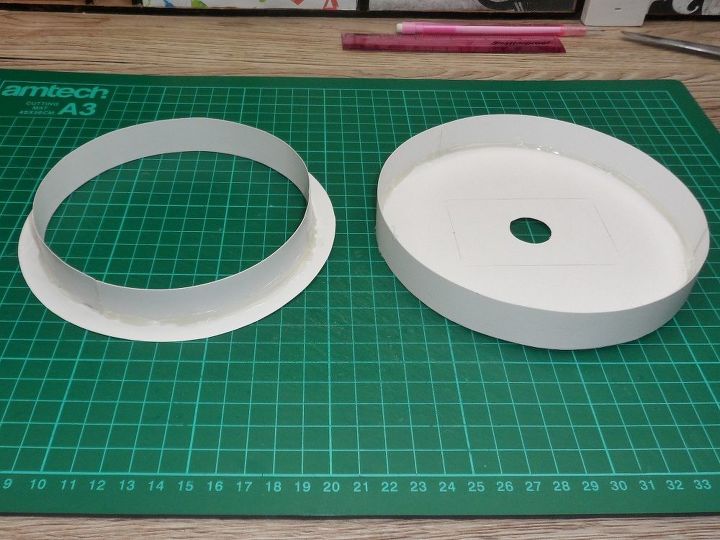
To start draw 2 x 15cm circles on a piece of A4 paper. Draw a smaller circle (13cm) inside one of them and another small one (2cm) inside the second circle. Measure the depth of the battery pack and cut out a few strips accordingly.
Glue the strips around the inside edge of the first circle and around the outside edge of the second circle. Join the two circles together with hot glue.
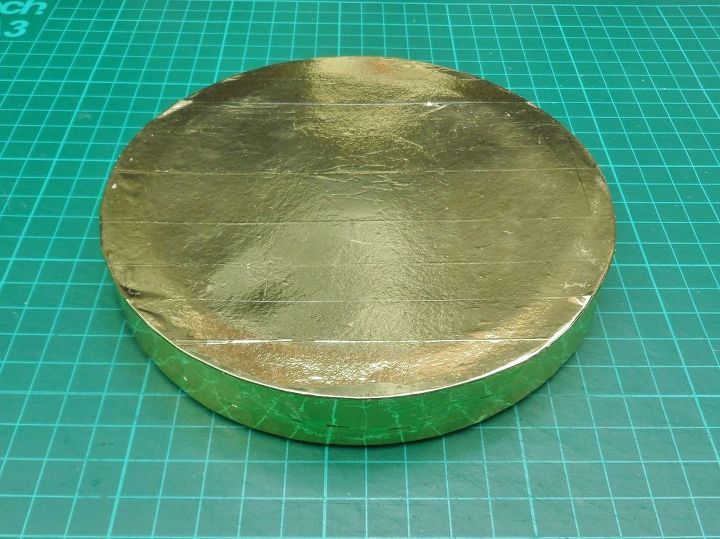
Attach the parcel tie on the top and sides of the base with a glue stick. Cut a strip from the foil long enough to go around the sides of the base and stick it around with double sided tape. Cut off unnecessary foil, fold the foil inwards and secure with hot glue on the under side of the base.
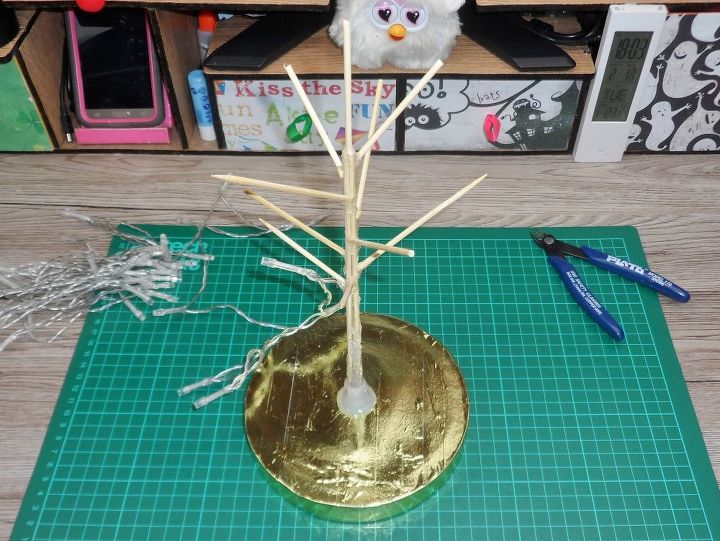
Pull the fairy lights through the base hole and attach the battery pack with hot glue. Take three skewers and glue them into the middle of the base.
Cut 4 skewers into 3 pieces each, so that you end up with 12 pieces and glue 10 of them to the body of the tree. These will serve as branches.
I decided to divide the 50 LEDs between 10 branches, but you can have more or less branches.
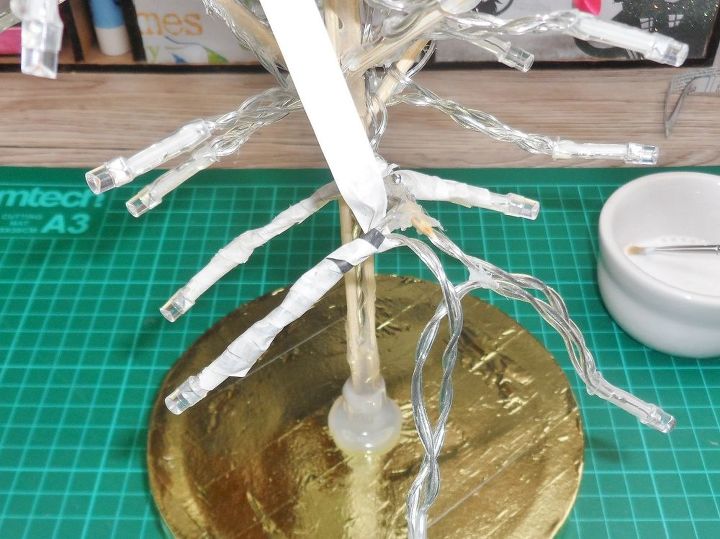
Cut the newspaper into 1cm strips and pour some universal glue into a small bowl. Apply the glue onto the newspaper end with a brush and stick it just bellow the LED. Apply more glue onto the strip and wrap the strip around the wire.
Cover all of the visible wires and skewers with the newspaper strips.
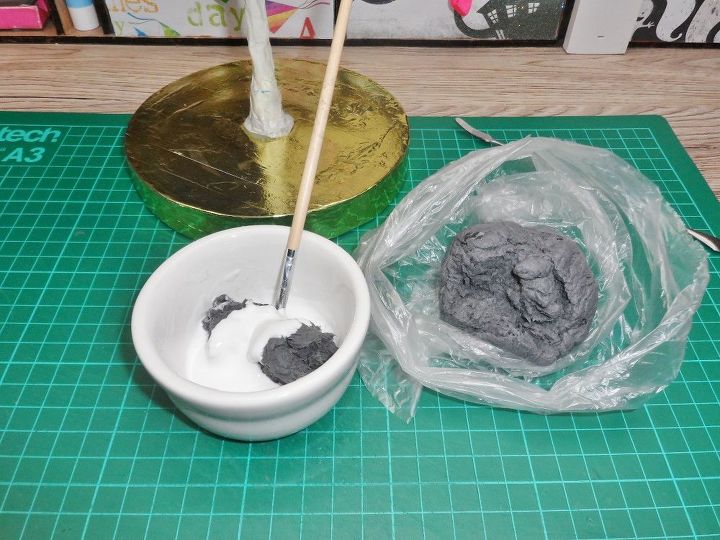
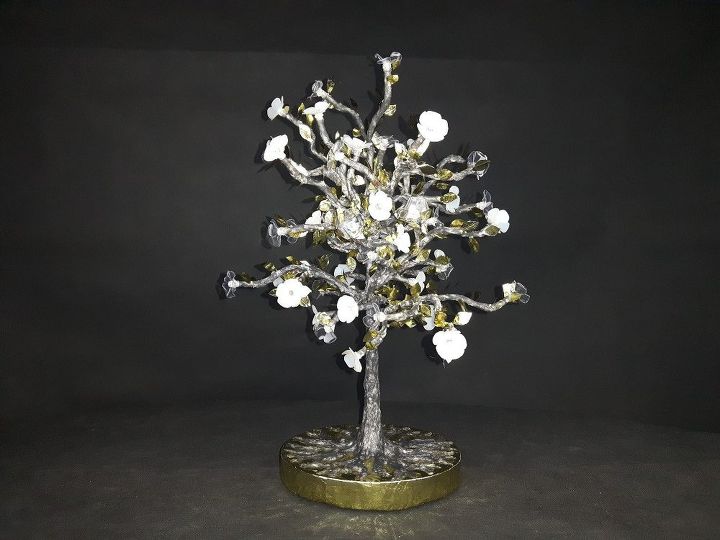
Cut the newspaper into a bowl, cover with water and blend. Pour the mixture into a kitchen towel and squeeze out the excess water. Put a bit of the mixture into a small bowl and mix with universal glue. Paint the branches with the mixture. This will make the tree more durable and it will look darker once it dries.
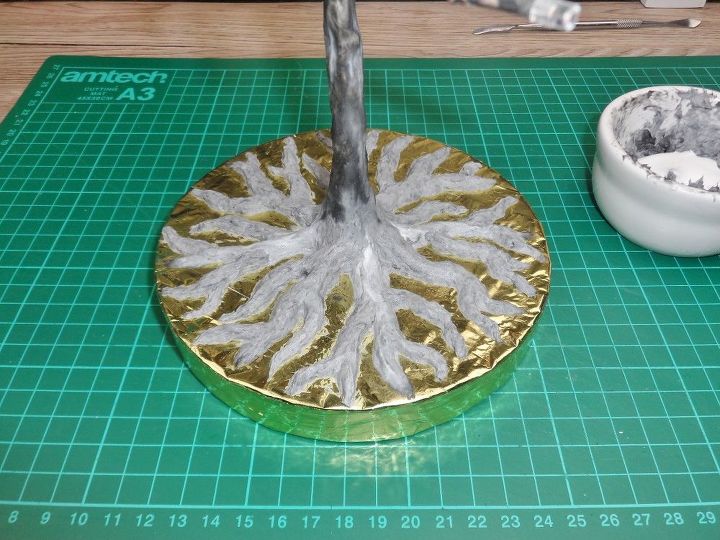
With the newspaper mixture and modeling tool form the roots. Once dried apply more mixture since the roots will shrink as they dry. To smooth out the surface brush the roots with glue.
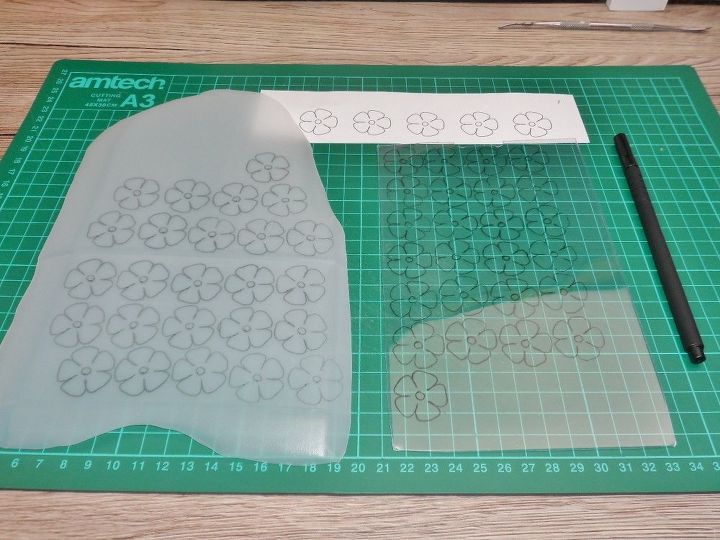
I couldn't decide if I wanted the flowers to be transparent of just diffused so I went with both. For diffused flowers I used a cutout of milk bottle and for the transparent I used clamshell packaging.
Printout the flower shape and trace onto the milk bottle 25 times and the same onto the clamshell packaging with a marker. Cut them all out and mark the centre with a punch tool. Clean the flowers with alcohol.
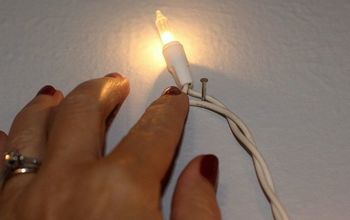
Using small pointy scissors make a hole in each flower. Apply hot glue onto an LED, slide on the flower and turn 360 degrees so that the glue is spread around the LED equally. Repeat for the rest of the fairy lights. Heat each flower with a lighter to make the edges a little softer and give it a bit of shape.
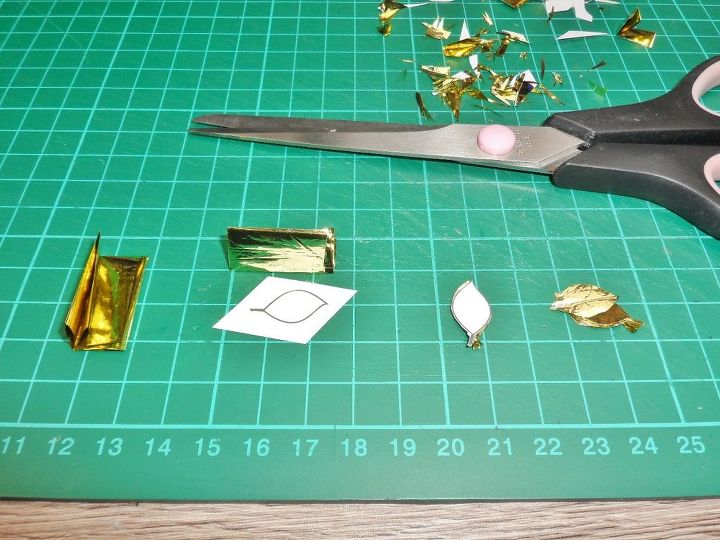
Print out the the leaf shape and fold the golden foil. Place the leaf printout over the foil and cut the leafs out. This might take a bit of a practice, since the foil will move and the leafs might have a bit of a funny shape.
Using tweezers, glue the leafs to the tree with the hot glue. And that's it, now you can enjoy your own fairy light tree :D
For more photos go to: https://www.instructables.com/id/Build-Your-Own-Fairy-Light-Tree/
Comments
Join the conversation
2 comments
-
Awesome!! I've always wanted to make something like this too! Great post!


Frequently asked questions
Have a question about this project?
Just wanted to tell you what a masterpiece you've created. Truly a thing of beauty! Thank you for the tutorial and pics. FAB!!!