


Make up Organization - Shabby Chic Crate

by
Stacy Davis
2 Materials
$5
15 Minutes
Easy
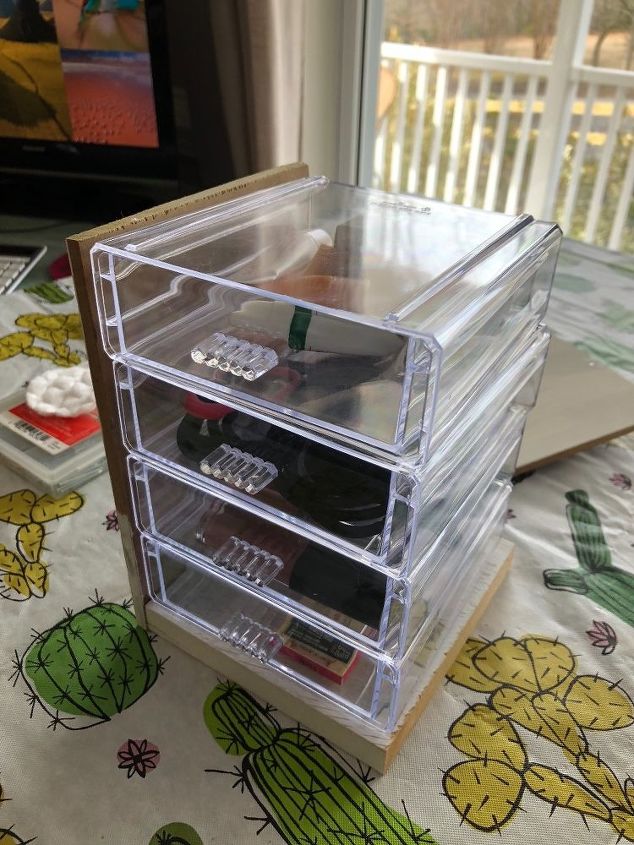
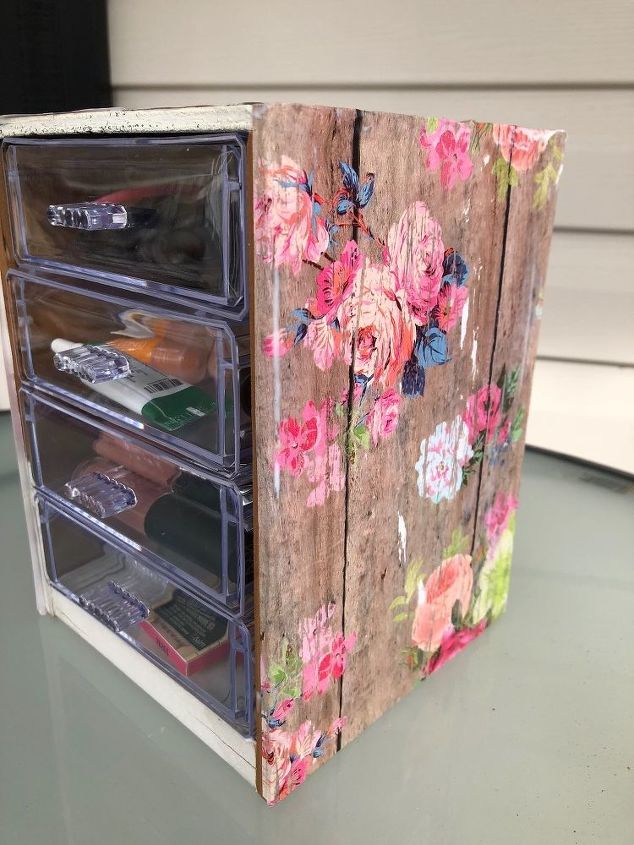
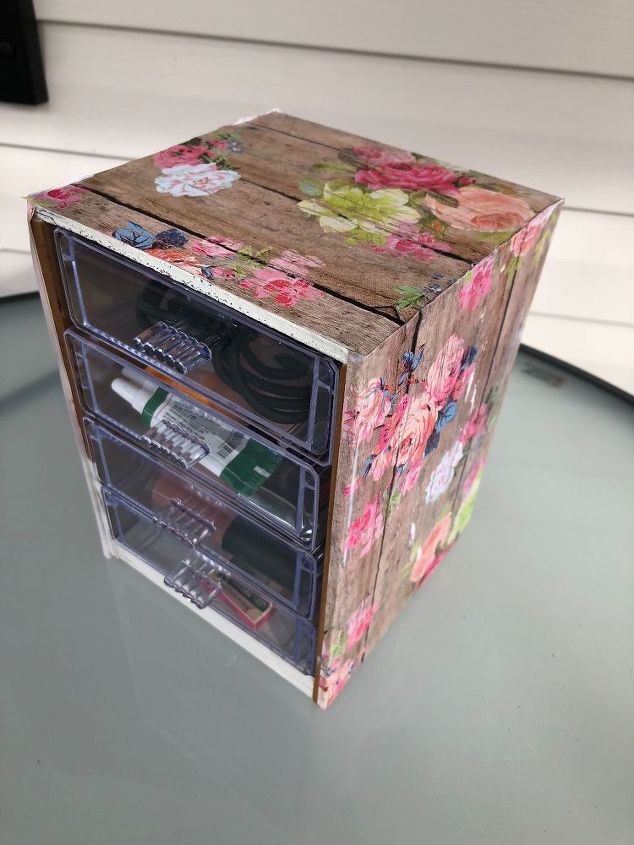
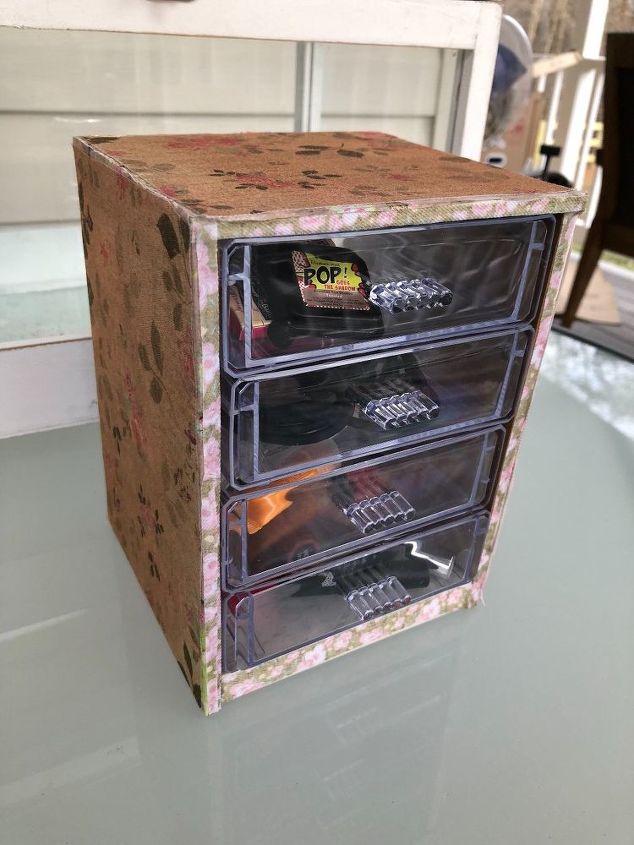
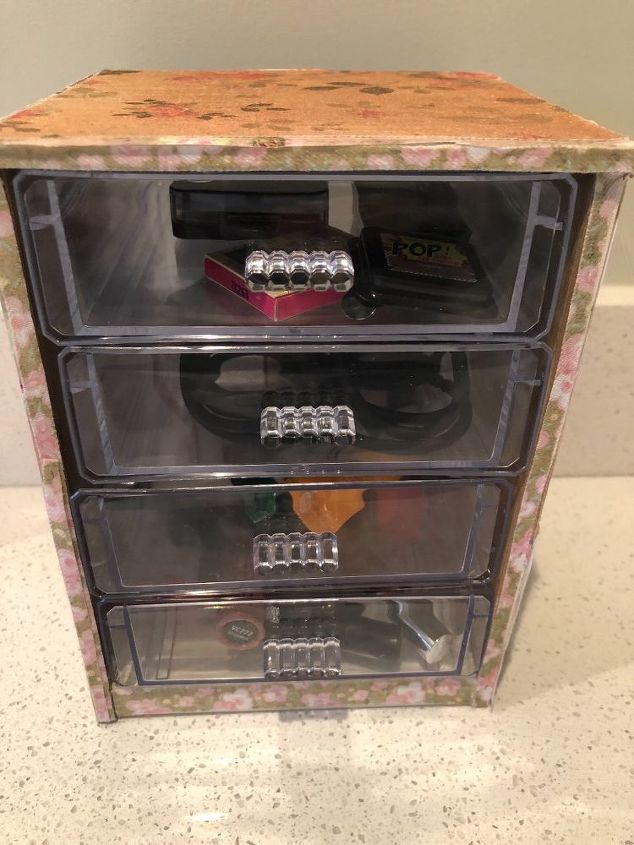
This post is about one of my favorite products, stackable storage drawers. I use them for organizing my makeup. Getting ready seems more difficult when the makeup is scattered all over and completely unorganized. I ended up finding these clear acrylic drawers at The Dollar Tree. (Only the larger Dollar Tree carry these but you can also get them at Amazon.) But have you ever had something you loved but it didn't seem to work well as intended? That's these drawers. Down on a single level, they work great but if you stack them... not so much. So, I used scrap wood to make these stackable storage drawers more sturdy. It is kind of a "mini-crate" and if you know me at all, I LOVE CRATES!

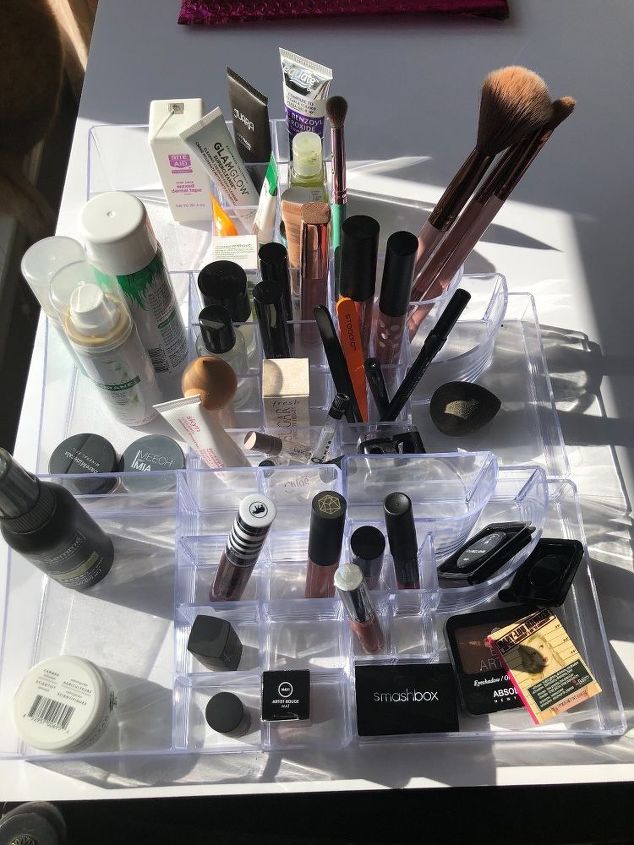
This hot mess is how I used to store my makeup. There was lip stuff mixed with eye shadows and what not. I couldn’t find anything and I would forget what the different tubes were for and I would even just forget I had awesome eye creams.
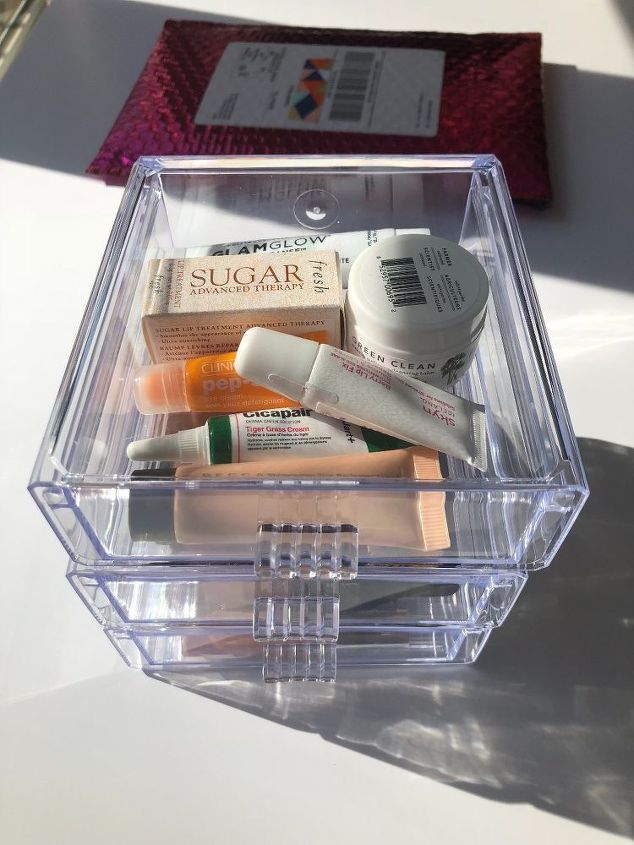
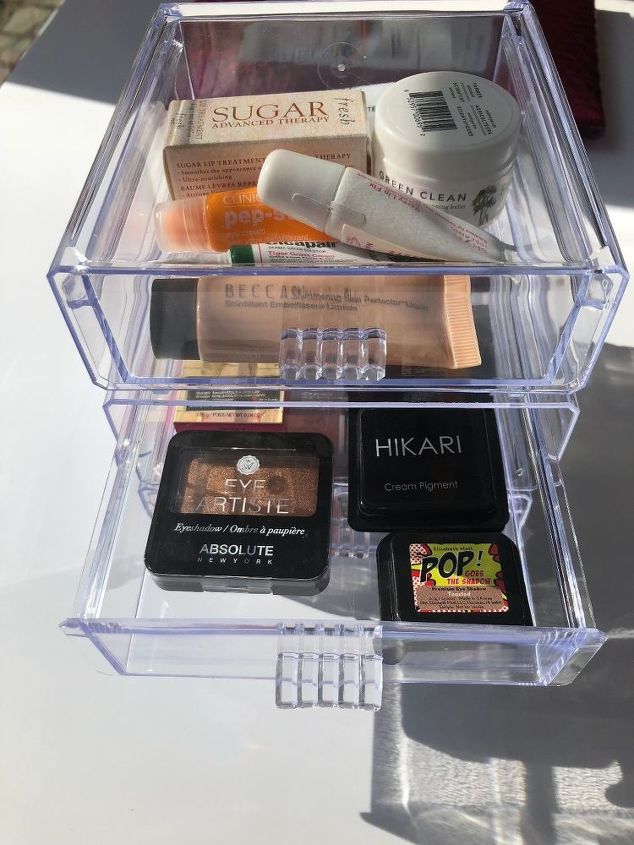
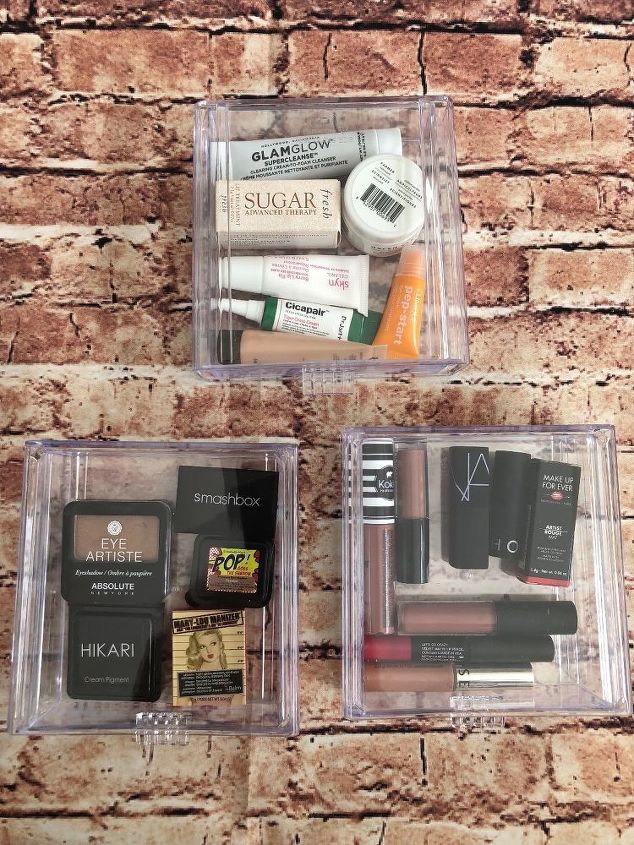
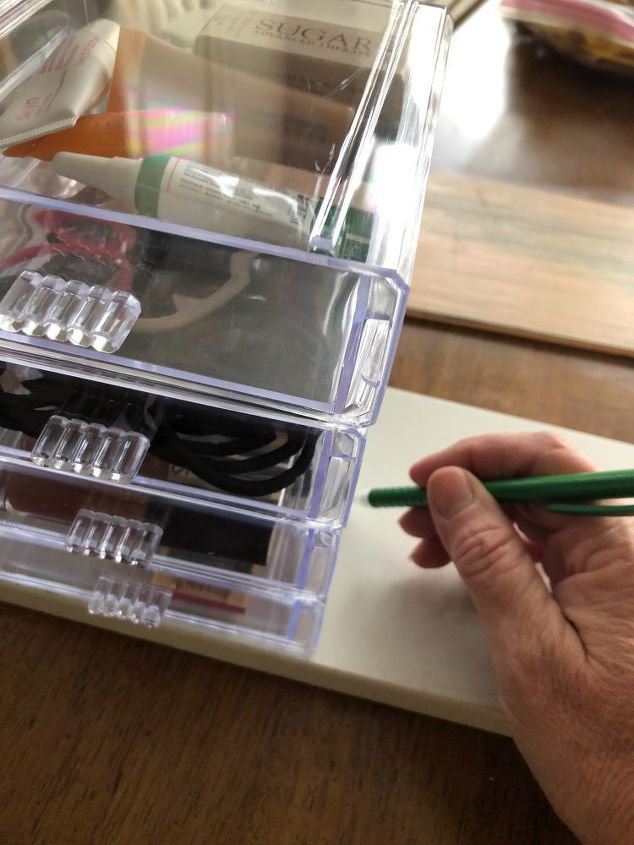
Then I happened on these clear drawer organizers at The Dollar Tree. I love them. I have face cleaners, eye creams and lip treatments together. Ha! I didn’t even know I had lip treatments til I organized this mess. I have eye shadows in another and lip gloss and lip sticks in a third. If you are short on space, they stack too. I thought about using either Velcro or glue to secure them together to help with opening the drawers.
So, I decided to problem solve...
If I had a bigger countertop, I would just keep them flat like this but I don't have room to spare.
So, here is my stackable storage hack... I used scrap wood to build a crate to hold the drawers nice and snug. The bottom piece is thicker than the sides and top for stability. This scrap is the same dimension as the drawer and I am just making a mark to shorten the length.
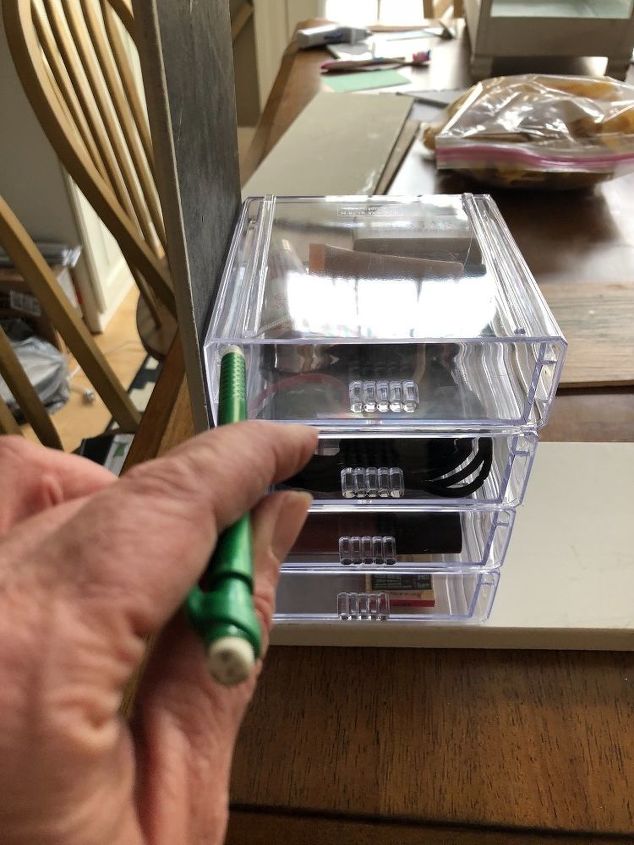
Next, I placed another board along the side and made a mark for how tall I wanted my unit. I used a miter box saw to cut the boards to the correct lengths. I cut two pieces identical for the sides.
I put the last piece across the top and marked it with a pencil.
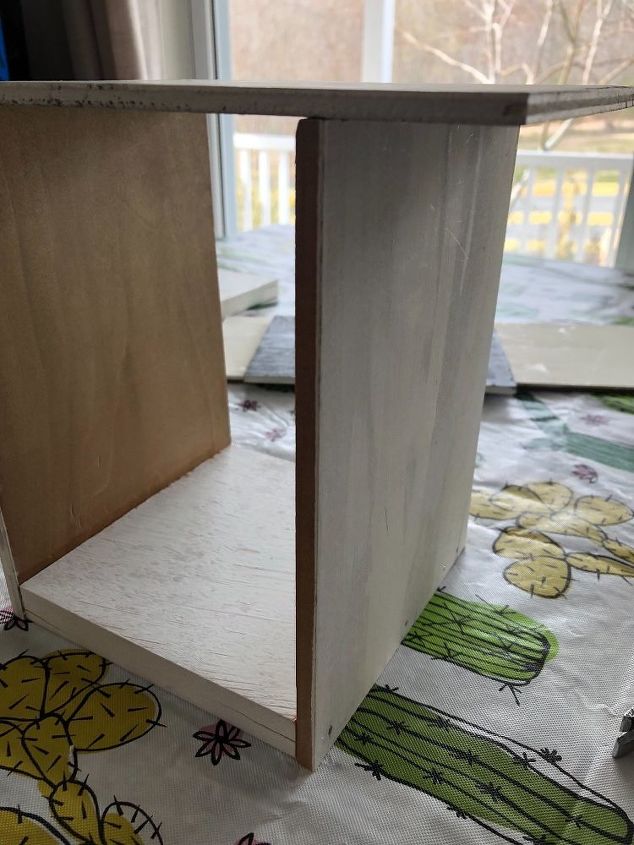
I used wood glue, brads and a hammer to attach the sides to the bottom and top to the sides.
First, I tried this.
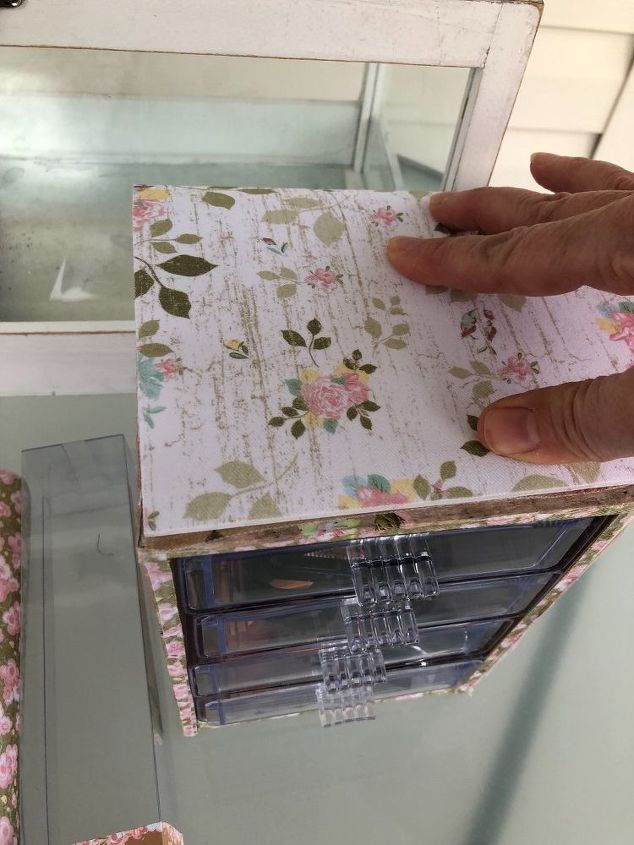
This is gift wrap Mod Podged onto the crate. I wasn’t loving it, so...
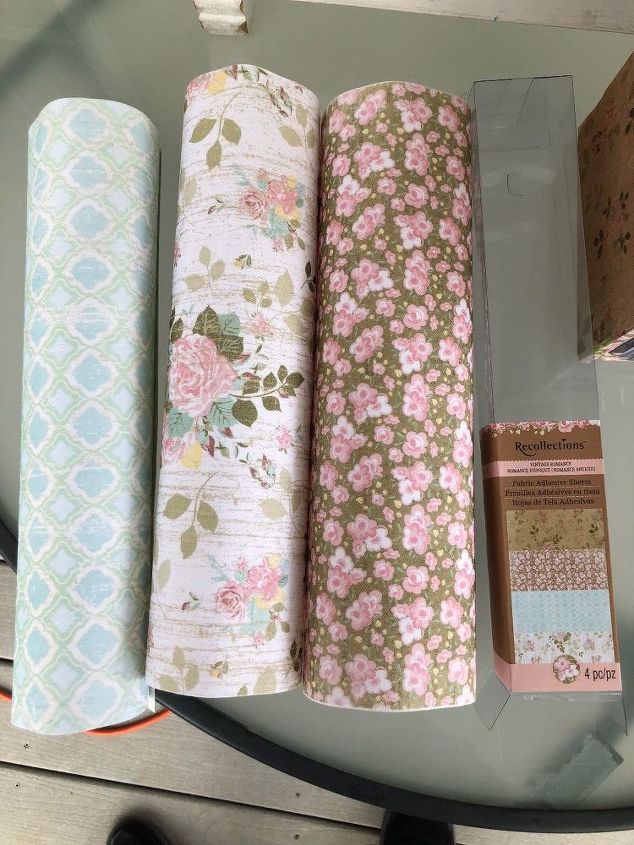
I had fabric adhesive sheets for another project. I picked my least favorite of the four and put it on the crate because I wanted my favorites for the other project.
This is my favorite, should I use it or save it? I think this would look lovely but then I just wasted the piece of fabric that I put on... hmmm... 
This is the one I used. I think it is too dull and rather blah. Should I cover it with the white one?
Resources for this project:


Any price and availability information displayed on [relevant Amazon Site(s), as applicable] at the time of purchase will apply to the purchase of this product.
Hometalk may collect a small share of sales from the links on this page.More info
Comments
Join the conversation
2 of 6 comments
-
Love the modpodge one.
-
I liked the MOD-PODGE best. Both are beautiful though. This is a great idea, I’m inspired.


Frequently asked questions
Have a question about this project?