


How To Create A DIY Bathtub Tray With Upcycled Wood Flooring
4 Materials
$20
4 Hours
Easy
I have to admit, this was a fun, little project. I have shared my big, soaking tub with my children for several years. I have to admit that I’ve gotten a bit sick of rubber duckies everywhere. Now that I’m remodeling the kid’s bathroom, I decided it was time to create an adult oasis. The first step was to make my bathtub a bit more user friendly. I needed a place to set a glass of wine and a good book so I could soak in luxury. On a whim, I made this little bathtub tray by upcycling wood flooring. I had a bunch of wood flooring leftover from our wood flooring project (future post) and from our stair remodel: https://www.countryesque.com/how-to-update-carpeted-stairs-into-a-wooden-staircase/
I love little projects like this that upcycle all the building materials that I have laying around. I love being economical (read: cheap) like that 
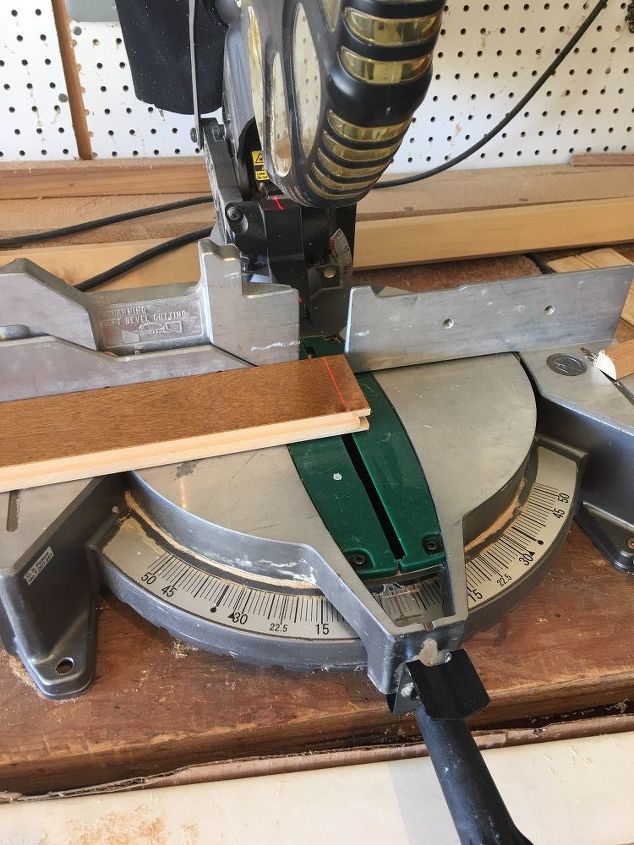
The first step was to cut three pieces of wood flooring to size. I measured the distance across my bathtub and cut the wood to fit with my miter saw.
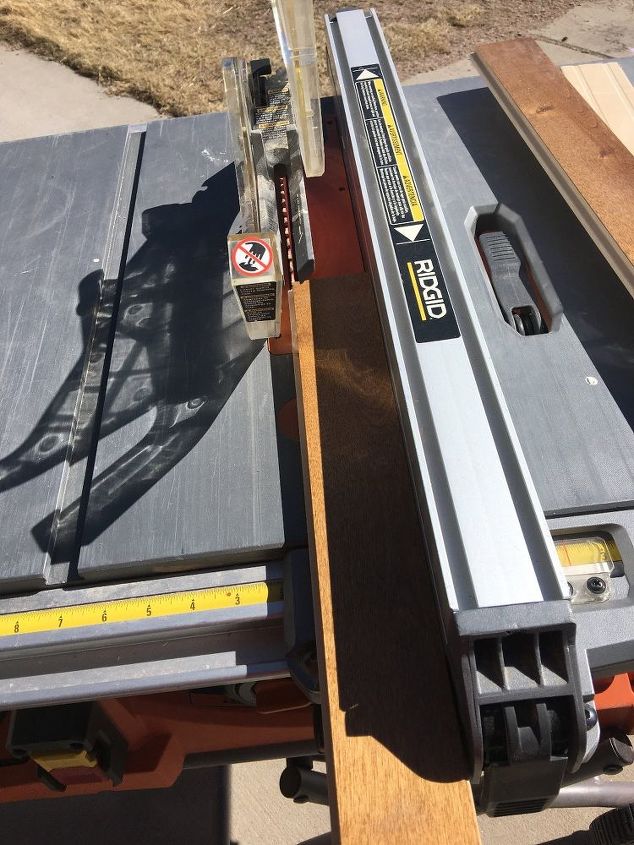
Next, I cut the tongue off of one of the wood flooring pieces, and the groove off another. I left the third as is so it could be the middle board.
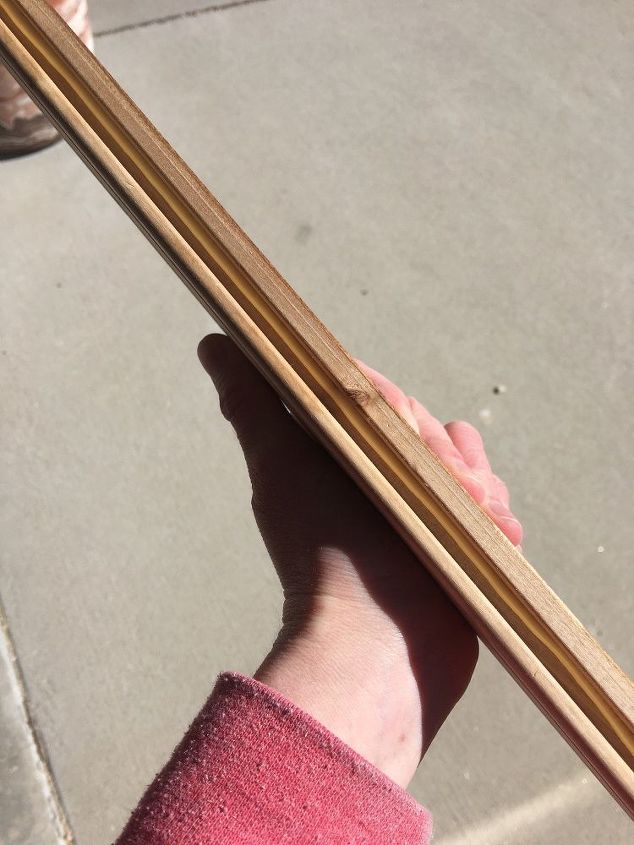
After that, I glued my boards together, running wood glue into the groove side of my wood flooring. The handles I would be using would ultimately hold my tray together, so wood glue was all I needed to hold the boards together.
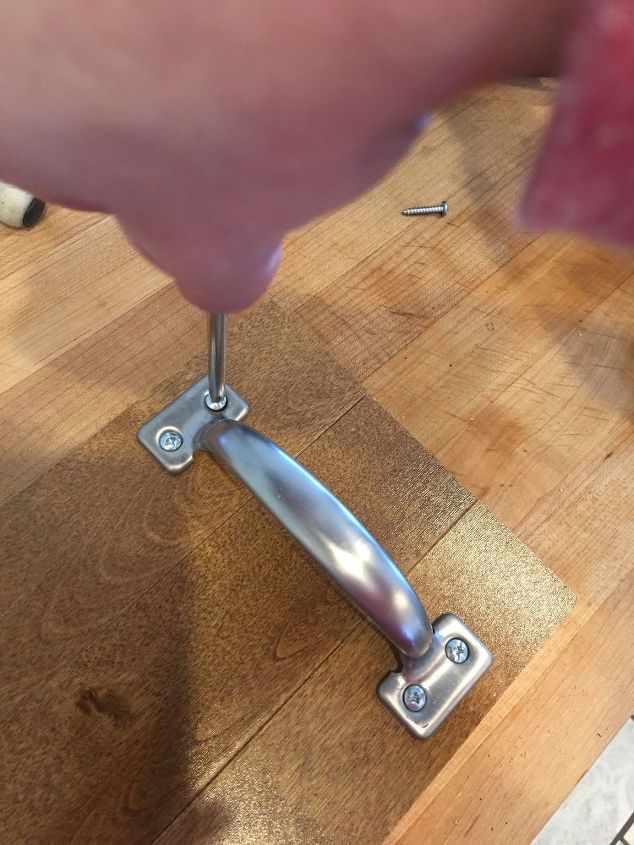
I found some metal handles that I had in the garage. I decided where I wanted the handles and marked them and drilled pilot holes slightly into the wood so it wouldn’t split. Then I attached the handles. Honestly, the most time-consuming part of this project was finding 8 matching screws in my container full of old screws to use to attach the handles.

Once my tray was assembled, I stained the bottom and sides to match the top and coated them with several coats of polyurethane to protect the tray from water damage. I don't plan on doing a lot of splashing in my tub, but I still wanted it to be protected from moisture.
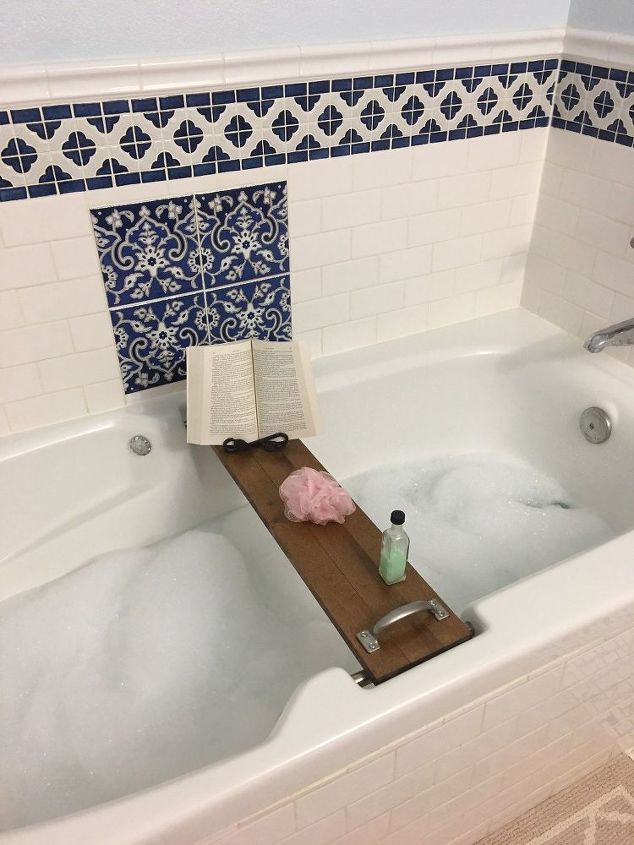
That’s it. I love my little tray! It didn't cost me a dime since I used scraps and materials that I already had on hand. And now that I don’t have to share this bathroom with my kids I can blissfully relax in my grown-up sanctuary. And there isn’t a single rubber ducky in sight. 


Any price and availability information displayed on [relevant Amazon Site(s), as applicable] at the time of purchase will apply to the purchase of this product.
Hometalk may collect a small share of sales from the links on this page.More info

Want more details about this and other DIY projects? Check out my blog post!


Frequently asked questions
Have a question about this project?