


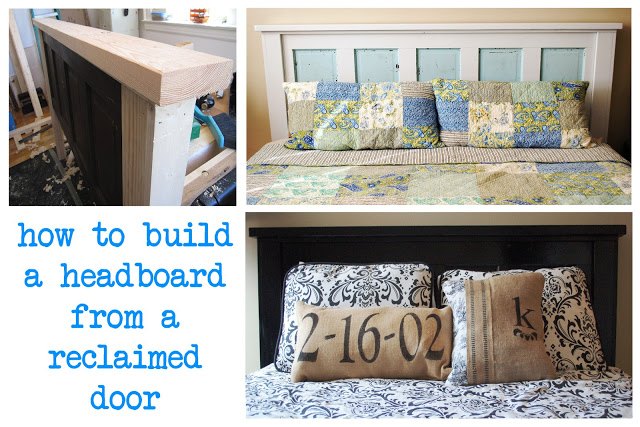
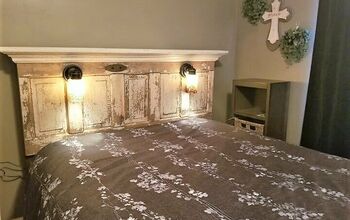
How To Build A Headboard From An Old Reclaimed Door
11 Materials
$50
1 Week
Medium
Learn how to turn an old reclaimed door into the perfect headboard!
I love catalogs like Pottery Barn and I love antiquing, but sometimes the prices for furniture is crazy!
Case and point, headboards.
My husband and I needed a headboard for both our bed and guest bedroom. However, finding 2 pretty headboards at a decent price was getting to be a challenge. So, I saw a few reclaimed headboards on Pinterest and thought it might be better to make our own headboard!
With that in mind, we headed off to the local salvage yard to find some reclaimed wood but instead, we found some old doors with great distressing character.
In this post, I am going to briefly cover how we took an old door and turn it into a headboard. If you like this idea and want to try it out for yourself, you can see the full detailed instructions (which include measurements, photos, and drawings) on my blog!
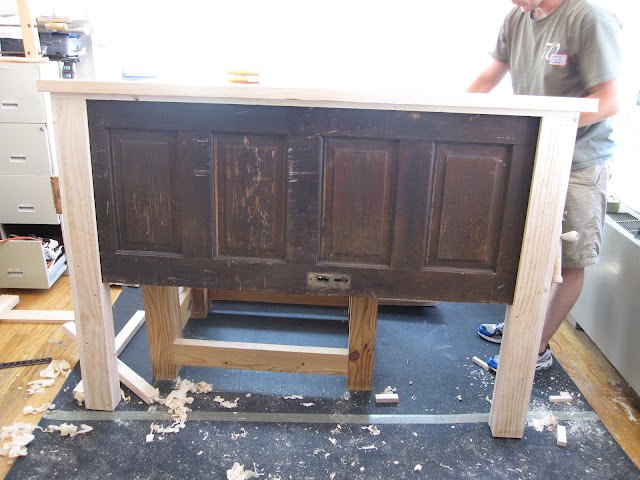
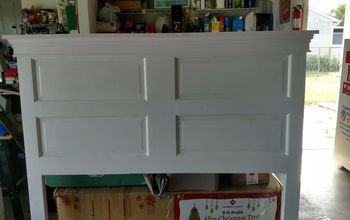
Step 1: Building The Frame
The door is the most important aspect of this project because depending on how you cut it, determines how the panels will be spaced out in the final product.
Before you start cutting your door, make sure you prep the door by washing and cleaning it.
Once your door is clean you can then move on to cutting.
For a king-sized headboard, you want a door that you can cut down to 76” and for a queen-sized headboard. you want a door that you can cut down to 60”. As for the width, that is totally up to you and your sense of design.
From there, we built a frame to go around the door and removed any hardware from the original door. The measurements for the frame was based on the size of our door and the distance from the top of our mattress to the floor.
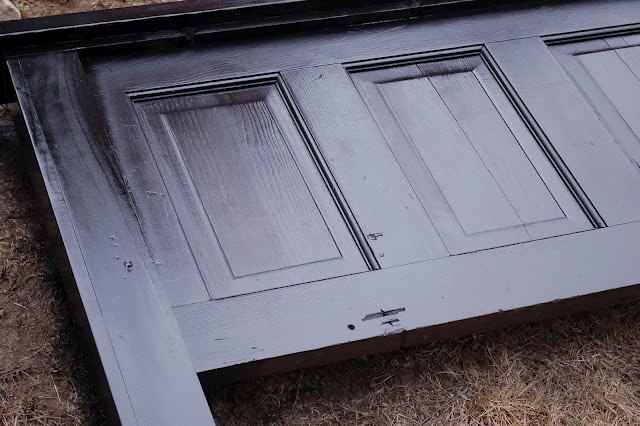
Step 2: Paint
After the frame has been built, you can now paint your headboard! We used a high-gloss Krylon spray paint and was able to do all of the coats in about 3 hours.
Step 3: Mount
To mount the headboard to the bed, first, drill holes into the legs that match up to your bed frame. Then, insert bolts and attach nuts.

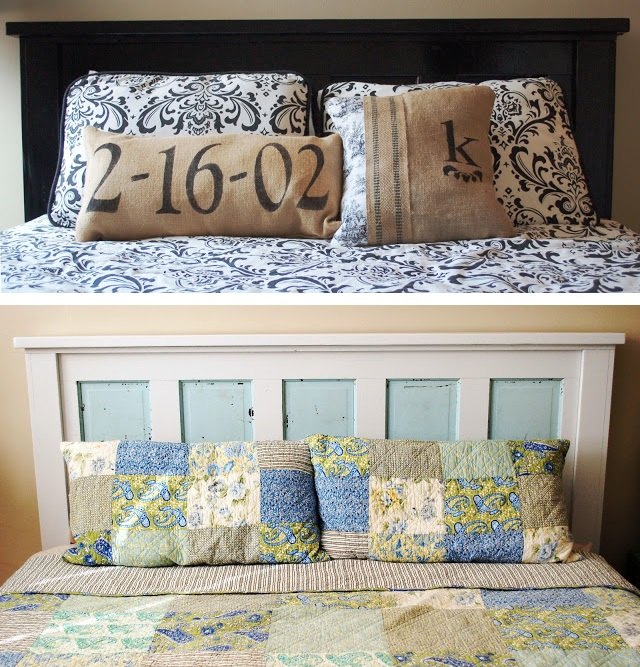
And voila! With an old reclaimed door, you can make your own headboard for half the cost!
As I mentioned before, this post was a brief overview of how to make your own headboard from a reclaimed door. So, if you want to see full detail instructions, with measurements, photos, and drawings, please stop by my blog!
To get more project inspiration for your home and to learn more about the products used in this project, stop by my blog!

Want more details about this and other DIY projects? Check out my blog post!
Comments
Join the conversation
2 comments
-
Very pretty! I love the spray paint colors you chose.


Frequently asked questions
Have a question about this project?