


Pantry Redo

by
Lisa L Hall
6 Materials
$300
2 Days
Medium
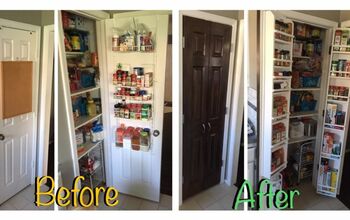
I have a small pantry and what made it even smaller was how the builder put it in. The wood shelves are nice but only if they are done correctly. I'm not sure about everyone, but I like to have some flexibility with my pantry. I would like a shelf that can hold cereal boxes upright and not every shelf the same height.
Don't get me wrong, I can get used to storing things differently if the shelves would have been to my liking. The depth of the shelving was 17 inches. That's a really deep shelf; especially when your pantry is only 34 inches deep. Then add in that there were shelves on each side so now they really closed off any sort of room to get in and around this pantry. It was built as a walk in, not just the type that you open a door to get to your items.
So this project has been on my list of things to do for over 3 years now. I finally decided this is it....it's getting done.
This was not an inexpensive makeover so that was part of the reason for the delay, but I'm very happy with the results.
This is easily a one day project if you have an entire day to devote to it. I took a weekend to get it finished. The final cost was around $300.00.
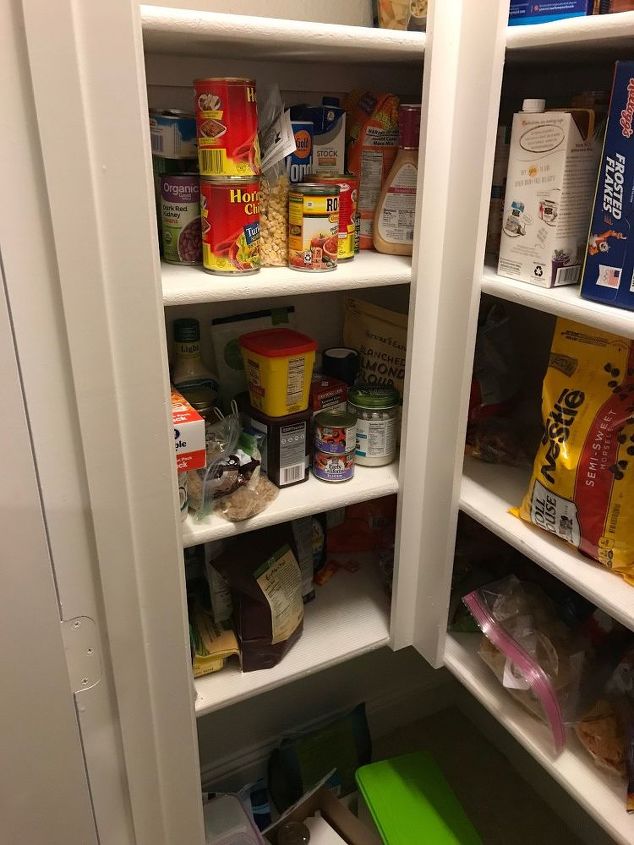
This is what the pantry looked like. This was the same on each side. There is no reason for the boards in the corner as they didn't add any structural integrity to the shelves. What they did do, was block access to any item behind them, from sight or being able to get them out.
I did think about just removing those and seeing if I liked it but even after that was removed, I still didn't like how things looked.
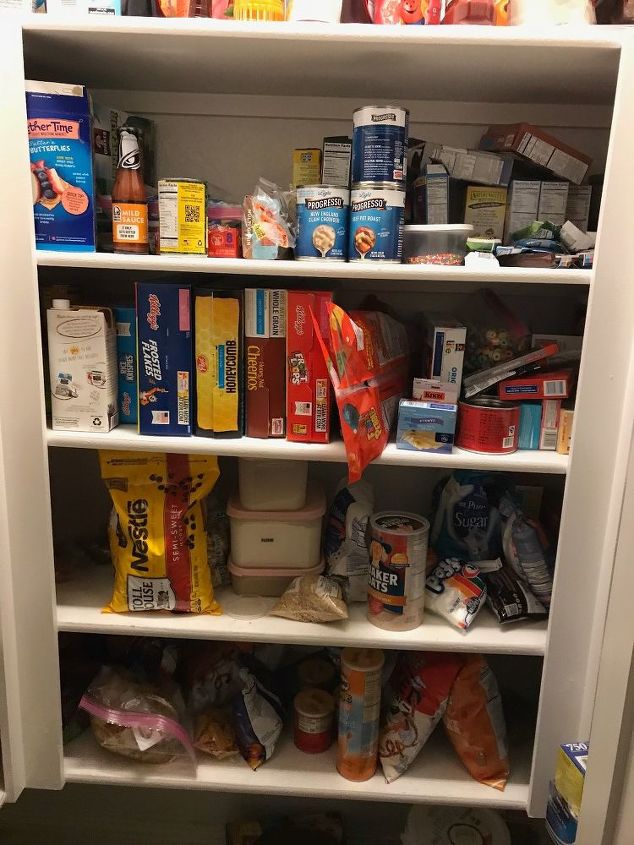
Aside from my horribly messy shelves, you can see just how dark it is in the back side of the shelves and when you get to the bottom shelves it's really dark. This was another problem with the pantry. Even a brighter light wasn't able to solve the issue.
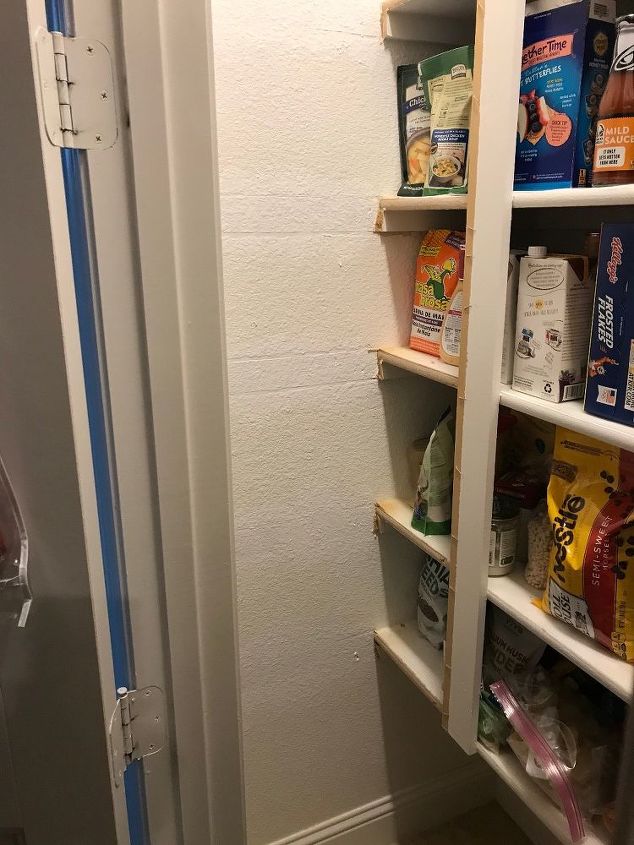
So removing the wood shelves sound like it would be easy and quick....Nope. Those suckers have nails that are about 2 inches long running through the shelf and into a 1x4 that is also nailed AND glued to the drywall.
So for this part of the project I needed a hammer and earplugs. The side shelves were much easier to get out since they were smaller. The large main shelves also had rubber sealant on the top and bottom. It took a bit more muscle to get those to come loose. The hardest part of getting the large shelves out is that they are exactly the size of the panty so the smallest tilt to either side results in the shelf getting stuck. And keep in mind this is just drywall; Yes I had some holes to patch. In hind sight; I think I may have cut the boards in half to make removal easier.
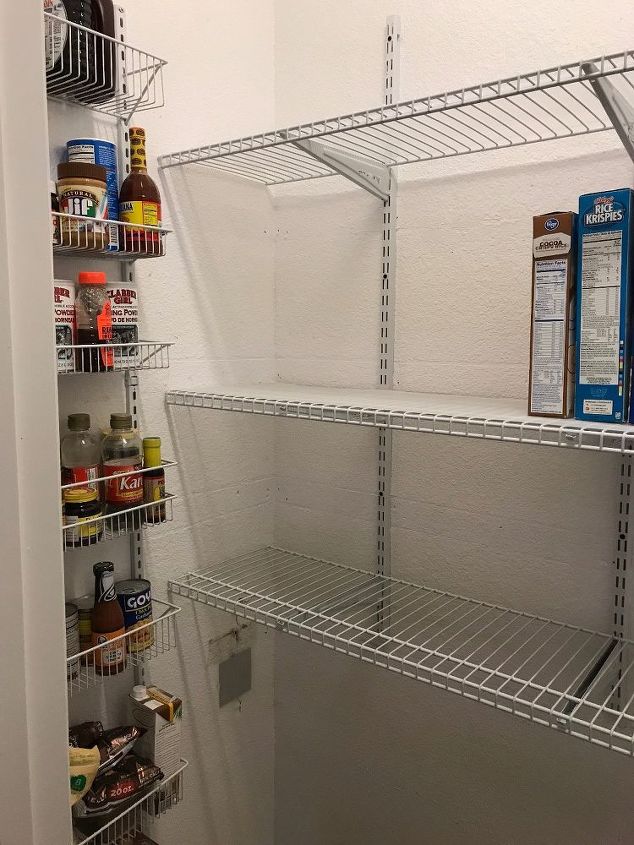
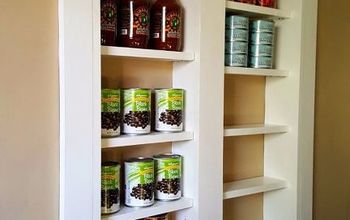
So once the pantry was emptied out I could start installing the shelving. Like I mentioned before I like to have adjustable shelving. So I opted for the track type system for my shelves. As long as you have a stud for your rods to attach to you don't need too many extra pieces.
And yes, that is a very large drywall patch for the very large hole I put in the wall taking the shelves out.
This part is the easiest of the project. I measured out 10 inches from the wall and found the stud. The next bracket rod went into the next stud, which would normally be 10-16 inches from the prior stud. (If you don't have a stud finder, you can tap the wall with your knuckle and you will hear the sound change when you reach a stud. I hammer a small nail when I hear that sound to make sure there is a stud. I only put the nail in the wall far enough to hit the stud then remove it)
So now that my studs have been located, I put the bracket rod on the wall, marked the two holes for screws. I did this for the entire pantry before I started drilling. It just speeds up the construction process so you aren't constantly picking up and putting down your drill.
I used a small drill bit as I just want a pilot hole to get me started.
Once I got the first screw into the bracket rod, I didn't tighten it all the way until I knew it was level. Once I had it level I tightened down the screw. Now the other screw can be put in and tightened. This will also ensure that the lower bracket rods will be level when I put them in.
So I continue these steps until all the bracket rods are in place. Now the fun part. Putting in the brackets and setting up the shelves.
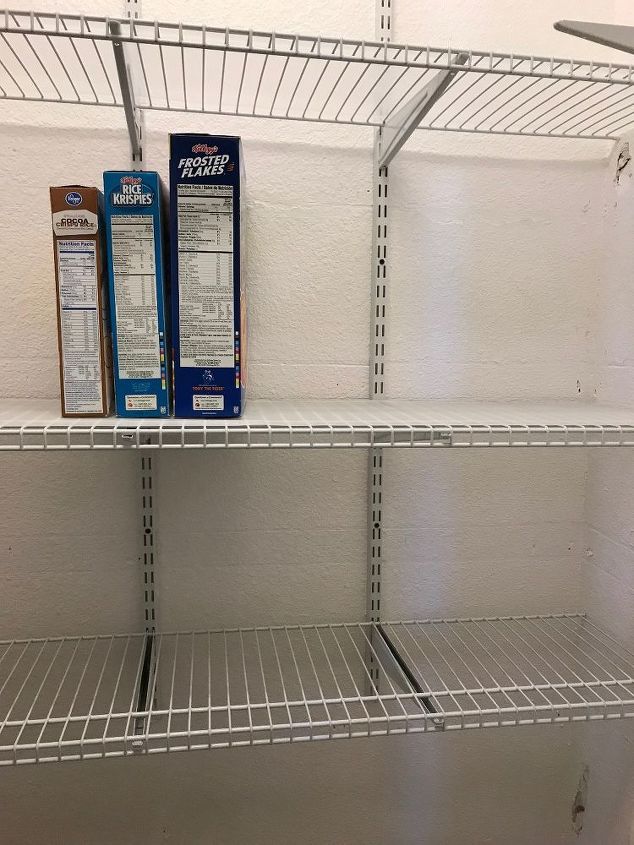
Cereal boxes are always tough so I made sure I had one shelf that they would fit on.
Home Depot cut my shelving for me for free. It was cheaper to buy their longest shelving and have it cut, rather than buying smaller pieces and needing to buy double the amount. You can do this at home too if you have bolt cutters (not wire cutters - you need heavy duty bolt cutters)
Remember you are putting in shelves that are the same width as your pantry so just as getting them out what a challenge so was getting them in.
You have to keep the shelves very level or they will get stuck on the wall. They won't leave big holes but they still get stuck.
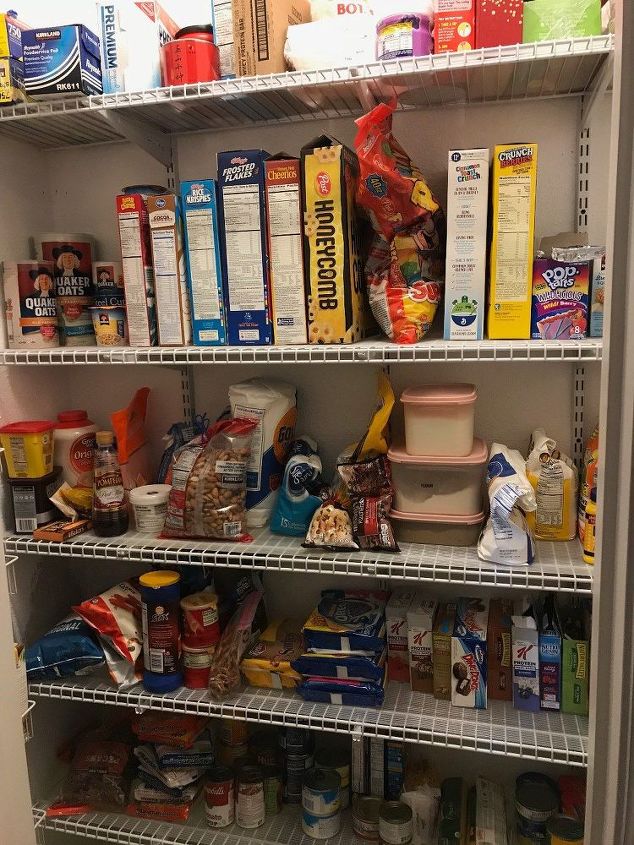
So I love the new shelves. The mess apparently is still there but now I have to say that's a ME problem. Ha ha.
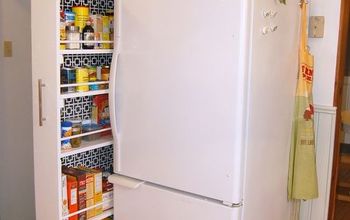
My photo doesn't do the lighting justice. It's so much easier to see everything on the shelves. I do have plenty of space now to get into the pantry and move around. I do have a set of shelves on the left side of the pantry and as you could see in a photo above, I added baskets to the other side to hold bottles and small boxes.


Frequently asked questions
Have a question about this project?