


Faux Bricks and Burgundy Walls

3 Materials
$35
1 Day
Medium
I’ll admit it. I like the old-fashioned, Victorian look. Burgundy walls, bricks, lace, and flowers ... that’s what I saw in my mind, but could I make it real?? I had seen so many faux brick projects on HomeTalk, I thought maybe I could give it a try and incorporate the colors I love.
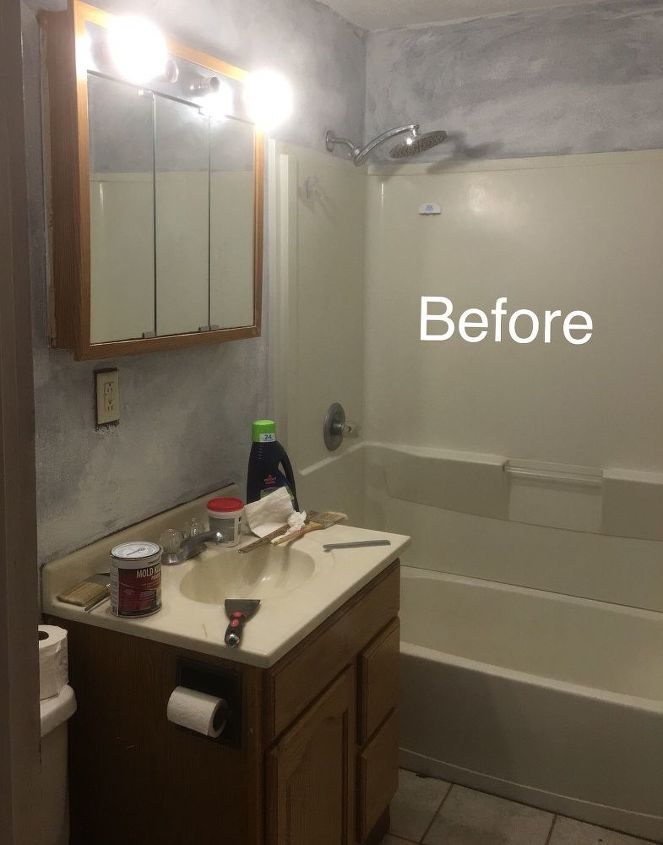
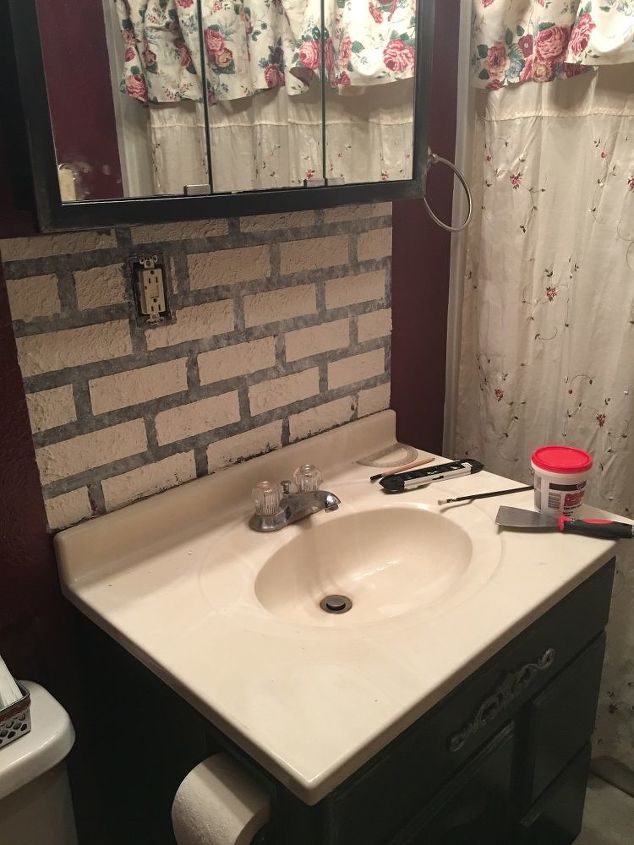
Our small bathroom before I began.
How to take my bathroom back in time (while maintaining all the modern conveniences)? :) The first step is to always prime those walls! Our home is 75 years old, and it is difficult to get paint to stick. We just picked up a can of primer from WalMart and covered the walls with two coats.
It’s a start ...
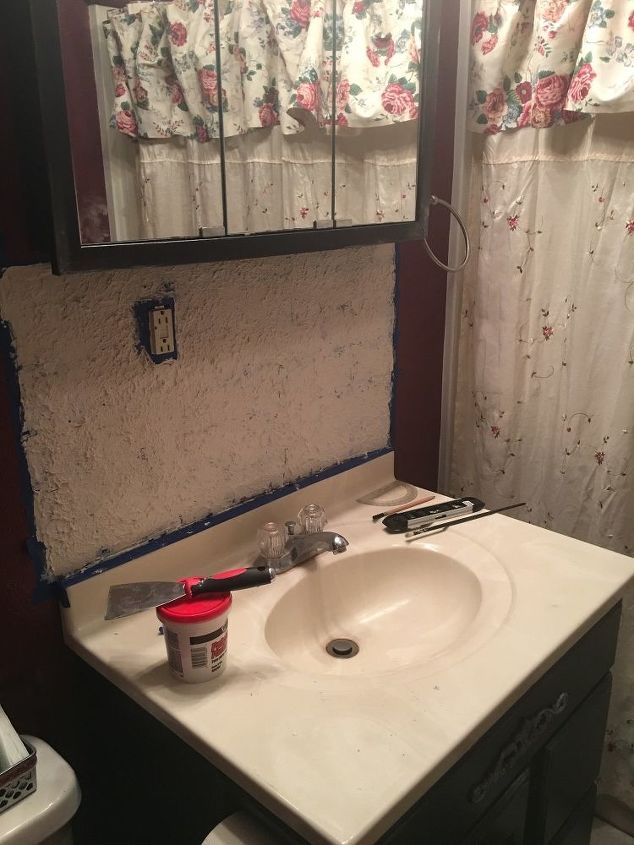
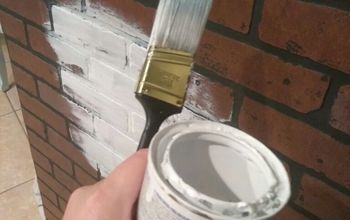
I found the perfect color at Menards — it’s simply called “Red Red Wine” from Pittsburgh Paints. You can’t see much of it here because I was focused on creating the faux brick backsplash, but every wall is covered with this deep burgundy color. I chose semi-gloss, and now I regret that decision. If you have a “popcorny” wall, the gloss reflects the light, and every bump looks like a small white dot. A boo-boo to fix later on. Ugghh....
After the burgundy paint dried, it was time to begin the faux brick backsplash! As you can see here, I taped off a simple rectangle over the sink and below the mirror. I used a yardstick, a pencil, and a level to make sure the lines were straight. Then I painted the rectangle with two coats of white.
You our can partially see my shower curtain reflected in the mirror. Off-white lace with burgundy roses. Perfect!
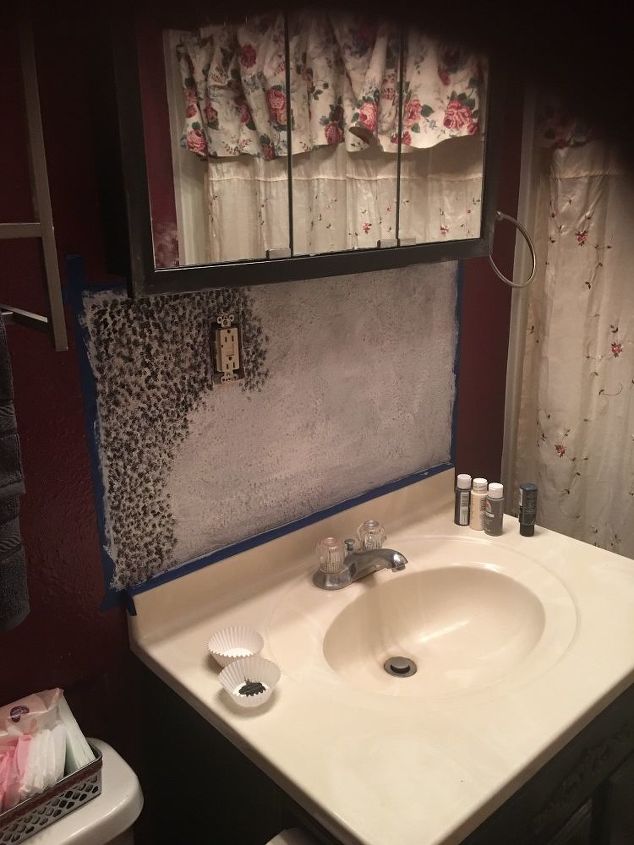
Dapple to resemble grout
Since the painted white rectangle needed to resemble grout, I used some gray, brown, black, and off-white craft paint to dapple the surface and make it look textured. Alas, another decision I regretted later. My bricks looked far better with white “grout” So I ended up painting over it. Grrr....
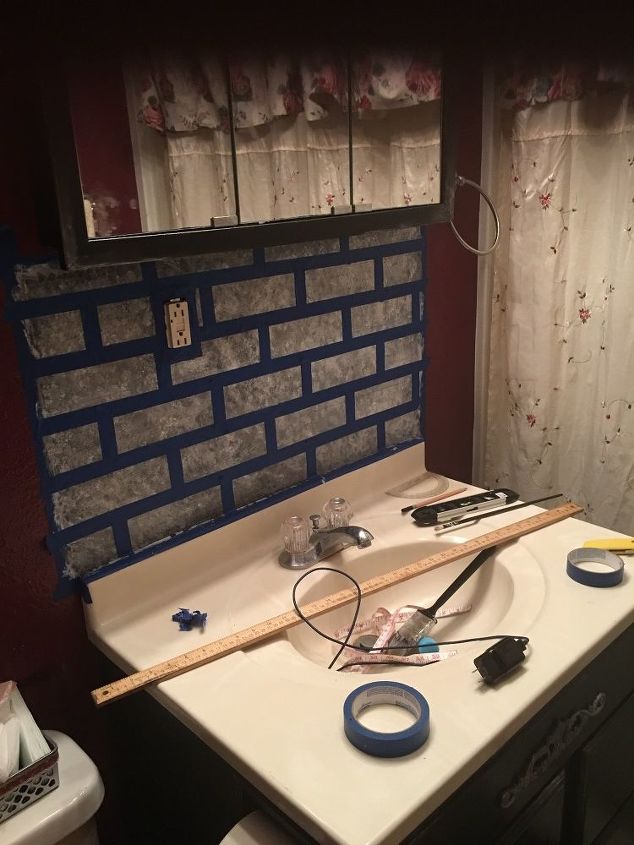
Tape it up!
The next step was to apply painter’s tape to my ”grout” rectangle. This was time consuming because I wanted my ”bricks” to be the same size and evenly spaced. This was accomplished with the good old yardstick, level, and pencil lines. I taped around the outlet as well.
Spackle and remove the tape!
I was so anxious to remove the tape that I forgot to take a picture of the next step! What you don’t see here is the entire rectangle covered with spackle, also known as joint compound or patching plaster. I chose the kind that comes in a little tub from WalMart. Using a putty knife, I covered the entire rectangle with the stuff, really slapping it on, about 1/4 inch thick. Then I did some finger painting — making swirls and peaks — giving the spackle lots of texture.
Now we have a picture to refer to — where I removed the tape! I let the spackle dry for about 10 minutes — enough to let it set a little bit, but not so dry that it would crumble. You want it to be pliable so you can do some shaping after you remove the tape.
Carefully remove the tape, centimeter by centimeter. You want the spackle to retain its brick shape, and if you just rip off that tape, you may take too much spackle with it. So easy does it.
After you you remove the tape, your “bricks” may have some sharp edges. You‘ll want to soften these edges with your finger tip while the spackle is still pliable to create a more natural look.
So, this picture shows my greyish “grout” and white “bricks.” Hmmmm.... not the look I was after. I let the spackle dry completely — about an hour — and started to paint.
Time to paint!
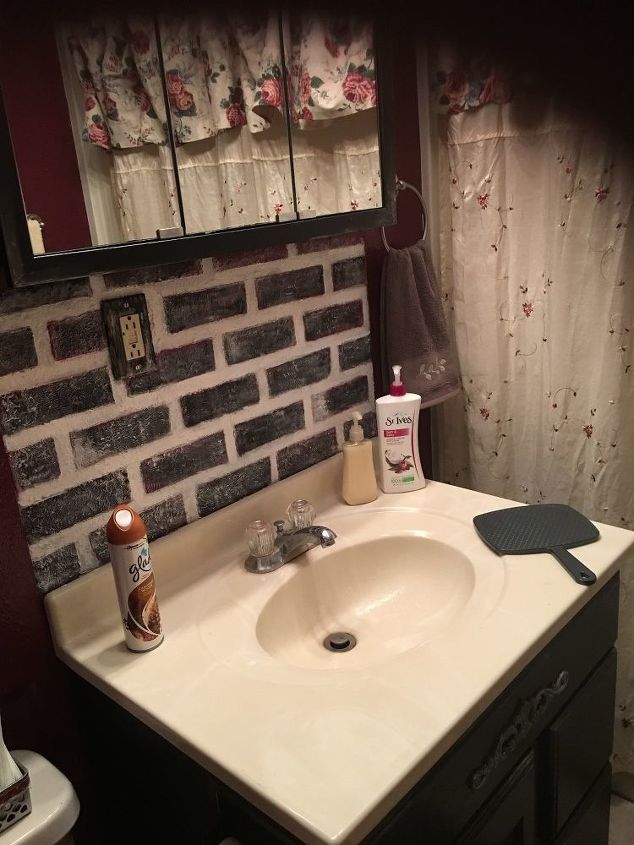
Here you can see where I painted my bricks grey, burgundy, and black, and repainted the “grout” white. This was getting closer to what I wanted. This was done by dabbing the colors on with a paint brush, mixing colors, and making sure each brick was different. Get creative and just blob those colors on! Any mistakes can be easily covered by painting over the bricks or adding more white in the grout area.
You know what was really the finishing touch? Adding a thin, white wash to the bricks to bring out the texture. Here’s a closeup shot.
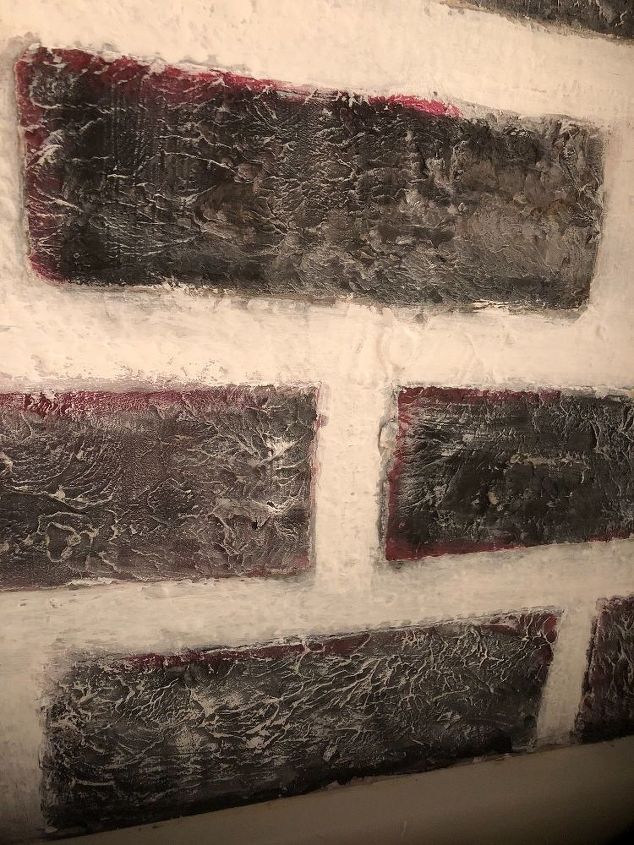
Swirls and peaks!
By adding this thin white wash (1/2 white paint and 1/2 water) all of those swirls and peaks I had made in the spackle showed through beautifully. It also made the bricks look more realistic and helped to blend the colors underneath.
It’s funny how this one little detail made all the difference in this project.
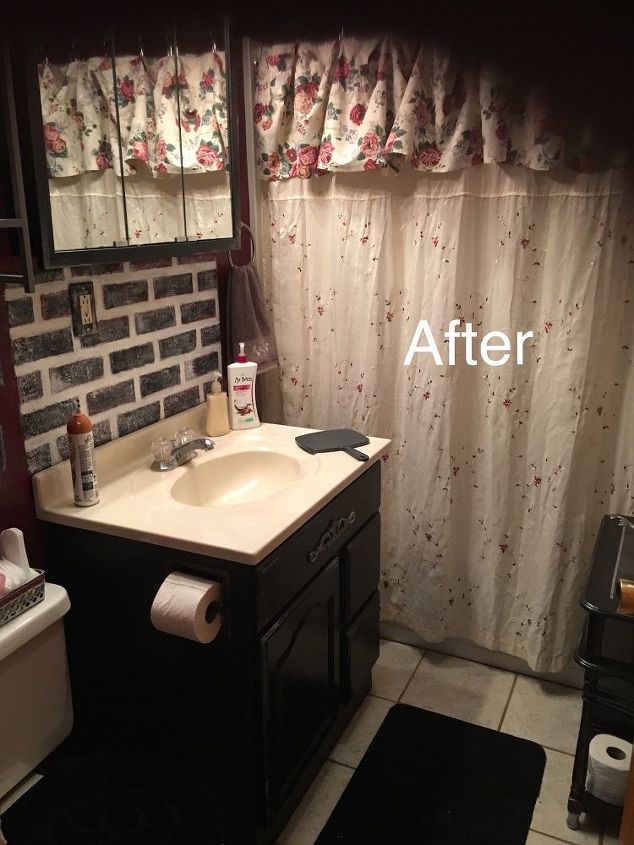
Ta-Dahh!
Well, here you have it! This bathroom is a work in progress, but I wanted to share with you all my first steps in taking my bathroom back in time to a different age.
I hope you enjoyed my VERY FIRST HomeTalk post!
Resources for this project:


Any price and availability information displayed on [relevant Amazon Site(s), as applicable] at the time of purchase will apply to the purchase of this product.
Hometalk may collect a small share of sales from the links on this page.More info
Comments
Join the conversation
2 of 32 comments
-
Really looks great!
What you can do about your lights is:
Build a cornice board around the top of the framing and add a stain glass look on the bottom and encase the bulbs. It will give that Victorian look and keep you from having those Hollywood lights look.
-
Oooooh, what a great idea! Thanks, Jean! :)


Frequently asked questions
Have a question about this project?
Nice Job. May I ask what you did with/to the lights that were part of the medicine cabinet? How did you retro them ? I ask because from the first image it would appear they are part and parcel of the cabinet themselves not separate so I would imagine difficult to change out .