


Safer Porch Steps at Night With EASY Solar Light Mods

by
Jim Cox
3 Materials
$22
30 Minutes
Easy
How I lit up my front deck/porch steps with solar lights and some minor cutting/modifications
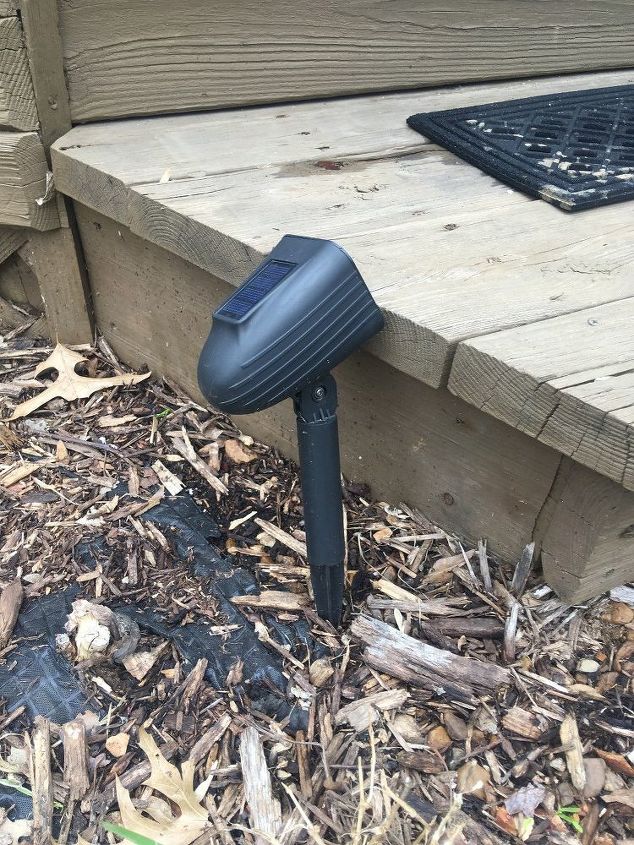
Not quite tall enough
Here's a $7 solar spotlight I got at the At Home store last summer. It's not quite tall enough to shine on the step, and since it's not inserted into the ground fully, it doesn't always stay up straight, and gets kicked from time to time.
(Ignore my winter flower bed mess)
I decided to take apart the light and just use the head. The plastic stake at the bottom will be holding down some landscaping cloth ASAP in it's re-purposed life.
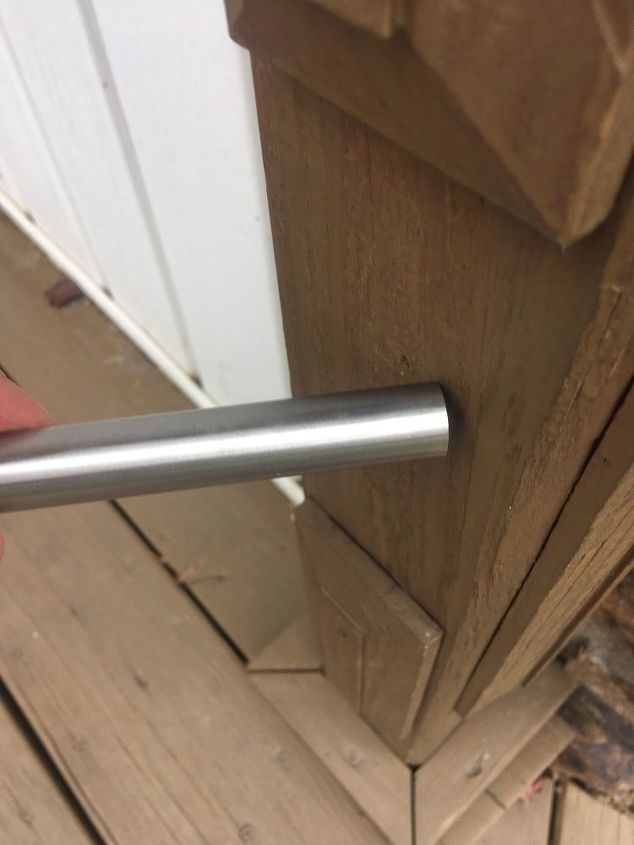
I took a piece of tubing from my solar deck lights (see my other projects) and visualized a cut to give me an angle where I could hit the step below. (This will make sense in a few more photos I promise)
You could use conduit or PVC here as well, and both are easy to paint. I'm guessing I cut a 30° angle, I didn't measure it. The idea was to point the light away from the post towards the center of the step.
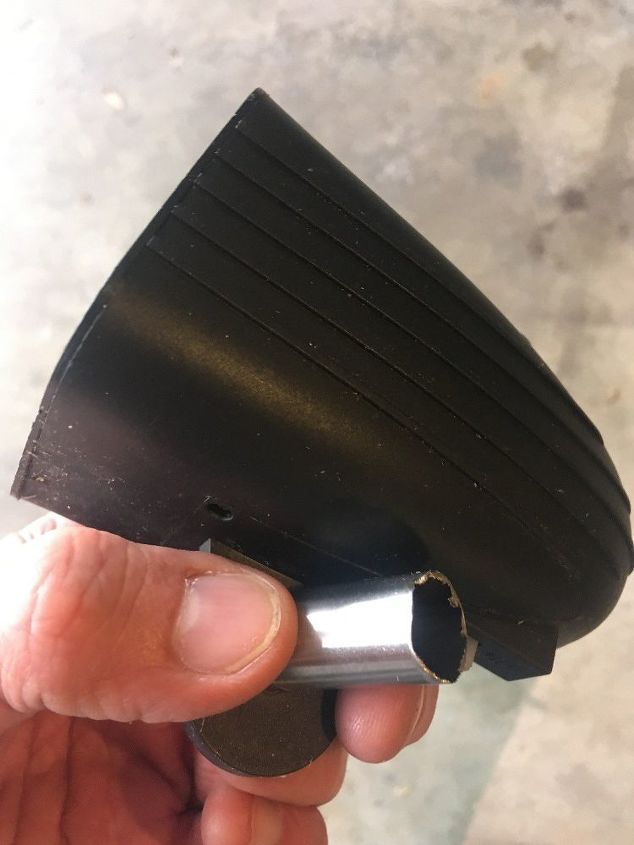
Here's the cut tubing held against the head of the light. This tubing is flimsy thin, so it got a little chewed up. I could have used the plastic tubing between the light and the stake if I had wanted to.
I used an electric grinder with a cut-off wheel (again see my deck light project). This $30-ish grinder saves me tons of time around the house when cutting metal or plastic.
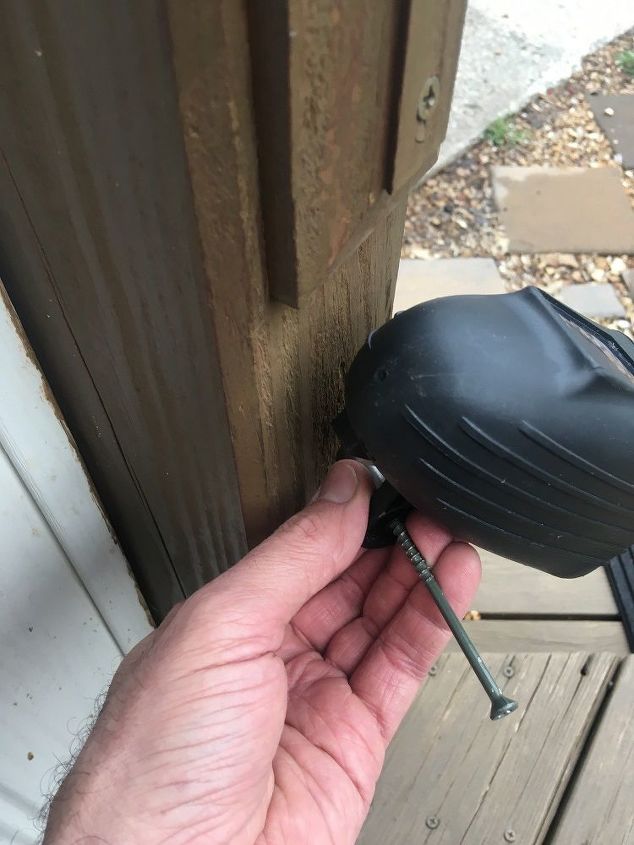
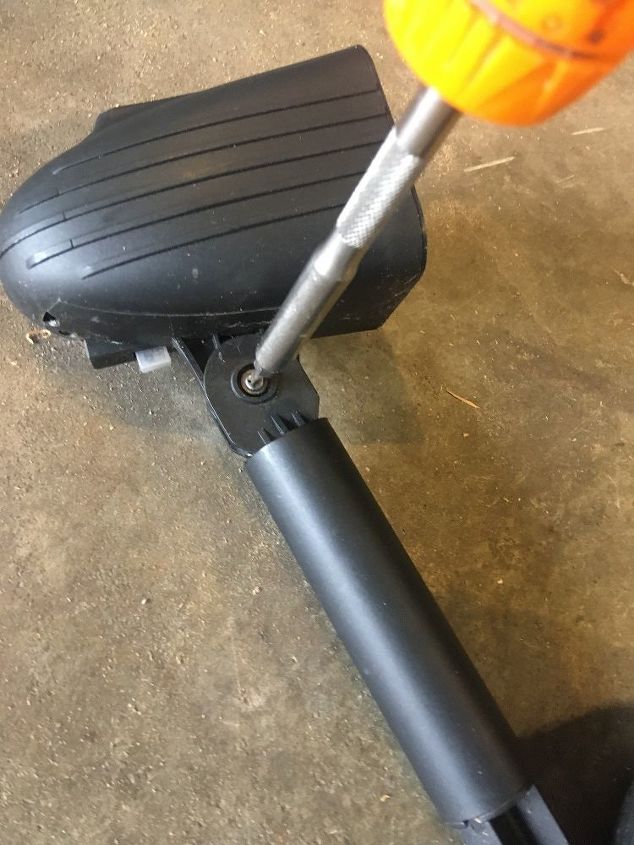
Here I am positioning the lamp against the post on the right (as you walk up to the house) and getting an idea of how high to start the screw. You can barely see the stainless tubing at the tip of my thumb. I already had the screws, No 8 x 3 1/2" or so, probably a bit longer than needed.
Put down the light and start the screw on it's own, then back it out and re-assemble your screw, light, and tubing. This will save you some serious frustration 
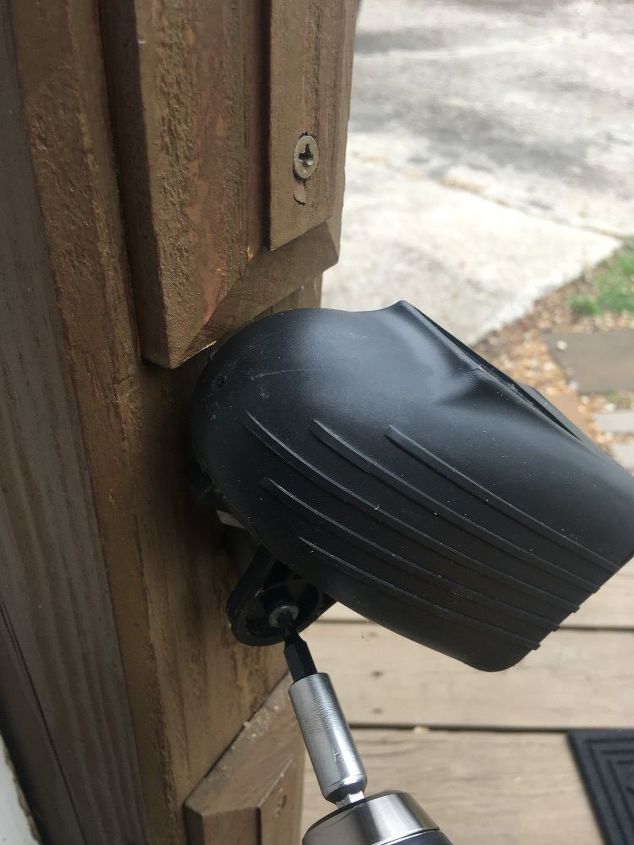
Here is my cordless drill driving the screw in. The light is now mounted to the deck post. This was so easy I did the other side's post as well.

This is a shot of the porch just as the solar lights begin to turn on in the evening. Having one on each side really lights up the steps well. I put two of my $.99 cut/modified deck lights on the lower step too. You can see my Porch Lamp Project in back to the right, and to the far left you'll see where I hid some of the small ones under my front porch bench last summer (also in my projects). Being close to the house they don't get as much sunlight to charge, but they normally last until 11 pm or later most summer nights.
I'm a bit overboard on solar lights. They're fun, inexpensive, easy, and after 35 years of doing electrical/electronic work, sometimes it's nice to not be running and hooking up wires. These solar projects require near 0% electrical knowledge.
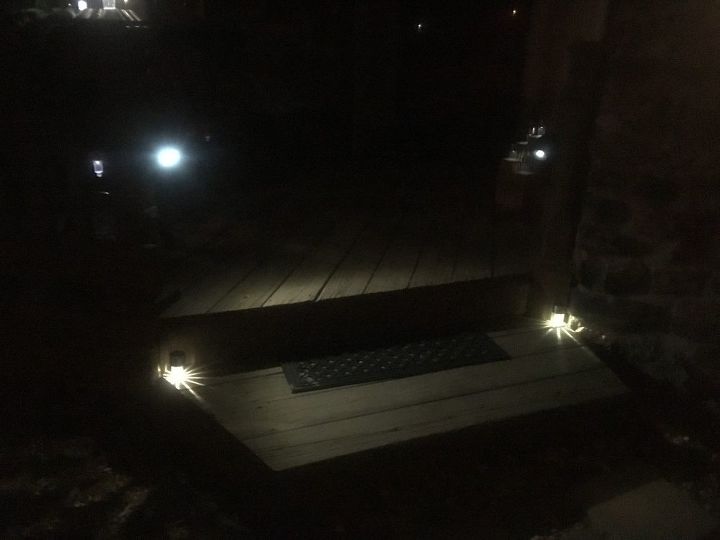
Here's the porch about 10 pm at night. The light on the left post is aimed towards the edge of the top step, the light on the right post is aimed towards the middle of the bottom step. Bottom two lights are the $.99 variety, and the top two are $7 each. From the steps to the front door is about 8' away so this makes the porch safer for when the kids come home late if the porch light isn't on.
The lights add a nice touch at night, and are not too obtrusive during the day, and very inexpensive. (I'll probably paint the bodies brown anyway for a better blend - don't paint over the solar panel! )
Happy lighting!
Resources for this project:
![BAXIA TECHNOLOGY Solar Lights Outdoor,Wireless 28 LED Motion Sensor Solar Lights [400 LM],Waterproof Outdoor Security Lights for Front Door,Outside Wall,Back Yard,Garage,Garden,Driveway [2 Packs]](https://m.media-amazon.com/images/I/41Yt5IftMkL._SL75_.jpg?size=80x80&nocrop=1)


Any price and availability information displayed on [relevant Amazon Site(s), as applicable] at the time of purchase will apply to the purchase of this product.
Hometalk may collect a small share of sales from the links on this page.More info
Comments
Join the conversation
2 of 23 comments
-
thanks for sharing. Great Idea! I have an old dog with cataracts who has trouble with the stair on our back deck despite the spot light we have on. Maybe this will help.
-
Love this idea, going to try this 4sure.


Frequently asked questions
Have a question about this project?