


Distressed Painting Technique

Make it look old with Shabby Paints
Got Stress? Need a distraction? Well, this is my stress reliever. Give me the task of making something look weathered and old and I can get lost in it. I love to take something new..or something not old enough and make it look really old, distressed, fractured and worn…like me :)
There is no specific way to do this, just make it your own and have fun. Layering sells the look. In a Nutshell: Paint, fracture, paint, fracture, paint, sand, reVAX, sand, love.
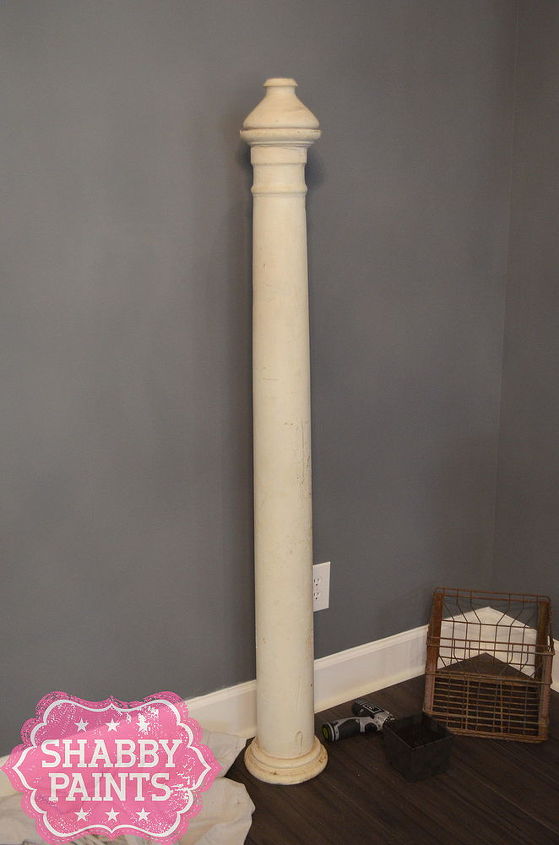
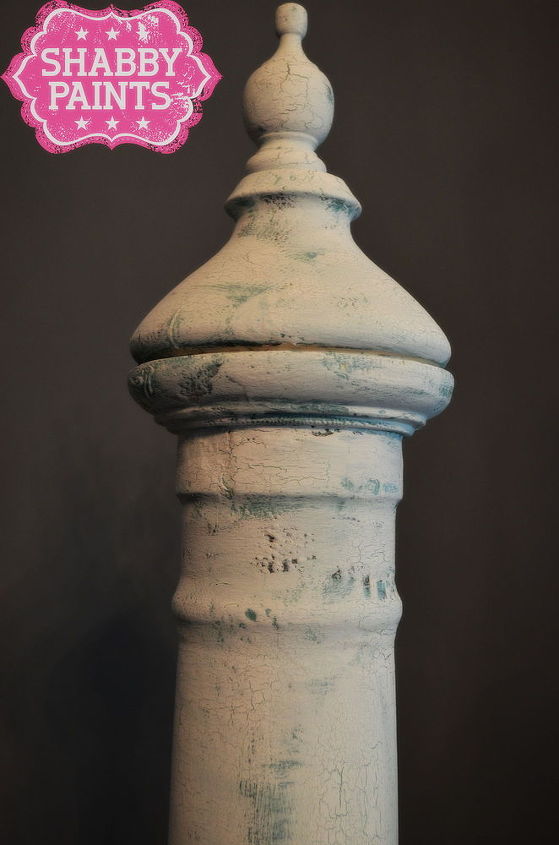
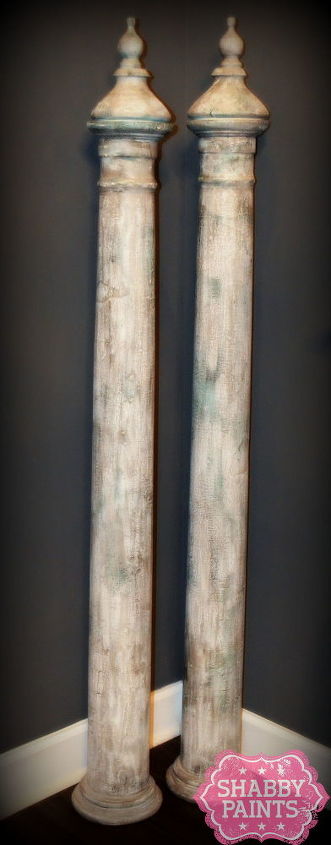
I started with decently old columns, they were okay as they were but to me just didn’t scream “I’ve been around the block”. The first thing it needed was to be finished. The top needed a final to look complete :)
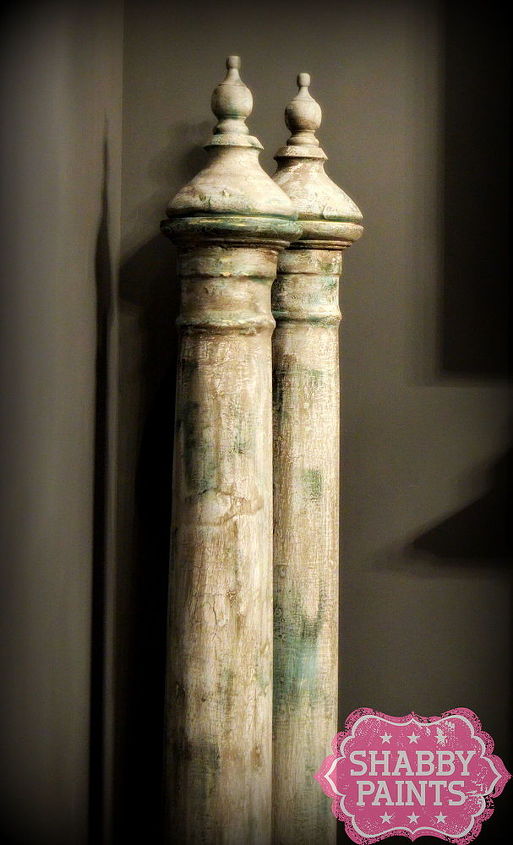
Layered, crackled, chippy, distressed vintage look.
I got these large craft final’s 2 for under $3.00 at Lowes. Drilled a small hole in the top with a drill bit just a hair smaller than the attached screws. (A hair smaller is a real measurement for me. :)
Layered, crackled, chippy, distressed vintage look.
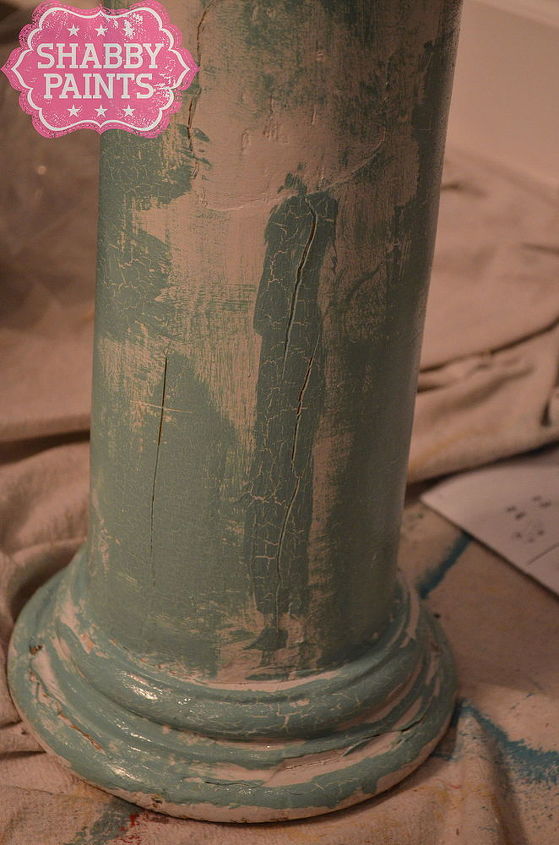
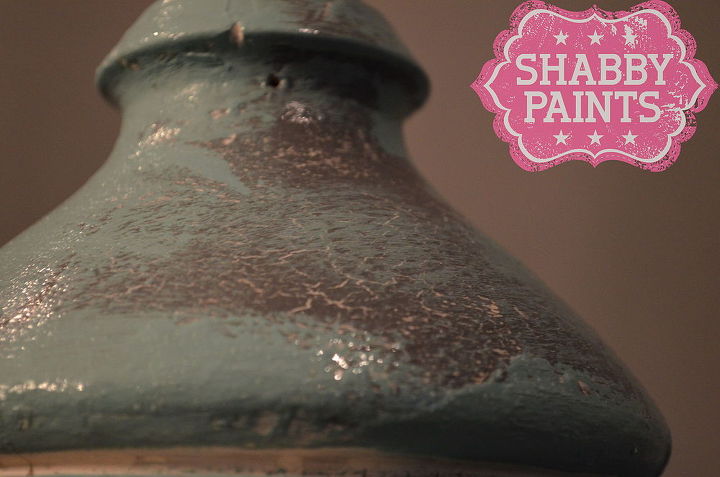
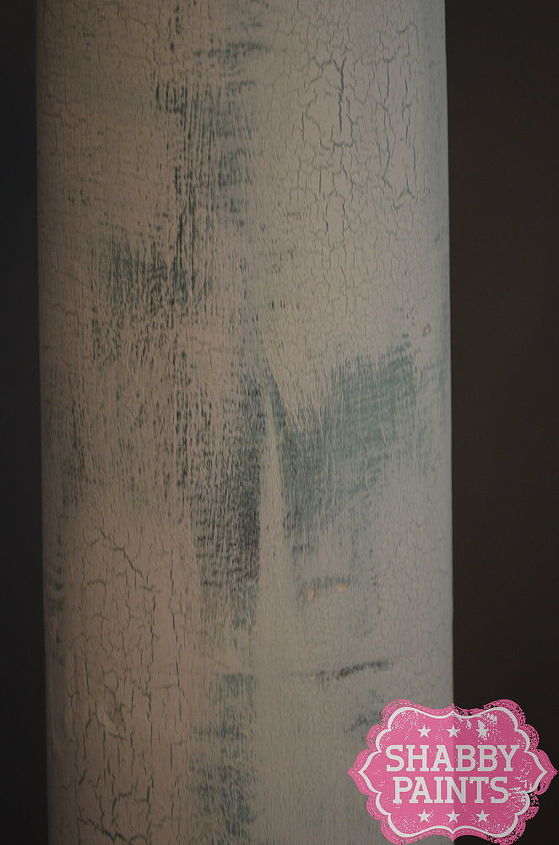
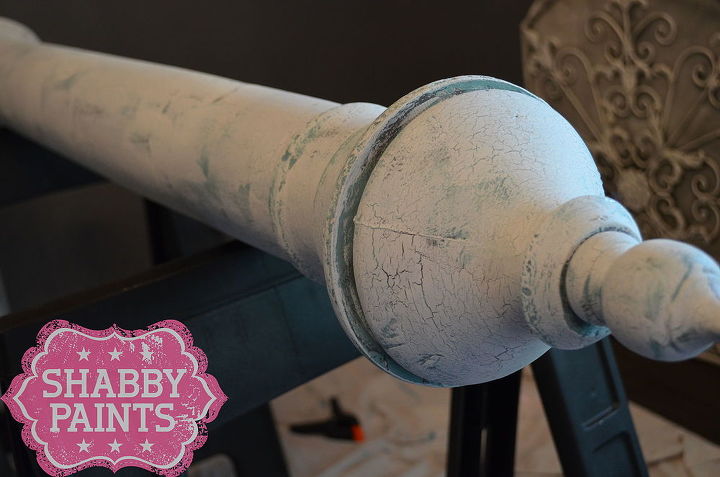
I cleaned it up with vinegar and water then Painted one coat of White Ice all over. Once that was dry I went over it with a foam roller and applied Furniture Fracture (crackle). I didn’t hit every inch but when thickly applied makes it’s on texture and this stuff will hold up once dried. Once the fracture dried I did random areas with So Serene, Garfield Grey, and more White Ice. Being careful to only go over an area with one stroke if I wanted that area to fracture. There is no right or wrong way..just random.
Layered, crackled, chippy, distressed vintage look.
When that dried I did another layer of Furniture Fracture, let dry and did the next layer of random colors.
Layered, crackled, chippy, distressed vintage look. Layered, crackled, chippy, distressed vintage look. Layered, crackled, chippy, distressed vintage look. Layered, crackled, chippy, distressed vintage look.
After the second layer of Furniture Fracture dried, I did a quick coat of White Ice, letting some of the colors show.
Layered, crackled, chippy, distressed vintage look. Layered, crackled, chippy, distressed vintage look.
I then sanded some places to expose some of the under layers, changing the pressure and sandpaper grit to get different looks.
Layered, crackled, chippy, distressed vintage look. Layered, crackled, chippy, distressed vintage look. Layered, crackled, chippy, distressed vintage look. Layered, crackled, chippy, distressed vintage look.
Now the layers, fractures and depth look great but it didn’t look old so I applied black reVAX with a damp applicator sponge all over, randomly pressing it in some of the fractures to deepen. Once the reVAX dried I took out my dremel sander and took off a lot of the black reVAX to lighten it and reveal the under lying fractures, colors, and layers. This is not a project for those with OCD that want a perfect finish. It is not an exact recipe, it is a loose guide to do what you think will look great. This is what makes it fun..making it look old and tattered.
https://shabbypaints.com/distressed-painting-technique/
Got Stress? Need a distraction? Well, this is my stress reliever. Give me the task of making something look weathered and old and I can get lost in it. I love to take something new..or something not old enough and make it look really old, distressed, fractured and worn…like me :)
There is no specific way to do this, just make it your own and have fun. Layering sells the look. In a Nutshell: Paint, fracture, paint, fracture, paint, sand, reVAX, sand, love.
I started with decently old columns, they were okay as they were but to me just didn’t scream “I’ve been around the block”. The first thing it needed was to be finished. The top needed a final to look complete :)
Layered, crackled, chippy, distressed vintage look.
I got these large craft final’s 2 for under $3.00 at Lowes. Drilled a small hole in the top with a drill bit just a hair smaller than the attached screws. (A hair smaller is a real measurement for me. :)
Layered, crackled, chippy, distressed vintage look.
I cleaned it up with vinegar and water then Painted one coat of White Ice all over. Once that was dry I went over it with a foam roller and applied Furniture Fracture (crackle). I didn’t hit every inch but when thickly applied makes it’s on texture and this stuff will hold up once dried. Once the fracture dried I did random areas with So Serene, Garfield Grey, and more White Ice. Being careful to only go over an area with one stroke if I wanted that area to fracture. There is no right or wrong way..just random.
Layered, crackled, chippy, distressed vintage look.
When that dried I did another layer of Furniture Fracture, let dry and did the next layer of random colors.
Layered, crackled, chippy, distressed vintage look. Layered, crackled, chippy, distressed vintage look. Layered, crackled, chippy, distressed vintage look. Layered, crackled, chippy, distressed vintage look.
After the second layer of Furniture Fracture dried, I did a quick coat of White Ice, letting some of the colors show.
Layered, crackled, chippy, distressed vintage look. Layered, crackled, chippy, distressed vintage look.
I then sanded some places to expose some of the under layers, changing the pressure and sandpaper grit to get different looks.
Layered, crackled, chippy, distressed vintage look. Layered, crackled, chippy, distressed vintage look. Layered, crackled, chippy, distressed vintage look. Layered, crackled, chippy, distressed vintage look.
Now the layers, fractures and depth look great but it didn’t look old so I applied black reVAX with a damp applicator sponge all over, randomly pressing it in some of the fractures to deepen. Once the reVAX dried I took out my dremel sander and took off a lot of the black reVAX to lighten it and reveal the under lying fractures, colors, and layers. This is not a project for those with OCD that want a perfect finish. It is not an exact recipe, it is a loose guide to do what you think will look great. This is what makes it fun..making it look old and tattered.
https://shabbypaints.com/distressed-painting-technique/


Frequently asked questions
Have a question about this project?