


How to Make Your Baseboards Look Expensive

The trend in moulding is the bigger the better but a lot of older homes have thin baseboard that was popular way back when.
Here is an easy and inexpensive way to beef up your baseboards.
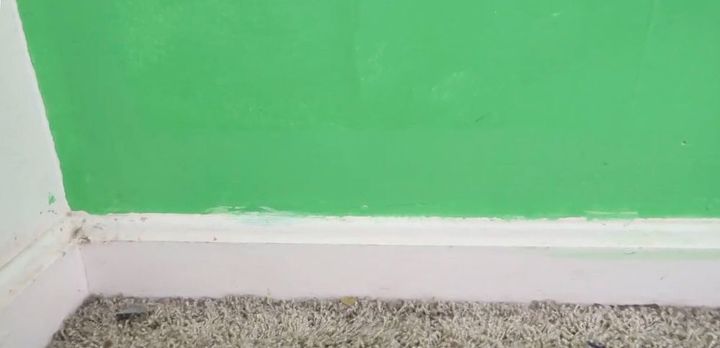
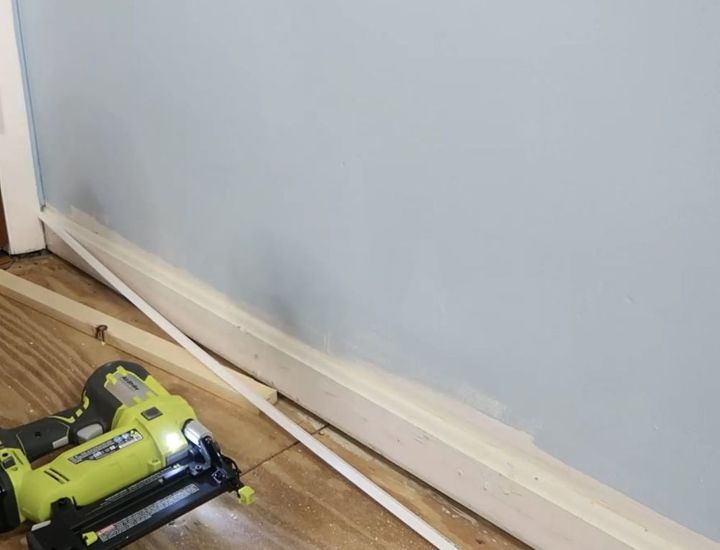
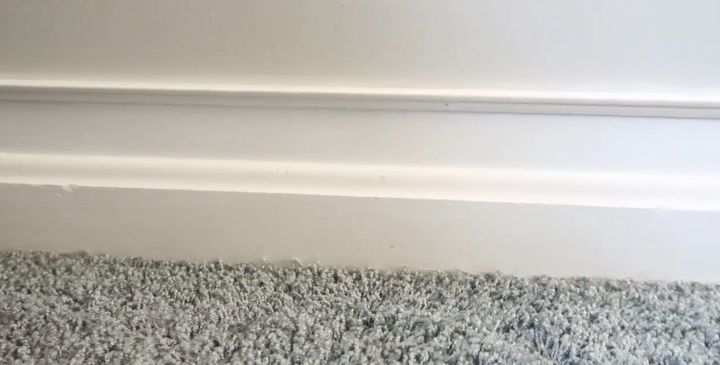
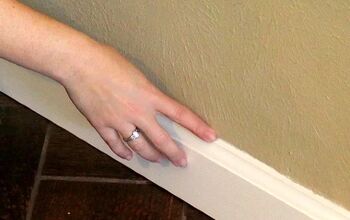
Most homes have baseboard that looks like this - kind-of skinny.
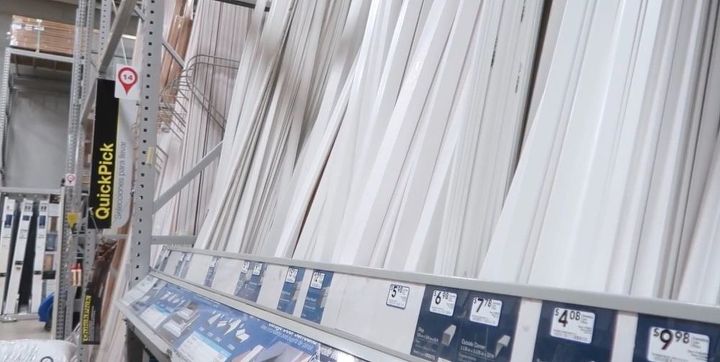
A simple trip to Lowe’s, down the moulding aisle, I found just what I was looking for.
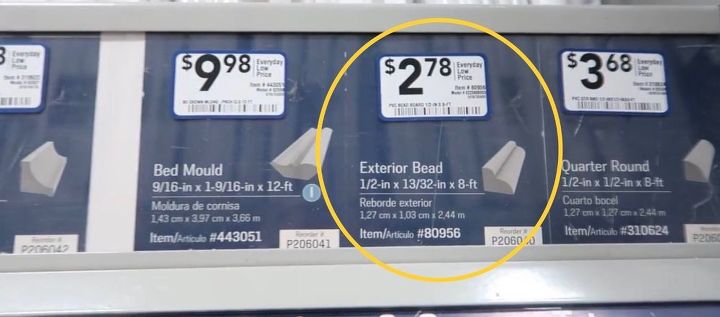
The moulding I chose was an exterior moulding which is fine for interior projects (you just can’t use interior on the exterior). I like it because it was already white and it wasn’t wood. It is a composite which means it will last longer and is more durable than wood.
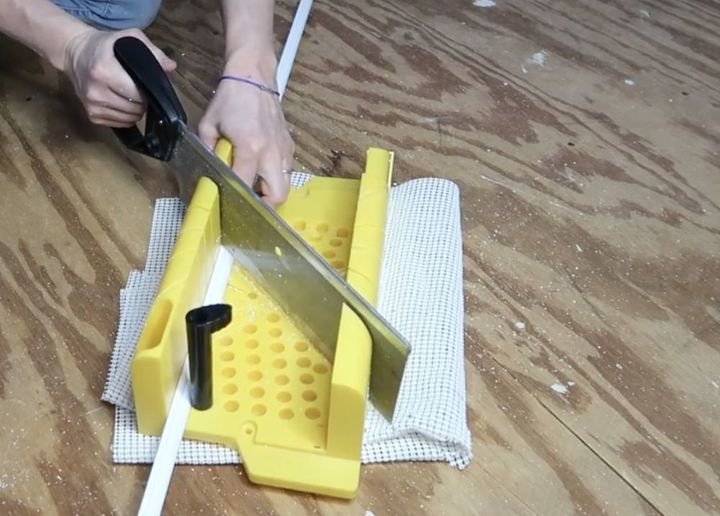
To make any cuts, I used my miter box which cuts through it like butter. No splintering either. Just make sure you sand the edges after each cut.
You are going to be amazed how simple this truly is!
I painted my wall color down to the old baseboard.
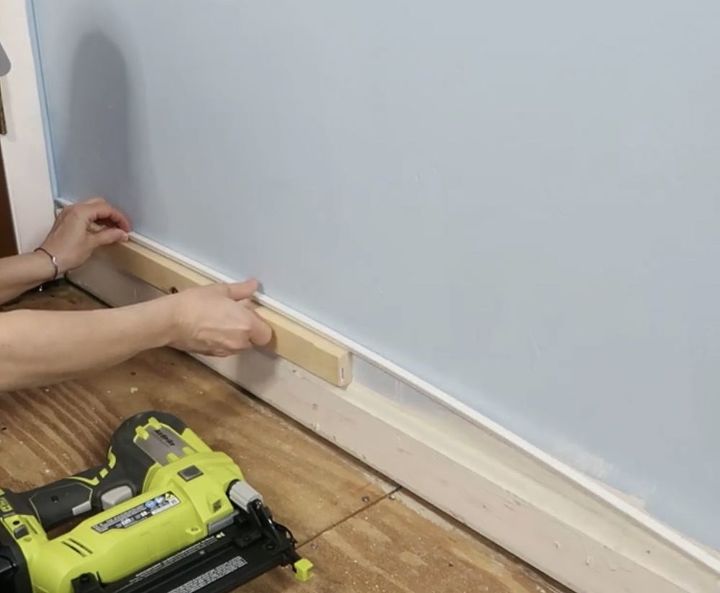
Using a piece of 1” x 2” scrape pine, I laid the wood on top of the existing baseboard then I laid the new moulding on top of the piece of pine.
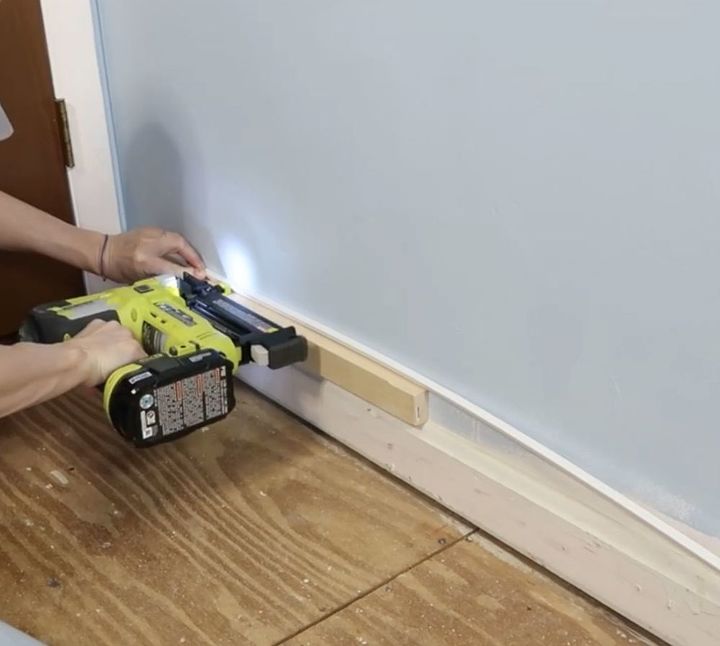
Using a brad nailer, I attached the new moulding to the wall.
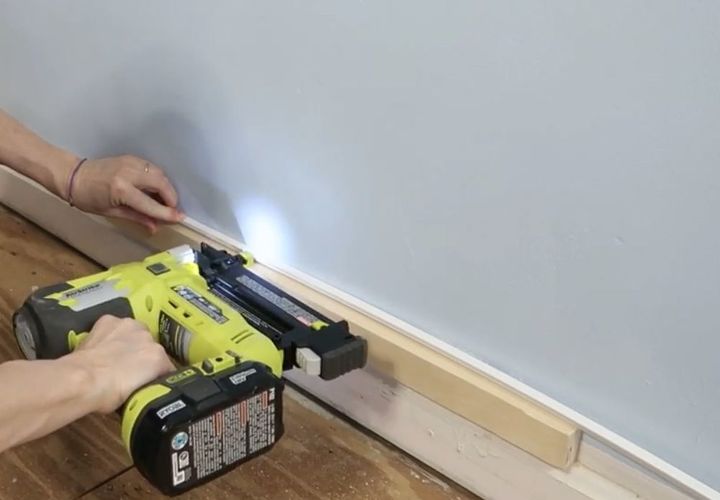
I continued to slide the pine board down the wall, keeping it on top of the existing baseboard, nailing every six inches.
Once all of the new moulding was attached, I painted between the old and new moulding and painted the old moulding with a semi-gloss white paint.
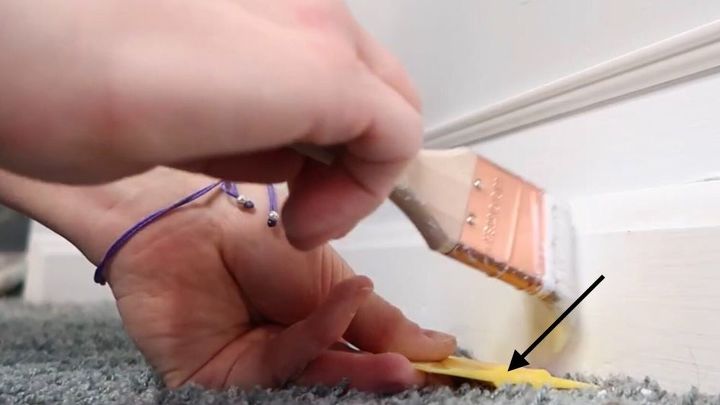
To keep from getting paint on the carpet, I used a piece of plastic (I used a wallpaper smoother) and moved it along the underside of the existing moulding, making sure the carpet was under the plastic.
Once the paint was dry, I added a bead of chaulk to the top of the new moulding and filled the nail holes.
It’s really that simple and depending on your room, takes about 2 hours from start to finish.
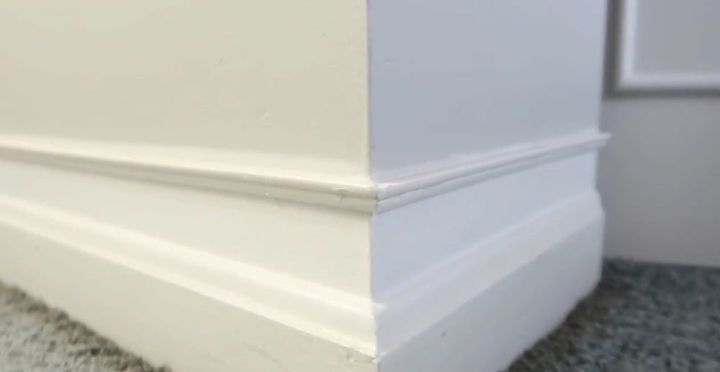
What a difference! Don’t you love projects that are inexpensive, simple and have such a huge impact on your room? I know I do!
Resources for this project:
See all materials


Comments
Join the conversation
-
I love this idea. The results look amazing. Thank You for sharing...
-
It’s a yes from me.


Frequently asked questions
Have a question about this project?
I would like to add crown moulding in my home. Can I use this method for crown? Also does the whole house need to match with base boards/crown moulding?
How do you remove the stamped information on the molding? It is stamped in black about every foot. Thank you.
Why did you add caulk to the top of the new molding?