


Easy DIY Painted Wine Cork Wreath
Today I want to share with you an easy DIY wreath project using wine corks. I’ve been saving corks for months now, because I knew someday I would come up a fun DIY project that would require corks. And when you live with someone who sells wine for a living, you end up with a lot of corks.
And so the DIY painted cork wreath was born. The best thing about this project is that you can customize the colors however you like. I wanted a festive wreath for the holiday season, but also one that would transition easily into spring… so I settled on various shades of green and blue. You could go with red and green hues for a Christmas feel, or silver and gold to celebrate New Year’s Eve.
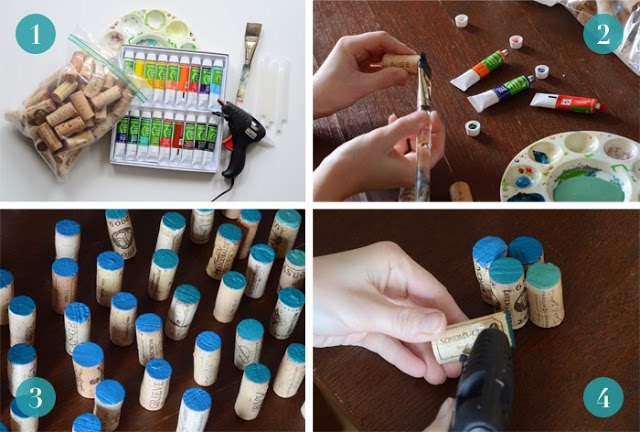
1. Here are the supplies that you’ll need for this project:
- 50 corks (you can buy them here if you don’t drink a lot of wine)
- Acrylic paint in a variety of colors
- Paintbrush
- Paint tray
- Glue gun with extra glue
- Ribbon and thumbtack for hanging
2. Paint one end of each cork. I did four different shades, so 12 or 13 of each color, but this is totally up to you depending on the colors you’ve chosen.
3. Let them dry thoroughly.
4. Now begin gluing them together using your hot glue gun. You will start by making clusters of seven corks, with one in the center and six surrounding that center point (see image #6 below for reference).
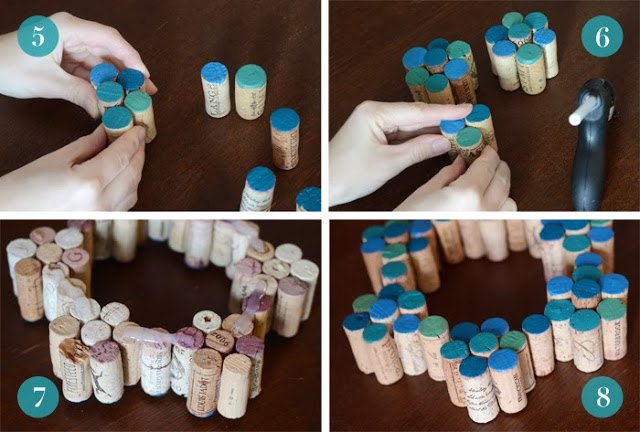
5. Some corks are longer than others, so I would recommend using the longer ones for the centers of the clusters (just for aesthetic appeal).
6. Create six of these clusters.
7. Now lay them out upside down on your work surface in a circle. Leave a bit of space in between each, and place one cork in between every cluster. You should be left with 2 corks (it’s always good to have a couple of spares). Once you’re satisfied with the layout, glue everything together using extra glue here. It also helps to put thick strips of glue around the whole wreath on the back (shown in image #7 above) to help strengthen the overall structure.
8. Now flip it over, and you have a beautiful new wreath for your door!
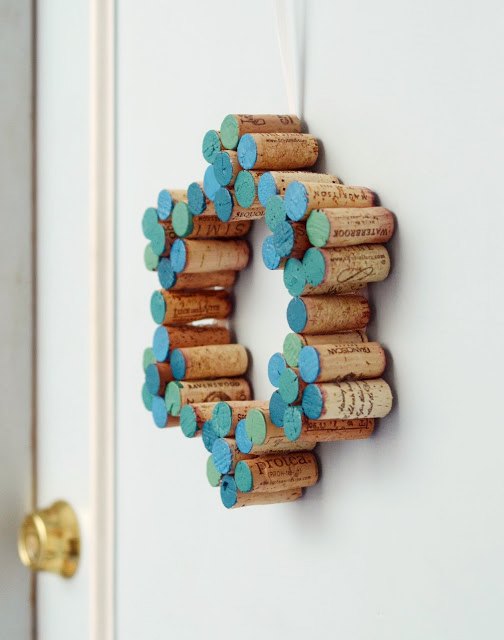
For hanging instructions and to see more photos of the final product, head over to my blog!

The process for this wreath is super simple, and you won’t need to raid the craft store to make one. You may already have many of the supplies at home.
Resources for this project:
See all materials


Frequently asked questions
Have a question about this project?