


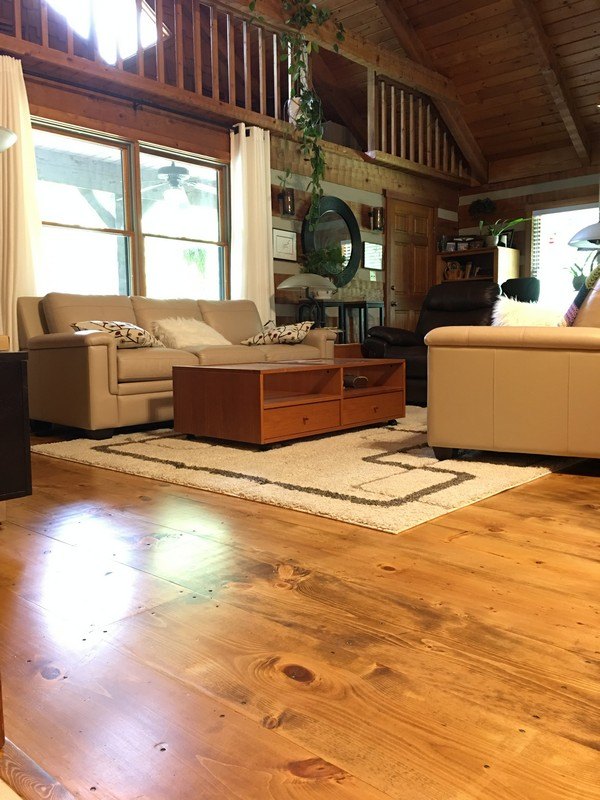
12" Wide Plank Pine Floor
8 Materials
$900
7 Days
Advanced
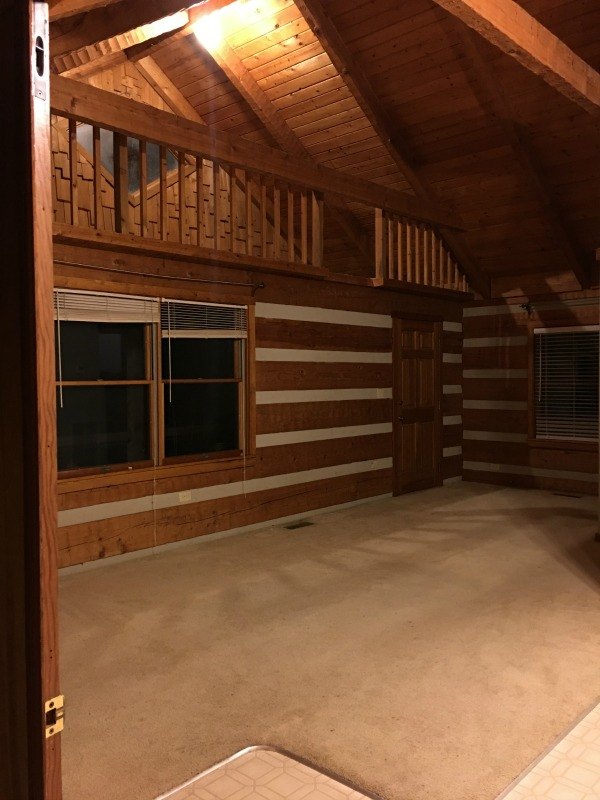
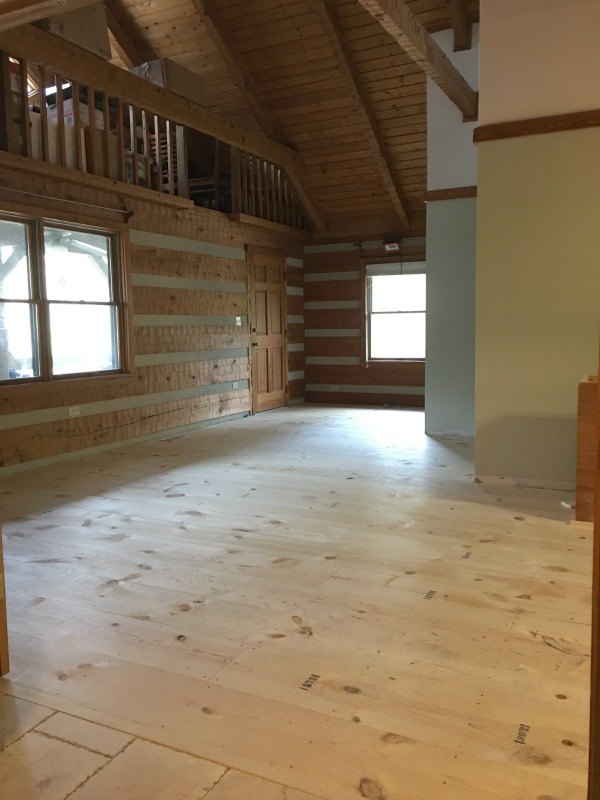
We are renovating a log home and one of the goals has been to choose materials that fit the house well and honor its uniqueness. The floor of the kitchen in our house is original, 30 years old, and it is 12" wide Ponderosa pine planks that were top nailed into the joists. Here is how we duplicated that floor in our attached MIL apartment on our house after talking with the original homeowner/builder. This is what the 450 sq ft room looked like before we started.
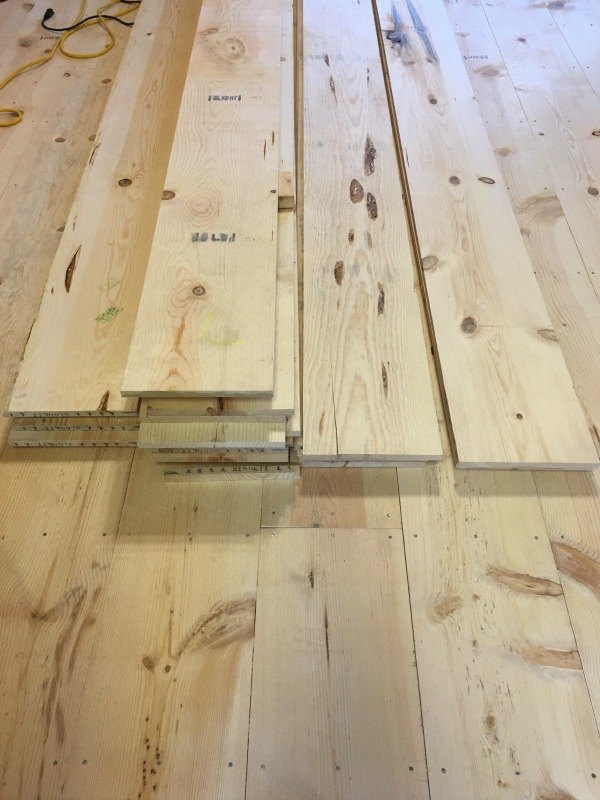
We were able to find #3 grade Ponderosa pine boards at a small local wood supply company for $1 per square foot. They are a pretty close match to the originals. We let them sit in the room for about two weeks.
Once we were ready to get started we began going through the boards, grading them from best to worst and stacking them.
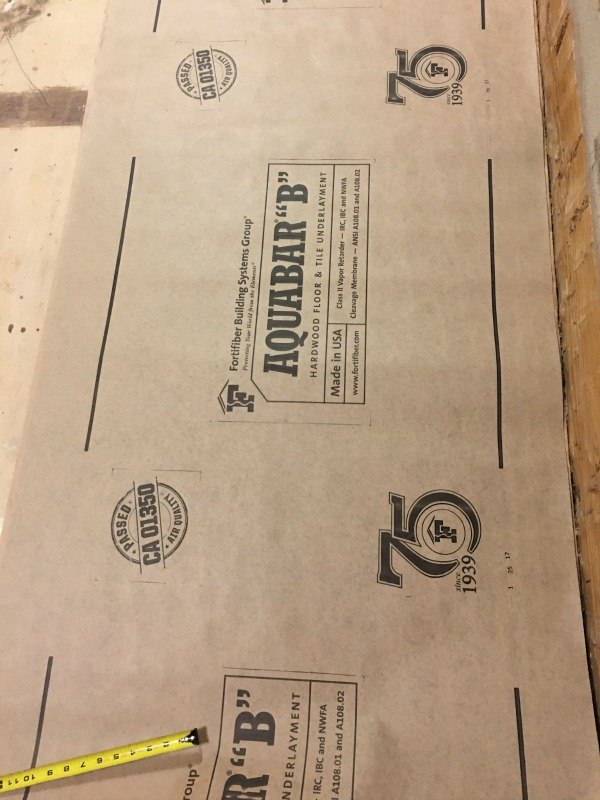
We laid down a layer of vapor barrier paper.
To keep our nail lines straight, we used a square to mark the location of the floor joists on the paper, using the nail line of the subfloor as a guide.
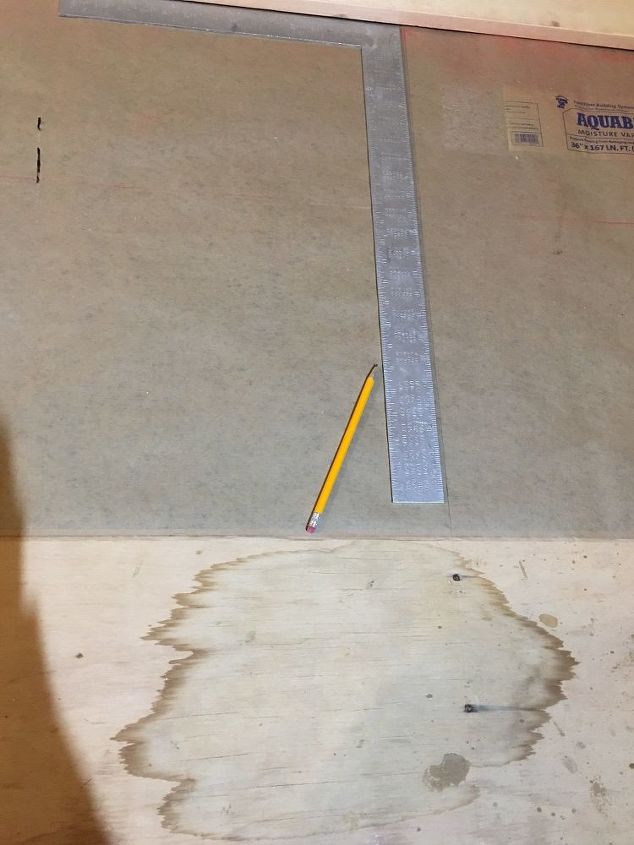
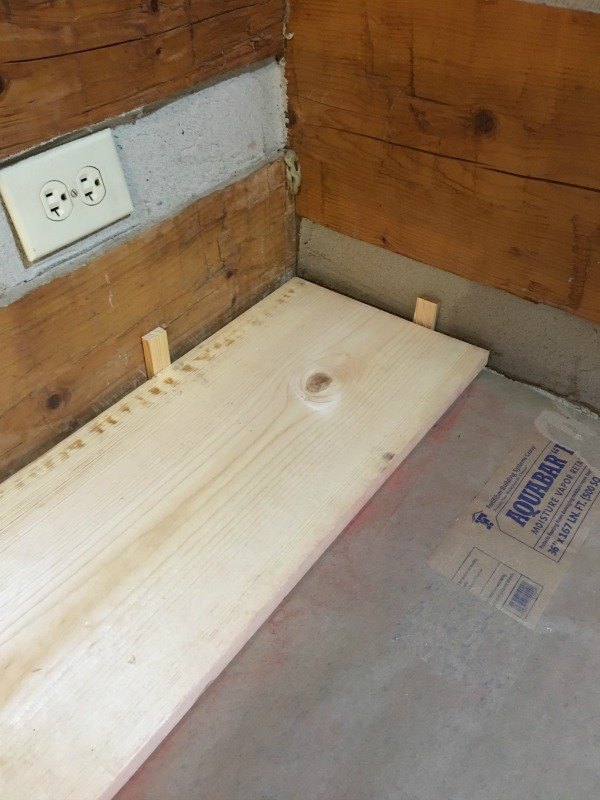
We used 1/2" thick blocks of wood as spacers between the boards and the walls. This will allow for movement in the boards with settling and expansion. We measured from the walls to the seam in the plywood subfloor to see if that line was square, and it was. So this gave us a good way to make sure our first board was laid square.
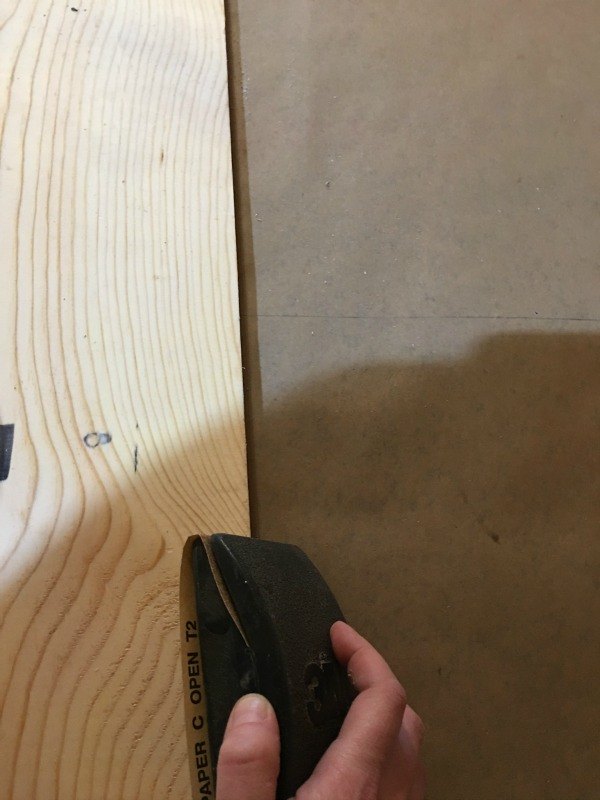
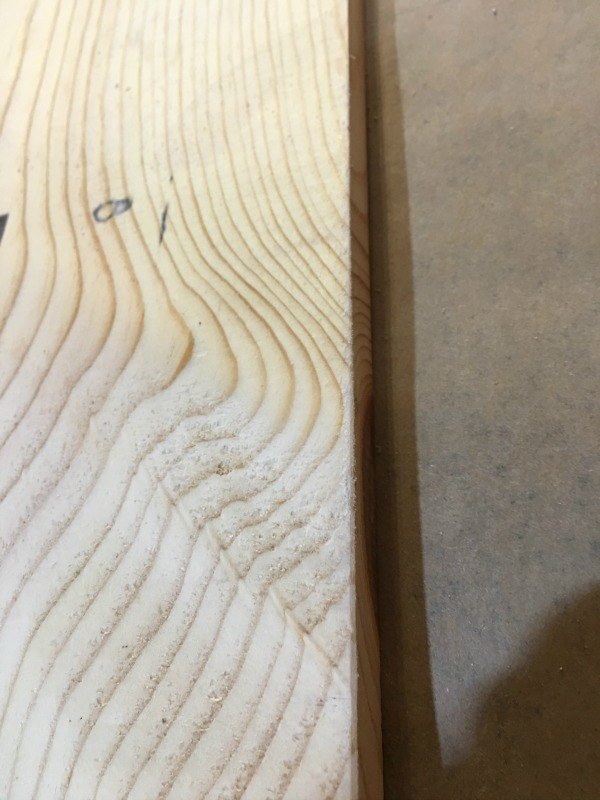
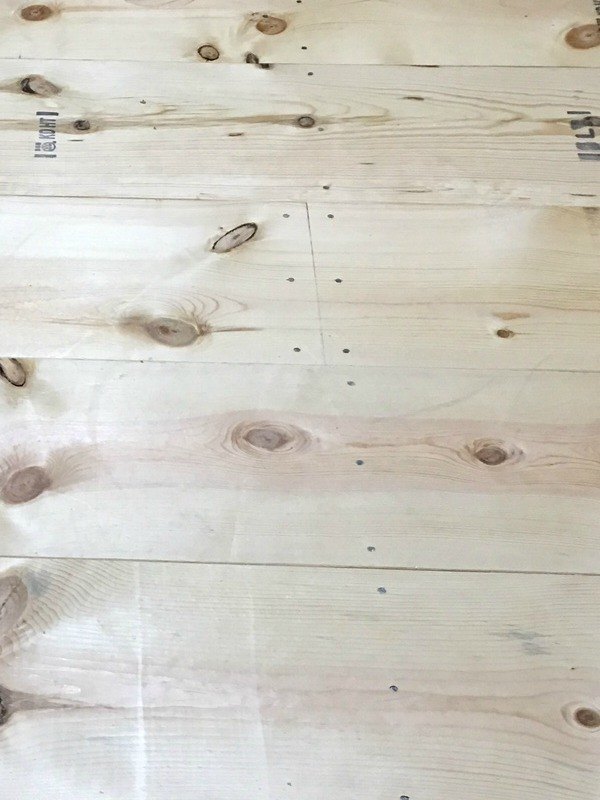
After each board was cut to size, we sanded a small bevel on the top two long edges to make a v-groove accent between the boards.
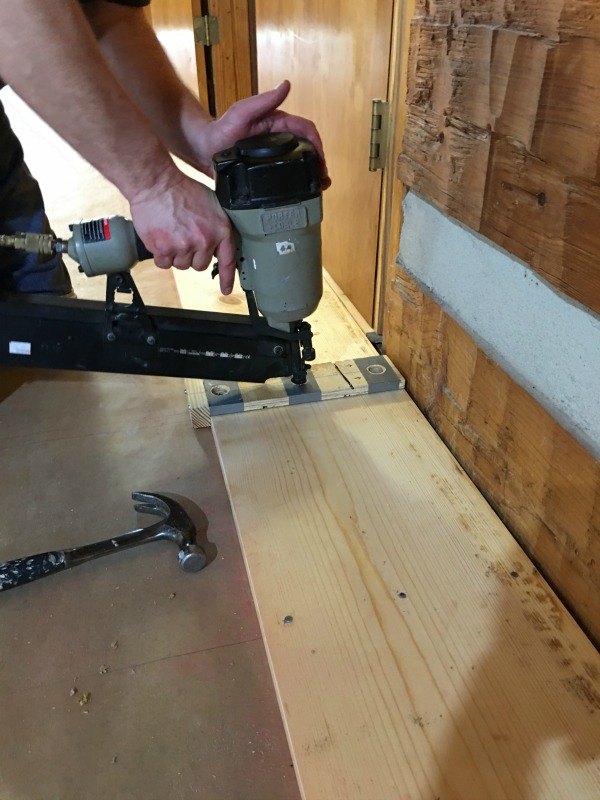
With each board we used a flooring nailer to nail the edge down and help keep the joints tight.
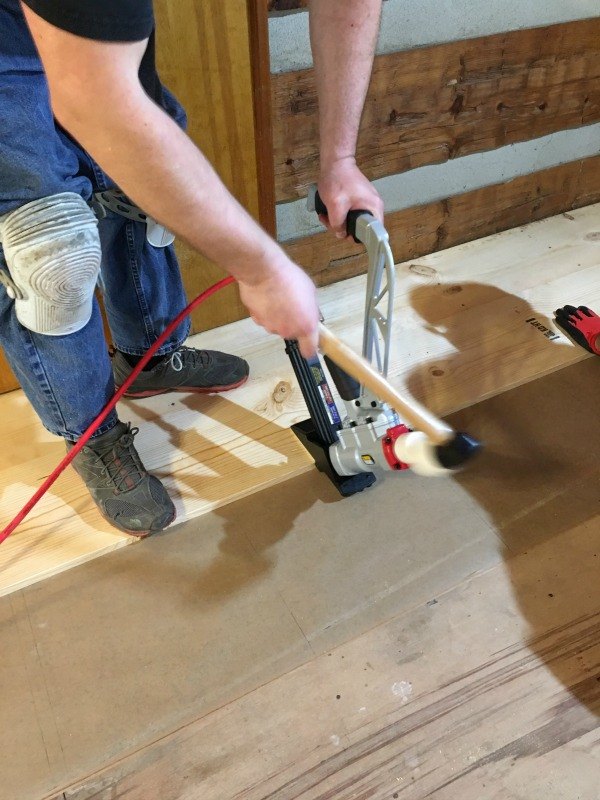
Then we used a framing nailer with 3" screw shank nails to top nail the boards into the floor joists, using a template (holes drilled into a board) to keep each set of nails evenly spaced and consistent.
We used a jigsaw to cut out vents.
When we had a butt joint of two boards, only one board actually was nailed into the floor joist. In the photo below, it would be the board on the right. See how those nails line up with the nails in the other boards? We used Liquid Nails for subfloors to basically glue the ends of the two boards together, so they will move together with expansion and prevent cupping on the ends. Then we cut about an inch off of some nails to use in the board on the left. We predrilled the holes through the boards and then nailed through into the subfloor. This way the nails didn't blow through into the basement ceiling below.
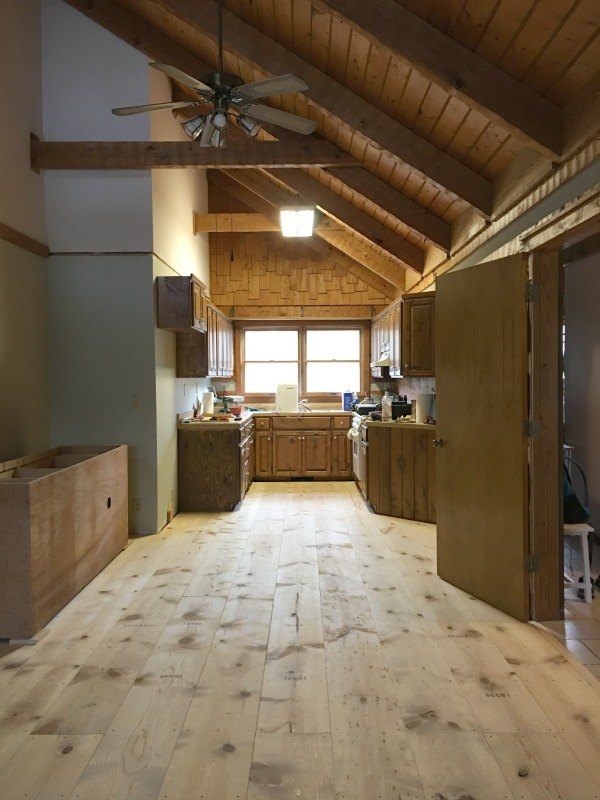
I have a lot more tips and tricks we discovered during this project that made the next floor we did so much easier. Make sure you read my blog post http://www.hoodcreeklogcabin.com/2017/03/diy-wide-plank-pine-floors-part-1.html for all of them as well as a full supply list. Here is what the floor looked like all completed.
To see how we finished and stained the new floor, visit this blog post http://www.hoodcreeklogcabin.com/2017/07/diy-wide-plank-pine-floors-finishing.html
Resources for this project:
See all materials


Any price and availability information displayed on [relevant Amazon Site(s), as applicable] at the time of purchase will apply to the purchase of this product.
Hometalk may collect a small share of sales from the links on this page.More info

Want more details about this and other DIY projects? Check out my blog post!
Comments
Join the conversation
2 of 40 comments
-
Beautiful job of keeping the same flowing through out.
-
Absolutely beautiful!!!


Frequently asked questions
Have a question about this project?
Just curious as to how soft this wood is. Would you think it would hold up with pups nails?
Just curious as to how soft this wood is. Would you think it would hold up with pups nails?
How do I get an invitation to view the other "Tips and Tricks" page links above? I am unable to view. LOVELY!!