


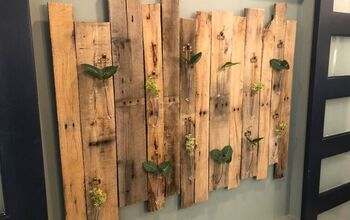
Pallet Board Dog Feeder
4 Materials
$15
1 Day
Easy
If you like to use reclaimed lumber, you'll love this dog feeder made from pallet boards. Your pet will love it too!
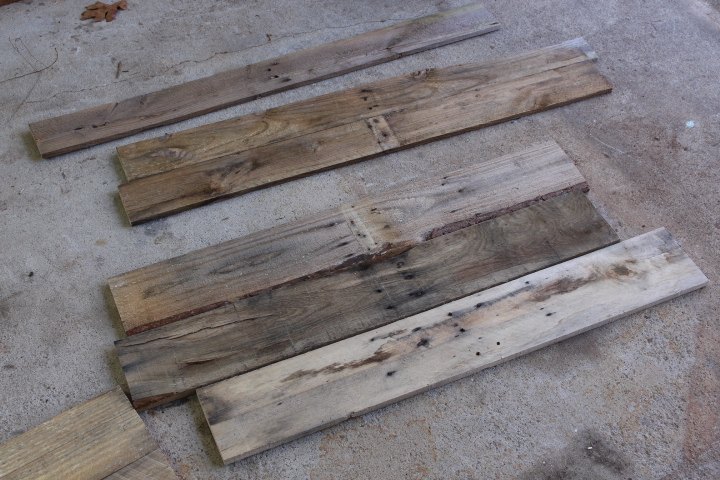
Ask around and check with different businesses or stores to access some free pallets. Then carefully disassemble the pallet and pick out the best boards. Preferably ones that aren't cracked or warped.
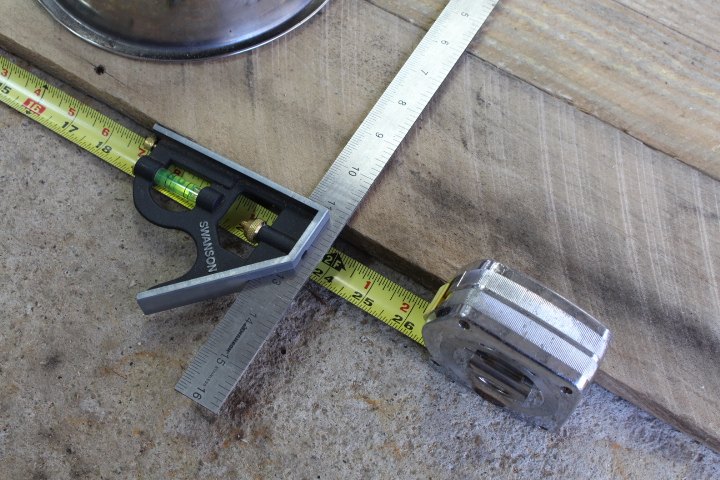
Take measurements of your bowls and also try to work with the existing dimensions of your pallet boards. This way you can minimize the number of cuts. You can check out my full tutorial and see the exact dimensions I used. You'll also want to consider the height of your dogs and perhaps adjust the height of your dog feeder.
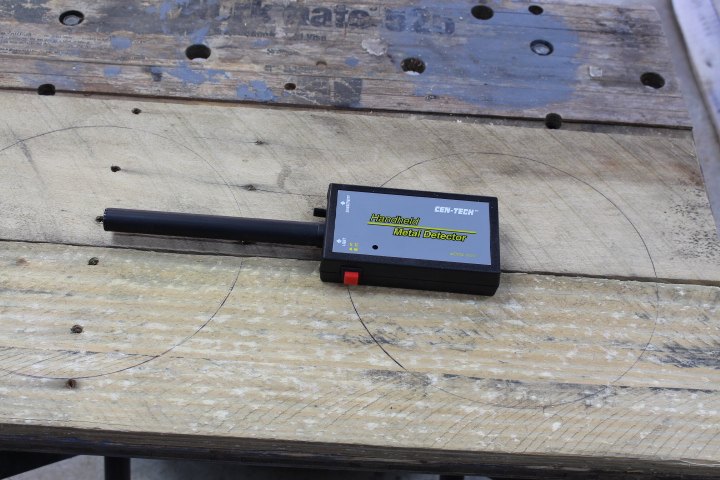
Although not a full-proof method, I like to use a small, hand-held metal detector to locate embedded nails before I cut anything. This is one downside of working with pallet boards. I also recommend looking for the ones stamped with HT which means heat treated. If in doubt, google what is stamped on your pallets to know how they were treated.
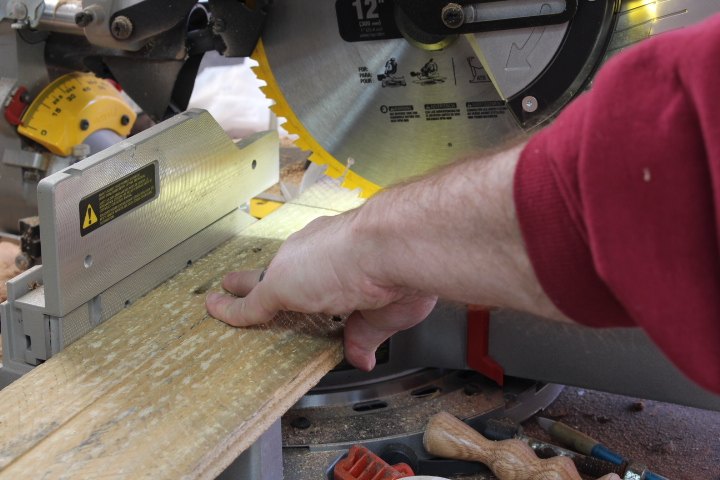
I mainly used the miter saw and made cross cuts. Be careful, because pallet boards can have embedded nails or other metal. If you don't feel safe using the power saws, you could use a hand saw.
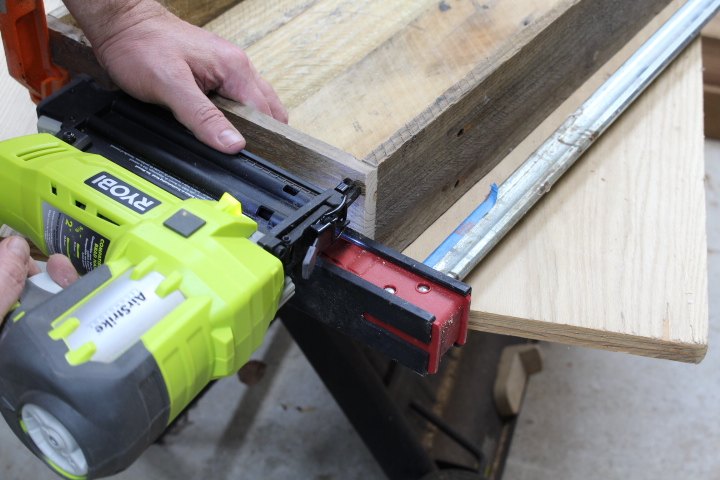
I used wood glue and my nail gun to assemble the dog feeder. Clamps help hold the boards while I nail.
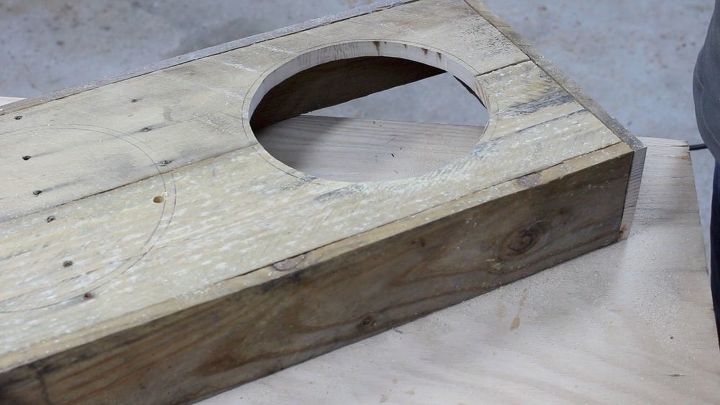
Measure the dimensions of your bowl and cut out the holes. You want the holes to be just the right size to accept the bowl but not fall through. My bowl had a lip that protruded from the rim. So I cut the hole just the right size so the lip of the bowl would rest on the wood.
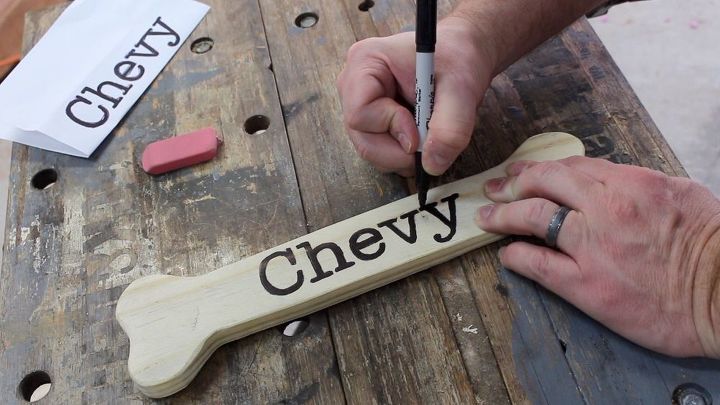
I took a scrap pallet board and sanded it really well. Then I freehanded the outline of a bone and cut it out. I added my dog's name to the bone with a Sharpie marker.
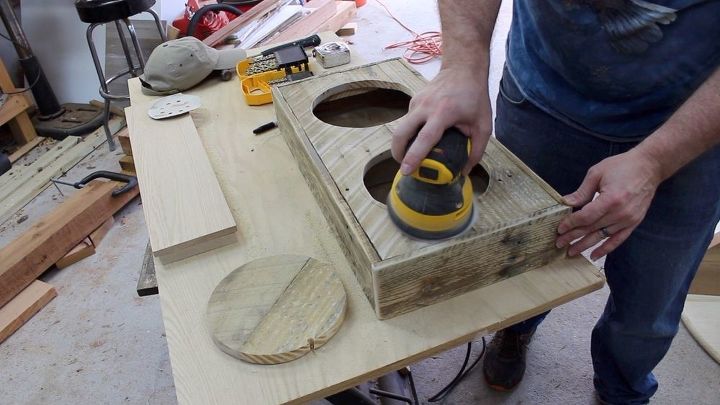
I lightly sanded surfaces and edges to get rid of the potential for splinters. I didn't sand too aggressively because I wanted to preserve the weathered look of the pallet wood.
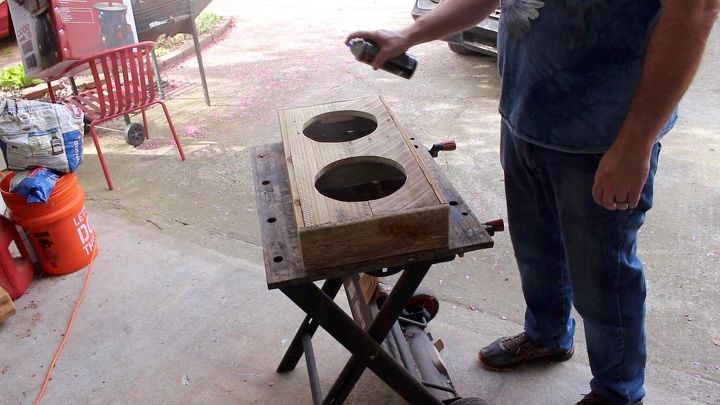
I then applied several coats of lacquer. Probably 4 or 5 coats. Read your container instructions on how to apply and dry times.

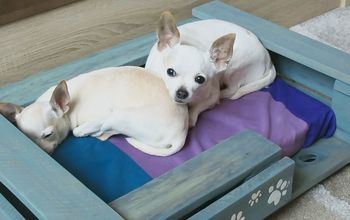
Chevy loves her new dog feeder station!
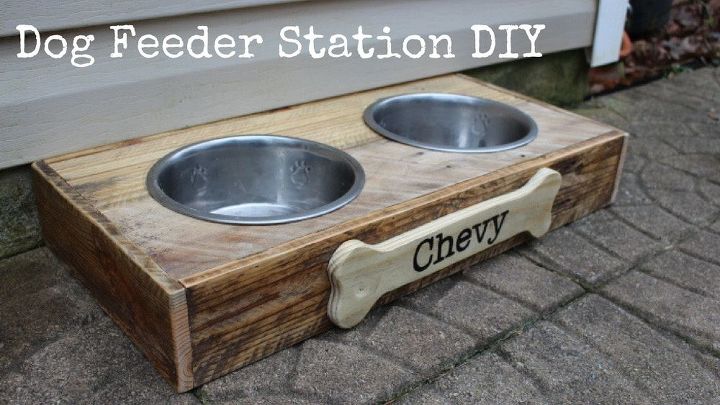
The finished dog feeder station.
Check out the full tutorial (and YouTube Videos) for the dog feeder station at the links below. Be sure to also subscribe to my website. If you subscribe, I will send you the Home Shop Safety & Tool Checklist for free. You can also check out my YouTube channel and find other videos on DIY projects.
{
"id": "4778293",
"alt": "",
"title": "",
"video_link": "https://www.youtube.com/embed/VxYw9OuzCtw",
"youtube_video_id": "VxYw9OuzCtw"
}
{
"width": 634,
"height": 357,
"showRelated": true
}
Enjoy my video and please consider subscribing to my channel. Thanks!
Resources for this project:
See all materials


Any price and availability information displayed on [relevant Amazon Site(s), as applicable] at the time of purchase will apply to the purchase of this product.
Hometalk may collect a small share of sales from the links on this page.More info

Want more details about this and other DIY projects? Check out my blog post!
Comments
Join the conversation
3 of 20 comments
-
Awww, our dogs name is Chevy 😁 great project, ty for sharing all the deets 😁
-
Are bowls with rounded sides easier for a dog to clean rather than straight side ones as shown?


Frequently asked questions
Have a question about this project?
Are those fake finger nails?