


Rustic DIY TV Gallery Wall on a Budget, PB Inspired TV Wall Decor
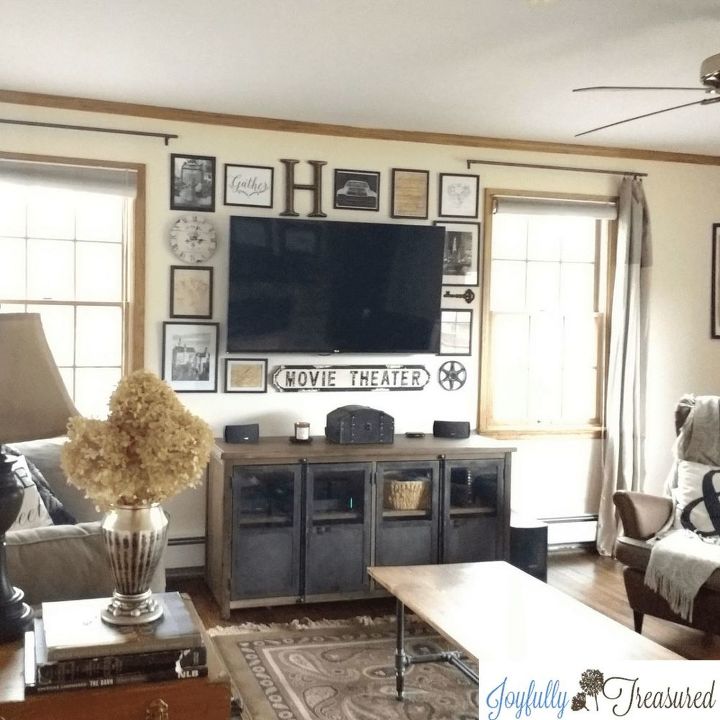
It was so much fun creating a TV gallery wall in our family room.
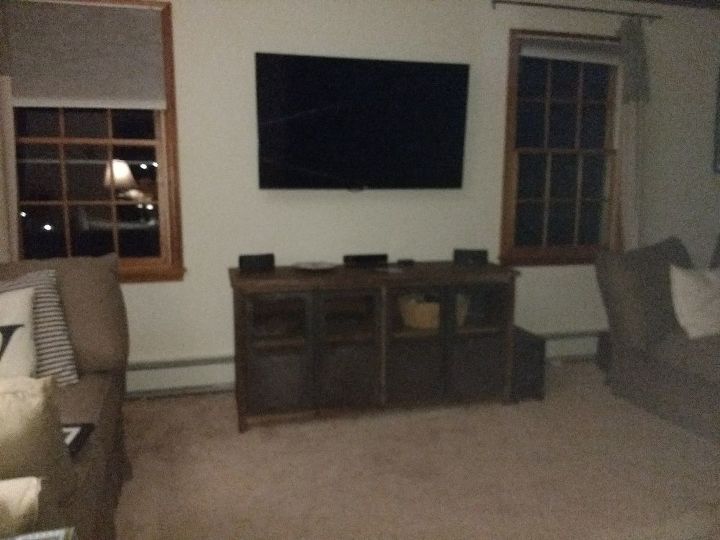
Our TV is mounted higher than average, and it is gigantic! So, I created my own version that fit the space we have. Here is the transformation!
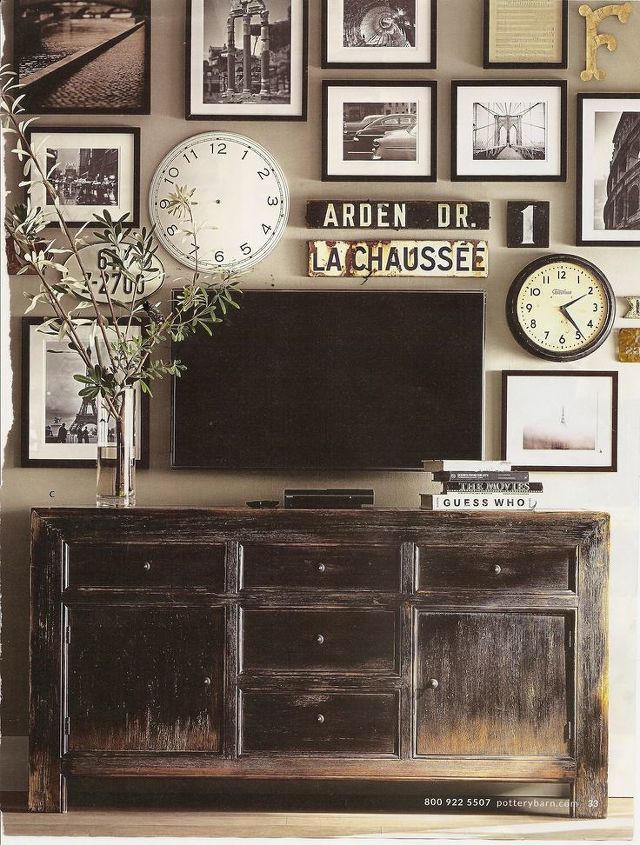
This whole project is inspired by a photo I saw in a Pottery Barn catalog. I had been contemplating various TV wall decor ideas for the family room, and when I saw this photo...I knew what I had to do!
What I Used for our Wall:
I used all Dollar Tree frames filled with various free photos, maps, and printables that are meaningful to our family. For example, vintage sheet music because I play the flute, and a schematic of my husband's favorite car engine. The free "gather" printable is from The Mountain View Cottage. I also put in photos of cities we love, places we want to travel, vintage maps of places we have lived... I really had fun with it! There are tons of free maps available for download from the Library of Congress.
I had the vintage maps and printables that take alot of ink printed at Staples. The photos I had developed into 8x10s at Walgreens. I faux “matted” two of the 8x10s into Dollar Tree 11×14 frames. I found the key, monogram letter, and theater sign at Hobby Lobby. The movie reel is from an antique shop, and the clock I purchased on eBay.
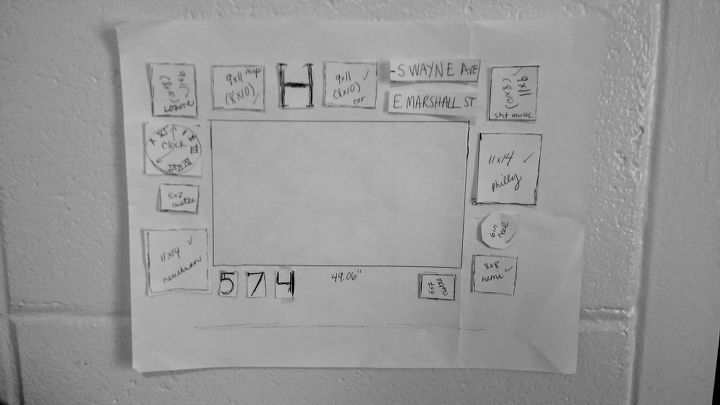
We were away from home when I was planning out the wall, so I made a crazy little scale version on a sheet of paper to see how I might arrange things. I was just playing around with ideas from the Pottery Barn inspiration photo at the time. I ended up not getting all the pieces I originally used when I took this photo, but I definitely felt like this little model helped me a ton to know roughly where everything was going before I put all the holes in the wall!
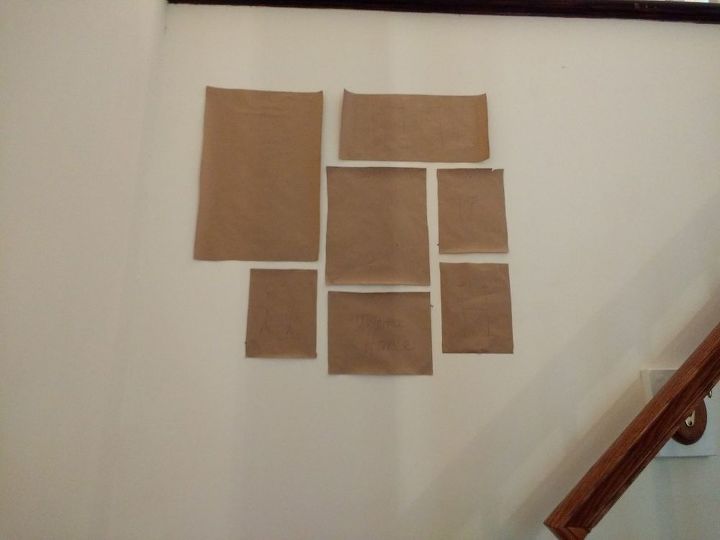
To hang photos for gallery walls, I use brown Kraft paper to create templates of each item I want to put on the wall. I mark a hole with a pencil where the hanger is for each item. Then, I used painters tape to arrange the paper templates in a way I liked in the wall. I put the nails in through the paper holes before removing the templates from the wall. Then, all I have to do is hang everything on the perfectly spaced nails! Unfortunately, in my hurry I forgot to take a photo of the templates on the TV Wall, but this is the same process I used for the photos in the foyer.
t wasn’t too time consuming to cut the templates for the TV wall decor, and it is the foolproof method I need. Last time I tried to “eyeball it”, my son’s bedroom became home to a collection slanted airplane artwork!
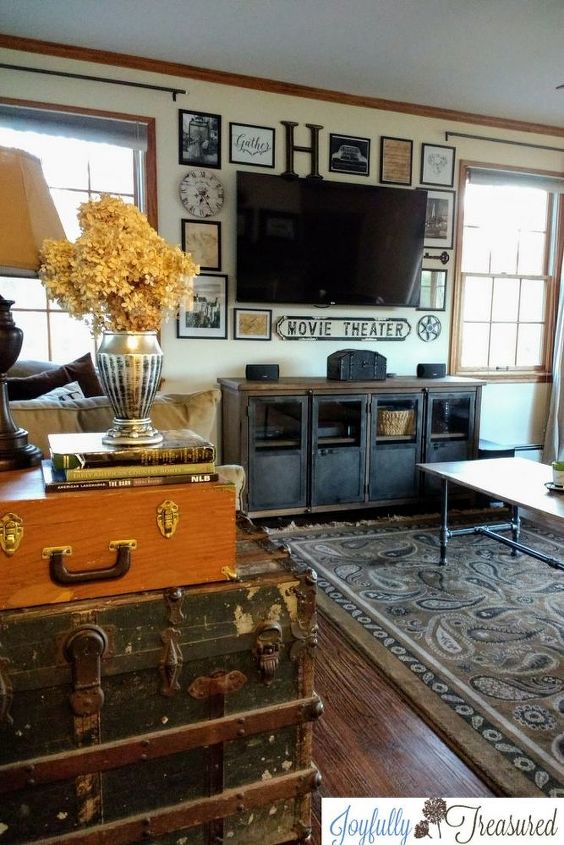
IThis was such an easy, creative, and affordable project that fit the rustic industrial style of our family room. If you found this project useful, please click through below and pin it!
Read this guide for more ideas on how to decorate around a tv.
Resources for this project:
See all materials


Comments
Join the conversation
-
Beautiful space. Inspires me to do something to my tv wall. Thanks
-
Love this!


Frequently asked questions
Have a question about this project?
Looks really great! I love how it takes away the focus from the TV. I have the problem of rearranging my living room and the TV is several different ways. I guess I am old school that way. Any suggestions?