


Farmhouse Stain Shaded End Table Makover

5 Materials
$20
5 Days
Advanced
I picked up a couple of end tables a while back for $10, and they have sat in storage for a few months. I just did not know what to do with them. I really like to stain shade and I wanted to use them for that but I was not sure what I wanted to put on them. While I was out shopping I seen all the farmhouse decor and lots of cow and pig pictures. I decided I definitely wanted to put a cow on one and a piggy on the other.
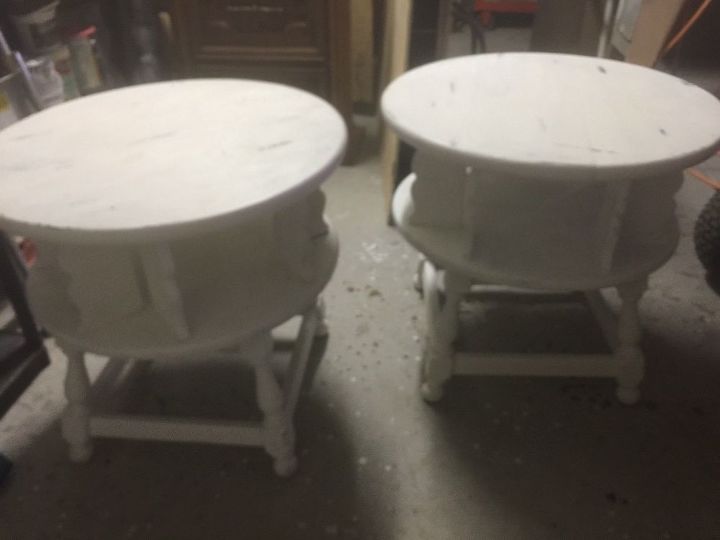
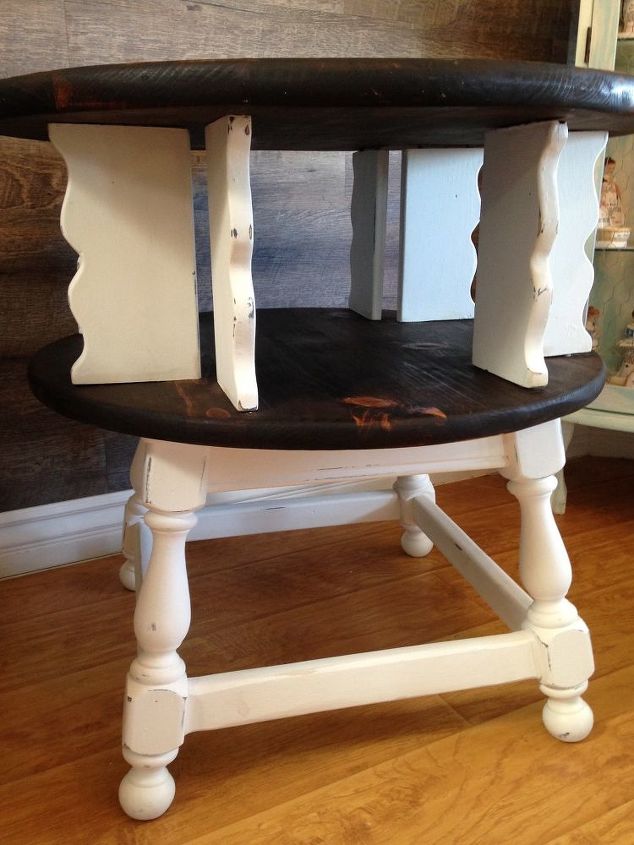
Here are the tables before. They had been painted. They also swivel which is really neat!
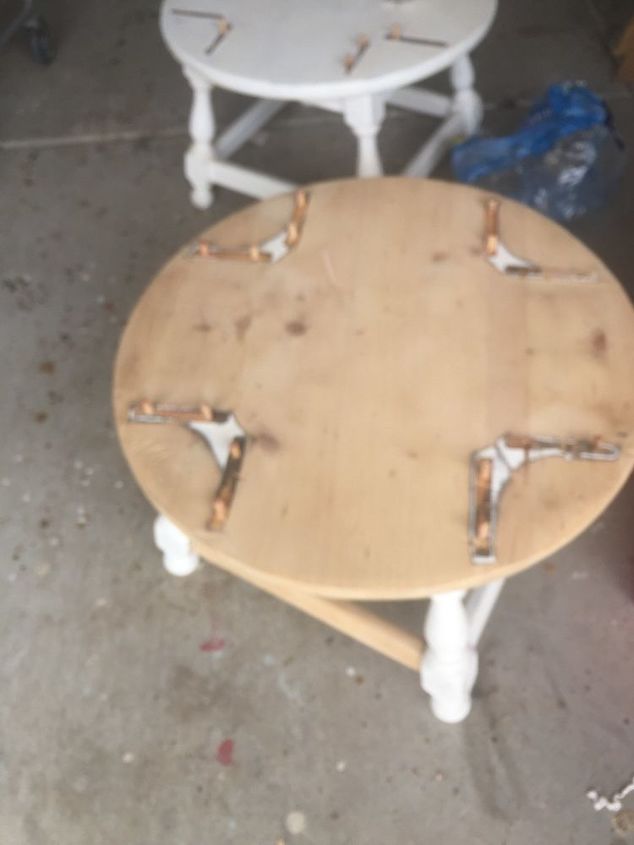
I took them completly apart and sanded the tops and bottoms.
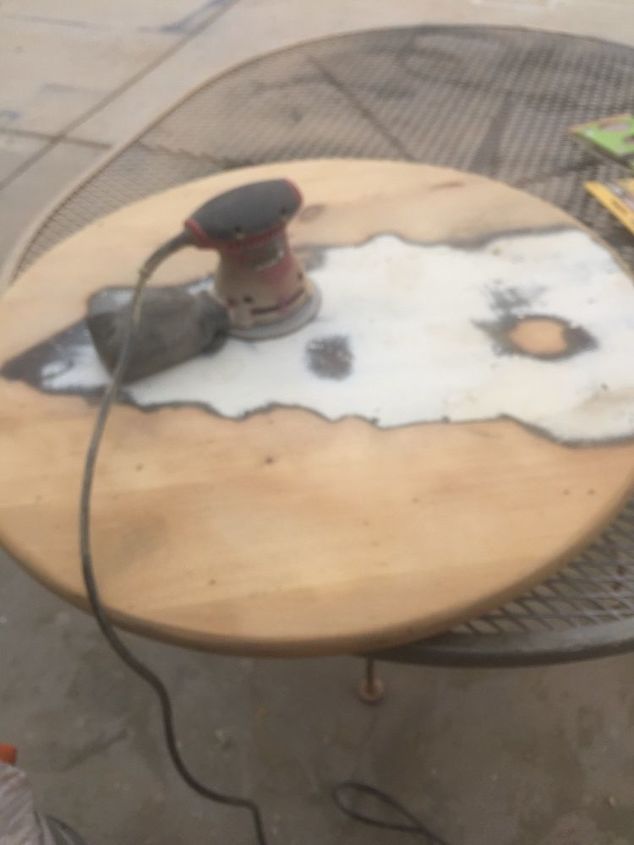
Sanding! I sanded with a 60 grit and finished with a 120 grit. I don’t like finishing with anything higher than a 120 when I am stain shading as the stain seems to “grab” better when going no higher than 120. Anything lower and it may be too ruff.
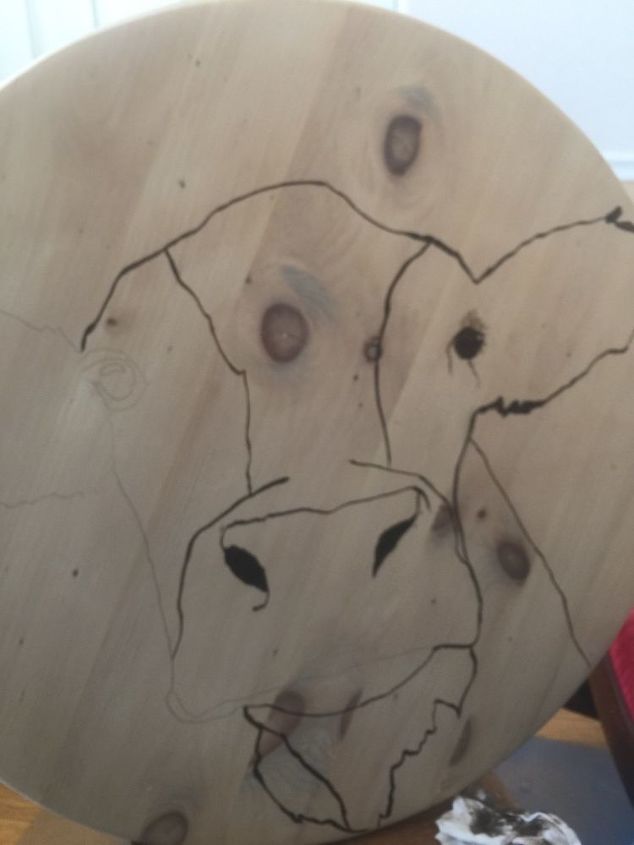
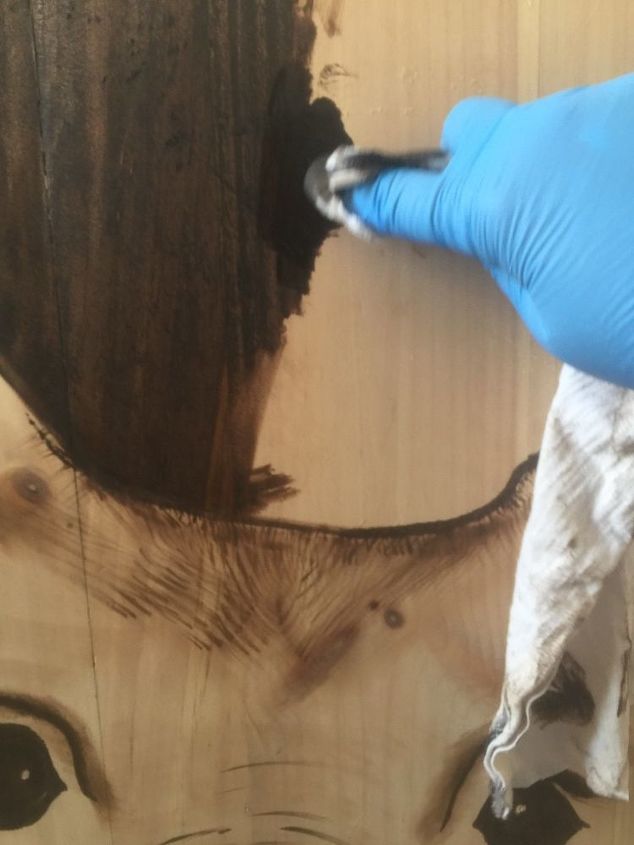
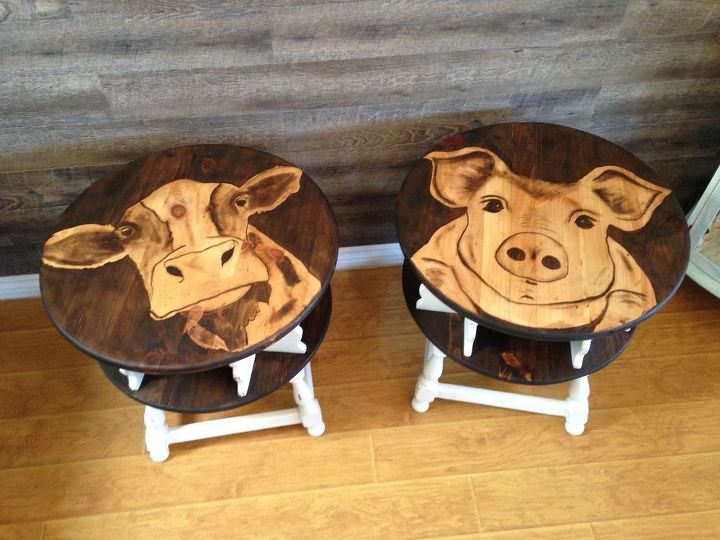
Outlining the cow. I draw on my image with a pencil then use a small brush or my finger wrapped in a cotton cloth dipped in stain to do the outline.
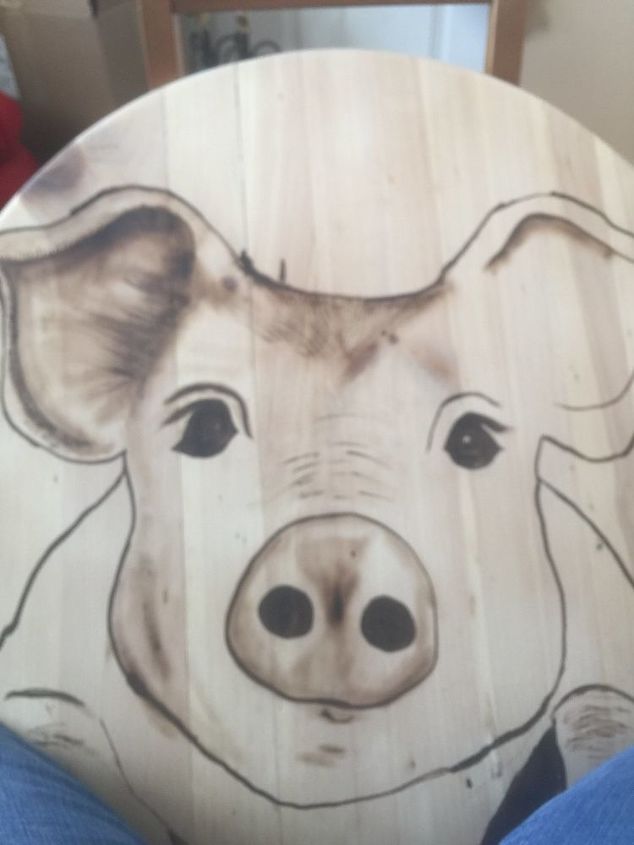
Little piggy completely outlined and shading started.
Staining the outer area of the image. This is done just like you would stain a table. Dip your cloth in stain, apply and wipe off excess.
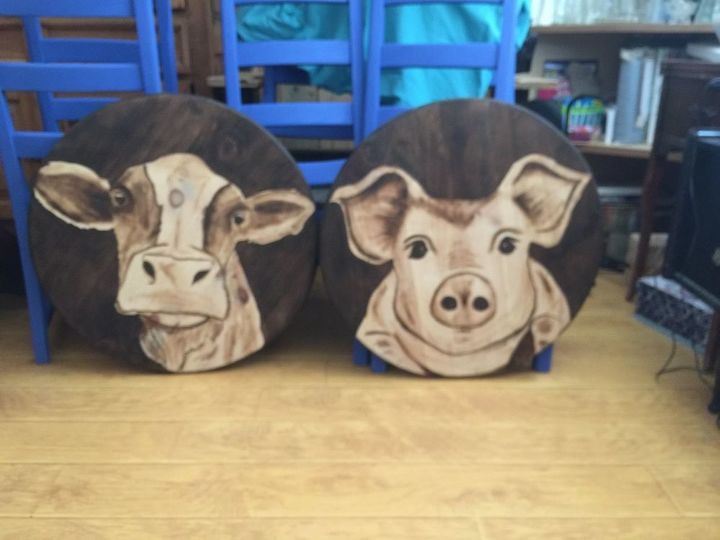
Tops are complete. Stain shading is a process of using just stain to create the image. I draw the image on with a pencil, I do not use stencils. Next step is to outline the image with stain. When you use a brush or even your finger wrapped in a cloth you have to dab all excess stain off to keep stain from running. I let set for a few minutes and lightly wipe with a clean cloth. After I have outlined I use my finger wrapped in cloth with excess dabbed off to shade the image to create details. I use a brush to do detail like eyes.
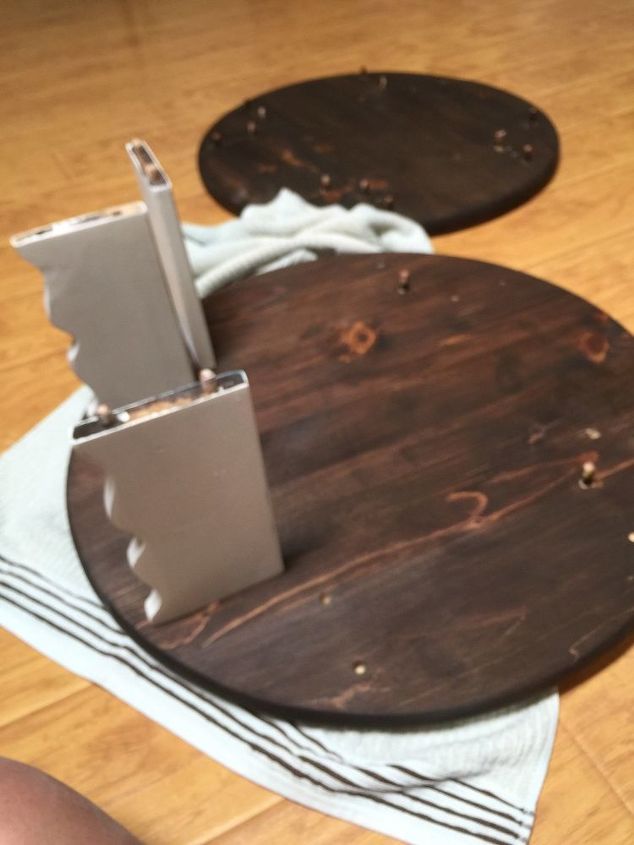
The image is on top but I also stained the bottoms. I like detail! I painted the inserts and bottom of table with chalk paint that I make. It is antique white.
All finished. I distressed the painted areas.
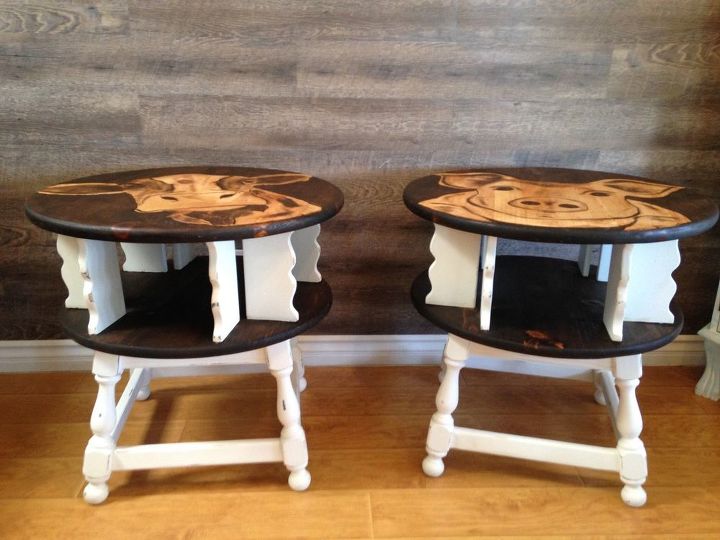
Completed. I sealed the painted areas with wax and the stained areas with wipe on poly.
Little piggy
All done! I just love them❤️. They turned out just like I wanted.
Here is the link to my FB page to see more of my work http://www.facebook.com/memawslovelyglass


Any price and availability information displayed on [relevant Amazon Site(s), as applicable] at the time of purchase will apply to the purchase of this product.
Hometalk may collect a small share of sales from the links on this page.More info
Comments
Join the conversation
2 of 33 comments
-
These are beautiful . Love them. Great job.
-
Just Too Cute. Love your tables. You could also create this onto canvas for the latest-up-to-datest artwork. Good job. More inspiration.


Frequently asked questions
Have a question about this project?
what would be the finishing to staining a kitchen counter top
I have one of these tables and I’ve been dreading painting it. Were they hard to take apart and did they go back together just as sturdy?