


Ordinary Snapshots Into Glitzy Wall Art

by
Marc Erick
6 Materials
$10
5 Hours
Easy
I wanted a way to display some snapshots I had, but was tired of just popping them into store bought photo frames. During the course of this project I also got a jump-start on some Christmas gifts as well! I used an app called PicsArt to enhance my pictures. Of course you don't have to do this part but it's super fun! It's available on Playstore and it's so fun to use. Here are the pictures before & after using the app.
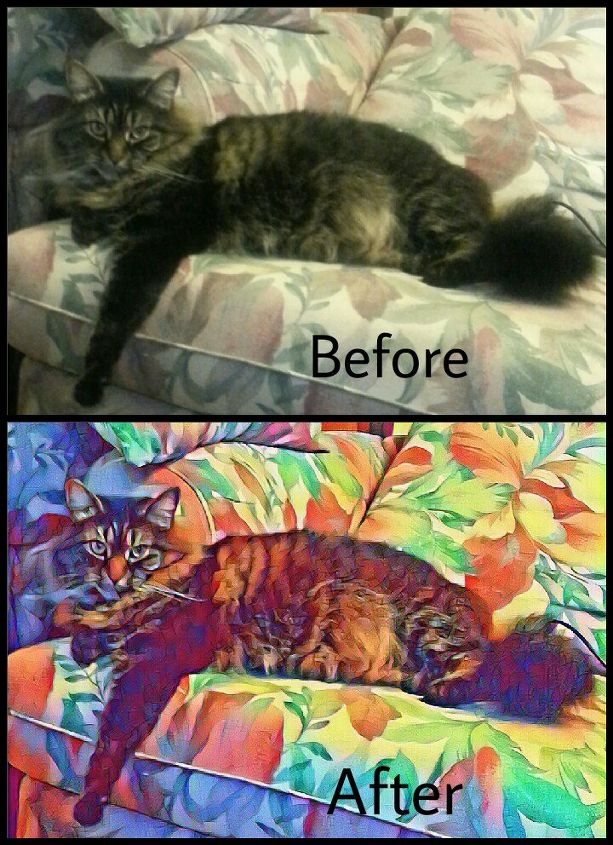
Bandit
The app allows you to manipulate and edit pictures, make stickers, add text and so much more... this is my kitty Bandit
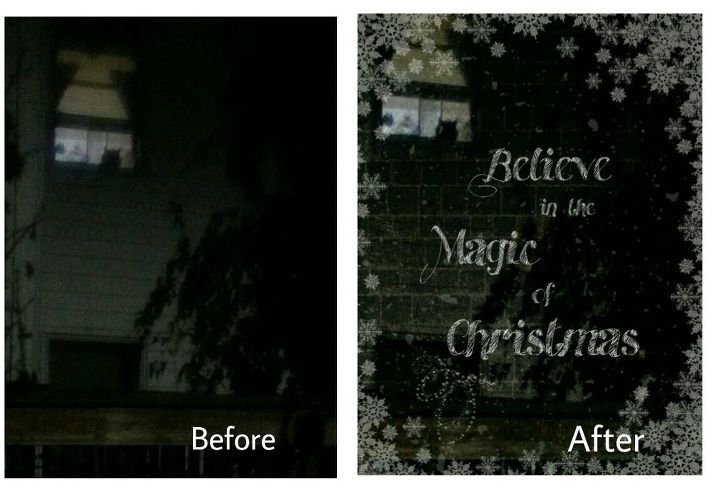
Bandit in window
And this is him in the window. ..I see this every night when I get home from work. I love how the finished picture came out and decided to use it for christmas gift giving.
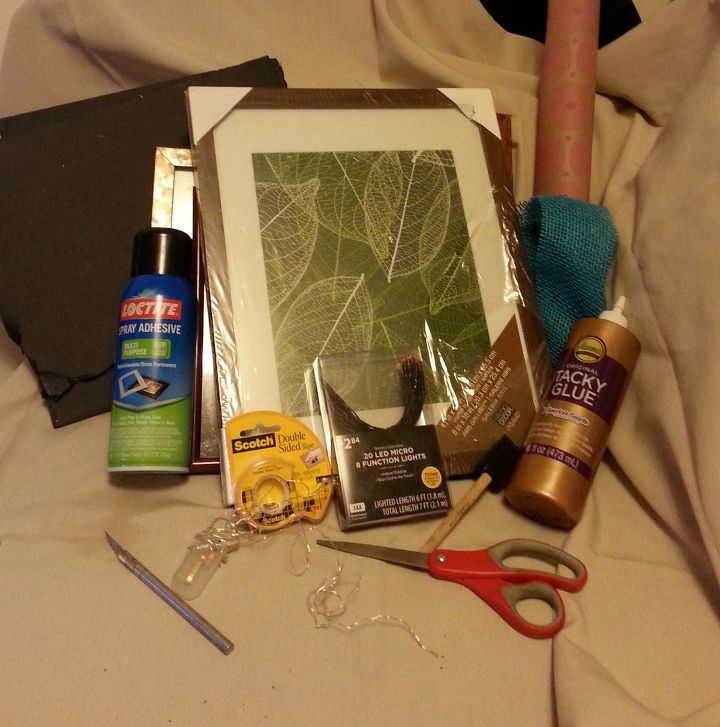
Anyway, you will need:
Your picture- i used a 5x7, a frame- i used an 11x14 (found 5 of em at a thrift store for $2!), foam board, battery operated string lights -I used the kind with a timer, craft sand, tacky glue, permanent glue (e6000), craft knife, spray adhesive, spray acrylic, craft paper, double sided tape, ruler, brushes
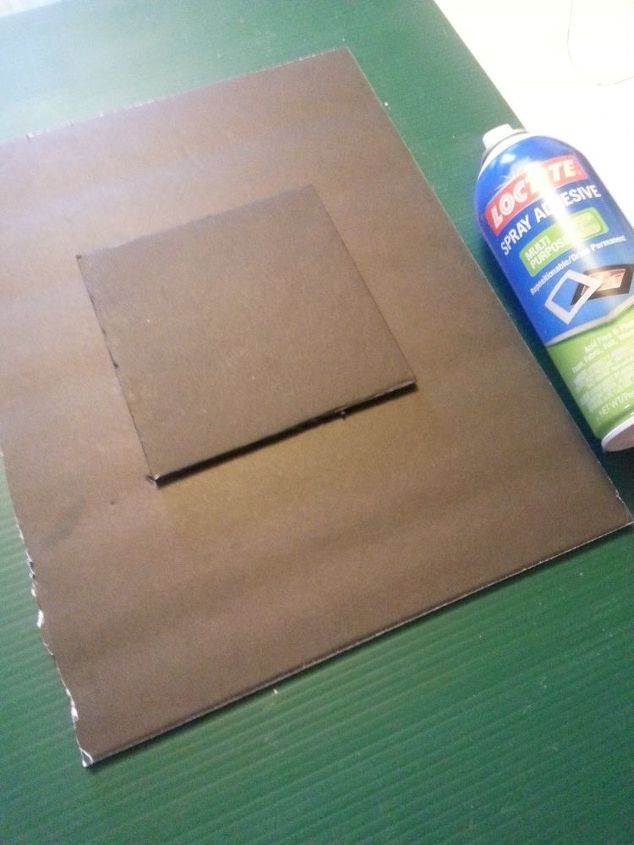
Take apart the frame and save the glass and backing for another project. Measure the inside of the frame and your picture. Cut the foam board (I used black) in those two sizes. Center the smaller piece on the larger piece and generously spray with the spray adhesive. Remove the smaller piece and attach your picture to it, smoothing out any air bubbles, set aside. Now attach the string lights.
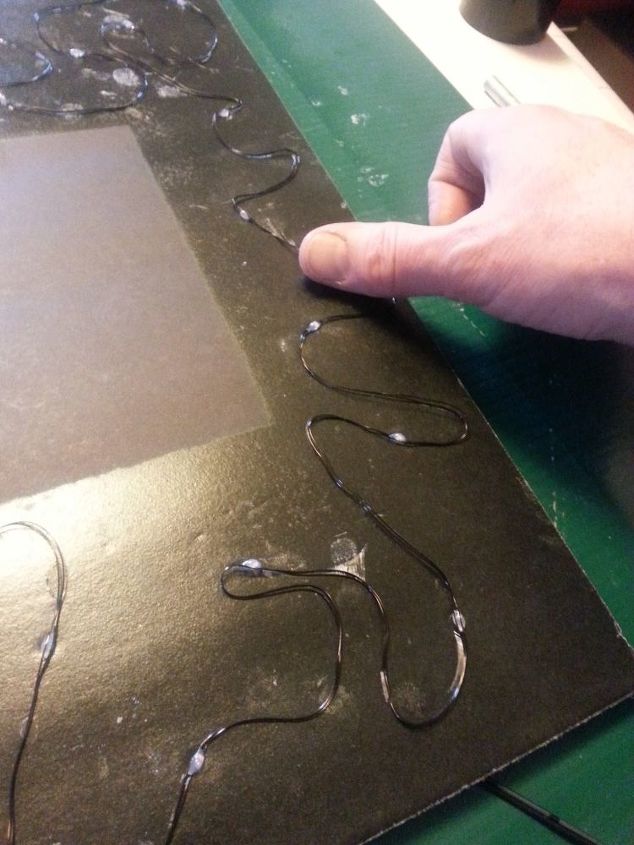
Making a swirled design, gently press the light strand onto the sticky foam board. This can be tedious but I found it fun ☺ Be sure to leave the center part empty. Once you've reached the end, make a small slit and guide the wire through.
Next, liberally brush the surface with tacky glue, again try to leave the center empty.
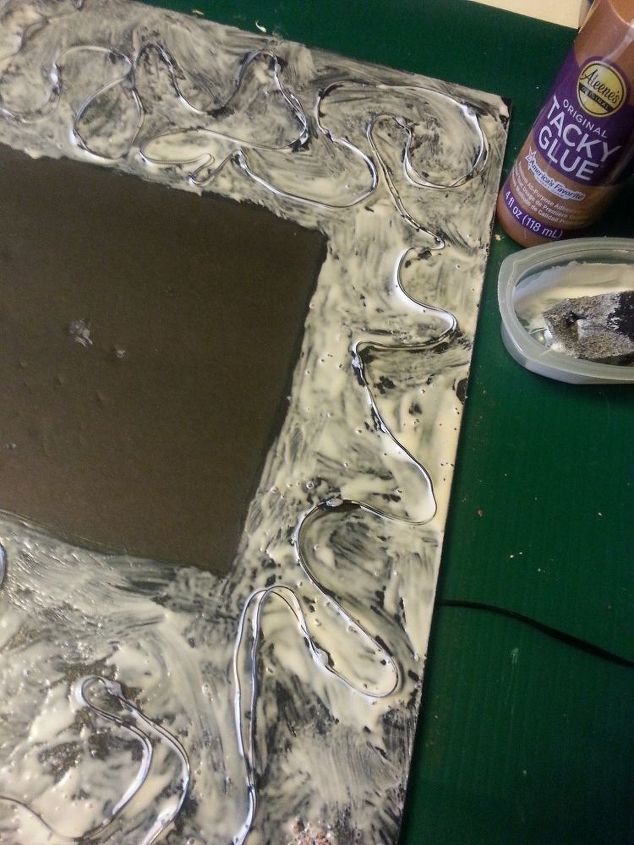
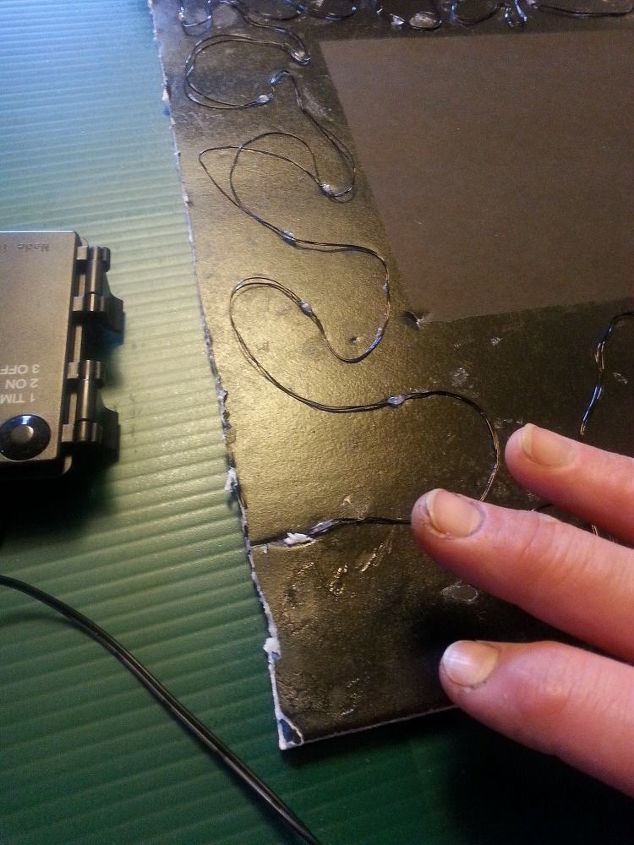
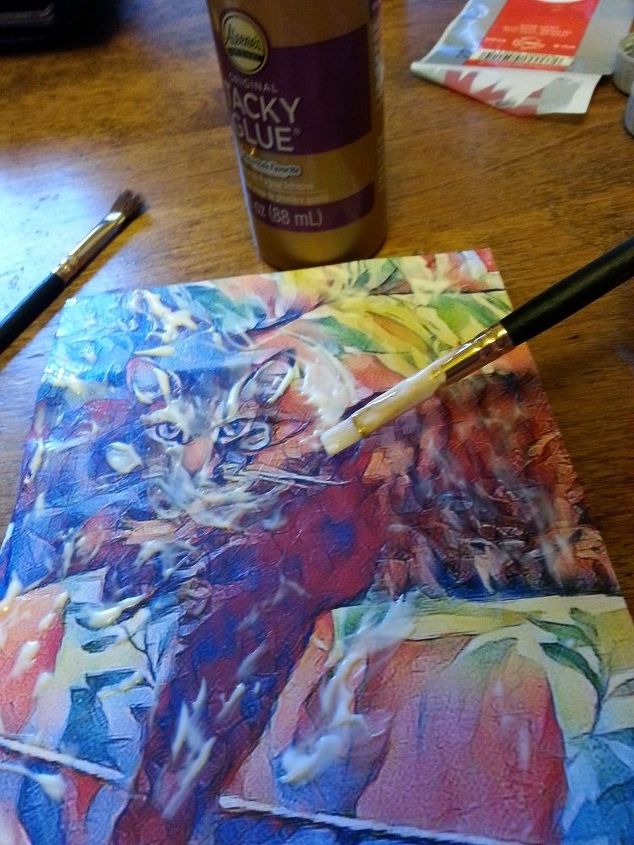
Mix the sand to your desired color (I used red & black ) and completely cover the glued part . Give it a gentle press all over. Allow to dry completely. In the meantime, you can enhance your picture further. ..I did this to only one of the pictures. Using tacky glue (or ModgePodge) cover the entire picture using brush strokes to create texture. It will dry clear.
Allow to dry completely. Next, spray the sand covered piece with spray acrylic. ..this will seal the sand in and give it a nice sheen. Once everything is dry, glue your picture to the center and again allow to dry.

Now we'll put it all together. Line the inside lip of the frame with permanent glue and place the picture in. Attach the battery pack with double sided tape and allow to dry. (I added some canned goods to add weight)
Because these were gifts, I decided to add a nice backing...
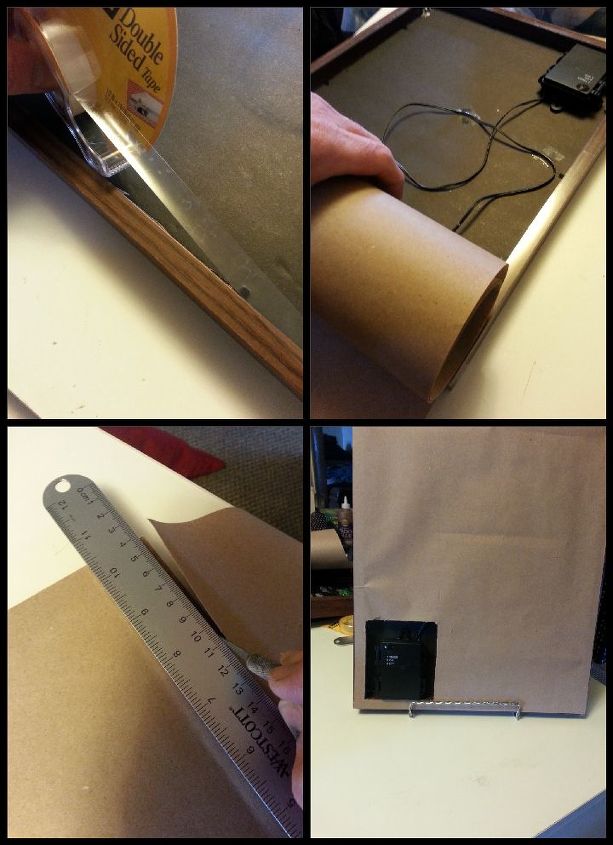
Line the back edge of the frame with double sided tape. Unroll the craft paper over the tape. Using a ruler and an xacto knife trim the edges and cut an opening for the battery pack. Attach hanging hardware and we're done!
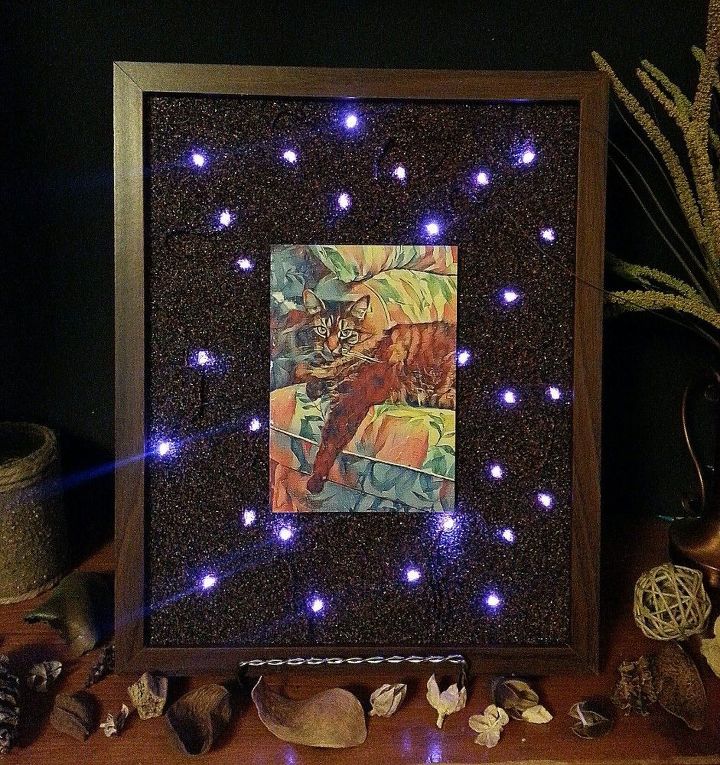
If you zoom in, you can see the detail of the light string.
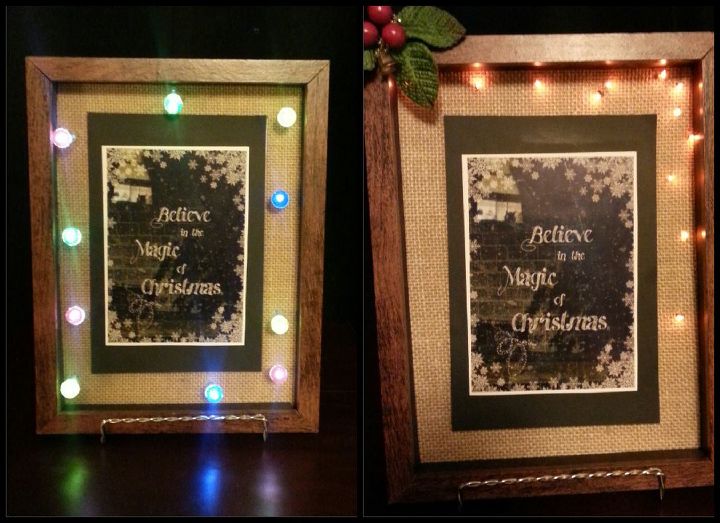
And these are for Christmas. They are made the same way except I swapped out the sand for bulap and made small holes to push the lights through.
I'm really happy with how they all turned out and hope you do too. Thank you for checking this out and happy crafting!


Frequently asked questions
Have a question about this project?