


How to Reupholster Kitchen Chairs
2 Materials
$30
1 Hour
Easy
Want a quick kitchen update without breaking the bank? This DIY was $30! These are the kitchen chairs… before. They’re not the worst. They actually go very nicely in our kitchen.
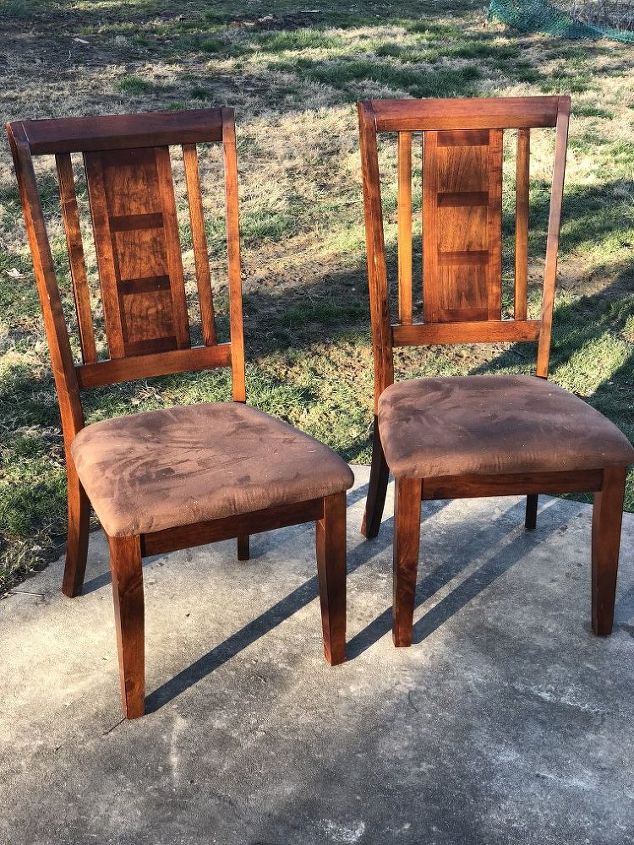
My quarrel with the chairs was really the quality of fabric. EVERYTHING sticks to it and it’s impossible to keep clean. I have picked food and individual dog hairs off these chairs because this particular fabric is indubitably a descendant of Duct Tape. Even using the attachment on our Dyson vacuum would not so much as suck a single hair off this fabric. After years of battle, it was time for a update.
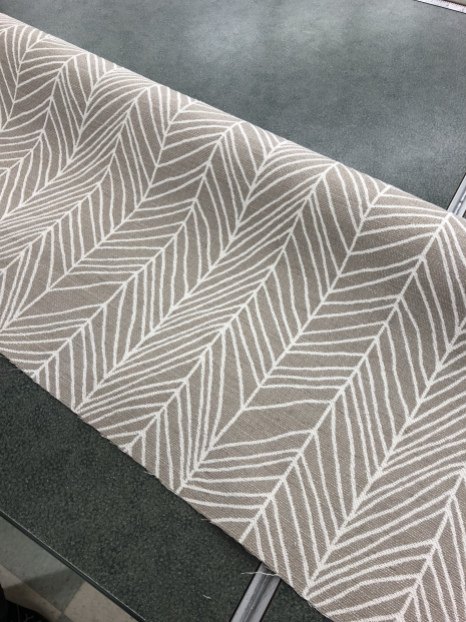
Here’s the new fabric we picked up for $30 at Joanne Fabric. It was originally $60, but they were running a 50% off sale.
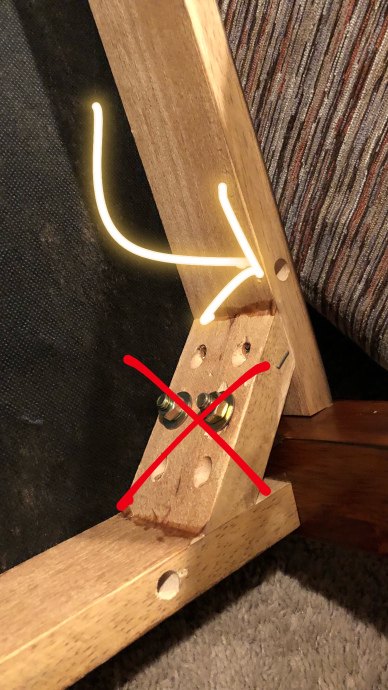
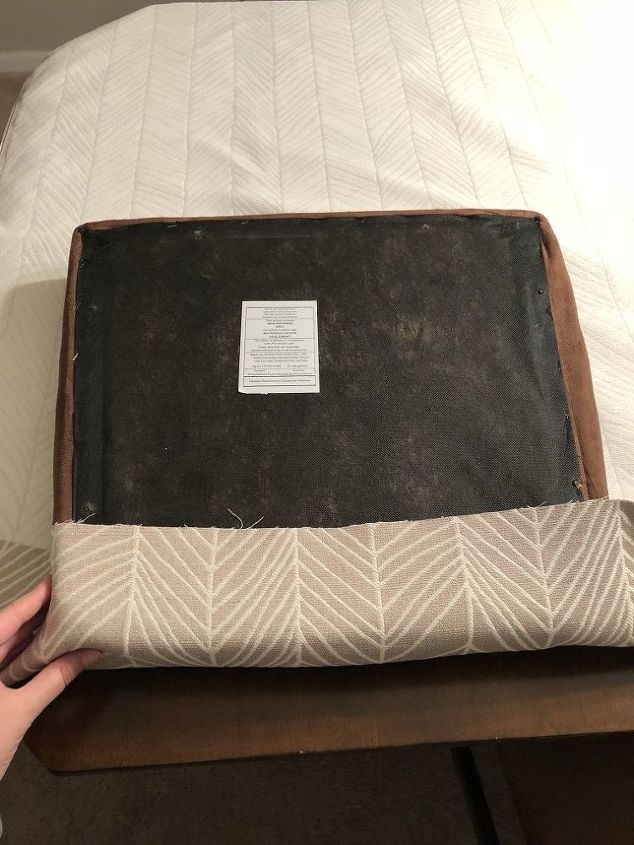
To get started, you’ll need to remove the seats from the chairs. I used a screw driver and this took about 5 mins total. Don’t worry about unscrewing the legs! Ignore the bolts in the corners of your chair. You’ll just need to unscrew the seat from the frame.
Once you have the seat removed, place the new fabric and the seat upside down on a large flat surface. I figured out how much fabric I needed for each piece ahead of time.
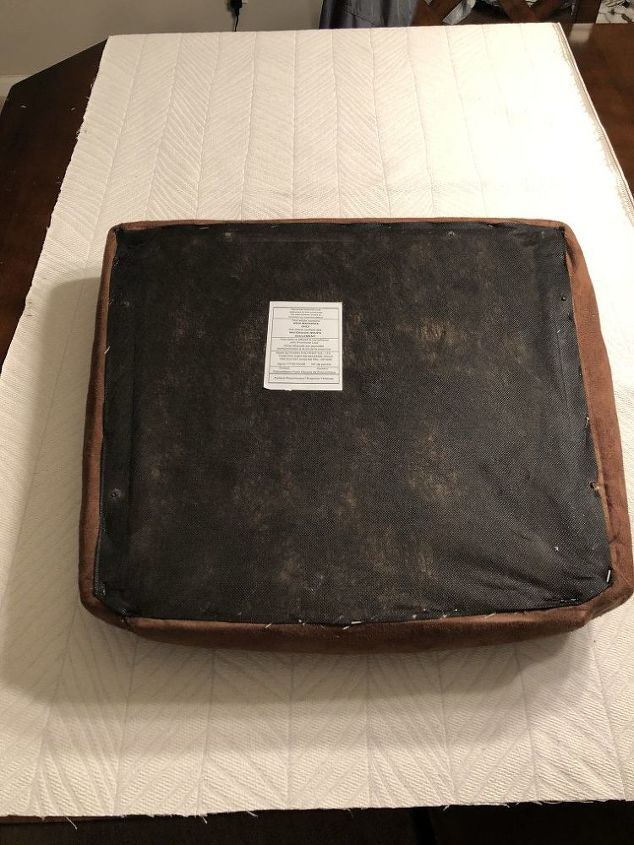
I didn’t remove the existing fabric because other than annoying me, there was nothing wrong with it. No huge stains, or rips, and the cushions were all in excellent condition. I decided to avoid that mess and opted to cover it all. The fabric I chose was also thick enough that the underlying color would not show through.
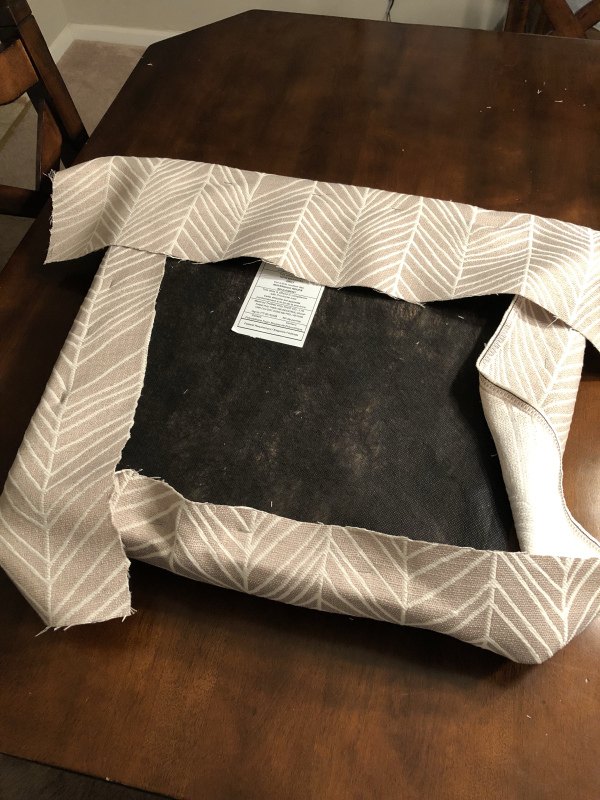
Place the cushion upside-down on the fabric and estimate its position, and how much excess fabric you will need to be able to staple it securely to the bottom of the cushion. Once you’re confident you have enough fabric, cut this piece away, saving the remnant fabric for the other cushions.
I used a Stanley stapler and staples for the next part.
Pull up the first piece of fabric and staple it into position. Along the same side, continue to staple, but leave about 1.5 inches from the corners. I originally put about 4 staples on the bottom side before moving to the left. I went back and added more, but before I went staple crazy, I wanted to make sure it was crisp looking incase I needed to remove any staples and reposition the fabric.
You’ll need to pull the fabric each time you staple and make sure it’s fitted tightly around the cushion. At this point, each side should be stapled, with the 4 corners still free to make pleats. The pleats are important because the’ll give you crisp corners.
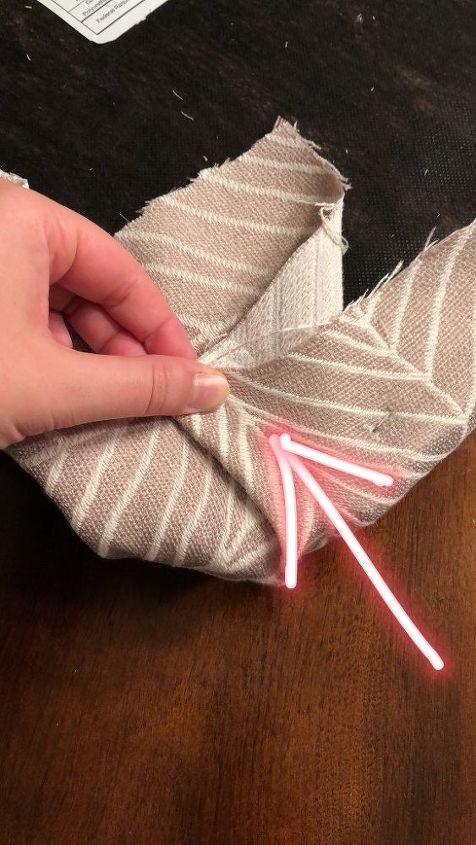
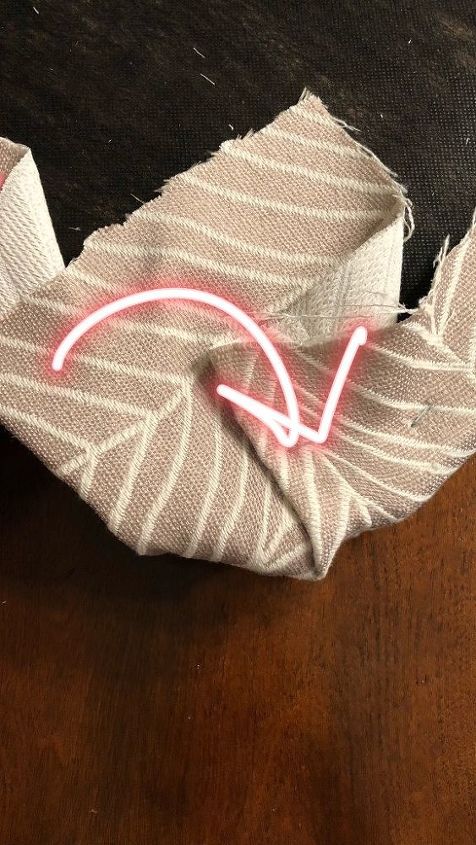
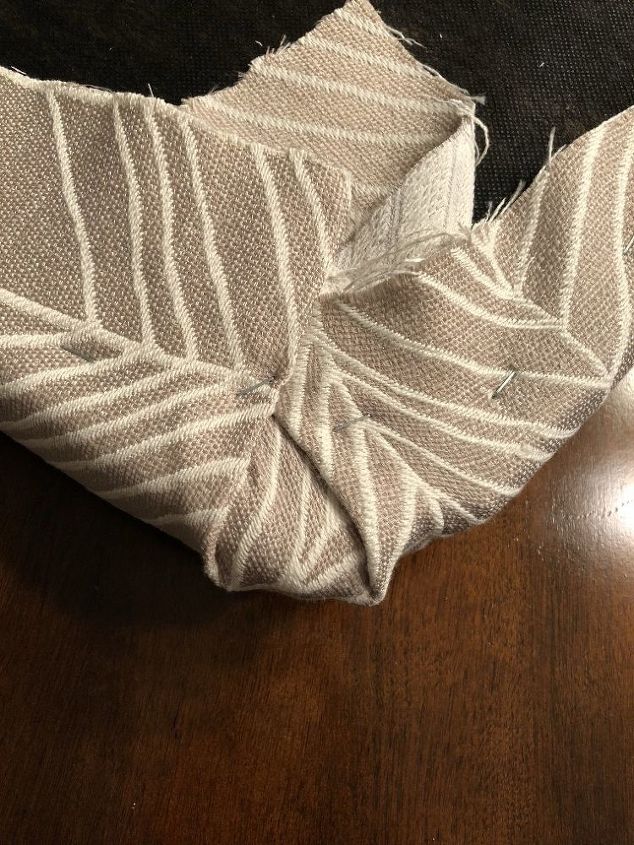
Basically, you’re going to fold this like you’re securing all the Mexican goodness into a burrito. First, you’ll need to pull the corner of the fabric straight towards the center of the cushion and staple. After you staple, you’ll have two “wings” to either side of the corner. Take the right wing and fold it left. Then staple. Then take the left wing and fold it right. Then staple. Repeat this 3 more times on all the other corners!
I timed myself for your convenience! After I removed all the seats from the frames, reupholstering the seats took about 12 mins each.
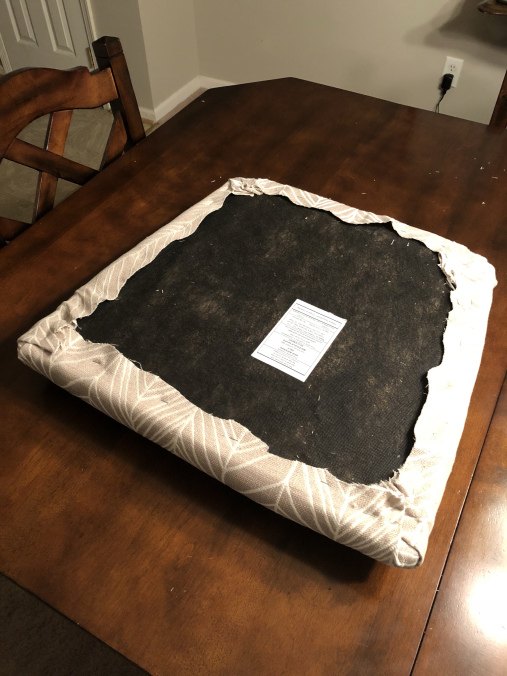
When you’re all finished, you can cut away the excess fabric. You could include an additional dust cover on the bottom of the cushion if you want. Since I didn’t remove mine, I left the one that was there.
I found the easiest way to reattach the seat to the frame was to place it upside-down on a flat surface. The frame lined up perfectly with the previous holes and it screwed back together very quickly. Once I got the frame on, You could barely see the excess fabric. You won’t see this anyway since it’s under the chair! But I felt better knowing that it was hardly visible anyway.
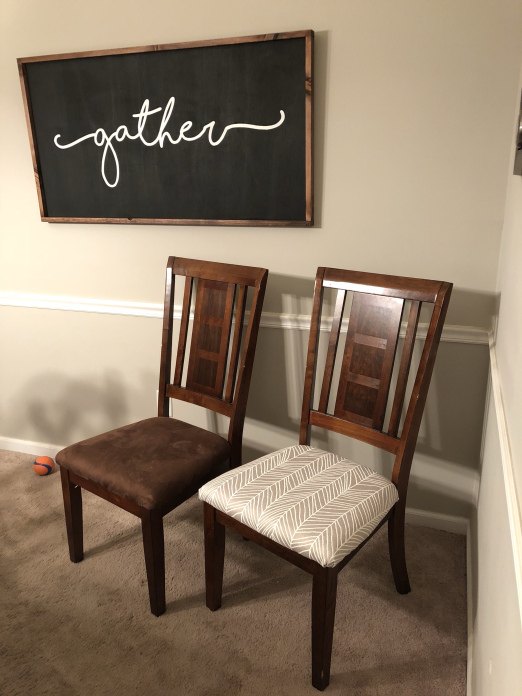
Here’s a side by side in our dining room so you can see the difference. I stopped to take this mid-DIY to share on my Instagram because I was so pleased with the results!
For the full DIY, visit my blog: www.thediydoghouse.com


Any price and availability information displayed on [relevant Amazon Site(s), as applicable] at the time of purchase will apply to the purchase of this product.
Hometalk may collect a small share of sales from the links on this page.More info

Want more details about this and other DIY projects? Check out my blog post!
Comments
Join the conversation
2 of 43 comments
-
Looks awesome. I reupholstered two square bar stools pretty much the same way you did.
-
I have these chairs too. Thank you for the inspiration. We are building a new home, I'm trying to 'renew' as much of our old furniture as possible.


Frequently asked questions
Have a question about this project?
Yes, I have been wanting to do my kitchen chairs for a while now. I would like to put more padding on each chair. What would wear well for padding?
I haven't had much luck with staple guns; which model/model number did you use?
I have wooden stools at my kitchen snack bar, is there any way I can pad them too make them more comfortable?