


How I Reupholstered Two Arm Chairs

by
Kathy R
6 Materials
$175
2 Days
Medium
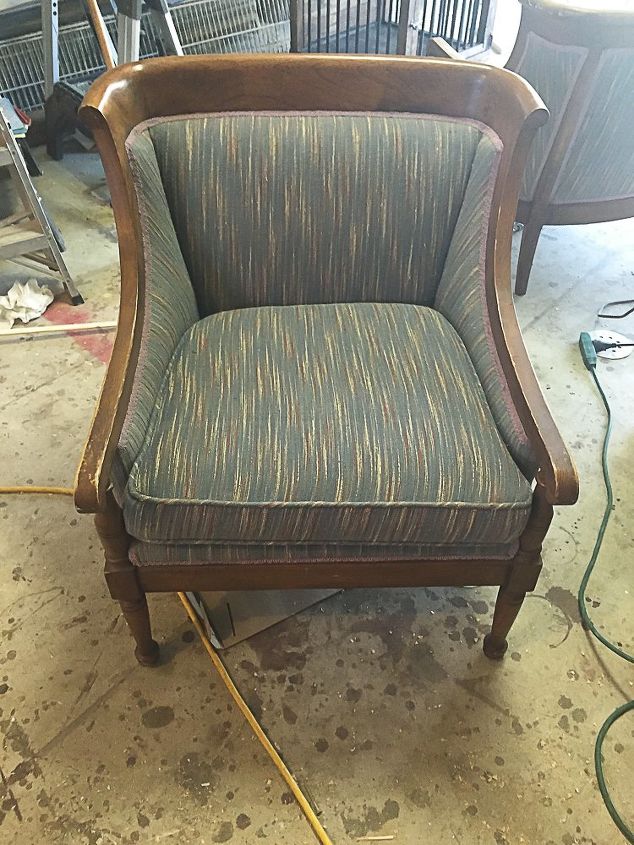
My daughter purchased two used arm chairs with the plan to reupholster them. She began the project then asked if I could finish it for her. I was delighted to give it a try and found that it was much easier than I expected! Here's the before.
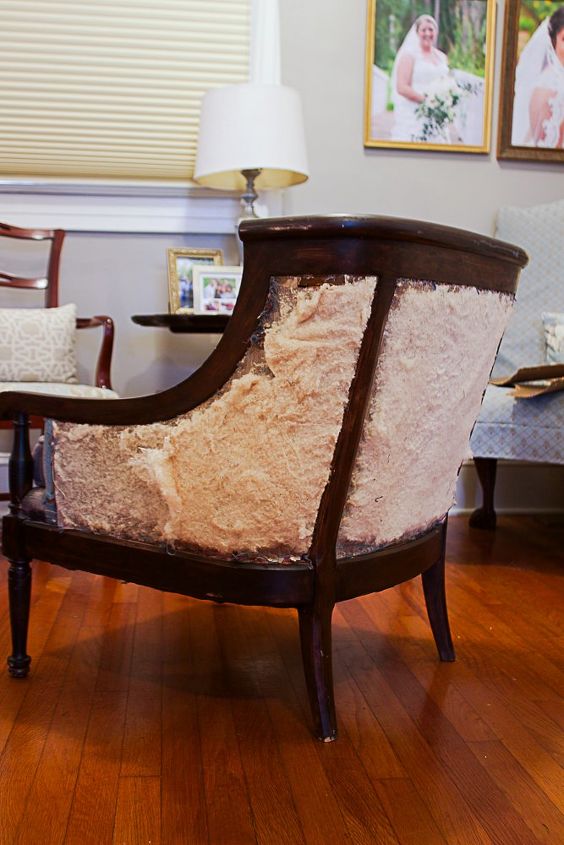
The first step was to remove the fabric from the back of the chair, assess the condition of the batting and frame (moulded cardboard) All had to come off so that I could attach the fabric to the front of the chair.
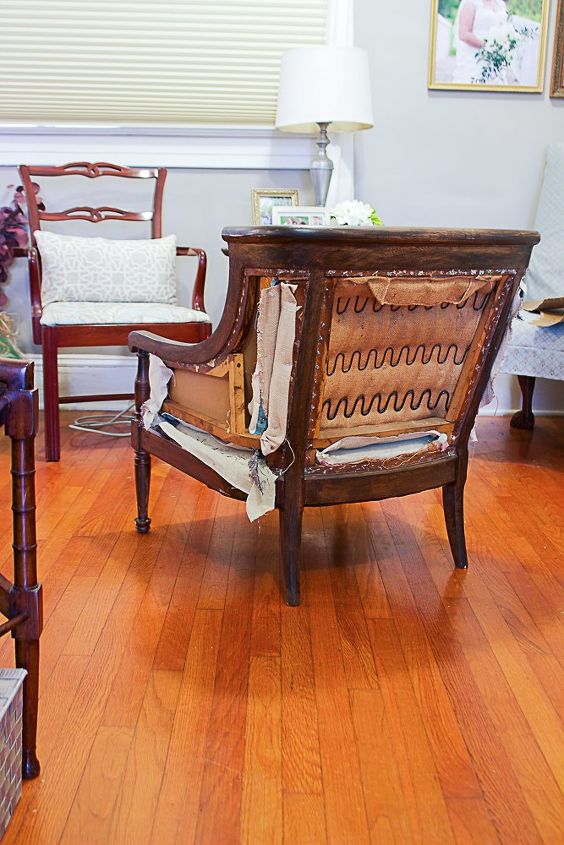
The hardest part and the one that took the longest was removing all of the staples from the fabric, batting and cardboard foam. Exposing the back allows for you to attach the fabric to the front, push it through to the back to attach with staples.
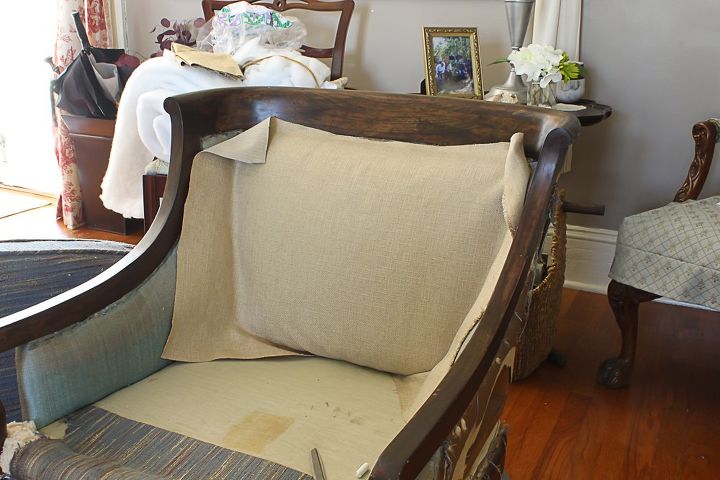
I used chalk to mark where the fabric needed to be cut. Take your time in measuring the fabric and make sure you have enough to push through and wrap around back.
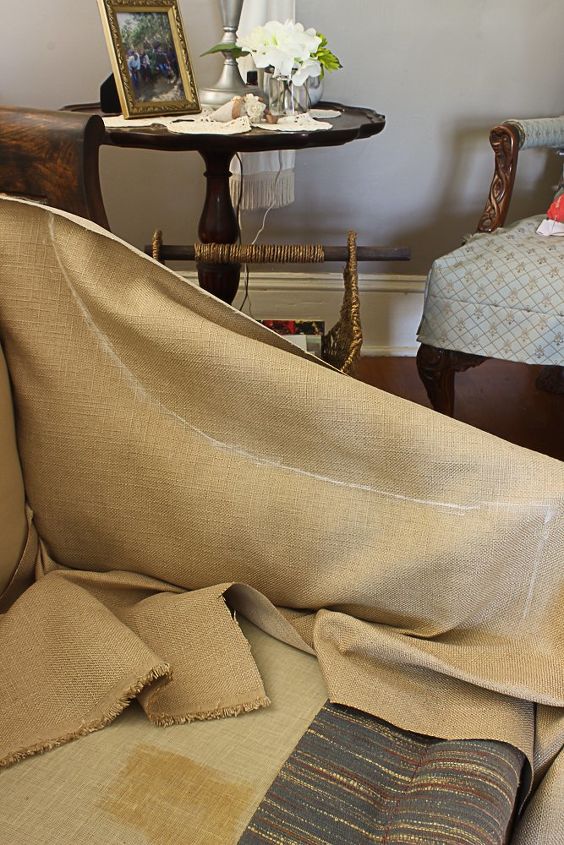
As you can see one of the sides - marked with chalk for cutting and extra fabric below - and extra fabric to wrap around arm of the chair.
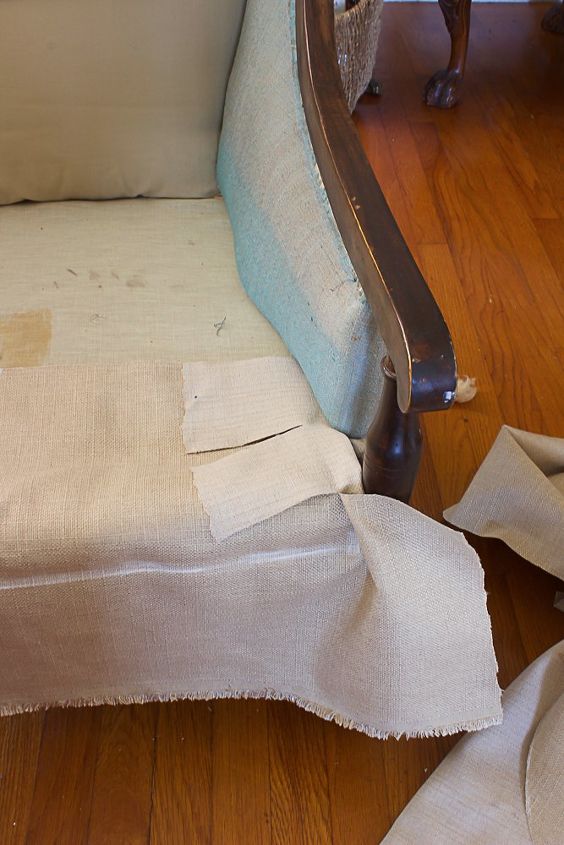
For the front underneath the cushion, I cut the fabric so that it would fit the front and notched it so that it would go under and through. I used white cotton duck fabric for the seat. This and the cushion were the only parts that I sewed. For the cushion, I deconstructed the old to use as a template and reused the zipper.
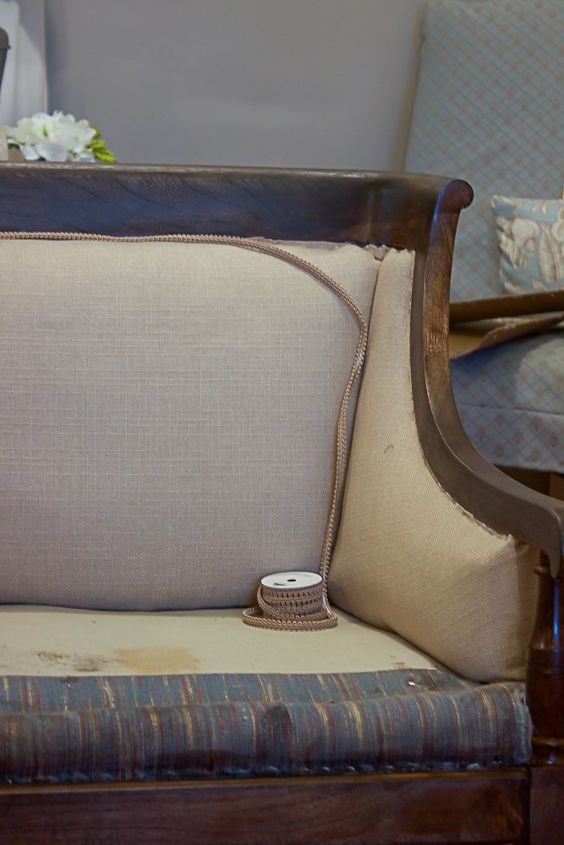
The fabric is attached with upholstery staples then I hot glued the trim wherever the fabric was stapled to the frame.
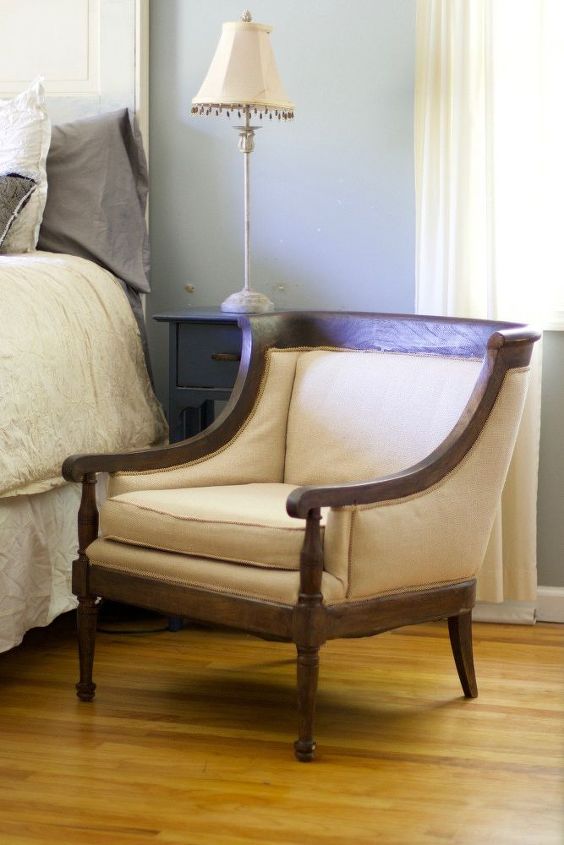
The finished chair! After attaching the fabric to the front, I did the same to the back. This is where you may need an extra set of hands to hold the fabric in place.
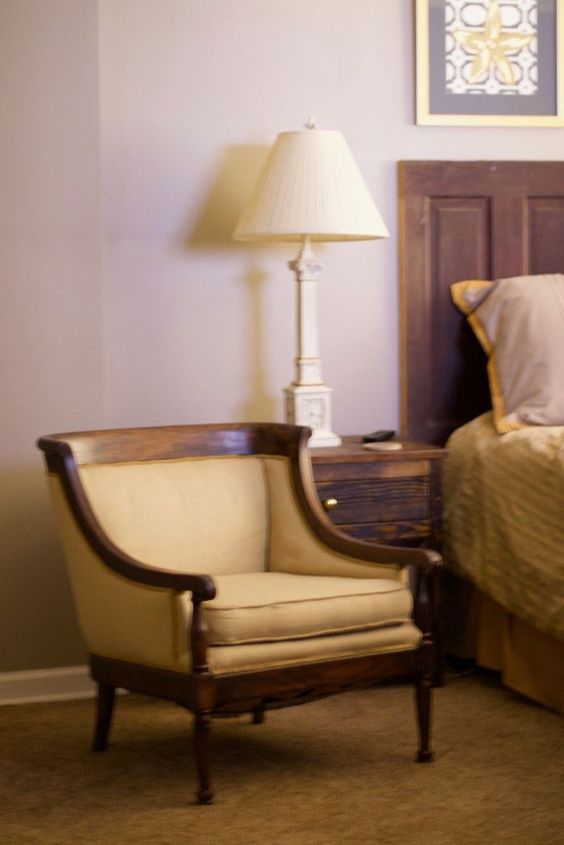
My daughter put one chair in a guest bedroom and one in their Master bedroom. These chairs are very heavy and sturdy. If you're looking at a chair to reupholster, the best ones are those that are of wood frame and are sturdy. To fix chairs that are wobbly would require more deconstruction. (cost estimate includes staple remover only)
Resources for this project:
See all materials


Any price and availability information displayed on [relevant Amazon Site(s), as applicable] at the time of purchase will apply to the purchase of this product.
Hometalk may collect a small share of sales from the links on this page.More info
Want more details about this and other DIY projects? Check out my blog post!
Comments
Join the conversation
3 of 21 comments
-
I'm not that brave to undertake reupholstering! I would try painting mine. I admire the fine work you did. Very nice look! Hugs
-
You make it look and sound so easy. This is not something that I would attempt, even with directions. I do sew ocassionally. Perhaps you and your daughter should start your own apolstery business. Wow! If you need someone to shop for apolstery material, I'm your girl. I am always running into beautiful apolstery material. I always think to myself, "Who can I tell?" Now I know. Kathy R. :)


Frequently asked questions
Have a question about this project?
That looks great ! How did you attach the batting to the chair?
I have dining room chairs that I want to recover but the seats are covered with a thick stretchable covering that is tearing in some spots. The chair frames have open bottoms so this material provides support to this cushion and prevents it from sinking. Do you know where I could obtain it? Extet@aol.com Gary
Nice Job. Do you have to take off the old fabric? Could you just put it over it?