


How to Make Triangle Shelves
7 Materials
$30
3 Hours
Easy
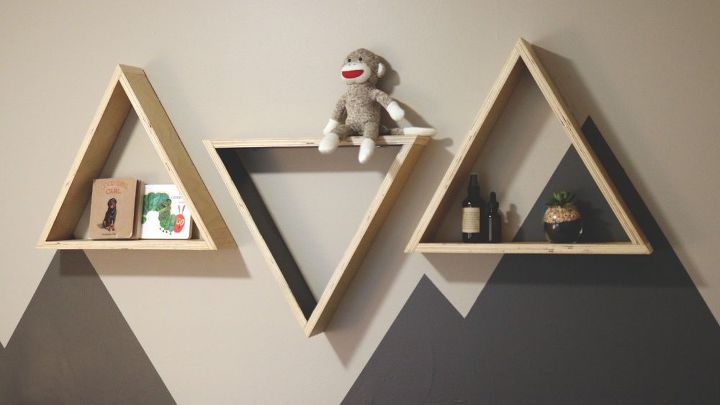
In this post I will show you how to make floating triangle shelves out of plywood. I was very excited to try to do some type of decorative shelves for my son’s room. I found a few photos of inspiration, and then got to work on them. This was a great project that anyone could do.
{
"id": "4809716",
"alt": "",
"title": "",
"video_link": "https://www.youtube.com/embed/QOkQ5zvh3GI",
"youtube_video_id": "QOkQ5zvh3GI"
}
{
"width": 634,
"height": 357,
"showRelated": true
}
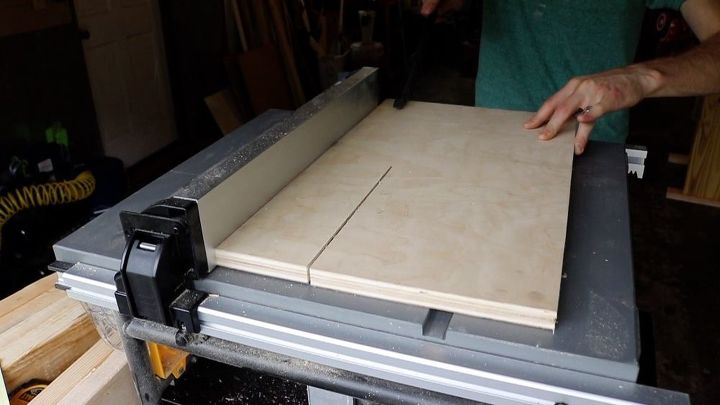
The first step to this project was to rip the plywood into strips. I had a few scrap pieces of ¾” plywood from a former project and I used the table saw for this and cut them into 3 and ½” strips. You can make your shelves whatever thickness you would like for these. I made three shelves so I had to rip nine boards.
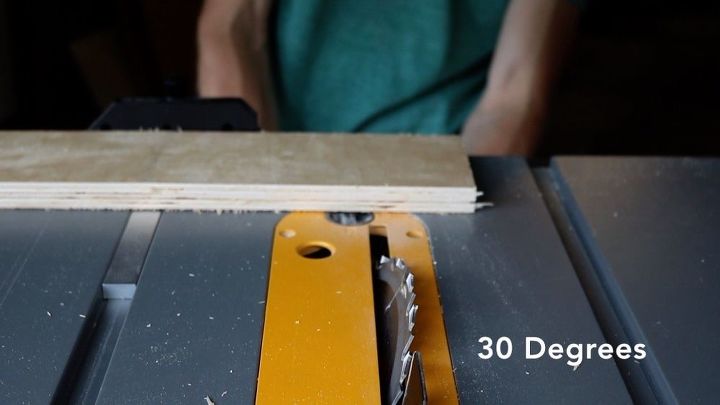
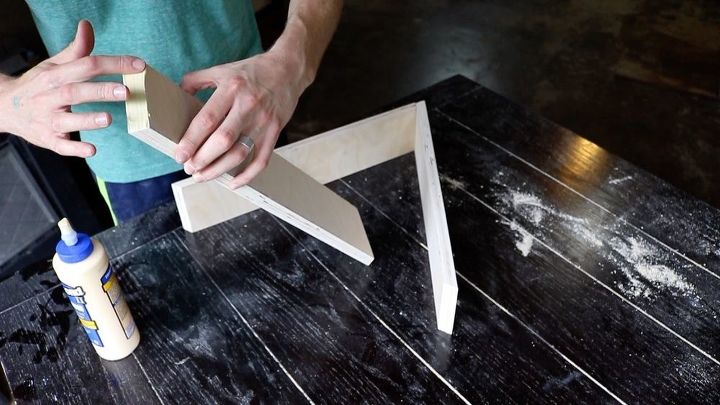
After you have your nine strips ripped to width, you can cut them to length. I cut my boards to 18” long and I cut them all at a 30 degree angle on each end. Instead of using a mitered type of joint, I did an angled butt joint. (I’m not sure if that is what it is actually called)
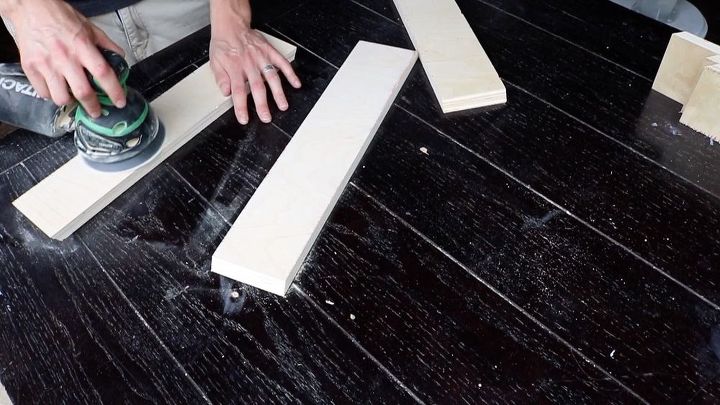
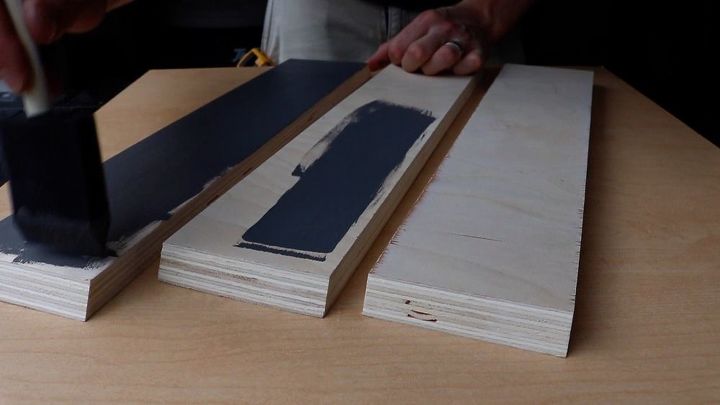
Next I sanded everything down really well. Because the shelves are triangles, I wouldn’t be able to sand the inside of the shelf once they were assembled because of the angle, so that is why I did this now. Especially the inside. I decided to add some grey paint to the inside of one of the shelves to give it a different look and leave the other two shelves just bare plywood. I had some leftover paint from painting the room, so I just used that.
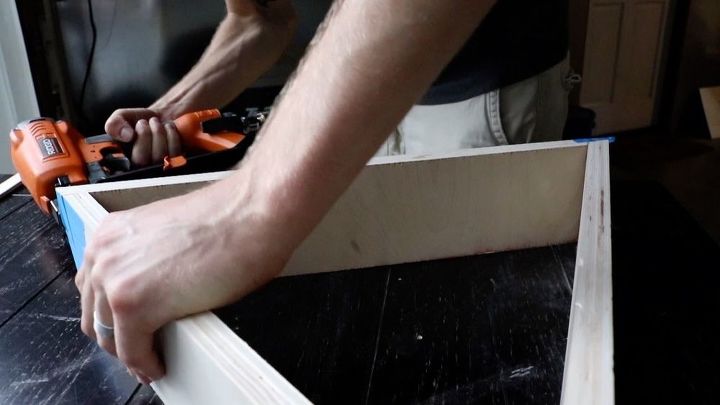
Next it was time to assemble the shelves. I had a little trouble at first mainly because of the angle of the shelves and them being a butt joint. I added wood glue to the joint and then first tried to hold pressure using a nylon strap but it didn’t work.
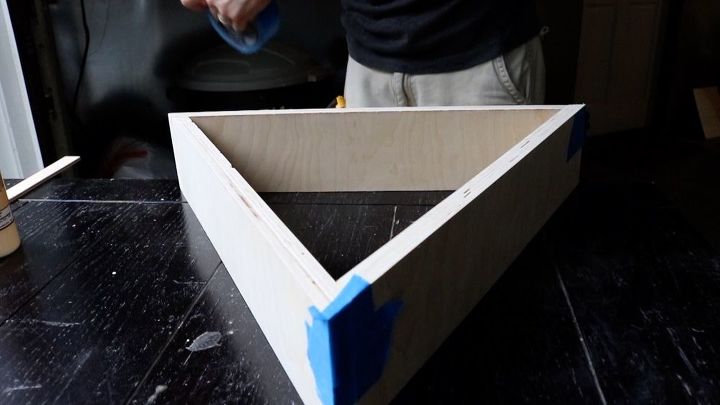
I ended up lining them up where they needed to go and then adding blue painters tape to hold them in place while I tacked them together with a finish nailer.
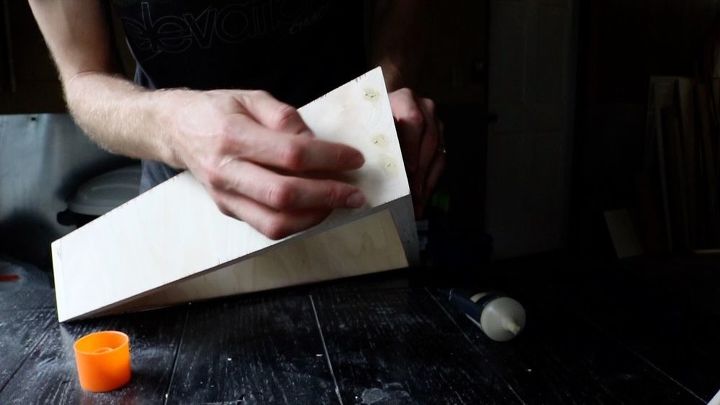
After they were all assembled I used wood filler to fill in the nail holes.
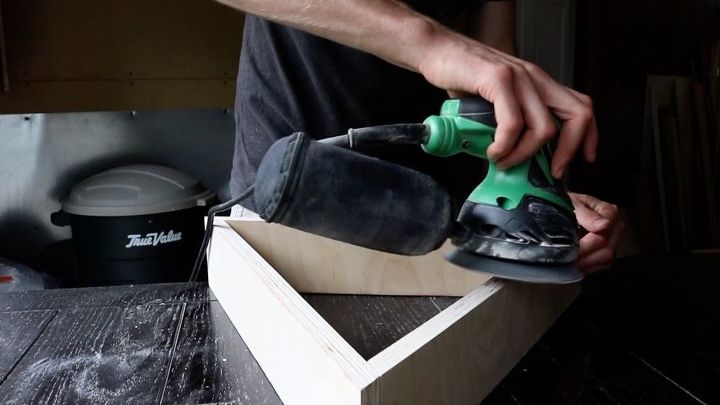
I sanded everything down one more time to get all the sharp edges down and the wood filler smooth. I went all the way up to 320 grit sandpaper. Then I added 3 coats of spray shellac. I let it dry for a few minutes between each coat and sanded lightly with 320 grit paper. After this the shelves were complete. I just needed to hang them.
To hang the shelves, I first used a stud finder to get an idea of how the shelves would be spaced on the wall. The shelves won’t be holding a lot of weight, so if I could anchor each shelf into at least one stud, I would be ok.
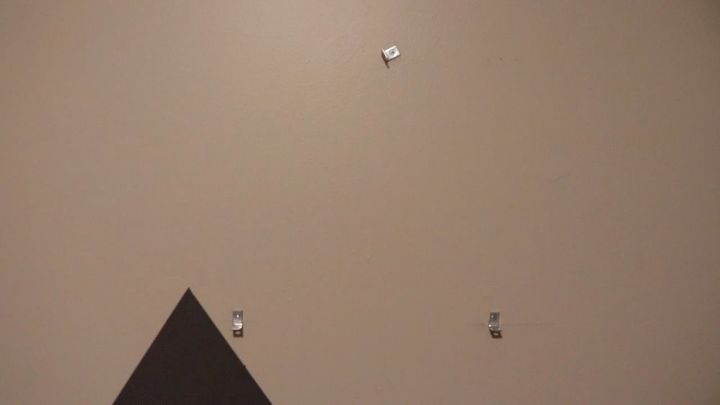
Each shelf used three L brackets. One of them into the stud and the other two I would use a self tapping drywall anchor. This worked out great. I started with the first shelf, and then just spaced them out how I liked them.

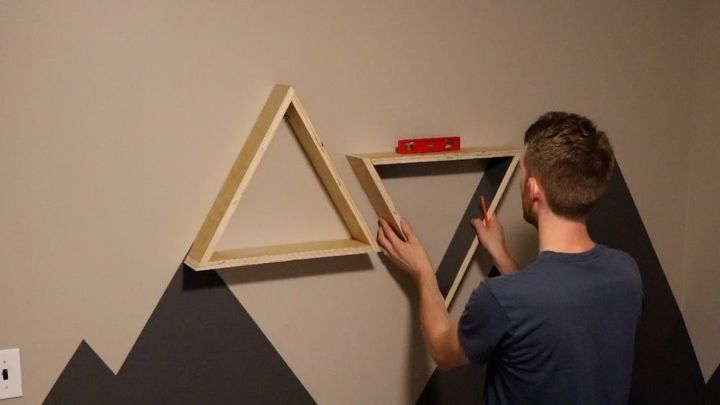
For the shelves on the sides with the triangle point facing upward, I used two l brackets at the bottom of the shelf and then one to hold the top. For the middle shelf the the point facing down, I just did the opposite.
This was a very fun project to do and pretty quick. You could totally do this in a day. I will have links to everything I used in .Let me know if you have any questions about these shelves and also be sure to check out the video to go along with this to see exactly how I did this.
………………………………
You can also find me on youtube along with many other projects
Resources for this project:
See all materials


Any price and availability information displayed on [relevant Amazon Site(s), as applicable] at the time of purchase will apply to the purchase of this product.
Hometalk may collect a small share of sales from the links on this page.More info

Want more details about this and other DIY projects? Check out my blog post!
Comments
Join the conversation
2 of 10 comments
-
Really nice shelves. The wall graphic looks good too. Thanks for sharing.
-
Nice idea, love the painting style.


Frequently asked questions
Have a question about this project?