


Beads Embedded in Epoxy

by
Sally
2 Materials
$60
2 Weeks
Medium
I love beads, I specifically seek out ones that are different/unusual. I buy them online and in shops. I learnt some lessons with this project.
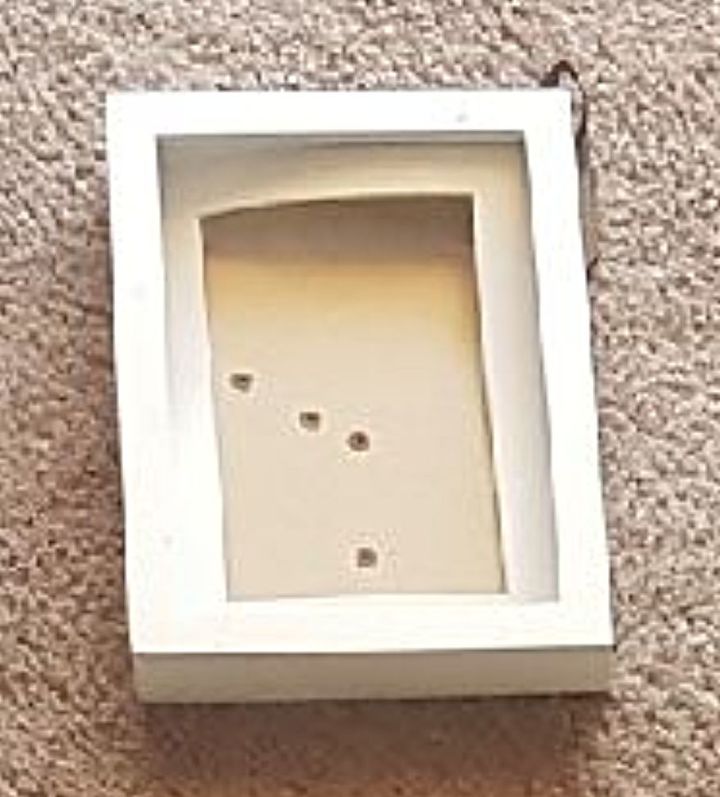
I brought this frame at a Salvation Army store for 50 cents. I thought it would be a good way to display some of the beads I have.
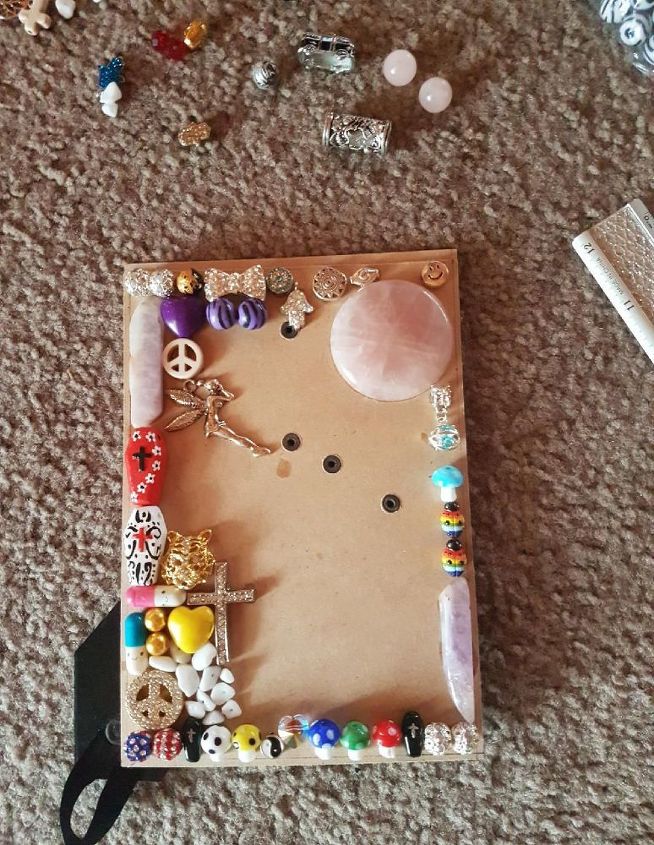
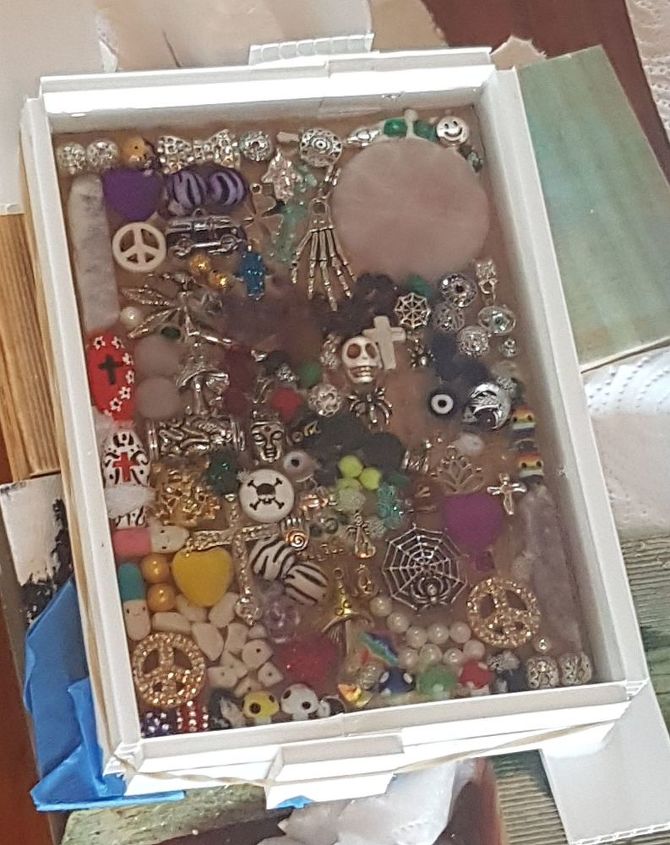
I separated the backing to the frame and started to arrange the beads. I used superglue to attach the beads.
I placed beads over the holes to cover them.
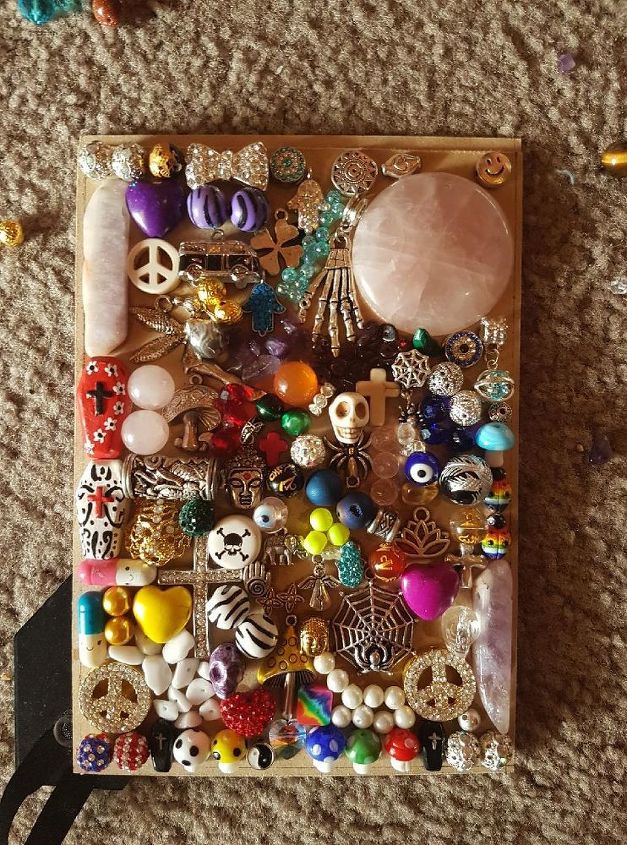
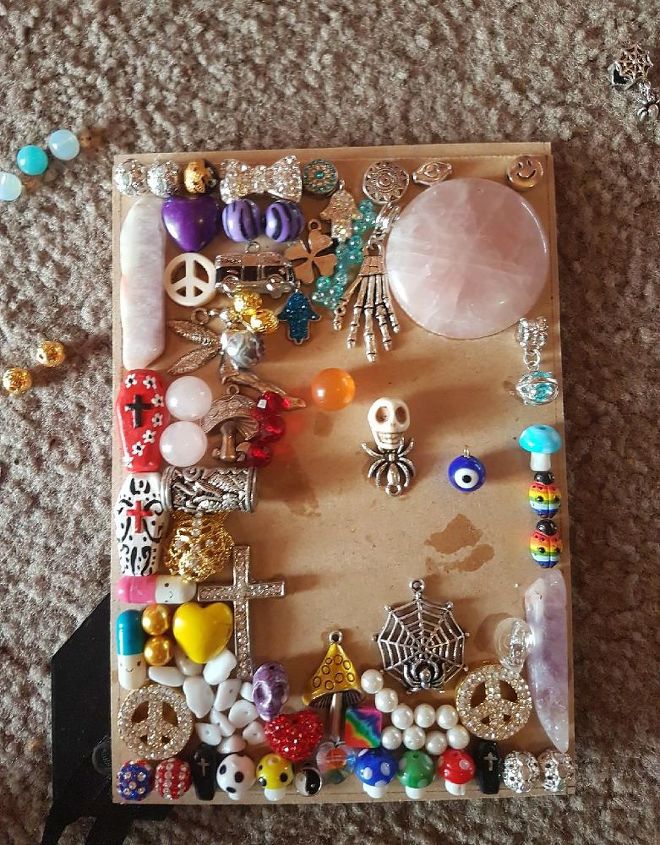
I continued to fill the space until I was satisfied with the coverage.
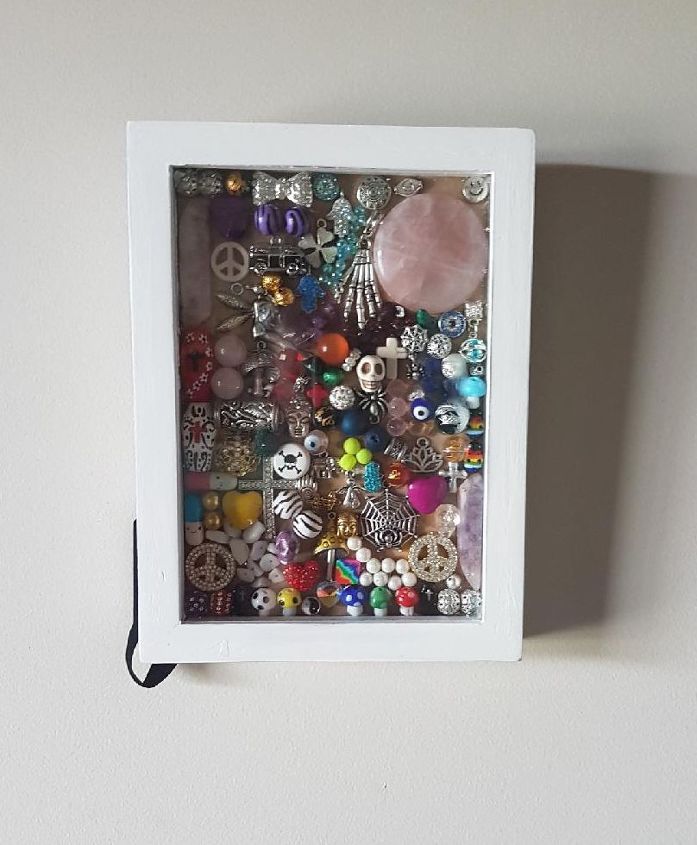
I originally spray painted the frame white. When I put them together, I thought the frame took the focus away from the beads.
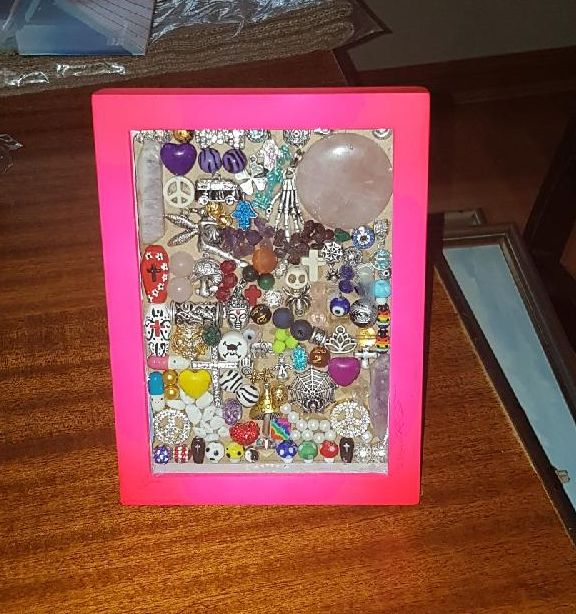
I spay painted the frame hot pink, I didn't think that worked either.
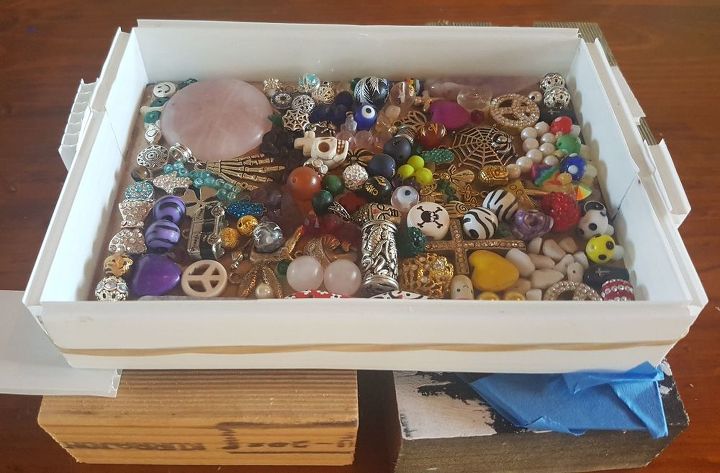
I decided to embed the beads in clear epoxy resin. I made a frame to fit the beaded board with corflute. To prevent the epoxy sticking to the corflute, I used my finger to smear cooking oil on the base and around the sides.
I brought a bottle of Feast and Watson glass finish. I mixed enough resin to just clear the beads. After I poured the resin, air bubbles started to appear. I used my blow torch to pop the air bubbles, however they continued to appear and in some places in small groups. I realised the air bubbles were coming from the air trapped in the hole of the beads.
.
I realised there was little I could do at this stage and waited 72 hours for the epoxy to harden.
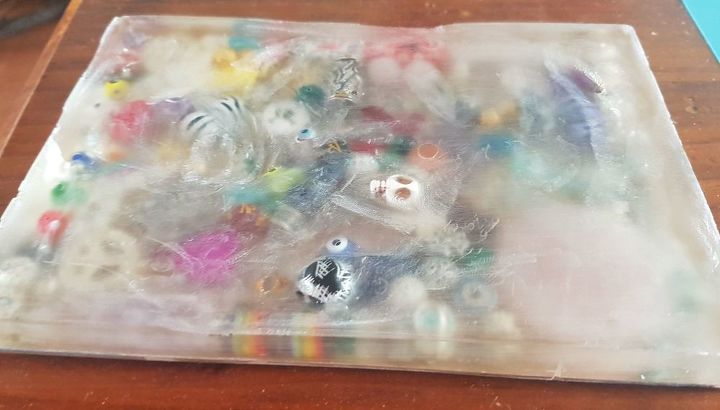
Once the epoxy had hardened, I saw that the air bubbles were deep and in some cases very close to the beads. I used a palm sander with 80 grit sand paper to sand as many of the air bubbles out that I could, without damaging the beads. Once I was finished with the palm sander, I hand sanded with 120 grit sand paper to smooth the surface. This left the surface uneven.
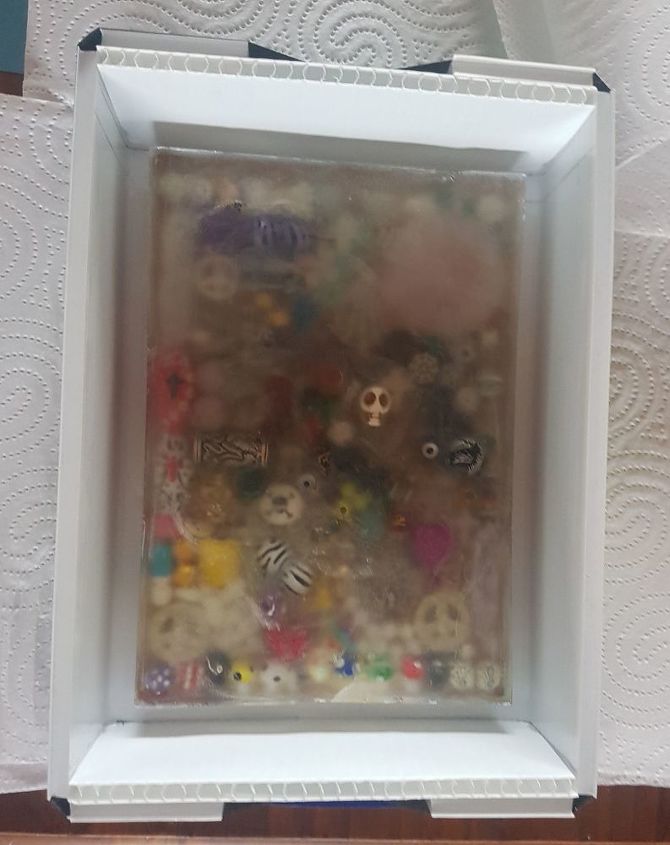
I made a second frame with corflute, this time leaving a small space around the border of the original resin. I did this to get coverage of the sides and top. I mixed and poured the 2nd pour of resin. I waited 72 hours to allow it to harden.
I was happy with the clarity however there were three big air bubbles on the bottom, the edges were not smooth and the top was not even.

This is the bottom and you can see the 3 holes where the air bubbles were and the pattern left by the corflute.
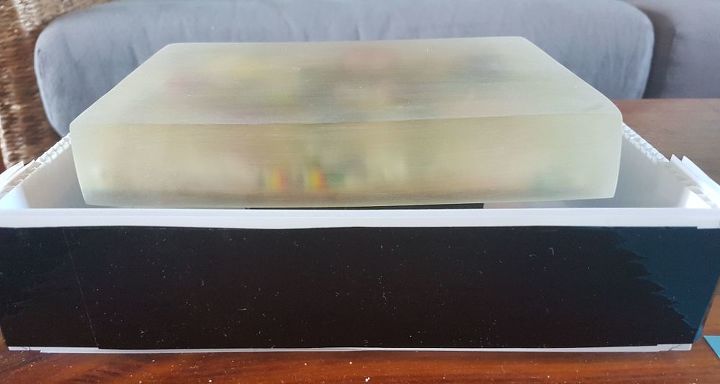
I used a sander and 80 grit sand paper to sand out the 3 air bubbles. I sanded the sides back so they were very close to the original epoxy border, as straight and even as I could. After using 80 grit sand paper I hand sanded the epoxy block with 120 grit and finally 400 grit to get it smooth.
.
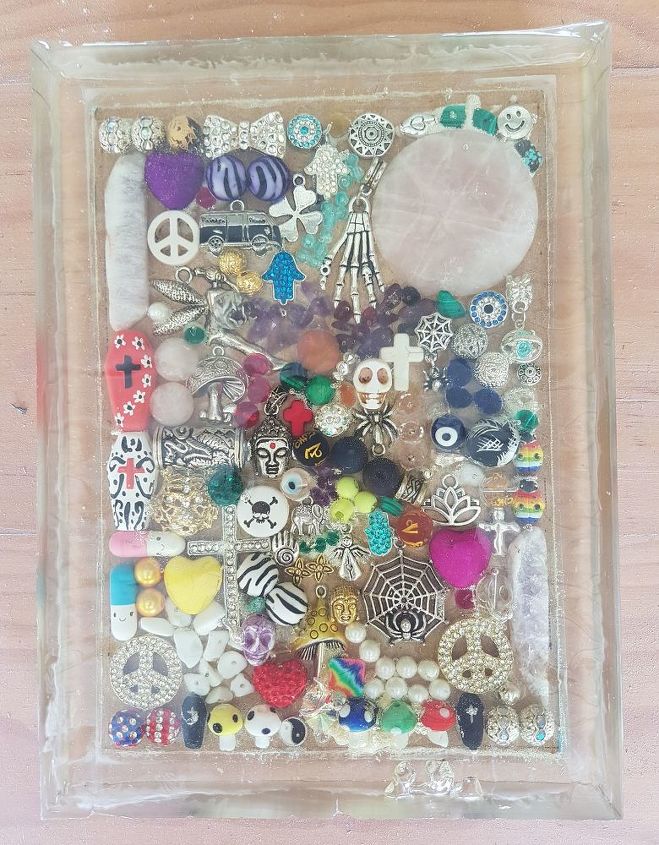
I used a wooden block to raise the bead/epoxy block. I mixed up enough resin to cover the top and run over the sides. I left epoxy to harden for 72 hours.
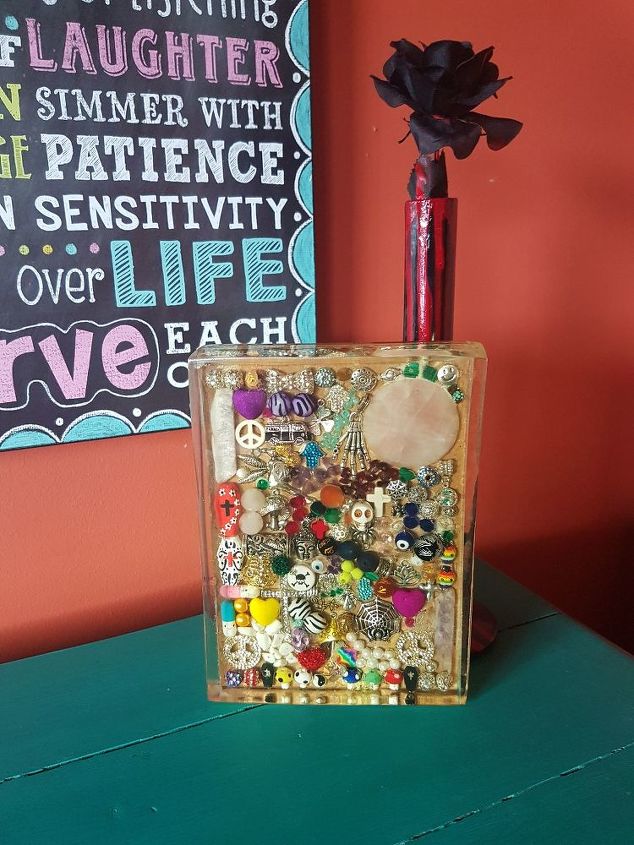
Finally, I had clarity, smoothness and beads embedded in Epoxy. I was incredibly happy with the final result. 
Comments
Join the conversation
2 of 4 comments
-
Looks great. Love it.
-
well done awesome project love it


Frequently asked questions
Have a question about this project?
How many frame did you use