


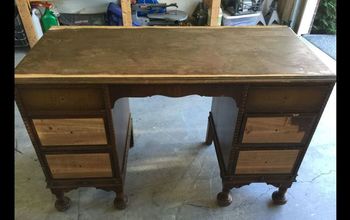
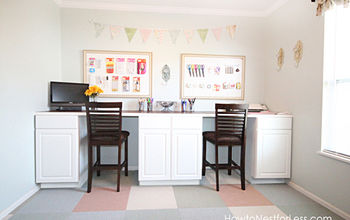
Truss Desk
14 Materials
$75
1 Day
Medium
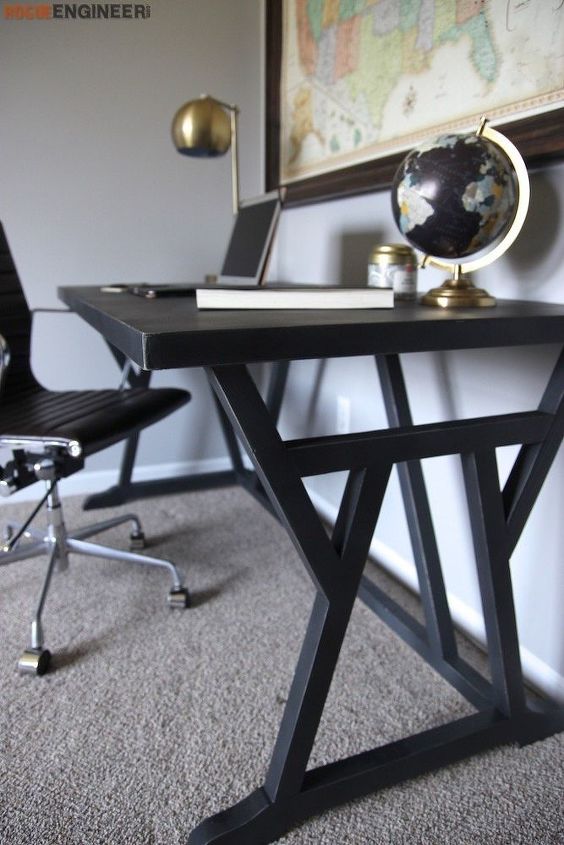
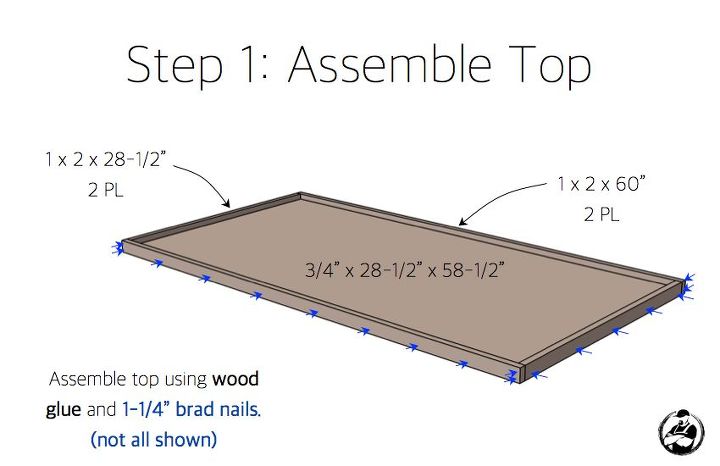
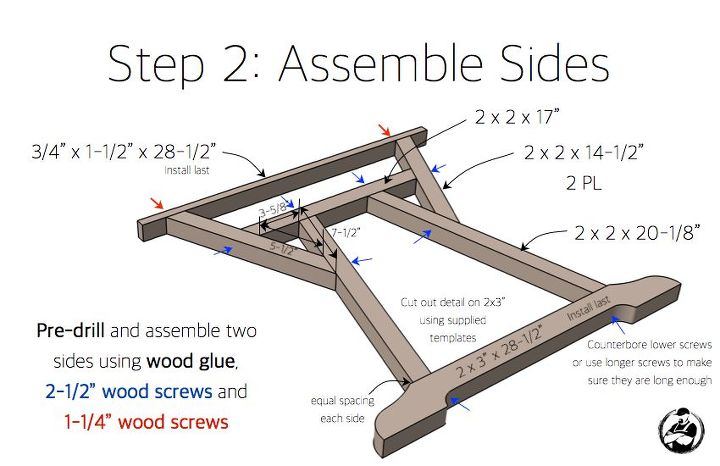
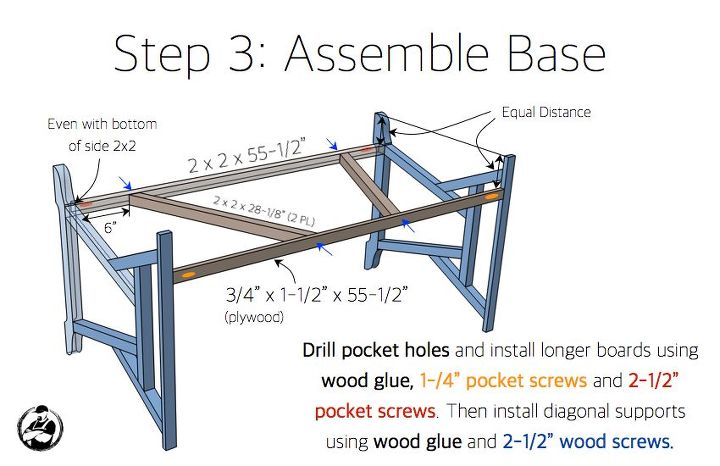
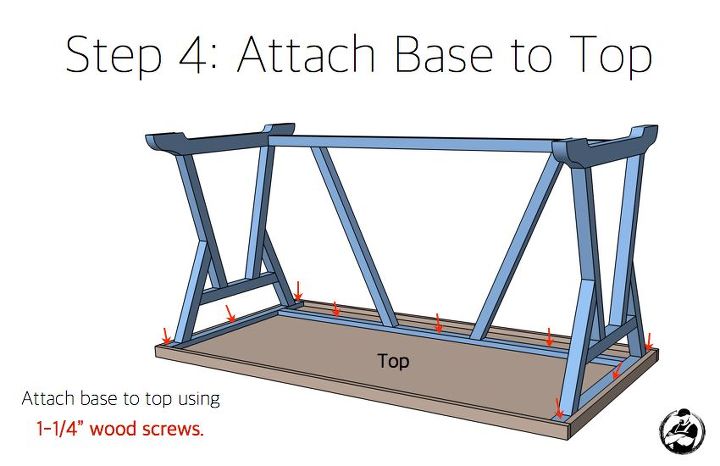
This truss style desk not only looks great but is lightweight and very strong. Not only do the angles add to the style of the table but they increase the stability and strength.
Truss Desk
{
"id": "4826725",
"alt": "",
"title": "",
"video_link": "https://www.youtube.com/embed/z6HhfKwcTq8",
"youtube_video_id": "z6HhfKwcTq8"
}
{
"width": 634,
"height": 357,
"showRelated": true
}
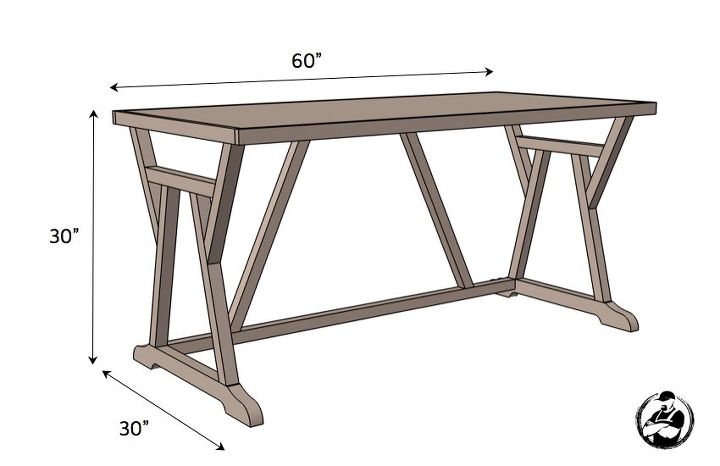
Dimensions
- Before applying a finish, Jamie first sanded the entire piece with 220 grit sandpaper. After the dust was removed she then primed the bare wood with a gray primer from Zinsser. This product is great for deeper darker colors instead of the regular white primer because it helps provide a more even coverage for the topcoat.
- After that dried she then added just a little vaseline to the edges so the top coat could be removed easily to expose the gray primer. Then she finished it off with Chalked paint from Rustoleum in Charcoal. Once that was dry she used some sandpaper to lightly scrape the edges, removing the topcoat only, to expose the gray primer. Finally, since this project will be seeing a lot of use we wanted to make sure it was protected so we did so with a Matte Clear specifically for Chalked paints.

Want more details about this and other DIY projects? Check out my blog post!


Frequently asked questions
Have a question about this project?