


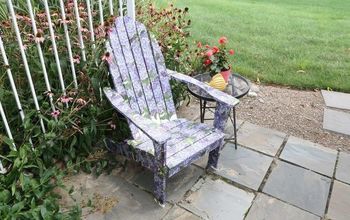
Vintage 1930s Adirondack Chair Restoration
“Wouldn’t it be great to restore these vintage 1930s Adirondack chairs?” she said. “It should only take a weekend,” she said. “Oh honey, they will be done soon,” she said. Three years later, it’s finally time to share the big reveal. These Adirondack chairs from the 1930s were headed to the landfill. Now they are a conversation piece and a proud addition to our front yard. The restoration is a must-see!
We thought some real wood Adirondack chairs would be a great addition to our yard. Rather than spending money on real wood chairs or buying those cheap and flimsy plastic chairs, we saw an ad in our local community email blast. One hundred dollars later, we were the proud owners of 4 broken down chairs and 2 tables. The woman was around my parents' age, and she told us that she remembered sitting in them in her grandparent's yard, and the chairs being passed down through the family. Her estimate was they were from the 1930s.
We certainly weren't going to pass up such a cool piece of history. I promised my dear husband that I would restore them and it should only take a weekend or two. I mean... how hard could it possibly be?
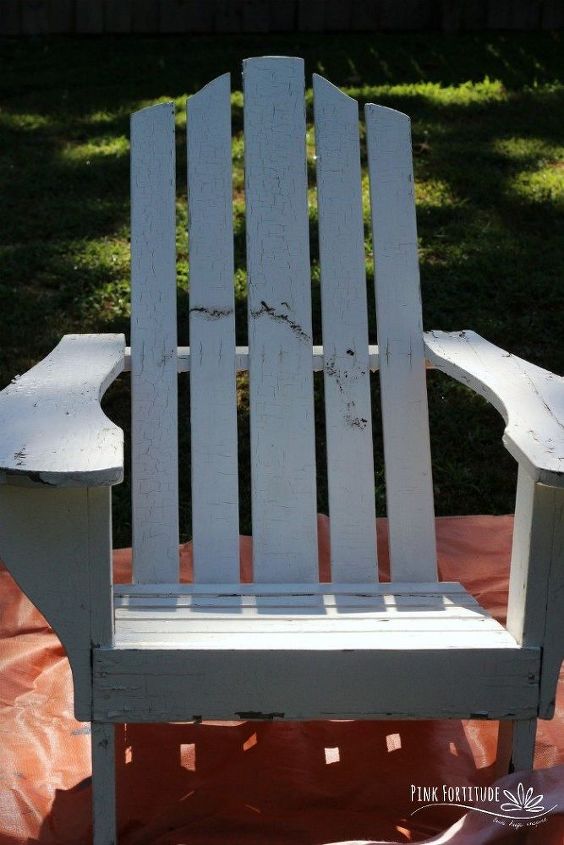
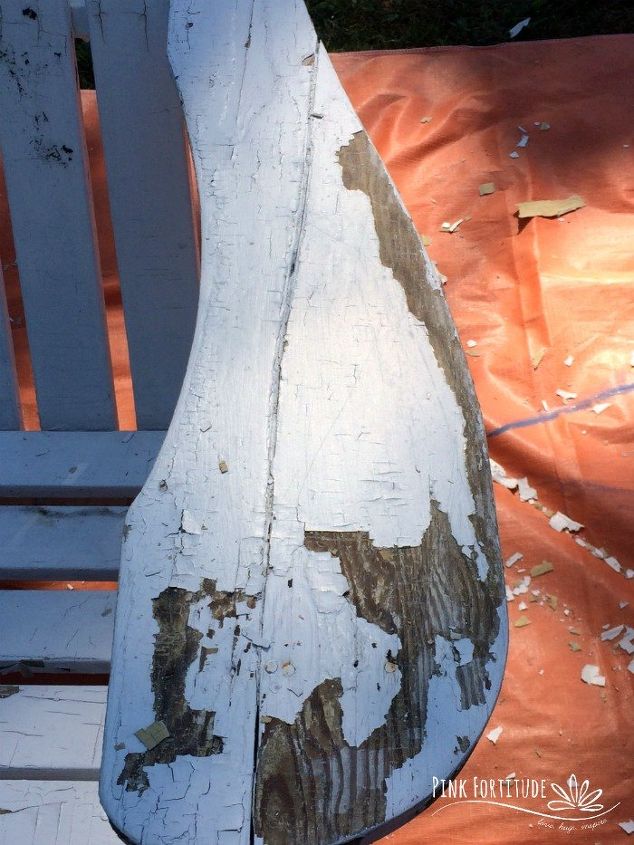
Here are a few pictures of the before. They were in pretty rough shape.
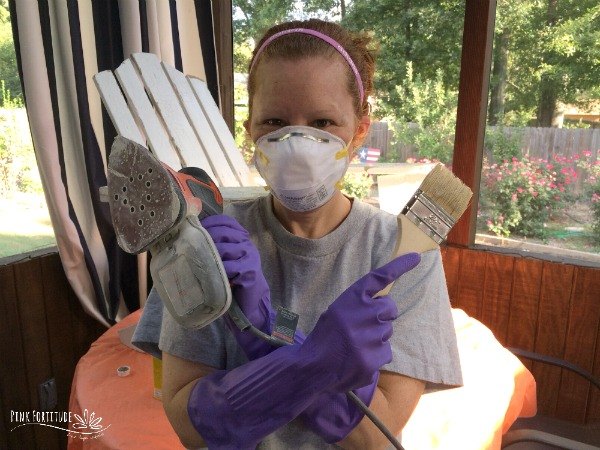
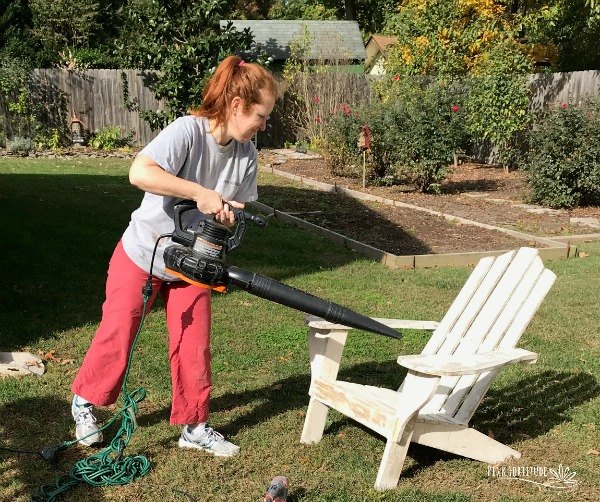
I honestly and sincerely didn't think it would take that long to restore the chairs. I had no clue what I was getting myself into. No clue. Between life, health issues, and chronic fatigue, everything else became a priority. And the chairs became an eyesore. Three years later, I made a commitment to finally finish the chairs. And Daddy Bob came to my rescue. Cuz that's what Dad's do. I took care of the stripping (snicker snicker) and painting, and Dad did all of the sanding and rebuilding. The most fun part of the restoration was getting out the leaf blower to get rid of all of the crud before painting.
It wasn't a perfect process. But here's how we did it.
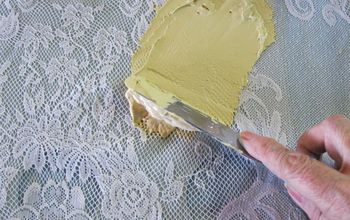
1. Using paint stripper, I stripped off multiple layers of paint. This took multiple efforts of stripping down.
2. Using a rabbit and good old-fashioned sand paper, we sanded the chairs.
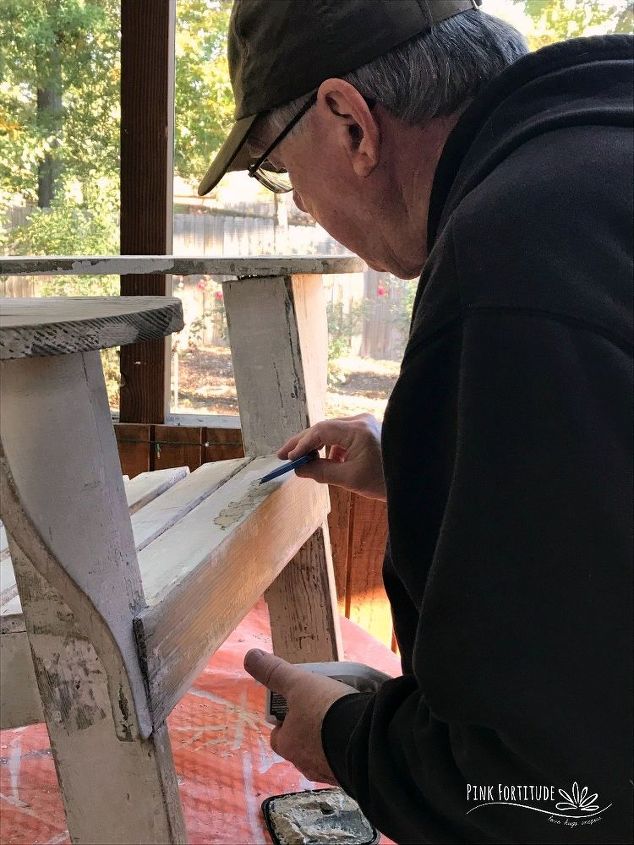
3. Dad then used screws to re-build the chair. It depended on the nails, but for some of them, it was easier to put in another reinforcement rather than trying to take them out.
4. Dad then used wood putty to fill in the holes from the screws.
5. We used a leaf blower to get rid of all of the crud left on the chairs.
6. Finally, I painted them.
Once we finished, Daddy Bob and I sat down for a celebratory drink. Ok, so mine is sparkling water. We still clinked. Don't you just love his t-shirt?

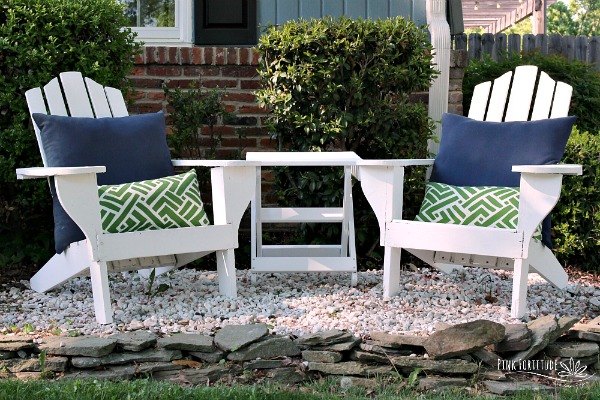
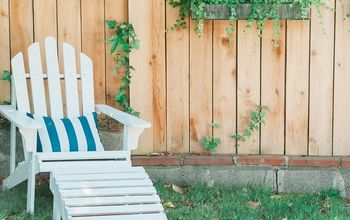
Here is the long-awaited ta-da. We placed two of the chairs in the front yard in this conversation space that we carved out, and two on our back deck.

Want to see all of the pictures and the entire DIY? Click on the blog link below and head over to the blog. I would love to know what you think!
PS - we have some super cool free printables for you too!


Comments
Join the conversation
-
In one picture it shows the guy looks like he is holding a nail polish brush. Just wondering what he is doing in this pic and is all the supplies listed here? Thank you.
-
Nice... probably much betterthan what you would find today


Frequently asked questions
Have a question about this project?
How cool that they will go on! Love to find some wood ones! You did get a bargain in the long run!
Did you ever go back to the woman you bought them from and show her that not only her history is still alive, but the chairs are making new memories and histories?.
I have my dad's chair from i would guess the late 1940s. The chair has been painted and is peeling. Did you worry about lead paint?