


Shutter Design and Installation: Pick the Best Shutters for Your Home

by
Wet & Forget
4 Materials
$35
2 Hours
Easy
Installing exterior window shutters is one of the best ways to boost your home’s curb appeal. If you’re thinking about installing exterior shutters, you may have questions – Can I paint or stain my shutters? How do I install them? How tall or short should window shutters be compared to window height? Learn more about choosing shutters, shutter design, and installation below.
What type of exterior shutters would look best?
The most popular shutter styles include –
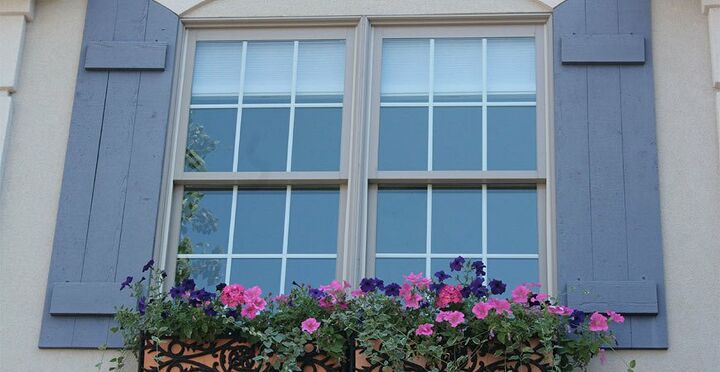
Raised Panel
Raised panel shutters became popular in the mid-1800’s. Solid, raised panel shutters were used on the first floor of homes for security and privacy, while louvered shutters were used on the second floor for air flow.
This shutter design looks similar to paneled kitchen cabinets or doors, and features a solid raised panel design. They’re also versatile – blending well with almost any home exterior including:
- Ranch
- Colonial
- Georgian
- Cape Cod Victorian
- Federal
- French Country
- Greek Revival
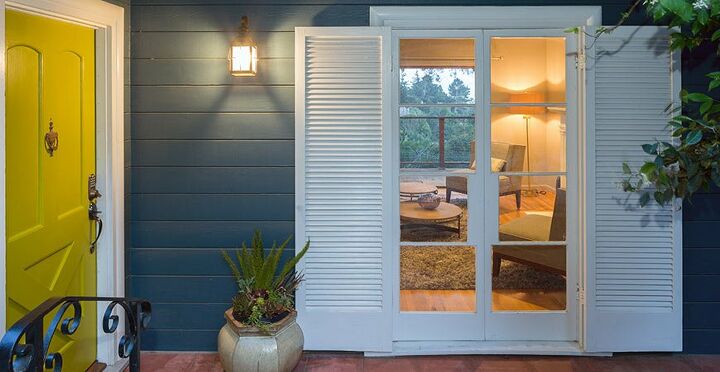
Louvered
Louvered shutters, sometimes called plantation shutters, are made up of angled louvers mounted to a solid frame. The adjustable louvers can be moved up and down with a tilt rod. The tilt rod is located in the middle of the shutter, or at the back. Before air conditioning was the norm, they were used to let in air and light while still providing privacy.
Federal and Colonial style homes often use adjustable louvered shutters on the second floor. Louvered shutters look the best on classic, casual or ornate homes such as these types of home exteriors:
- Federal
- Colonial
- Cape Cod
- Ranch
- Victorian
- Italianate
- Georgian
- Greek Revival
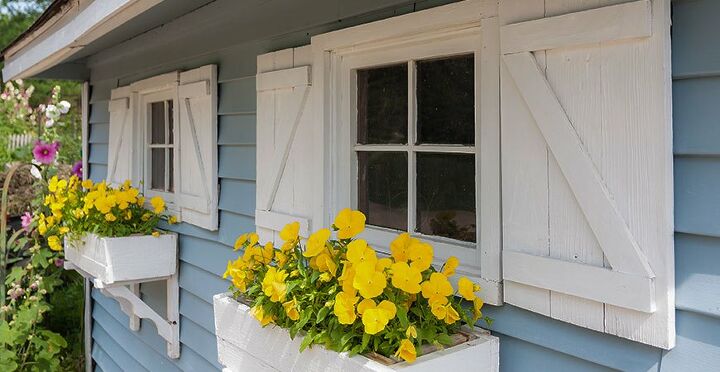
Board and Batten (BnB)
Board and batten shutters give off a rustic, European feel due to their simple board construction. BnB shutters consist of one to three vertical boards and a cross panel. The cross panel is attached to the panel. The cross panel is attached to the boards horizontally, or at an angle. The distinctive shutter design pairs well with styles:
- Cape Cod
- Ranch
- French Country
- Mediterranean
Bahama Shutters
Bahama shutters, also called Bermuda shutters, are louvered shutters that affix to the top of the window. Popular in coastal regions, this shutter design is adjusted to let in air and light, or shut tightly to protect the home during a tropical storm. Bahama shutters look great on coastal residences:
- Cape Cod
- Ranch
- Cottage
Hybrid shutter styles are also available. For example – a combo raised panel and louvered design, which consists of a solid panel on the bottom, and a louvered panel at the top.
What are exterior shutters made of?
Shutters are made from a variety of materials including fade-resistant vinyl, composite wood, PVC, synthetic foam, and natural wood. Natural wood shutters are usually crafted of North American Basswood.
What size shutters do I need for my windows?
The size of the shutter depends on the size of the window you want to highlight. In general, choose shutters that have the same size and shape as your windows. Using the wrong size shutters can detract from, rather than enhance the look of your windows. Shutters that are too short or too tall won’t look right.
Installing shutters
Line up the shutter next to your window and adjust it to where it looks best. Align the upper and lower edges with the upper and lower edges of the window trim. Most shutters come with six or more pre-drilled holes for screws. Take a pencil and push it through the holes to mark where to position the screws. Drill pilot holes and add screws. The shutter should be attached to hold tight during high winds and storms. If the screws tighten down firmly, your project is complete. If not, you may want to include screw anchors or plugs to secure the shutter to the house.
Installing shutters on a brick home:
- Add shutters to a brick home with 3-inch deck screws, expanding wall anchors, a drill, and a 3/8-inch carbide drill bit.
- Drill starter holes into the brick face by using the shutter ’s pre-drilled holes as a guide. If your shutters aren’t pre-drilled, drill holes into the four upper and lower corners of the shutter and the brick. If you have large shutters, drill an extra hole on each side of the frame, at the vertical center point.
- Insert a 3/8-inch carbide drill bit into the drill. Drill at each starter hole to 1 1/2-inches deep for the expanding wall anchors.
- Add a 3/8-inch by 1 1/2-inch expanding wall anchor to each hole.
- Using a hammer, tap the exposed end of each anchor into the brick until it is flush with the wall.
- Insert a screw tip attachment into the drill.
- Ask a helper to position the shutter against the wall, aligning the shutter edges adjacent to the window trim.
- Attach the shutter to the brick with a 3-inch deck screw drilled into each wall anchor.
For more info about adding shutters to a brick home, visit here.
Can I repaint my vinyl shutters?
Yes, you can repaint vinyl or plastic shutters. Do not paint them a darker shade than the original color. Why? Because dark colors absorb more heat, which can eventually warp the plastic.
If your shutters are new, check with the manufacturer for recommended painting instructions.
Clean shutters before you paint them by removing dirt, garden debris or mildew. A quick application of Wet & Forget Outdoor will remove moss, mold, mildew or algae on your shutters. Once the surface is clean, you’re ready to paint!
Paint the shutters with an exterior, acrylic latex paint or a paint formulated for plastic surfaces. Priming shutters with a latex primer can improve paint adhesion and coverage.
Tip: Paint the shutters before installing them. After installation, fill any screw holes with wood filler then sand and touch up spots with a small paintbrush and a dab of paint.
Shutter Durability
Exterior shutters are available in a wide variety of materials and are available at many price points. Get the best durability for your money, with these shutter design and installation pros and cons:
MDF and Vinyl – Shutters constructed of MDF with a vinyl overlay cost less than wood shutters. But they may lose their water resistance over time.
Vinyl – Vinyl shutters may be inexpensive, but they may yellow from sun exposure. Vinyl shutters are usually constructed of hollow PVC with end caps to hide unfinished edges. Depending on the brand, they may have a ‘plastic’ look.
Synthetic Foam – One of the best choices in the non-wood category is synthetic foam. These shutters look like wood but cost less. Bonus – They are water and fire resistant and provide excellent insulation.
Faux wood – Faux wood is identical to wood but costs less. Plus, it comes in a wide range of colors and styles. Choose a good quality faux wood product, because if the shutter isn’t constructed well, the joints may separate over time.
Natural wood – Wood shutters are usually made of basswood, pine or poplar, with basswood being the favorite. Natural wood shutters can be painted or stained. Wood isn’t naturally moisture resistant, so consider using a water-resistant paint or stain.
Showcase your home’s style outside and beckon visitors inside with the shutter design and installation tips above. The right exterior shutters will add year-round architectural interest to your at-home hideaway.
Resources for this project:
See all materials


Any price and availability information displayed on [relevant Amazon Site(s), as applicable] at the time of purchase will apply to the purchase of this product.
Hometalk may collect a small share of sales from the links on this page.More info


Frequently asked questions
Have a question about this project?