


Personalized Handy Map Trinket DIsh
I love to make homemade gifts for people. With my girlfriends, it's easy to find ideas of things to make but for the men in my life, it's a bit harder.
I did make my son a Map Mason Jar Bank which went down very well. He is using to save for his travels.
So when it came to making something for my husbands birthday I decided maps was the way to go.
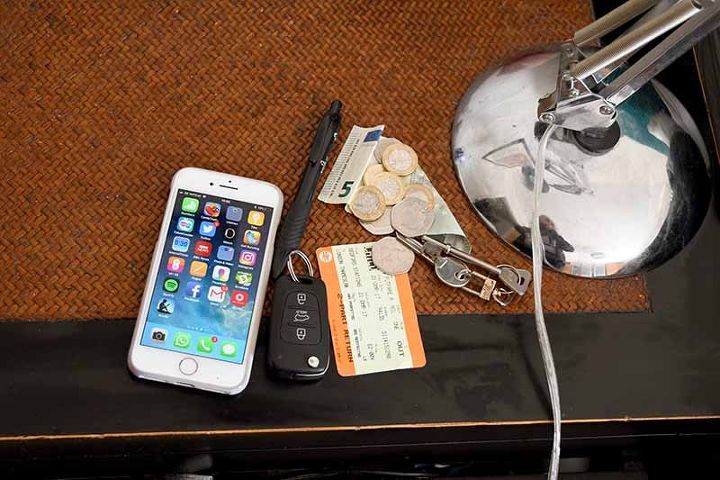
Every night when my husband goes to bed he empties his pockets of money, keys, phone and anything else that he's picked up that day.
He simply plonks it down onto his bedside table, where some coins invariably get knocked off on to the floor. Therefore I decided that I would get him a trinket dish for his table to keep everything in one place.
However, a trinket dish did seem a bit of a boring present, but that's when I got the idea to put a map on it. To make it more interesting and personal I used a map of somewhere special to him.
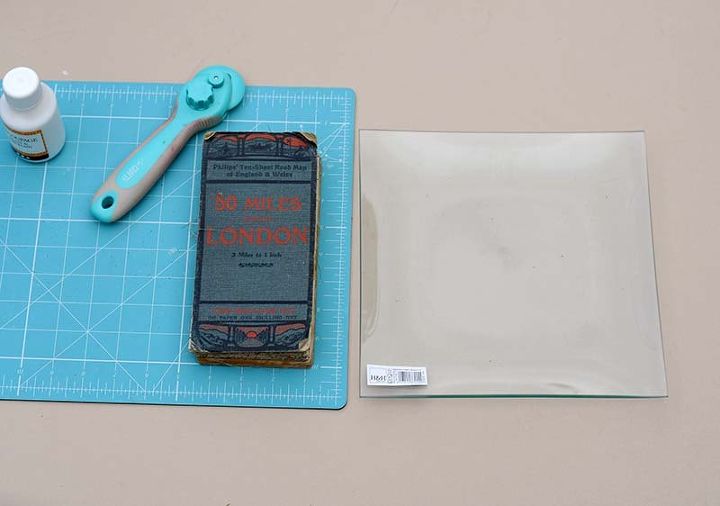
What you need to make this lovely map trinket dish. Is a plain glass square tray/plate, an old map, a rotary cutter and board and some Mod Podge. You can often pick up the glass trinket dishes in dollar/pound stores.
I used an old road map of the South Coast of England. You can normally pick old roadmaps up cheaply in thrift stores or on eBay. I also find elderly relatives have a good collection of out of date roadmaps.
There are some wonderful free vintage maps on the internet you can also download and use. I have a fabulous collection on my blog (link at the end) that you can print and use for free.
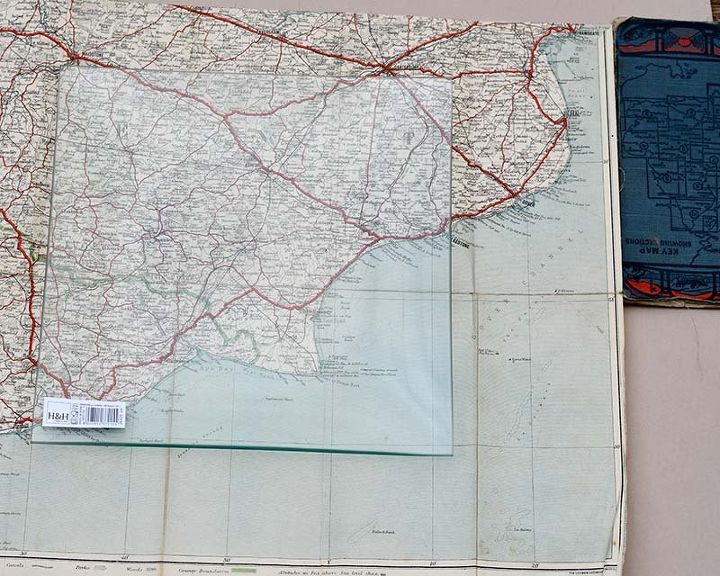
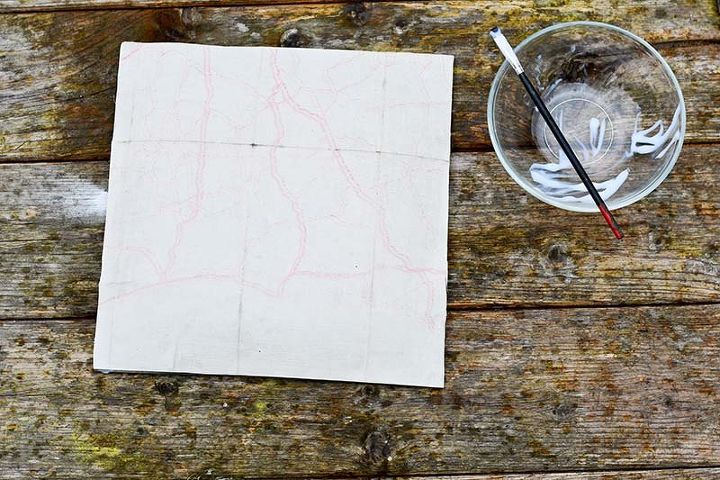
Once you have decided on what map to use. Lay your trinket dish on top of the bit of map you would like to use.
Measure out what you will need to cover the bottom of the glass trinket dish, allowing for the curve. It's always best to overestimate how much map you will need. You can trim any excess off later.
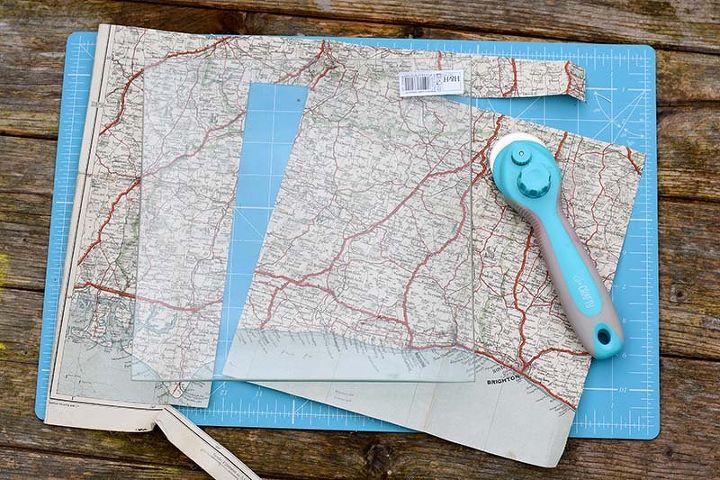
Using a rotary cutter and mat. Cut out the section of the map you need
Apply a layer of Mod Podge glue to both the underside of the dish and to the printed front of the map.
Then carefully place the map face down onto the base of the glass tray. Use your fingers or the edge of a credit card to carefully squeeze out any trapped air bubbles.
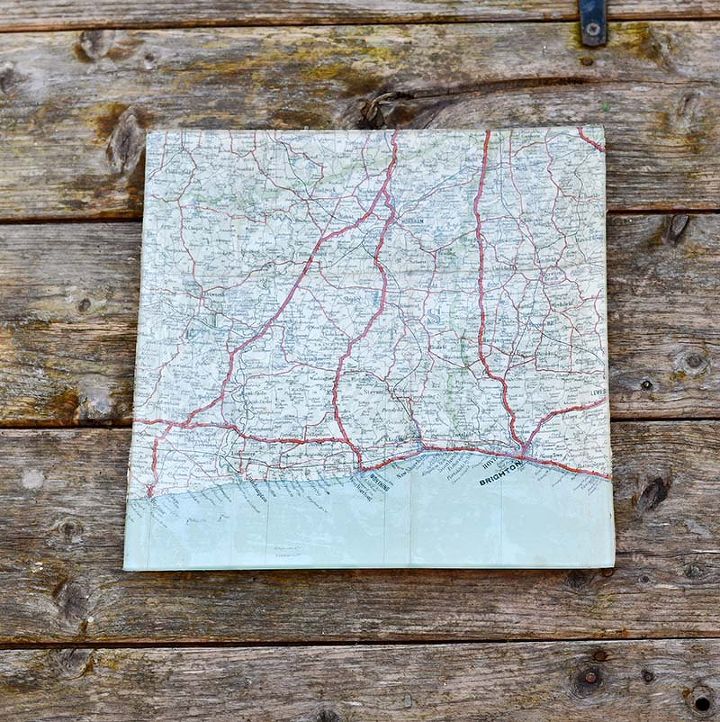
Once the map is stuck down to the dish. Apply another coat of the mod podge to the outside of the map. Once dry this will act as a protective varnish.

My husband now has a handy but lovely looking dish to place the contents of his pockets in at night.
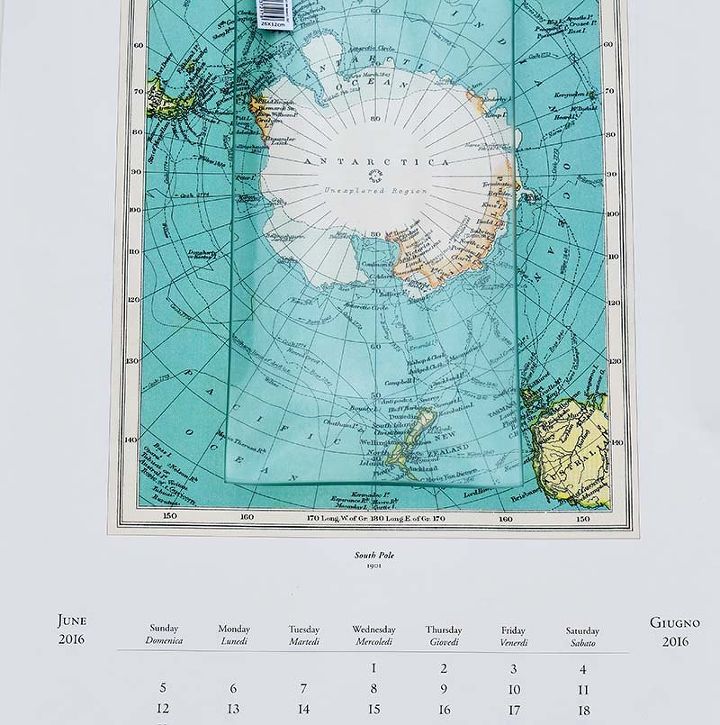
I was so pleased with how the trinket dish turned out, I made another one for my father, for fathers day. This time I used a map of the Antarctic that I had from a leftover Cavallini Map Calendar. You can see how this turned out on the blog.
Pictureboxblue has an amazing collection of free maps to print. They have lots of vintage world maps and maps of cities and countries.


Comments
Join the conversation
-
What a cool idea! I like the idea of a mason jar travel money jar too!
-
Great idea! I did something very similar using a clear glass cutting mat from Dollar Tree to make a trivet.


Frequently asked questions
Have a question about this project?
How do you make the map lay flush on the dish if the dish has rounded edges? Maybe a silly question but there’s got to b an easy way!
If the map piece is a little over sized what tool would you use to trim it down so that it has a smooth edge? When would you trim it, before or after sticking the map to the dish? Thanks! I’m new to this.
Where did you get the clear glass tray?